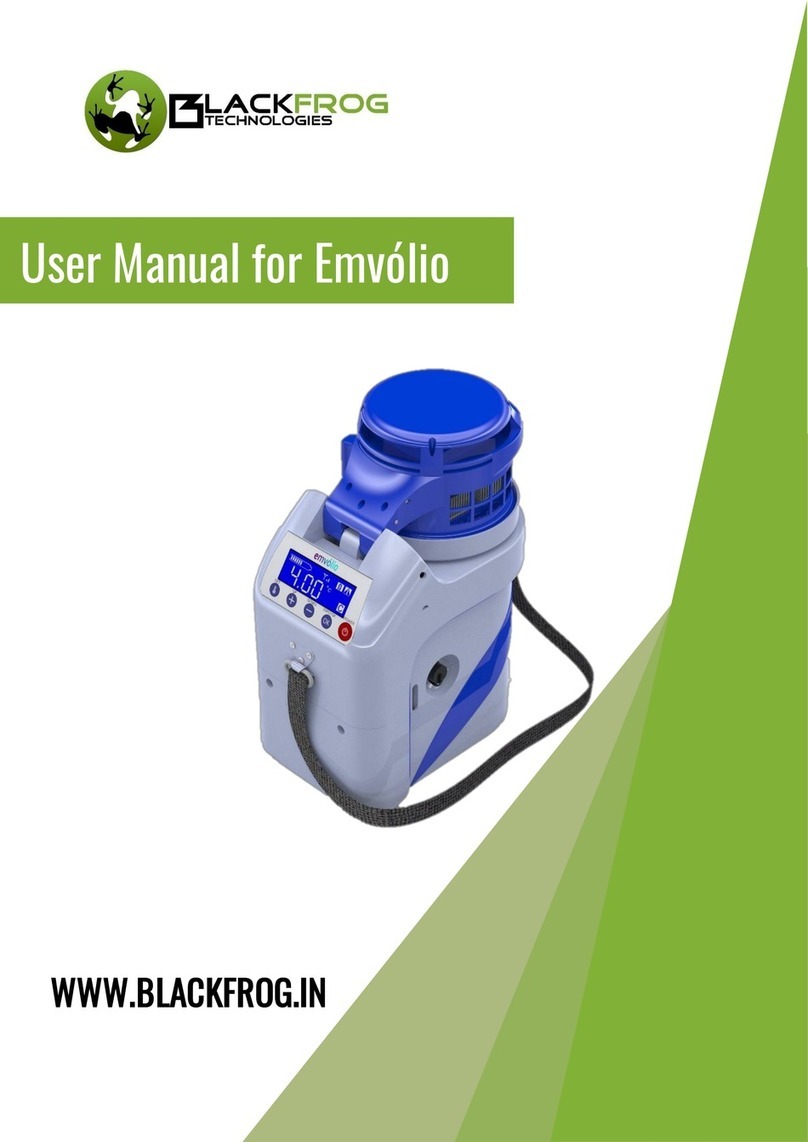
Blackfrog Emvolio Pro Technical manual

Emvólio Pro
User Guide & Warranty Document

This is a controlled document.
Any unauthorized access, redistribution,
reposting and reproduction is strictly prohibited.
This document must not be copied in whole or in
part, without written permission from
Blackfrog Technologies Pvt. Ltd.

Emvólio Pro: User Guide & Warranty Document
3
About this Document
The purpose of this document is to help the user understand Emvólio and its
functions and operations, and set up Emvólio for safe transportation of vaccines
and biologicals. This document also outlines the warranty terms and conditions
applicable for Emvólio.
It is important that you read and adhere to all the safety instructions, warnings and
cautions contained in this manual prior to using Emvólio.

Emvólio Pro: User Guide & Warranty Document
4Table of Contents
Instructions 5
Conventions 5
Problem Reporting Instructions 5
Introduction 6
Safety Information 7
Emvólio Usage: Do’s 7
Emvólio Usage: Dont’s 7
Setting up your Emvólio 8
Unpacking Emvólio 8
Inspection 8
Using Emvólio 9
Know your Emvólio 9
Using Emvólio 13
Common Usage Indications 17
Device Settings 18
Emvólio Maintenance 25
Troubleshooting 27
Device Reset Process 27
Basic Troubleshooting 27
Problem Reporting Instructions 28
Online Portal 29
Technical Specications 30
Warranty Terms & Conditions 31

Emvólio Pro: User Guide & Warranty Document
5
Instructions
This section outlines the general conventions and instructions to be followed when
using this document.
The following are the common typographic conventions used in this document:
For resolving any issue(s) that may be encountered during normal operation of the
device, please refer to Page. 27 of this document for common troubleshooting steps.
For additional support, repairs and documentation, perform the following actions:
• Italics: indicates captions/remarks on graphical and pictorial content.
• Bold: Indicates important information/concepts to be remembered.
• Note: This indicates important information that should be remembered
when using Emvólio. It is indicated by the ‘i’ symbol.
• Document the issue: Record any details of the issue(s) occuring on the device.
• Contact Blackfrog Technical Support team through any of the following means:
Email: [email protected]
Mob: +91 72043 76004
Phone: 0820 - 2572478
• Caution: This denotes caution to be exercised when performing a certain
operation, which if ignored, can result in device/equipment damage
when operating Emvólio. It is indicated by the ‘warning’ symbol.
Conventions:
Problem Reporting Instructions:

Emvólio Pro: User Guide & Warranty Document
6Introduction
Technical Specications:
Salient Features:
• 0.5°C Accuracy of sensor and control.
• Corrosion Resistant material used in construction of cold chamber.
• On-board display for monitoring temperature, battery and product status.
• Audio & Visual warnings during temperature excursions and
low battery situation.
• IOT based remote location tracking, temperature and
statistics measurement.
Parameter Value
Model Emvólio Pro
Dimensions (L x B x H) 30cm x 20cm x 41cm
Weight 6.7 Kg
Payload Capacity 1.8 L
Operating Ambient Temperature -20°C to 65°C
Operating Humidity Upto 100%
Battery Li-Ion, Upto 311Wh
Charging Time 4 hours
Emvólio is a portable medical-grade refrigeratorthat provides a platformfor delivery
of vaccines and other biologicals which require strict temperature controlled
transport environments. Emvólio can maintain a temperature of between 2°C to 8°C
for 12+ hours on the eld*.
*The battery life of the device may vary with changes in ambient temperature.

Emvólio Pro: User Guide & Warranty Document
7
Safety Information
This section provides safety and warning information which you must be aware of
before using Emvólio.
Emvólio Usage: Do’s
Emvólio Usage: Dont’s
• Please clean the device and the cold-chamber before each use.
• Please ensure device is fully charged before use.
• Please ensure device lock and multipurpose backpack locks are secured
before transportation.
• Please pay attention to device indications during usage.
• Please keep the device upright at all times.
• DO NOT cover the top cap of the device or insert object(s) through the top
and side vent holes.
• DO NOT disassemble device and/or its accessories.
• DO NOT apply excessive force on the hinge and lock mechanism.
• Avoid exposing the device to direct sunlight during usage and storage.
• DO NOT charge product near areas with Flammable substances/Fire
Hazards.
Failure to observe the above instructions during operation of the device may lead to
device/equipment damage.

Emvólio Pro: User Guide & Warranty Document
8Setting up your Emvólio
This section helps you understand how to setup your Emvólio for operation.
2.1 Unpacking Emvólio
The following items are shipped along with your Emvólio:
The accessories for Emvólio can be purchased through Blackfrog Technologies Pvt. Ltd.
Item Specication Quantity
Product Emvólio Pro One
Charger + Power Cord 110-240V, 50-60 Hz One Each
Standard Accessories Multipurpose Backpack One
Documentation User Guide & Warranty Card One
2.2 Inspection
An Inspection is important and should be done when the Emvólio is delivered to
avoid any warranty issues.
Do the following checks to identify any damages done if any during shipping:
Initial Checks Status
Check for sealed box/Box opened by authorised personnel
from Blackfrog Technologies OK / NOT OK
All contents present in the box OK / NOT OK
Check for any external damages on the product OK / NOT OK
Check for any loose parts on the product OK / NOT OK
In case of any damage observed on the device or its accessories, please contact the
Blackfrog Technical Support Team.

Emvólio Pro: User Guide & Warranty Document
9
Using Emvólio
3.1 Know your Emvólio
The various components of Emvólio are as follows:
Front View Cutaway View
Back View
B
C
D
E
F
A
G H
A. LED Indicator
B. Top Cap
C. Lock
D. Body
E. LCD Display
F. User Interface
G. Charging Port
H. Ambient Temperature Sensor
J. Cold Chamber
K. Temperature Sensor
JK

Emvólio Pro: User Guide & Warranty Document
10
3.1.1 Body
The body of the device is manufactured out of PC ABS, with rugged build quality to
ensure that the contents are safe from physical, chemical and thermal stresses
during transport. The body has the cold chamber, instrumentation, control system
and battery pack assembled inside it. The body also has an ambient temperature
sensor embedded in the side.
3.1.2 Cold Chamber
The temperature-controlled cold chamber of 1.8L capacity is manufactured with
food grade Stainless Steel, to ensure that the chamber will not undergo corrosion
or react with any of the typically transported bio-chemical solutions. The chamber is
sealed by the Top Cap assembly, and a gasket and locking mechanism ensure proper
sealing of the chamber.
3.1.3 Top Cap Assembly
The Top Cap assembly on the device contains the Thermo Electric Assembly which
functions as a heat pump, extracting heat from the cold chamber and dispersing it
to the atmosphere. The Top Cap assembly also functions as a lid to provide access
to the cold chamber. It is connected to the body through a hinge, to enable easy
loading/unloading of contents from the chamber.
Sealing Gasket
TE Assembly
Hinge
The top cap assembly consists of small instruments crucial for proper functioning of
the device. Proper care must be taken during handling the product to avoid damage to
the wires or hinge.

Emvólio Pro: User Guide & Warranty Document
11
3.1.4 User Interface
• Current temperature of the chamber
• Battery Level
• Mode of operation. (Heating/Cooling)
• Lid Open warning
• Mute & Flight Mode Indicator
• Charging Indicator
• Set Temperature & Top, Bottom, Average& Ambient Temperature Display
• Date & Time Display
• Network Signal, Wi-Fi, Bluetooth & Location Indicators
The user interface on the device consists of a custom LCD display and switches to
control various functionality of the device.
The LCD displays the following parameters:

Emvólio Pro: User Guide & Warranty Document
12
3.1.5 Control System
3.1.6 Battery
The chamber temperature is maintained through a custom algorithm, which
allows for ne control of temperature in the range of 0.5°C. The control boards
also incorporate a GPS tracker and a data logging system which enables remote
monitoring of device parameters through a dashboard.
The battery on-board Emvólio is a Lithium-Ion battery rated at 311Wh, with a cycle
life of 1500 cycles. It can sustain the device operation continuously for more than
12 hours, beyond which the device must be plugged in for charging. The battery is
charged via a standard 110V to 240V, 12V DC battery charger. The charger can also
power the device operation for continuous usage#.
There are nine switches provided on the device, which are as follows:
The functions that can be adjusted on the device are as follows:
• Switching the device ON/OFF
• Setting the temperature of the chamber.
• Setting Date/Time
• Enabling/Disabling Flight Mode & Device Mute
• Changing Temperature Units of the display (°C or °F)
SET Used for entering Settings Menu
+ & - Used for adjusting values
OK Used for conrming actions
F1, F2, Temperature, Back Used for additional functionality
POWER Used to Switch the device On/O
#The device is meant to be used for transporting contents requiring refrigeration in
a safe and controlled manner. This device is not intended to replace WHO mandated
ice-lined refrigerators. Doing so may lead to signicant depreciation in the device life.

Emvólio Pro: User Guide & Warranty Document
13
• Foam Absorption Pad: A thin foam-based one-time use pad placed at the
bottom of the chamber which soaks up any form of spillage. It ensures less
chances of contamination and easier cleaning.
a. Place the Device and backpack on a at surface.
b. Ensure that the middle and top harnesses of the backpack are open.
c. The device User Interface must be aligned to the cutout provided in the backpack.
d. Gently lift the device using the handholds provided at the bottom.
e. Place the device in the backpack and ensure that the device is seated correctly.
Person 1 can place the device while Person 2 can adjust the backpack as required.
f. Fasten the middle strap and the top harness.
3.1.7 Accessories
The following optional accessories can be congured with the product:
3.2 Using Emvólio
3.2.1 Placing Device in the Multipurpose Backpack
The following steps have to be followed to place the device in the provided
multipurpose backpack:
The device is now ready for usage.
3.2.2 Switching the device On/O
The following steps have to be followed to switch the device On:
Repeat the above steps to switch o the device. The device display & LED indicator
will turn o, indicating that the device is powered o.
a. Ensure that the device user interface is facing towards you.
b. Press the power button for 3-5 seconds.
c. The device display and LED indicator will turn on, indicating that the device is
powered on.
Please ensure that the harnesses of the backpack are securely locked before
transporting. Failure to do so may result in damage to the device.

Emvólio Pro: User Guide & Warranty Document
14
1. Opening Emvólio
a. Place one hand on the device body and hold the lock with your other hand.
b. Lift the lock with an upward motion to unfasten the lock from the top cap. The
top cap is now unlocked and free to move.
c. Gently lift the top cap backwards on the hinge using the thumb hold on the cap,
and rest it at the end position. The cold chamber is now accessible to place/
remove contents.
Step a: Holding the lock Step b: Lifting the lock Step c: Lift Top Cap
• Unfasten the clips and open the harness of the backpack.
• Open the Top Cap of the device to access the cold-chamber.
• Place/retrieve contents from the cold chamber.
• Close the top cap of the device and lock it in place.
• Fasten the top harness of the device.
3.2.3 Storing Contents in the Chamber
The following steps have to be followed to store or retrieve any contents from the
cold -chamber of the device:

Emvólio Pro: User Guide & Warranty Document
15
Step a: Close the Top Cap Step b: Toggle the lock Step c: Device is locked
Placing contents in the cold-chamber
2. Loading Contents
3. Closing Emvólio
Now deposit the samples/contents that need
to be refrigerated into the cold chamber.
Ensure the sensor in cold chamber is not
damaged during loading the contents.
a. Gently close the top cap back to the closed position using the thumb hold
provided on the cap.
b. Once the top cap is in a closed position, hold it in place with your hand. Lift the
lock with an upward motion with your other hand.
c. When the lock is lifted completely, push the top part of the lock inward and
return the lockto the normal position. The top cap is now securely locked.

Emvólio Pro: User Guide & Warranty Document
16
4. Retrieving Contents
a. Repeat step 1.
b. In step 2, carefully remove the samples/contents from the cold chamber,
while ensuring that the sensor in the cold chamber is not damaged by the
contents during removal.
c. Repeat step 3 to close the device lid.
Ensure the contents are placed in a manner such that they are not at risk of moving around
during transport and leading to breakage. Usage of zip-lock bags to contain any glass vials
is recommended.
Before the contents are transferred from a stationary refrigerator onto Emvólio, it is
recommended that the system be pre-cooled to the desired temperature. This may take
about 10- 15 minutes depending on the ambient temperature of the surroundings. This
process will ensure there is no freeze-thaw cycle for the contents.
3.2.4 Charging the Device
The following steps have to be performed to set the device for charging:
a. Use the ap on the charging port cover to
remove it and access the charger port.
b. Insert the cable from the charger into the
charging port while ensuring the correct
orientation of the cable plug to the port.
c. Switch on power to the charger.
d. The display/LED indicator on the device will
indicate the status of charging.
Connecting the charger to the device.
The charger is designed to t in only one orientation. DO NOT force the charger plug into the
charging port on the device. DO NOT PULL the charger wire when it is connected. Doing so
may result in damage to the product.
Only use the charger supplied with the device for charging. Use of any third-party charger
may lead to damage to the device.

Emvólio Pro: User Guide & Warranty Document
17
The LED indication is accompanied by the buzzer during normal operation. Device Mute
function can be selected to enable silent operation of the device if required. Please refer to
section 3.4 on selecting Device Mute function.
3.3.1 LED Indicator
3.3.2 Buzzer
3.3 Common Device Indications
This section covers the common indications provided by the device during regular
usage, and the information indicated by these indications.
The LED indicator is used as an quick indicator of the cold-chamber status during
operation. It also indicates the charging of the device in powered-o state. The
following are the indications provided through the LED indicator:
A buzzer is installed onboard Emvólio to provide indications on functioning of the
device. The following are the indications provided by the buzzer:
LED Indicator glowing RED This indicates that the cold-chamber temperature is
outside the safe range (2°C - 8°C).
LED Indicator glowing GREEN This indicates that the cold-chamber temperature is
within the safe range (2°C - 8°C).
LED indicator glowing WHITE
with animation
This indication is displayed when the device is
powered o and placed for charging. This indication
will turn o after the device is fully charged.
Buzzer beeping every 10
seconds
This indicates that the cold-chamber temperature is
outside the safe range (2°C - 8°C).
Buzzer stops beeping This indicates that the cold-chamber temperature is
within the safe range (2°C - 8°C).

Emvólio Pro: User Guide & Warranty Document
18
Press Temperature button to toggle between SET TEMP, AVG, AMB, TOP & BOT sensor
temperatures.
Based on device conguration, the indications displayed on the LCD screen may vary.
Indication Indicated by Description
Cold-Chamber
Temperature
Main Temperature
Display
The current (lowest) temperature of the cold-
chamber.
Battery Level Battery Icon The current battery level of the device.
Device Charging Charging Icon The device is currently charging.
Top Cap Open Lid Open Icon The top cap of the device is open.
Cooling Mode Emvólio Icon The device is currently in cooling mode.
Device Locked Lock Icon The device settings are password-protected.
Date/Time Date/Time Display The current date/time is displayed.
Sensor
Temperatures
SET TEMP/AMB/
TOP/BOT/AVG
Displays the Set temperature and Ambient,
Top, Bottom & Average sensor temperatures.
Flight Mode Airplane Icon The device is in ight mode.
Device Buzzer
Sound
Speaker Icon The device buzzer sound is switched on/o.
SIM Network Network Signal
Strength Icon
This indicates the network signal strength
available for the device SIM card.
Wi-Fi Wi-Fi Icon This indicates that the device Wi-Fi network is
being used.
Bluetooth Bluetooth Icon This indicates that the device Bluetooth
network is being used.
Device Issues Warning Icon This indicates any possible issues observed in
the device systems during usage.
3.3.3 Display Indications

Emvólio Pro: User Guide & Warranty Document
19
3.4 Device Settings
Setting Indicated by Description
Set Temperature TEMP Temperature to be maintained in the cold chamber
Date & Time DATE / TIME The date & time displayed on the device
Password Lock Icon The password to enter the device settings menu
Flight Mode Airplane Icon Enable or disable ight mode for the device
Device Sound Speaker Icon Enable or disable the device buzzer sound
Temperature Units °C or °F Toggle the temperature units between °C and °F
3.3.4 Warning Indications
The warning indication will be displayed on the LCD when a performance issue is
detected during usage. The warning icon will blink to indicate the following potential
issues detected in the system:
• Battery Temperature Warning: The warning icon will be displayed when the
battery temperature exceeds the lower/upper limit for performance.
• System Temperature Warning: The warning icon will be displayed when the
system board temperature exceeds the lower/upper limit for performance.
• Cooling Mechanism Issue: The warning icon will be displayed when the cooling
mechanism temperature exceeds the lower/upper limit for performance.
If the warning icon blinks during regular usage, perform the following actions:
• Document the issue: Record any details of the issue(s) occuring on the device.
• Contact Blackfrog Technical Support team through any of the following means:
Email: [email protected]
Mob: +91 72043 76004
Phone: 0820 - 2572478

Emvólio Pro: User Guide & Warranty Document
20
a. Ensure that the device is switched on, and the user interface is facing you.
b. Press SET button. The lock symbol will blink, indicating the device is now in
password mode.
c. Press OK to enter password input menu.
d. Use + or - button to adjust the 1st digit as required. After selecting the rst digit,
press OK to conrm the selected value. The rst digit is now conrmed and the
next digit of the password is automatically highlighted.
e. Repeat the process to select and conrm the second digit of the password. On
pressing OK, the second digit is conrmed and the next digit is highlighted.
f. Repeat the process of selecting the value of the third digit. The password is now
entered. Press OK to conrm the password and enter the settings menu.
g. If the correct password is entered, the device will display the settings menu.
3.4.1 Entering Settings Menu
The following steps have to be performed to enter the device settings menu:
In case of a wrong password, the device will display ERR on screen. Repeat the above
steps while entering the correct password to enter the settings menu.
To modify a previously entered digit, press the Back button to move back one digit. Use
+ or - button to enter the correct value and follow the subsequent steps indicated .
Device Settings Menu Overview
Table of contents
Other Blackfrog Medical Equipment manuals
Popular Medical Equipment manuals by other brands

Bard
Bard Button Device Continuous Feeding Tube INFORMATION FOR USE

Ropox
Ropox Mobilio Showerbed user manual

KARL KAPS
KARL KAPS SOM 62 user manual

Stryker
Stryker altrix quick start guide

SCHEU
SCHEU BIOPLAST XTREME PRO Kit instruction manual

Inova Labs Inc.
Inova Labs Inc. LifeChoice Activox quick start guide