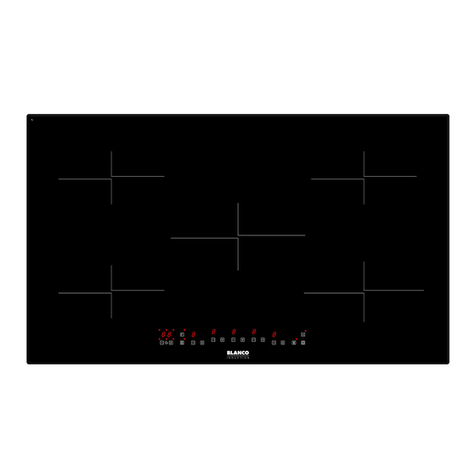
Activating The Key Lock
The key lock is used to set the appliance up so that it cannot be operated without disabling the lock. This is a
useful feature when cleaning down the glass, or to stop children playing with the controls.
1. Set any cooking zones up first if wanted. Press the Key Lock touch control (08) for 6 seconds until the
indicator above the sensor turns on. The sensors are now all locked except for the On/Off Power touch
control 01). The Cooking Zone Power LED Displays (12) will not change from what they were previously.
2. To unlock the control panel, repeat the sequence above (with the appliance in Operating-Mode), and the
sensors will all be active again. The cooking zones will stay in the same modes as they were previously.
With the Key Lock Function active, the appliance can still be turned to Stand-By-Mode. If any cooking
zones are active when this happens, they will not turn back on once the appliance is changed back to
Operating-Mode.
Minute Minder Function
The Minute Minder function is a timer that does not affect any operation on the appliance, but can be used as
a reminder to take action (add a spice, turn meat etc).
1. The appliance must be in set to Operating-Mode.
2. With no cooking zones running, press the Timer Decrease Touch Control (09) and the Timer Increase
Touch Control (10) simultaneously to activate the Minute Minder Function. The Timer LED display (11)
will light up “000” (if no previous time has been set) and the “min” icon above them will start to flash.
3. Adjust the time (in minutes) using the Timer Decrease Touch Control and the Timer Increase Touch
Control. Once set, the “min” icon will flash for 5 seconds, then stop flashing and the Minute Minder
Function will start counting down.
4. The Timer LED display will show the time left (as minutes) until 1 minute is reached, then will count down
in seconds.
5. When finished, the alarm will sound and the Timer LED display will flash “000” for 2 minutes, or until a
sensor is pressed.
The Minute Minder time can be adjusted at any point by activating the function and adjusting as above.
To disable the function, adjust the time to “00”.
The minute minder can be used while the cooking zones are running, but should be started before the
cooking zones are activated (after that, the only way to disable the Minute Minder Function is to turn off all
cooking zones or change the appliance to the Stand-By-Mode. When the timer function is being used on a
cooking zone, its display takes preference over that of the Minute Minder.
Timer Function
The timer function differs from the Minute Minder function in that it will turn off a cooking zone at the end of the
time. It can be set for one or more cooking zones (each working independently). The Timer LED display (11)
always shows the shortest timer when in operation.
1. First set up the appliance with cookware placed on cooking zones and set all power levels.
2. As with the Minute Minder Function, press the Timer Decrease Touch Control (09) and the Timer
Increase Touch Control (10) simultaneously to activate the Timer Function. The Timer LED display (11)
will light up “000” (if no previous time has been set) and the “min” icon above them will start to flash.
3. As this function is dedicated to a particular cooking zone, the Timer Set/Active Indicator (14) for the left
most active cooking zone control will light up. If this is not for the correct cooking zone, press the Timer
Decrease Touch Control (09) and the Timer Increase Touch Control (10) simultaneously again, to select
the next cooking zone control to the right (continue this to cycle through all active cooking zone controls
until the one wanted has the Timer Set/Active Indicator lit).
4. Adjust the time (in minutes) using the Timer Decrease Touch Control and the Timer Increase Touch
Control. Once set, the “min” icon will flash for 5 seconds, then it will stop flashing and the Timer Function
will start counting down.
5. The Timer LED display will show the time left (as minutes) until 1 minute is reached, then will count down
in seconds. When multiple cooking zones are using the Timer Function, the Timer Set/Active Indicator will
be bright if that cooking zone Timer function is being edited or has the shortest time left, all others will be
dim.
6. When finished, the alarm will sound and the Timer LED display will flash “000” for 2 minutes, or until a
sensor is pressed. The cooking zone will turn off and the Timer Set/Active Indicator will turn off. If
multiple cooking zones are using timers, the one with the shortest time left will be displayed on the Timer
LED display, and its Timer Set/Active Indicator will become bright.
5
