Blaupunkt PP6BR User manual

PP6BR
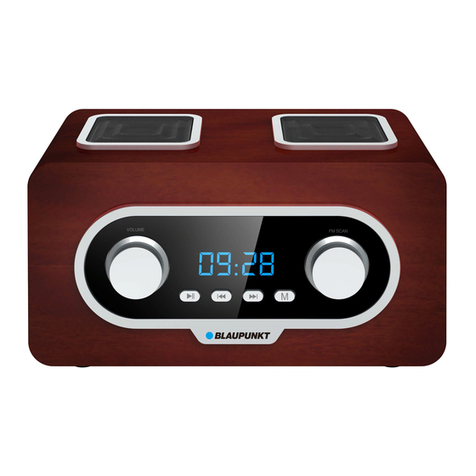
Portable radio with clock and USB/microSD playback


PP6BR
IMPORTANT SAFETY INSTRUCTIONS
The lightning flash within an equilateral triangle is intended to
alert you to the presence of uninsulated dangerous voltage
within the product's enclosure that may be of sufficient
magnitude to constitute an electric shock to a person or persons.
The exclamation point within an equilateral triangle is intended
to alert you to the presence of important operating and
ENGLISH
CAUTION
RISK OF ELECTRIC SHOCK
DO NOT OPEN
The marking plate is located at the bottom of the apparatus.
1

POLISH
2
PP6BR

ENGLISH
3
PP6BR

4
PP6BR

NOTICE
Conformity
Hereby, Blaupunkt Competence Center 2N-Everpol Sp. z o.o., declares that
this equipment is in compliance with the essential requirement and other
relevant provisions of Directive 2014/53/EU. Declaration of conformity can
be obtained from the product page at www.blaupunkt.com.
Responsible party: 2N-Everpol Sp. z o.o, Puławska 403A, 02-801 Warsaw,
Poland, Phone: +48 22 331 99 59, E-mail: info@everpol.pl
Your products is designed an manufactured with high quality materials
and components, which can be recycled and reused.
18.
ENGLISH
5
PP6BR

When this crossed-out wheeled bin symbol is attached to a product it
means that the product is covered by the European Directive 2002/96/EC.
Please inform yourself about the local separate collection system for
electrical and electronic products. Please cat according to your local rules
and do not dispose of your old products with your normal household waste.
Correct disposal of your old product helps to prevent potential negative
consequences for the environment and human health.
Your product contains batteries covered by the European Directive
2006/66/EC, which cannot be dispose with normal household waste. Please
inform yourself about the local rules on separate collection of batteries
because correct disposal helps to prevent negative consequences for the
environmental and human health.
Environmental information
All unnecessary packaging has been omitted. We have tried to make the
packaging easy to separate into three materials: cardboard(box),
polystyrene foam(buffer) and poly ethylene (bags, protective foam sheet).
Your system consists of material which can be recycled and reused if
disassembled by a specialized company. Please observe the local
regulations regarding the disposal of packaging materials, exhausted
batteries and old equipment.
Recording and playback of material might require consent. See Copyright
Act 1956 and The Performer's Protection Acts 1958 to 1972.
6
PP6BR
Control locations
0 1— Display. 0 2— Remote control sensor.
0 3— Speaker. 0 4— Power button.
0 5— Play/Pause key for play/pause and mute function operation.
0 6— Previous/volume – button for previous track selection and volume adjustment.
0 7— Next/volume + button for next track selection and volume adjustment.
0 8— Clock button.
0 9— Mode button to switch the play mode between USB/microSD/FM/AUX IN mode.
1 0— FM antenna. 1 1— AUX IN jack.
1 2— USB port. 1 3— Power LED indicator.
1 4— System reset. 1 5— microSD slot.
1 6— DC5V power jack.
ENGLISH
7
PP6BR

Remote control
01—Repeat button (Repeat all, random and repeat one).
02—Power ON/OFF button.
03—Light button for display backlight brightness adjustment.
04—EQ selection button(only for USB/microSD card playback mode)
05—Play/Pause button. 06—Volume +.
07—Volume -.
08—FM auto scan button. 09—Mode button for play source selection.
10—Previous button. 11—Next button.
12—Digits button (0~9).
Notes:
a. Before you use the remote control, please make sure the CR2025 battery has installed inside
properly according to the polarity indication.
b. Please remove the power insulation sheet before use the remote control.
c. Please disposal the exhaust battery in environmental method friendly. Please reference
your local government's requirement for the detail.
d. The best operation distance for remote control is within 5 meters without any block. Please
aim to the remote control sensor on unit front panel for operation.
Unit installment and power setting
DC power: Using the supplied USB power cable connect with DC adapter; and connect another
terminal of USB cable to the micro USB DC power jack on the back panel of the unit. Then plug
on the DC adapter to your household power source. The red LED power indication will light up
after the power connection successful.
Press the power button in 2 seconds on the front panel of unit to power on/off the unit. Press
the power button from remote control can standby on/off the unit. The display will light up
after power on, and then you can start other operation.
8
PP6BR

Battery charging: The unit will start charging after connection with DC power, and the power
LED on rear panel will turn to green color in case of be fully charged. You can understand the
battery power status by check the battery icon on the right top corner of display. The unit will
off automatically in case of exhausted battery power. Please kindly arrange re-charging for
playing.
Unit power on and standby: Press the power button in 2 seconds on the top panel of unit to
power on/off the unit. Short press the power button from top panel or remote control can
standby on/off the unit (clock time interface on display without sound output). The display will
light up after power on, and then you can start other operation.
Notes:
a. The supplied USB power cable includes universal USB connector and micro USB connector.
The universal USB connector is for DC adapter connection, and the micro USB connector is
for DC power USB jack connection.
b. Only the supplied power adapter or same rating spec adapter is allow to use for power
operation.
c. When you press off power by the power button on top panel, then the unit cannot power on
by remote control due to the power is cut off completely. Please press the power button on
top panel to power on the unit again.
d. The unit can play audio during charging, we suggest to power off(display off ) the unit for
charging in case of fully charge the battery in once.
Display back-light adjustment (dimmer)
Press the “ LIGHT” button on remote control can adjust the display back-light brightness
between high/middle and low level.
Volume adjustment: press and hold previous & next button on top panel to increase or
decrease the volume level in high speed; if you short press the previous & next button
immediately, there will adjust the volume output level step by step; remain the button 3
seconds without further operation, the previous & next button will resume for last & next track
selection function.
Time operation
Clock time: Power on the unit, then short press the power button again enter to clock time
interface. Short press the mode button 3 times continuous to start the setting, and the hour's
digits will flare on display; press the previous/next button to adjust the hour; press the clock
button skip to minute's setting, or press clock button again return to hour's setting in case of
need; press the previous/next button to adjust the minute, and short press the power button to
complete the clock setting.
ENGLISH
9
PP6BR

Alarm operation: Power on the unit, then short press the power button again enter to clock
time interface. Short press the mode button once to start the alarm1 setting, and alarm 1
icon(bell with digit 1) will light up; press the previous/next button to adjust the hour; press the
clock button skip to minute's setting, or press clock button again return to hour's setting in
case of need; press the previous/next button to adjust the minute,; press the clock button skip
to alarm source selection, press the previous/next button to switch the alarm source between
beep/USB/microSD/radio/play;short press the play/pause button and power button again to
confirm and complete the alarm setting. For alarm 2 setting, press the mode button twice to
start the setting program. The other is same operation as alarm 1.
Tips:
a. The clock and alarm will work in case of there have available battery power, or DC power
connection. We suggest to connect DC power for long time using.
b. When the alarm activate, press any other button except previous/next button can cancel the
alarm sound, and wake up
again in the coming time of next day. The duration of alarm voice is 5 minutes and off
automatically in case of no further operation.
c. When the alarm activate, short press the snooze button to enter snooze mode. And the alarm
will wake up again in another 5 minutes. Press any other button can cancel the snooze.
d. Short press the clock button on top panel once can turn off or on the alarm 1; short press it
twice can turn off or on alarm 2; long press it can turn off or on both of alarm 1 and alarm 2 in
once.
e. When we select USB/microSD/radio as alarm source, short press the play/pause button can
preview the alarm track or preset radio station, short press the previous/next button can
switch the previewed alarm track and preset station, press the play/pause button to return
the alarm setting operation.
f. When we select play as alarm source, that means the unit can wake up and auto play the
radio/USB/microSD when the time is being. Short press the play/pause button can switch the
wake up source between play-radio/play-USB/play-microSD. The unit will play 120 minutes
and off automatically.
g. Please make sure the USB/microSD device with music will plug on the unit properly when
you select USB/microSD as alarm source.
h. The alarm is workable on power off mode (display off ).
Sleep: When the unit is in standby mode(clock time interface), short press the play/pause
button can activate the sleep setting, short press previous/next button to adjust the sleep time
between off/15/30/45/60/75/90/120, short press the play/pause button again to confirm the
selection. In audio playing mode(radio/USB/microSD/Bluetooth/aux in), the sound will auto off
after the selected sleep time arrival. If you return to standby mode, and short press the
play/pause button again can check the remained sleep minutes.
10
PP6BR

FM radio operation
The unit has an external antenna which allows you to listen the FM radio station. Before listen
the radio, please fully extent the antenna and try to move the unit next to window in order to
get better radio signal.
Power on the unit, press the “M” key on the top panel of unit or press the “ MODE” button on
remote control can enter to radio mode.
1. Auto tune and preset: short press the “ FM SCAN” button, or press and hold “ PLAY/PAUSE”
button from remote control and top panel of unit in 3 seconds, the unit will scan and save
the available station automatically. The unit can save up to 60 preset stations.
2. Auto scan: Press and hold the “Previous” and” Next” button on top panel of remote
control can auto scan the available station in upward or downward frequency.
3. Station manual memory: When you get a favorite station by auto scan, short press the “
SAVE” button on remote control can save the current station; Short press the “ REPEAT” key on
remote control, then press the volume – and volume + button from remote control can change
the radio frequency per 0.1MHz, press the “SAVE” button can save the current station manually;
remain 10 seconds without operation, the volume knob will resume volume control function.
4. Remove weak signal preset station: in case of you find weak signal or dislike radio station
during preset station picking up by press “ next” and “ previous” button; long press the “ 0”
digit button from remote control can remove the current preset station. And the afterward
preset station number will move forward accordingly.
5. Get a specific station: in order to get a specific frequency station, you can input the
frequency directly by the digit button on remote control. For example, you want to listen the
radio frequency at “ 104.3 MHz”, you just need key in 1-0-4-3 by the digit button of remote
control. Then the unit will skip and play the defined station.
6. Preset station picking up: short press the “ Previous” or “ Next” button on remote control or
front panel can pick up the preset station; Or input preset station number by digit button on
remote control for picking up. For example, you want to listen the preset station number 12,
please just key in 1-2 by remote control, then the related station will be played.
USB and microSD card playback operation
Before start the MP3 playback function, please make sure the USB and microSD card had been
inserted into the USB or microSD port on the unit rear panel. Also, the MP3 music had been
copied and stored inside of device. The unit can support up to 32GB capacity device.
1. Press the “MODE” or “ M” button enter to the USB or microSD card playback mode, the unit can
auto detect and start to play the music after show the total track's number.
2. Short press the “ Previous” or “ Next” button can select the last or next track; press hold and
release the “ Previous” or “Next” button from remote control can fast-forward or fast rewind
the current playing
track.
ENGLISH
11
PP6BR

12
3. Key in the related number by the digit button on remote control can fast pick up and play the
track.
4. Short press the “ REPEAT” button on remote control can switch the play mode between repeat
all, repeat one and random. Press and hold the Play/pause button on front panel of unit 3
seconds can get the same operation.
5. If you want to repeat play a specific section of track, Press and hold the “ REPEAT” button 3
seconds till the P—A show on display to select the start point ; then press and hold the “
REPEAT” button 3 seconds till display show the P--b to select the end point; Then the unit will
repeat play the selected track. Press and hold the “ REPEAT” button till P---E showed on display
can cancel and quit the specific repeat function.
6. During the MP3 play mode, short press the EQ button on remote control can change the
equalizer between NORMAL/ROCK/POP/CLASS/JAZZ/BASS.
Notes:
a. An extension cable for USB connection playing is not recommended, because that will
impact the audio signal transfer and create noise output issue.
b. The unit only can detect and play the music when the USB or microSD card installed.
AUX IN/MP3 Link operation
Using the supplied 3.5mm stereo to 3.5mm audio cable and connect the AUX IN jack on the rear
panel of unit to other player( like MP3 player etc..). Then the unit will enter to the AUX IN
playback mode directly. Select and play the music from your player, then the sound will output
from radio.
Please kindly note the main control is on your player side. The radio only can adjust the volume,
play/pause function in AUX in mode.
Specification:
Power source: DC IN 5V/600mA; 3.7V/1800mA(Battery power)
RMS Output power: 2 x 2.5W RMS. FM frequency: 87.5~108.0MHz.
USB rating output: 150 mA.
Power consumption: 9.5W Standby power consumption: < 0.5 W
Factory default:
System time: 00:00,
Time format: 24hours.
Sleep: OFF.
Alarm duration: 5 minutes
Volume: 15
(The specification may revise without prior notice)
PP6BR

POLISH
WAŻNE INSTRUKCJE DOTYCZĄCE BEZPIECZEŃSTWA
Symbol błyskawicy zakończonej strzałką umieszczonej w trójkącie
równobocznym ostrzega użytkownika przed nieizolowanym
„niebezpiecznym napięciem” w obrębie obudowy urządzenia, które
może osiągnąć wielkość grożącą porażeniem prądem elektrycznym.
Znak wykrzyknika w trójkącie równobocznym ostrzega użytkownika,
że w tym momencie przedstawione są ważne informacje dotyczące
ZAGROŻENIE PORAŻENIEM
ELEKTRYCZNYM
NIE OTWIERAĆ
Tabliczka znamionowa znajduje się na spodzie urządzenia.
PRZESTROGA
13
PP6BR

14
PP6BR

15
POLISH
PP6BR

16
PP6BR

17
POLISH
PP6BR

18
PP6BR
Table of contents
Languages:
Other Blaupunkt Portable Radio manuals

Blaupunkt
Blaupunkt PP14BT User manual

Blaupunkt
Blaupunkt BWR-400 User manual

Blaupunkt
Blaupunkt PR4BK User manual

Blaupunkt
Blaupunkt PP10BK User manual

Blaupunkt
Blaupunkt PR3BK User manual

Blaupunkt
Blaupunkt BDR-500 User manual

Blaupunkt
Blaupunkt PR7BK User manual

Blaupunkt
Blaupunkt PP5.2 User manual

Blaupunkt
Blaupunkt BR-70DABB User manual