manuals.online logo
Brands
  1. Home
  2. •
  3. Brands
  4. •
  5. Blodgett
  6. •
  7. Oven
  8. •
  9. Blodgett 1200 Series User manual

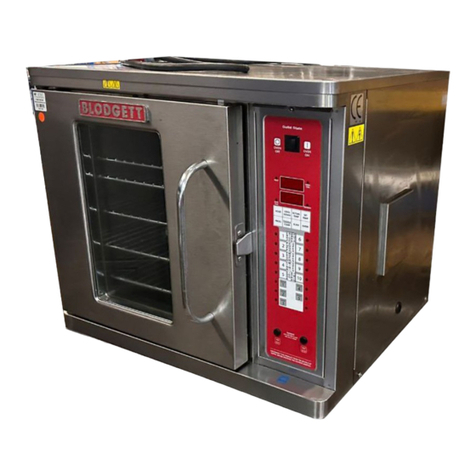
Blodgett 1200 Series User manual

Other manuals for 1200 Series

2

Other Blodgett Oven manuals

Blodgett Mark V User manual

Blodgett

Blodgett Mark V User manual

Blodgett 1400 SERIES Guide

Blodgett

Blodgett 1400 SERIES Guide

Blodgett CONVEYOR OVEN MT1820E User manual

Blodgett

Blodgett CONVEYOR OVEN MT1820E User manual

Blodgett BE2136 DOUBLE Owner's manual

Blodgett

Blodgett BE2136 DOUBLE Owner's manual

Blodgett XR8-G User manual

Blodgett

Blodgett XR8-G User manual

Blodgett RE-42 User manual

Blodgett

Blodgett RE-42 User manual

Blodgett BCX-14E User manual

Blodgett

Blodgett BCX-14E User manual

Blodgett 966 User manual

Blodgett

Blodgett 966 User manual

Blodgett DFG-100 Series User manual

Blodgett

Blodgett DFG-100 Series User manual

Blodgett XCEL-50EC Guide

Blodgett

Blodgett XCEL-50EC Guide

Blodgett 981 BASE User manual

Blodgett

Blodgett 981 BASE User manual

Blodgett 1415 Owner's manual

Blodgett

Blodgett 1415 Owner's manual

Blodgett BG3240 Manual

Blodgett

Blodgett BG3240 Manual

Blodgett BCX-14G User manual

Blodgett

Blodgett BCX-14G User manual

Blodgett SHO-E User manual

Blodgett

Blodgett SHO-E User manual

Blodgett 900 SERIES Guide

Blodgett

Blodgett 900 SERIES Guide

Blodgett MT3255 Series Installation and operating manual

Blodgett

Blodgett MT3255 Series Installation and operating manual

Blodgett 1048 User manual

Blodgett

Blodgett 1048 User manual

Blodgett BC-20E Owner's manual

Blodgett

Blodgett BC-20E Owner's manual

Blodgett 961 User manual

Blodgett

Blodgett 961 User manual

Blodgett XR8-G Owner's manual

Blodgett

Blodgett XR8-G Owner's manual

Blodgett SG2136 E & G Application guide

Blodgett

Blodgett SG2136 E & G Application guide

Blodgett 1060 Owner's manual

Blodgett

Blodgett 1060 Owner's manual

Blodgett 1200 Series Application guide

Blodgett

Blodgett 1200 Series Application guide

Popular Oven manuals by other brands

Brandt FC 222 user manual

Brandt

Brandt FC 222 user manual

aumate TOA20M04N-1E instruction manual

aumate

aumate TOA20M04N-1E instruction manual

Maytag CWE4100AC - 24" Single Electric Wall Oven Dimension Guide

Maytag

Maytag CWE4100AC - 24" Single Electric Wall Oven Dimension Guide

Kernau KBO 1076 S PT B instruction manual

Kernau

Kernau KBO 1076 S PT B instruction manual

Bosch HB 37 N Series User manual and installation instructions

Bosch

Bosch HB 37 N Series User manual and installation instructions

Electrolux EOD5420AA user manual

Electrolux

Electrolux EOD5420AA user manual

Mx Onda MX-HC2183 instruction manual

Mx Onda

Mx Onda MX-HC2183 instruction manual

Daewoo F6EV19SM2 Service manual

Daewoo

Daewoo F6EV19SM2 Service manual

GE ZET2F owner's manual

GE

GE ZET2F owner's manual

GE JK3000DF3WW owner's manual

GE

GE JK3000DF3WW owner's manual

eka EKF 523 NT Operating and instruction manual

eka

eka EKF 523 NT Operating and instruction manual

AEG Electrolux E3191-5 user manual

AEG Electrolux

AEG Electrolux E3191-5 user manual

Pratica Rocket Express quick start guide

Pratica

Pratica Rocket Express quick start guide

Viking Professional VGSO260T user guide

Viking

Viking Professional VGSO260T user guide

FM RX203 instruction manual

FM

FM RX203 instruction manual

Bosch HBN331 9B Series instruction manual

Bosch

Bosch HBN331 9B Series instruction manual

NEFF B95M42N0MK Instructions for use

NEFF

NEFF B95M42N0MK Instructions for use

Miele H 5961 B User instructions

Miele

Miele H 5961 B User instructions

manuals.online logo
manuals.online logoBrands
  • About & Mission
  • Contact us
  • Privacy Policy
  • Terms and Conditions

Copyright 2025 Manuals.Online. All Rights Reserved.

1200 SERIES
ELECTRIC DECK OVEN
INSTALLATION - OPERATION - MAINTENANCE
BLODGETT OVEN COMPANY
www.blodgett.com
44 Lakeside Avenue, Burlington, Vermont 05401 U A Telephone: (802) 658Ć6600 Fax: (802)864Ć0183
PN 11360 Rev D (6/01)
E 2001 - G. . Blodgett Corporation
IMPORTANT
FOR YOUR SAFETY
Do not stor or us gasolin or oth r flammabl vapors or
liquids in th vicinity of this or any oth r applianc .
WARNING: IMPROPER INSTALLATION, ADJUSTMENT,
ALTERATION, SERVICE OR MAINTENANCE CAN CAUSE
PROPERTY DAMAGE, INJURY OR DEATH. READ THE INĆ
STALLATION, OPERATING AND MAINTENANCE INĆ
STRUCTIONS THOROUGHLY BEFORE INSTALLING OR
SERVICING THIS EQUIPMENT
Th information contain d in this manual is important for th prop r
installation, us , and maint nanc of this ov n. Adh r nc to th s
proc dur s and instructions will r sult in satisfactory baking r sults
and long, troubl fr s rvic . Pl as r ad this manual car fully and
r tain it for futur r f r nc .
Errors: D scriptiv , typographic or pictorial rrors ar subj ct to corr cĆ
tion. Sp cifications ar subj ct to chang without notic .
BLODGETT Ć THE REPUTATION YOU CAN COUNT ON
For a century and a half, The Blodgett Oven Company has
been building ovens and nothing but ovens. We've set the inĆ
dustry's quality standard for all kinds of ovens for every foodĆ
service operation regardless of size, application or budget. In
fact, no one in the foodservice industry has more oven engiĆ
neering experience than Blodgett, and no one offers more
models, sizes, and oven applications than Blodgett; gas and
electric, fullĆsize, halfĆsize, countertop and deck, convection,
Cook'n Hold, CombiĆOvens and the industry's highest quality
Pizza Oven line. For more information on the full line of
Blodgett ovens contact your Blodgett representative.
Your ervice Agency's Address:
Model:
erial Number:
Your oven was installed by:
Your oven's installation was checked by:
Tabl of Cont nts
Introduction
Oven Description and pecifications 2. . . . . . . . . . . . . . . . . . . . . . . . . . . . . . . .
Oven Components 3. . . . . . . . . . . . . . . . . . . . . . . . . . . . . . . . . . . . . . . . . . . . . . .
Installation
Delivery and Location 4. . . . . . . . . . . . . . . . . . . . . . . . . . . . . . . . . . . . . . . . . . . . .
Oven Assembly 5. . . . . . . . . . . . . . . . . . . . . . . . . . . . . . . . . . . . . . . . . . . . . . . . . .
Leg attachment 5. . . . . . . . . . . . . . . . . . . . . . . . . . . . . . . . . . . . . . . . . . . . . . .
Double tacking 5. . . . . . . . . . . . . . . . . . . . . . . . . . . . . . . . . . . . . . . . . . . . . .
Ventilation 6. . . . . . . . . . . . . . . . . . . . . . . . . . . . . . . . . . . . . . . . . . . . . . . . . . . .
Ultra Rokite Decks 6. . . . . . . . . . . . . . . . . . . . . . . . . . . . . . . . . . . . . . . . . . . . .
Electrical Connection 6. . . . . . . . . . . . . . . . . . . . . . . . . . . . . . . . . . . . . . . . . .
Op ration
Control Panel 7. . . . . . . . . . . . . . . . . . . . . . . . . . . . . . . . . . . . . . . . . . . . . . . . . . . .
General Baking Tips 8. . . . . . . . . . . . . . . . . . . . . . . . . . . . . . . . . . . . . . . . . . . . . .
Maint nanc
Cleaning and Preventative Maintenance 9. . . . . . . . . . . . . . . . . . . . . . . . . . . . .
Troubleshooting Guide 10. . . . . . . . . . . . . . . . . . . . . . . . . . . . . . . . . . . . . . . . . . . .
Introduction
2
Ov n D scription and Sp cifications
Blodgett Deck ovens have set industry wide stanĆ
dards of excellence for baking characteristics,
performance and reliability. They remain unsurĆ
passed for product quality.
implicity of design and quality construction
throughout assure years of trouble free service
when the equipment is properly installed and
maintained.
Features include a full angle iron frame, all welded
radius corners and stainless steel exteriors.
AMPERES ELECTRICAL
CONNECTION
KW/SECTION VOLTS PHASE L1 L2 L3
CONNECTION
AWG*
10 208 1 48 0 48 6
10 208 3 24 42 24 6
10 220Ć240 1 42 042 6
10 220Ć240 3 21 36 21 6
10 440 3 12 20 12 10
10 480 3 11 18 11 10
NOTE: Refer to page 6 in this manual for Electric Connection specifications.
NOTE: In multiple section oven installation, each section may e individually wired for service connections.
Multiple section ovens can e loaded to partially alance electrical input. Multiple section ovens
also may e interconnected y use of appropriate kit.
Introduction
3
Ov n Compon nts
Ultra Rokit D ck - stone deck that absorbs heat
from below to cook the bottom of the product.
St l D ck - absorbs heat from below to cook
the bottom of the product.
D ck Supports - hold the oven decks.
Control Pan l - contains wiring and components
to control the oven operation.
El m nts - provide heat to the baking chamber
and the decks.
1201 doubl
1201 Singl
Figur 1
Installation
4
D liv ry and Location
DELIVERY AND INSPECTION
All Blodgett ovens are shipped in containers to
prevent damage. Upon delivery of your new oven:
DInspect the shipping container for external damĆ
age. Any evidence of damage should be noted
on the delivery receipt which must be signed by
the driver.
DUncrate the oven and check for internal damĆ
age. Carriers will accept claims for concealed
damage if notified within fifteen days of delivery
and the shipping container is retained for inĆ
spection.
Th Blodg tt Ov n Company cannot assum
r sponsibility for loss or damag suff r d in
transit. Th carri r assum d full r sponsibility
for d liv ry in good ord r wh n th shipm nt
was acc pt d. W ar , how v r, pr par d to
assist you if filing a claim is n c ssary.
OVEN LOCATION
The well planned and proper placement of your
oven will result in long term operator convenience
and satisfactory performance.
Be sure to place the oven in an area which is acĆ
cessible for proper operation and servicing.
Installation
5
Ov n Ass mbly
LEG ATTACHMENT
1. Tip bottom oven section backward.
2. Attach the 32" (81,2 cm) front legs with two
bolts to the underside of the oven frame.
3. Lift the oven to the upright position. Block up
the back end.
4. Attach the 32" (81,2 cm) rear legs with two
bolts to the underside of the oven frame.
Figur 2
DOUBLE STACKING
1. Place bottom oven as close to the installation
site as possible.
2. Use two 1" (2,5 cm) boards. Place one at the
right edge of the oven. Place the other toward
the left side.
3. Lift the upper oven on top of the boards.
4. Center the top oven over the bottom oven.
5. Remove the board from one side. Place a
piece of lumber approximately 4' (1,2 m) long
under the angle skirt. Lift up to remove the
board.
6. Push the top oven until the base fits tight
against the oven side.
7. Remove the other board in the same manner.
NOTE: DO NOT use pry ars to lift the oven
sections. Also e careful not to get
wood chips under the oven sections.
Figur 3
Installation
6
Ov n Ass mbly
VENTILATION
1. Assemble the back vents.
2. crew the back vent to the rear of each oven
section with the offset (enlarged) end toward
the bottom. Holes are provided. For stacked
units, the top of the lower back vent fits inside
the bottom of the upper vent.
3. ecure the trim to the top right of the upper
oven. The flanges on the right side, back and
front of the trim collar fit under the crown.
Use three sheet metal screws to attach the left
side of the trim to the top of the oven body
4. Remove all tags.
Figur 4
ULTRA ROKITE DECKS
Us only Blodg tt Ultra Rokit D cks. Us of
d cks oth r than Blodg tt will invalidat th
warranty.
NOTE: Ultra Rokite shelves are heavy e careful
when handling.
1. lide 1/2 of the Ultra Rokite shelf through the
door until it rests on the deflector. Move the
shelf to the rear until it drops into the shelf supĆ
port. Push to the right.
2. lide the remaining shelf through the door unĆ
til it rests on top of the other half. Move the
shelf to the rear until it drops the shelf support.
Push all the way to the left.
3. Move both shelves in so the center joint
closes.
4. Level with shims provided if necessary.
5. Refer to preheating instructions supplied with
shelf.
ELECTRICAL CONNECTION
Before making any electrical connections to this
unit check the rating plate to be sure that the oven
is being connected to the proper electrical supply.
The supply conduit is connected to the right rear
of each oven section.
1. Remove the trim cover on the right lower front
of the oven to access the supply connecting
terminals.
2. Run the supply wires through the conduit to
the front of the oven.
3. Connect the supply wires to the circuit breaker
on the lower right front corner of the control
panel.
NOTE: When using an interconnection kit, refer to
detailed instructions supplied with the kit.