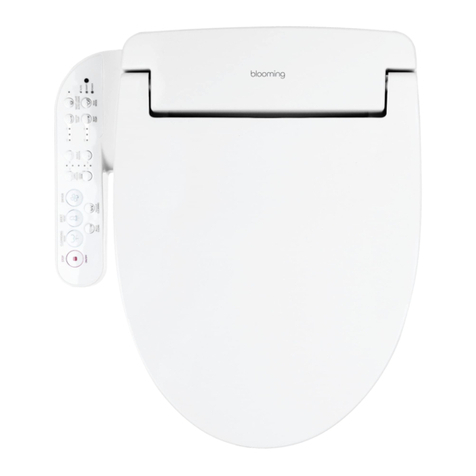
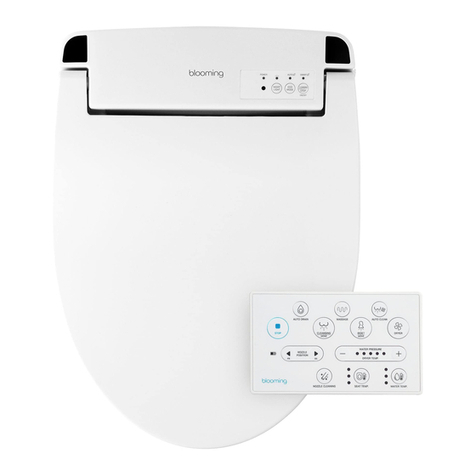
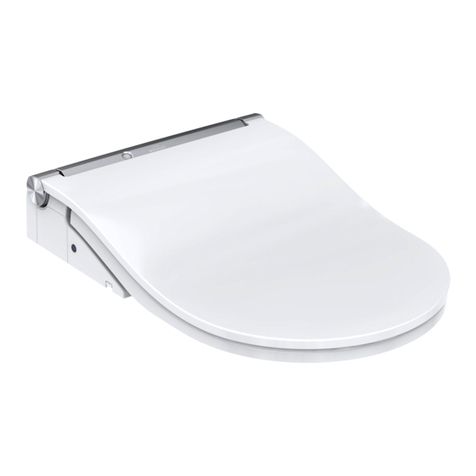
Blooming NB-R770 User manual

NB-R770
21
Product Specifications
Detachment and Service request
19
Personal Hygiene

Connect this product to a properly grounded outlet only. See Grounding Instructions.
Any other servicing should be performed by an authorized service representative.


DANGER

Lid
Outlet of warm
air dryer
Luminous LED
Remote
control
receiver

Deodorization
Cartridge Spare NUT
T-Valve
Conversion NUT
( 3/8" to 1/2" )
SUS Flexible Hose(for Water Tank)
Remote control
& Holder
Catch Plate
Brackets
Fixation Bolts
Washers
Packing nuts
Batteries
PVC Flexible Hose(for Main Unit)

Remote control
Unit control panel

Deodorization automatically starts.
When seated, "DEODORIZER" indication lights up.
Move cleansing runs by pressing "CLEANSING" or "BIDET"button
while using.
It beeps if cleansing or bidet cleansing function is over.
It beeps if dryer function is over.
Operate either the "CLEANSING" or the"BIDET" function.
Each function operates for 1 minute.
The "DRY" indication lights up and warm air dryer starts.
Dryer function will operate for 3 minutes.
(Running for 1 minute in auto-clean mode)
Drying operation can be maximized by gently wiping wet area with
toilet paper.
Sit on the seat
When using the unit, please sit in center.
If the "CLEANSING" or "BIDET" function is operated for a long time, water temperature will
drop gradually. To regain warm water, resume operation after 3 minutes.
(The seat sensor may not be properly activated, if not seated in center. Please refer to 'seat sensor' on 12 page.)
"CLEANSING", "BIDET" and "DRY" button on the unit control panel is supplementary ones which is used
in case of remote control breakdown or battery out, then the adjustment of the water pressure and the
warm air temperature are not available through the unit panel control.
You need to press "CLEANSING" or "BIDET" or "DRY" and related control buttons on the Remote Control
to adjust water pressure or the temperature of warm air.

Move cleansing runs by pressing "CLEANSING" or "BIDET" button while cleansing or bidet cleansing.
Nozzle stops by pressing "CLEANSING" or "BIDET" button again.
Press the "FR" or "BK" button to adjust the nozzle position during "CLEANSING" or "BIDET" fuction.
It returns to the first middle position when finishing and moving away the seat.
The water pressure level indication lights up when the seat is occupied. The unit remembers the last
water pressure settings.
Press the "WATER" button to adjust the water temperature level. Select the desired level.
Press the "SEAT" button to adjust the seat temperature. Select the desired level.
Water pressure can be adjusted by pressing the "HI" or "LO" button.(When controlling with remote control)
(Just 3rd level is available and cannot control the water pressure if using button on the unit control panel)
The unit remembers the water and seat temperature settings even if the power is shut off.
No need to readjust the temperature settings after a power failure.
"LOW" →"MIDDLE" →"HIGH" →"OFF"
"OFF" ←"HIGH" ←"MIDDLE" ←"LOW"
"LOW" →"MIDDLE" →"HIGH" →"OFF"
"OFF" ←"HIGH" ←"MIDDLE" ←"LOW"

Luminous LED
Luminous LED activates by pressing "LIGHT" button and luminous function runs automatically when
getting dark. To cancel the luminous function, press "LIGHT" button again and LED goes OFF.
During the dryer operation, the "WATER/DRY" LED indicates the temperature level of the
warm air dryer.
The unit remembers last warm air temperature settings.
Press "HI" or "LO" button to adjust the temperature of the warm air.
(Just 3rd level is available and cannot control the warm air temperature if using button on the unit control)
When luminous function runs, Bidet senses automatically toilet light and luminous LED goes on.
User can use conveniently bidet without toilet light.
Electric power consumption is little and use the luminous function without care about the electric charge.
Auto Power Saving
Locate the LED indication at "AUTO" position by pressing "POWER SAVING" button.
It maintains 30 C(86 F) for warm water and seat temperature each in the auto power saving mode.
To cancel power saving function, press "POWER SAVING" button twice, then LED indication goes OFF.
Power saving function is temporarily released, when sitting on the seat.
Power saving function runs again, when moving away from the seat.
Super Power Saving
Locate the LED indication at "SUPER" position by pressing "POWER SAVING" button.
Bidet senses toilet luminosity for itself and shows excellent efficiency of power save
in the super power saving mode.
To cancel super power save, press "POWER SAVING" button, then LED goes OFF.
It returns to normal mode from power saving mode even if occupying the seat in dark condition.
Water and seat temperature maintain normal temperature in the super power saving function
and power saving mode is temporarily released when toilet lightning goes ON.

Deodorizing function automatically runs when occupying the seat. Sound of deodorization
running appears and "DEODORIZER" LED lights up.
When moving away from the seat, deodorizing function runs for 1 minute more and stops automatically.
(When occupying the seat for over 30 minutes, it runs for 30 minutes and stops)
For fragrant function, put the aromatic instead of deodorizing filter. Need to purchase from
specialty store.
Before and after each operation, the self nozzle cleaning function runs and sanitizes the nozzle head.
Press the "CLEANSING" and "BIDET" button simultaneouslyon the unit control panel.
The nozzle comes out.
Press any button except "LO" and "HI" buttons, then power goes ON lighting up the "POWER" LED.
Clean the nozzle manually with a small brush. Press the "STOP" button and the nozzle returns
to its storage position, then self-cleaning function is operated.
Press the "STOP" button for more than 4 seconds and then the power indication light goes off.
Unit will be power off completely.
The unit remembers all of the prior settings in spite of an electrical outage so no need to reset functions
after power is back.
Self Nozzle Cleaning
Nozzle Cleaning
Press massage button and pulsating function runs while cleansing or bidet function are running.
(Not operated on the 1st level of water pressure)
Massage function stops by pressing "MASSAGE" button again.
Massage Function
Buzzer sounds for 30 seconds to call guardian if pressing "HELP" button.
Buzzer sound stops by pressing "STOP" button or "HELP" button again during help function is running.
Help

Seat temperature goes OFF sounding alarm when sitting on the seat for over 30 minutes.
(May cause burns at the low temperature in case sitting on the seat for a long time.)
It returns to set point when resetting or moving away from the seat.
Burn protecting system at the low temperature
Move cleansing and warm air dryer run for 1 minute each by pressing "AUTO" button.
Buzzer sounds if the auto clean function finishes.
Can return to previous auto-clean function that was set up when canceling auto-clean function or
pressing stop button.
Useful function for the old and the weak, children.
The 3rd level for water pressure , the 2nd level for warm air dryer temperature and the 3rd level of
nozzle position are automatically set-up. (Water pressure, warm air dryer temperature and nozzle
position can be adjusted according to user preference)
When using auto clean function, Sensor forces to set the water & seat temperature to "Medium", in
case the temperature were set up on the "High" position.
(Can adjust the water & seat temperature according to user preference)
Auto Cleansing
If the LED of "BATTERY SIGN" goes on and off, there will be trouble pressing buttons and change the
battery to new ones. Battery can be discharged fast according to the installation environment and may
not use the remote control before realizing the LED notice of "BATTERY SIGN"
Insert the batteries according to the (+) , (-) indications marked on the remote control.
Do not use the used battery and new one together.
1. Separate the remote control
from the remote control holder.
2. Open the battery cover and change to new
batteries. (Battery life time : about 1 year)
3. Close the battery cover and insert the remote
control into the remote control holder.
Changing batteries of remote control
For improving sensor efficiency, 2 seat sensors are installed in the unit and seat both.
(Refer to 5 page)
Therefore, Seat sensor may not be activated if covering cloth
cover or other material protector on the seat part.
Available if either 2 seat sensors detects.
Seat sensor in the hinge part : Well activating when sitting back of seat.
Seat sensor in the seat part : Activating when skin contacts the seat.
Seat Sensor
AA(LR6) type battery
Battery cover
Caution

Check whether the size and shape of the toilet seat
suitable for installation.
Gound connection available by authorized service person
only.
Check all the accessory parts are in place.
Do not connect the power until installation is finalized.
Drain toilet water tank completely after turning off the water supply by
turning the shut off valve clockwise.

T-VALVE
PACKING NUT
T-valve included is standard 1/2" size.
In case connecting the T-valve to the 3/8" water supply line,
use the conversion nut.
If there is trouble inserting packing nuts due to small fixing
hole (below 14mm or 0.55") on the toilet seat, you need to
use other packing nuts and washers.
(Only one pair of standard packing nuts are included in the
package as an accessory part)
CONVERSION
NUT
Connect the sus flexible hose. (for water tank)
Insert the packing nuts into the fixing holes on the toilet seat.

Fasten the catch plate with bolts after setting in
place the bracket on the catch plate.
Slide the unit to the catch plate installed
according to grooves underneath the unit.
Connect the PVC flexible hose to the T-valve
and unit both.
Attache the remote control on the wall with
double stick tape
Insert batteries as illustration below and put the
remote control into the remote control holder.
Insert the deodorization cartridge into the unit.
Put the washers on the packing nut.
9
Washer
Catch plate
Bracket Fixation bolt
Double stick tape
Remote
control
holder
Battery cover

Check any water leakage on the
connection hoses.
Connect the power plug.
Press the "CLEANSING" or "BIDET" button to fill up the water tank.
It beeps once long if the tank is full.
Open the shut off valve by turning
anticlockwise.
For the test of water spray operation,
press either "CLEANSING" or "BIDET"
button. Cover the nozzle with hand to
prevent water from spraying outside.
If the power indication light is not turned on after the power plug connection, press any button,
then power goes ON.
Do not turn over or move the unit after power connection.
It may cause trouble.

T-valve
Spare Nut
Drain plug
Fasten a spare nut on the position that PVC flexible hose was connected.
Disconnect the power plug.
Follow the below instructions if in need to detach the unit for house-moving etc.
Close the water supply by turning the shut off valve clockwise and drain the
toilet water tank completely.
Disconnect the PVC flexible hose from the T-valve and unfix the unit from the
toilet seat.
Unfasten the drain plug underneath the unit and drain the water completely
in the water tank.
Follow No.1 to 4 on "For Service Request".
Disconnect the flexible hoses (for Water Tank & for Main Unit both) and T-valve.
Open the shut off valve by turning anticlockwise and check leakages
on the connection.
Reconnect the original water supply hose removed during initial installation
of the unit.
Open the shut off valve by turning anticlockwise and check any leakages
Reinstall the original seat and lid to the toilet seat.
Reinstall the original seat and lid to the toilet seat.
Please send the unit detached to service center with a strong packing materials
not to be damaged in transit. For the information of service center, please refer
to "Product Registration" on the operating instruction manual.
on the connections.
< For service request >
< For removal >
Detachment and Service request

The external case of the unit is made of the plastic which may be damaged
by scrubbers, chemicals, etc. Do not use any chemicals.
Press the "CLEANSING" and "BIDET" button simultaneously.
The nozzle comes out and stops.
After cleaning the strainer, reinsert it by turning clockwise.
Open the shut off valve.
Remove the water strainer by turning anticlockwise.
Close the water supply by turning the shut off valve clockwise and drain the
toilet water tank completely.
Clean the nozzle manually with a small brush. To return the nozzle to its
storage position, press the "STOP" button. Then nozzle self cleaning function
is automatically activated.
Clean the unit with a tightly wrung wet soft cloth. Do not spray water the unit.
Touching the power socket with wet hands can cause an electric shock.
Disconnect the powr plug when cleaning. Please be careful not to splash the water
to the plug or socket.

After placing a basin under the drain hose, unfasten the
drain plug and drain the water tank completely.
Connect the power cord and check if the unit power is on.
Do not turn off the "WATER" level and adjust water temperature to "LO"
or more higher water temperature.
If not in use for a long time, drain the water tank.
Drain plug

The power is OFF condition.
The power plug is not connected.
There is a power failure.
The shut off valve is closed.
There is water supply outage.
The water pressure level is set to "LO".
The water strainer is clogged.
The water temperature level is turned off or set to "LO".
The warm seat temperature level is turned off or set to "LO".
The help function is running.
Batteries in the remote control have been exhausted .
The toilet lighting is the three wave lamp.
Remote control may not run if the toilet lighting is the three wave lamp.
Please adjust the position of the remote control or recommend
changing the toilet lighting to normal lamp in case the remote control
does not run in spite of position adjustment.
The warm air dryer temperature level is turned off or set to "LO".
Problem Description Possible Causes
Buzzer sound happens
Remote control
does not operate
at all
Table of contents
Other Blooming Toilet manuals
Popular Toilet manuals by other brands
Villeroy & Boch
Villeroy & Boch VICLEAN U+ installation guide
Woodbridge
Woodbridge T0001 installation instructions
American Standard
American Standard HYDRA installation instructions

Kohler
Kohler K-3825 Installation and care guide
SereneLife
SereneLife SLCATL420 user guide
Ecoflo
Ecoflo Separera mini user manual
Kohler
Kohler K-3869 Series Installation and care guide
Moen
Moen INS2321B installation instructions
Toto
Toto CST746 installation manual
SPX
SPX Johnson Pump AquaT instruction manual
American Standard
American Standard OLYMPUS O2 installation instructions
Kohler
Kohler ODEON K-8752K-W installation instructions
