BloomSky SKY2 User manual

BloomSky TM
1 of 12
www.bloomsky.com
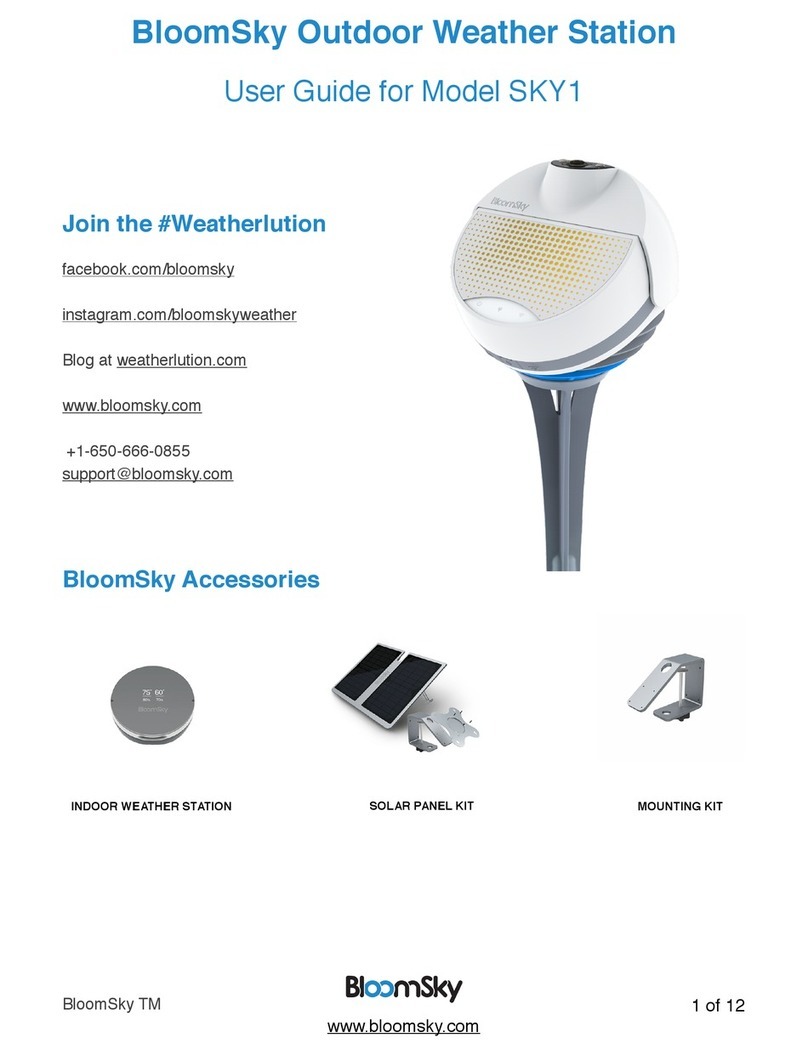
BloomSky Outdoor Weather Station
User Guide for Model SKY2
Join the #Weatherlution
facebook.com/bloomsky
instagram.com/bloomskyweather
Blog at weatherlution.com
www.bloomsky.com
+1-650-666-0855
BloomSky Accessories
SOLAR PANEL KIT
Mounting Kit

BloomSky TM
2 of 12
www.bloomsky.com
Table of Contents
Join the #Weatherlution 1
BloomSky Accessories 1
Meet your BloomSky 3
Intended Use 3
Requirements 3
In the Box 4
Your Outdoor Station 4
Indicator Lights 4
Getting Started 5
Setup Guidelines 5
Placing your BloomSky 5
Troubleshooting 6
Technical Specifications 6
Camera 6
Sensors 6
Power Options 7
Connectivity 7
Material/Design 7
App Features and Operating Systems 7
Firmware Updates 8
For your Safety 8
Installation and Use 8
Keeping the Lens Clean 8
Handling 8
Avoid Harsh Environments 9
Warranty 9
Disposal 9
Federal Communications Commission Compliance (FCC) 10
IC Rules 11
Explanation of Symbols 12

BloomSky TM
3 of 12
www.bloomsky.com
Meet your BloomSky
Thank you for purchasing the BloomSky Outdoor Station, the personal weather station + sky
camera compatible with iOS and Android devices. The Outdoor Station is a weather
measurement device that uses internal sensors to give you a hyper-local weather report based
on its location. It provides visually-rich, accurate, hyperlocal weather data that is updated every
three to eight minutes.
The camera turns on 30 minutes before sunrise and turns off 30 minutes after sunset. During
the first and last hour of the day when the camera is on, it takes a pictures every 3 minutes to
better capture sunrise and sunset. These images will be automatically combined at the end of
every day into a spectacular time-lapse video for you to view and share.
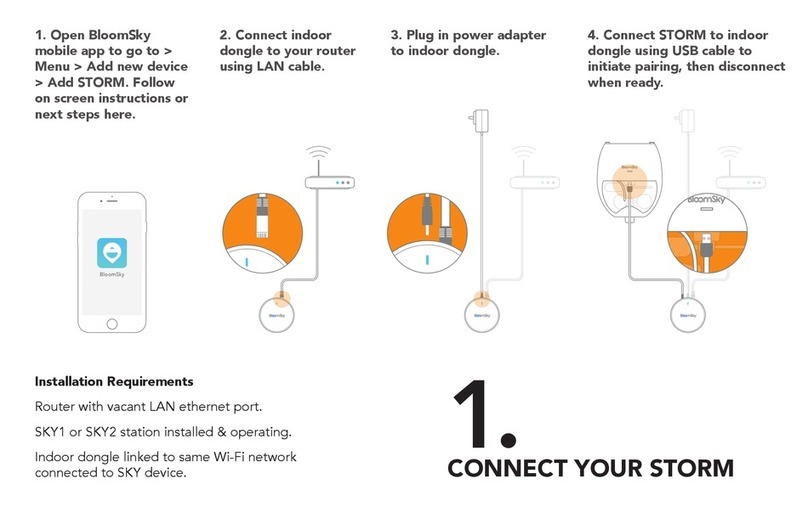
To begin, download the BloomSky app for your phone if you have not already done so. The
BloomSky app is used for setup of your weather station and to view, save, and share the
weather data.
Read this manual before use and keep it for your future reference. It will help you through the
setup process of your BloomSky Outdoor Station (model SKY2), introduce you to your device,
guide you through troubleshooting and completing a hard reset. If you need any further
assistance with your BloomSky Outdoor Station, you can call our customer support line at +1-
Intended Use
The BloomSky Outdoor Station is designed to allow you to record and share weather data and
pictures from its location. The data and images will be sent to the cloud through Wi-Fi. Users
can search, view, and share these data and images anywhere through the BloomSky mobile
application. For your privacy you can choose for your BloomSky’s data to not be publicly
searchable. This can be set and changed in “settings” menu of the BloomSky app. Please refer
to our Terms of Service for further details.
Requirements
• iOS version 8.0 or higher
• Android version 4.3 or higher
• 2.4GHz wifi connection
• Smart phone with Bluetooth 4.0
• BloomSky app installed on a smartphone or iPod. App is available from the App Store or
Google Play Store.

BloomSky TM
4 of 12
www.bloomsky.com
In the Box
• One Outdoor Module
• One Power Adaptor
• One Ground Stake
• One Installation Guide
Your Outdoor Station
Indicator Lights
Indicator LightStatusMeaning
Power IndicatorFlashes green 1 timeDevice is powering up.
Flashes green 3 times, every 3
secondsLow battery.
Charger IndicatorFlashes red, every 10 secondsDevice is charging
Flashes green, every 10 seconds Battery has been fully charged.
Wi-Fi IndicatorFlashing Red (with a solid green
power indicator)Waiting for a network to be
configured. Wi-fi setting mode.
Flashing Red and Green (with a solid
green power indicator) Waiting for a network to be configured
in Bluetooth Wi-Fi setting mode.
Flashing Orange (with a solid green
power indicator)Station is connecting to Wi-Fi.
Flashing GreenA network has been successfully
configured and the device is in “Real-
Time Mode.” Used for completing
setup.

BloomSky TM
5 of 12
www.bloomsky.com
Indicator LightStatusMeaning
Solid Green for 10 secondsDevice is in normal working mode
and busy transmitting a picture.
Getting Started
Setup Guidelines
Detailed setup instructions are available in the Outdoor Station Installation Guide. Below are
guidelines for a successful setup.
• Before starting setup, you must install the BloomSky app on your iOS or Android mobile
device. Links are available at www.bloomsky.com. Or you can download directly from the App
Store or Google Play.
• Connect your device to the same 2.4GHz Wi-Fi network you will connect your BloomSky to.
• To ensure a strong signal strength, stay within 5 feet of your router during setup.
• If it takes longer than 3 minutes for your device to connect, you may be too far from your Wi-Fi
router or you may have entered the wrong Wi-Fi password. Perform a hard reset of the
device and restart the setup process.
• After you open the BloomSky app and create your account, select “Setup a BloomSky
Device.” Once you’ve completed the setup of your Outdoor Station, you may add an Indoor
Station at any time.
• After you complete the initial setup, the Outdoor Station will connect automatically to your Wi-
Fi, barring a connection interruption, to upload weather data and pictures to the BloomSky
Cloud every three to eight minutes.
Placing your BloomSky
Your BloomSky Weather Station will perform best when it’s fully exposed to the elements. Try
to install your device where it will see direct sunlight and is as far as possible from tall obstacles
(like trees, buildings, or fences), artificial heat sources (like ventilation ducts and air conditioning
units), and moisture sources (such as garden irrigation systems and roof gutters). Accordingly:
• Install your BloomSky in a location with a clear view of the sky. Trees, roof eaves, or other
obstacles can cause the pictures to be overexposed.
• Keep your BloomSky raised above paved surfaces, especially blacktop. Blacktop radiates
heat and could confuse the sensors.
• Be sensitive to sprinklers triggering the precipitation sensor.
• Try to place your BloomSky at least 10 feet away from any artificial heat or cooling source
(this includes air conditioning units, heating vents, chimneys, etc.) to aid in accurate reporting.
• Finally, the higher your device, the better!

BloomSky TM
6 of 12
www.bloomsky.com
Troubleshooting
ProblemSolution
• The Power indicator quickly flashes green 3
times, every 3 seconds • The battery is low and the device needs to
charge.
• When the device is in Wi-Fi setting mode,
Network LED always shows orange color
and flash
• The device cannot get the IP address from
router. Please confirm your router’s DHCP
function is enabled.
• If the Network Indicator light continues to
flash red while you are completing setup. • The device can not receive the Wi-Fi
network information correctly. Please
confirm:
-
Your Wi-Fi is not on a 5 GHz band
-
Your device is close (within 5 feet) of
your router.
A Hard Reset restores your device to factory settings. Press and hold the Wi-Fi button for about
5-6 seconds, or until the power indicator stays green. Release the button and after 2 seconds,
the power indicator will flash green again. After 1 more second, the Wi-Fi indicator will start
flashing red. Your device has now returned to the Wi-Fi Setting Mode.
Note: DO NOT manually power off device when resetting Wi-Fi. The device will automatically
restart and the Wi-Fi will return to a blinking red icon.
Technical Specifications
Camera
• Ultra-wide angle HD camera built-in with 49-degree adjustable shooting angle and fisheye
lens
• Capture sky pictures around every 5 minutes or upon sudden change of temperature, humidity
or precipitation.
• Compressed time lapse video of sky view generated at end of the day
• Turn on at dawn and turn off at dusk based on sunrise and sunset in your area.
Sensors

BloomSky TM
7 of 12
www.bloomsky.com
• 4-in-1 sensors measure temperature, humidity, barometric pressure, and precipitation
(detection only) with the following tolerances
• Operating temperature range: -4°F (-20°C) to 131°F (55°C)
• Temperature accuracy: ±3°C (max)
• Relative humidity precision : ± 3% RH (max), 0–100% RH
• Absolute pressure range: 300 - 1100 hPa
• Smart photometric sensor measures daylight brightness and ensures correct exposure
• Smart rain sensor distinguishes precipitation from other moisture and responds instantly when
rain starts to fall
Power Options
• Powered by a rechargeable lithium-ion battery
• Battery operating and charging temperature range: -4°F (-20°C) to 131°F (55°C)
• Operating time: up to two weeks per charge
• Low battery alert sends push notifications on mobile apps
• Charging Option 1: through A/C Input
• 100-240V~50/60Hz(worldwide use), Output: DC 12V-2A
• Charging Option 2: through solar panel
• Output: DC 12V-1A
Connectivity
• Wi-Fi connection
• WLAN Standard: Single-band 2.4GHz IEEE 802.11b/g/n
• Frequency Range: 2412 MHz ~ 2462 MHz (2.4 GHz ISM Band)
• Number of Channels: 2.4GHz: Ch1 ~ Ch11
Material/Design
• Water, dust, UV-resistant when the Outdoor Station is positioned upright
• Stake apparatus stands upright on for insertion in patio or garden soil
• Mounting hardware designed for placement on roof/railing
App Features and Operating Systems
• Smartphone and tablet apps available
• iOS version 7.0 or higher
• Android version 4.0 or higher
• Access real-time weather data, sky pictures, alert notifications, and time-lapses via the App

BloomSky TM
8 of 12
www.bloomsky.com
• View real-time photos of the sky to learn more about your weather. Pictures are updated every
five minutes.
• Learn about real-time Temperature, Humidity, UV, Pressure, and Precipitation for your
Outdoor Weather Station. Data is updated every five minutes.
• Search and follow other BloomSky users to access their weather stations’ hyper-local weather
reports.
• Share your weather and sky pictures with your friends and family.
• Track the sky and cloud movement throughout your day.
• Use the app to set up your BloomSky Outdoor Station and BloomSky Indoor Station.
• Receive rain alerts and notifications of major weather events.
Firmware Updates
The firmware inside of your Outdoor Station can be automatically updated through its Wi-Fi
connection to the BloomSky Cloud.
For your Safety
WARNING: Failure to follow these safety instructions could result in fire, electric shock, or other
personal injury or loss or damage to the Product or other property.
Installation and Use
Please read and follow all installation instructions carefully. To avoid risk of shock or falls, do
not install in wet weather or at night. Use only as specified in the user manual, including being
sure to orient the camera away from homes, windows, walkways or areas where people are
likely to pass through. Not for use as a general webcam, security monitor, or surveillance
device.
Keeping the Lens Clean
Clean lens immediately if it comes into contact with any contaminants that may cause stains,
such as ink, dyes, makeup, oils, and lotions. To clean the lens, use a soft, slightly damp cloth.
Avoid window cleaners, household cleaners, aerosol sprays, solvents, alcohol, ammonia, or
abrasives.
Handling
The Product contains sensitive components. Do not drop, disassemble, crush, puncture,
incinerate, paint, or insert foreign objects into the Product. Inspect the Product periodically for

BloomSky TM
9 of 12
www.bloomsky.com
damage, including battery leakage or damage to the electrical cord, as applicable. Do not use
the Product or handle before unplugging if it has been damaged.
Avoid Harsh Environments
The Product is designed to be operated in temperatures between -4°F (-20°C) to 131°F (55°C).
Extreme temperatures may affect battery life or functionality. While the Product is designed for
use outdoors and in rain, avoid immersion in water or other liquids. If the Product gets
extremely wet, allow it to dry thoroughly before handling. Do not attempt to dry the Product with
an external heat source, such as an oven, microwave oven or hair dryer.
Warranty
BloomSky warrants that for a period of 1 year from shipment the product will be free from
defects in materials and workmanship under normal use. In the event of a defect, contact
BloomSky at https://www.BloomSky.com/contact/ or 1-650-666-0855 for return instructions.
BloomSky’s sole obligation under this warranty will be at its option to repair or replace the
product. This warranty does not apply to products damaged by misuse, accident, or normal
wear and tear. The product is not designed for or warranted against damage from use in areas
subject to electrical interference, extreme heat or cold, immersion under water, or other
inherently hazardous environments. In addition, BloomSky does not warrant the accuracy of
weather data or forecasts obtained from use of the product. ALL IMPLIED WARRANTIES OF
MERCHANTABILITY OR FITNESS FOR A PARTICULAR PURPOSE ARE LIMITED TO THE
DURATION OF THIS WARRANTY. BLOOMSKY DISCLAIMS ALL OTHER EXPRESS OR
IMPLIED WARRANTIES OR CONDITIONS. TO THE EXTENT NOT PROHIBITED BY LAW, IN
NO EVENT WILL BloomSky BE LIABLE FOR ANY SPECIAL, INDIRECT, CONSEQUENTIAL,
INCIDENTAL OR PUNITIVE DAMAGES, HOWEVER CAUSED, ARISING OUT OF OR
RELATED TO THE USE OF OR INABILITY TO USE THE PRODUCT, EVEN IF BloomSky HAS
BEEN ADVISED OF THE POSSIBILITY OF SUCH DAMAGES. IN NO EVENT WILL
BloomSky’S LIABILITY EXCEED THE AMOUNT PAID BY YOU FOR THE PRODUCT. Some
jurisdictions do not allow limitations on how long an implied warranty lasts, or the exclusion or
limitation of incidental or consequential damages, so the above limitations or exclusions may not
apply to you. This warranty gives you specific legal rights, and you may also have other rights
which vary by jurisdiction.
Disposal
Wasteelectricalproductsshouldnotbedisposedofwithhouseholdwaste.Pleaserecyclewhere
facilitiesexist.CheckwithyourlocalAuthorityorretailerforrecyclingadvice.

BloomSky TM
10 of 12
www.bloomsky.com
Federal Communications Commission Compliance (FCC)
This device complies with Part 15 of the FCC Rules. Operation is subject to the following two
conditions:
(1) This device may not cause harmful interference, and
(2) This device must accept any interference received, including interference that may cause
undesired operation.
Cet appareil est conforme à la section 15 des réglementations de la FCC. Le fonctionnement de
l’appareil est sujetaux deux conditions suivantes :
(1) cet appareil ne doit pas provoquer d’interférences néfastes, et
(2) cet appareil doit tolérer les interférences reçues, y compris celles qui risquent de provoquer
un fonctionnement indésirable.
Note: This product has been tested and found to comply with the limits for a Class B digital
device, pursuant to Part 15 of the FCC Rules. These limits are designed to provide reasonable
protection against harmful interference in a residential installation. This product generates, uses,
and can radiate radio frequency energy and, if not installed and used in accordance with the
instructions, may cause harmful interference to radio communications. However, there is no
guarantee that interference will not occur in a particular installation. If this product does cause
harmful interference to radio or television reception, which can be determined by turning the
equipment off and on, the user is encouraged to try to correct the interference by one or more of
the following measures:
—Reorient or relocate the receiving antenna.
—Increase the separation between the equipment and receiver.
—Connect the equipment into an outlet on a circuit different from that to which the receiver is
connected.
—Consult the dealer or an experienced radio/TV technician for help.
Please take attention that changes or modification not expressly approved by the party
responsible for compliance could void the user’s authority to operate the equipment.
This equipment should be installed and operated with a minimum distance 20cm between the
radiator and your body
Cet équipement doit être installé et utilisé à une distance minimale de 20 cm entre le radiateur
et votre corps

BloomSky TM
11 of 12
www.bloomsky.com
IC Rules
This device complies with Industry Canada licence-exempt RSS standard(s). Operation is
subject to the following two conditions:
(1) this device may not cause interference, and
(2) this device must accept any interference, including interference that may cause undesired
operation of the device.
Le présent appareil est conforme aux CNR d'Industrie Canada applicables aux appareils radio
exempts de licence. L'exploitation est autorisée aux deux conditions suivantes :
(1) l'appareil ne doit pas produire de brouillage, et
(2) l'utilisateur de l'appareil doit accepter tout brouillage radioélectrique subi, même si le
brouillage est susceptible d'en compromettre le fonctionnement.
Under Industry Canada regulations, this radio transmitter may only operate using an antenna of
a type and maximum (or lesser) gain approved for the transmitter by Industry Canada. To
reduce potential radio interference to other users, the antenna type and its gain should be so
chosen that the equivalent isotropically radiated power (e.i.r.p.) is not more than that necessary
for successful communication.
Conformément à la réglementation d'Industrie Canada, le présent émetteur radio peut
fonctionner avec une antenne d'un type et d'un gain maximal (ou inférieur) approuvé pour
l'émetteur par Industrie Canada. Dans le but de réduire les risques de brouillage radioélectrique
à l'intention des autres utilisateurs, il faut choisir le type d'antenne et son gain de sorte que la
puissance isotrope rayonnée équivalente (p.i.r.e.) ne dépasse pas l'intensité nécessaire à
l'établissement d'une communication satisfaisante.

BloomSky TM
12 of 12
www.bloomsky.com
Explanation of Symbols
Symbolforthe“Owner’sManual–Mustberead”
Symbolfor“Caution”
Symbolfor“ENVIRONMENTPROTECTION–Wasteelectricalproductsshouldnotbe
disposedofwithhouseholdwaste.Pleaserecyclewherefacilitiesexist.Checkwithyour
localAuthorityorretailerforrecyclingadvice.”
ManufacturedforBloomSky,Inc.
723N.ShorelineBlvd,MountainView,CA94043
www.BloomSky.com
BloomSkyisthetrademarkofBloomSky,Inc.
iPhoneisatrademarkofAppleInc.registeredintheU.S.andothercountries.
AndroidisatrademarkofGoogleInc.
©2015BloomSky,Inc.Allrightsreserved.
Table of contents
Other BloomSky Weather Station manuals
Popular Weather Station manuals by other brands
Oregon Scientific
Oregon Scientific JM898WFA user manual
Pegasus
Pegasus Portable Weather Station user manual
Bresser
Bresser WIFI ClearView Weather Station 7in1 instruction manual

Conrad
Conrad WS9129 manual
La Crosse Technology
La Crosse Technology WS-9023U instruction manual
Conrad
Conrad 515474 operating instructions
