manuals.online logo
Brands
  1. Home
  2. •
  3. Brands
  4. •
  5. Blu Stream
  6. •
  7. Matrix Switcher
  8. •
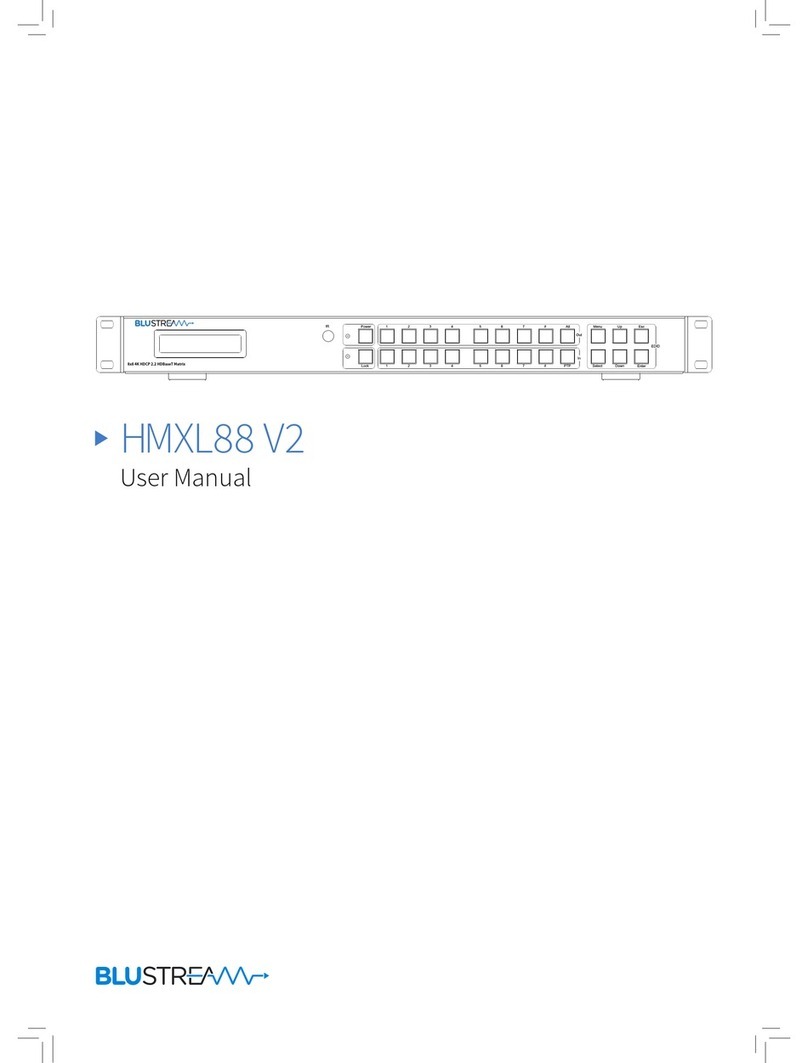
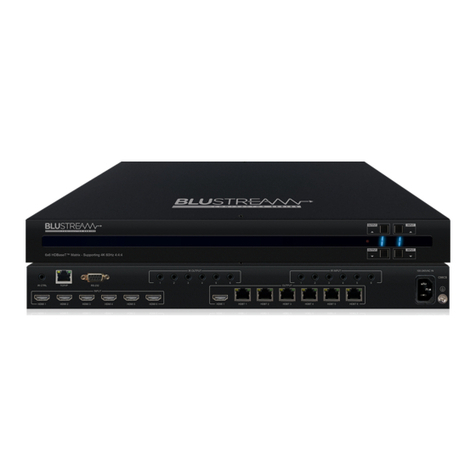
  9. Blu Stream Custom Pro Matrix Series User manual

Blu Stream Custom Pro Matrix Series User manual

CUSTOMPRO
Custom Pro Matrix
User Manual
RevA4_Custom_Pro_Matrix_User_Manual_180620
02 www.blustream.co.uk | www.blustream.com.au
CUSTOM PRO MATRIX USER MANUAL
Contents
Thank you for purchasing
this product.
For optimum performance and safety,
please read these instructions carefully
before connecting, operating or
adjusting this product. Please save /
keep this manual for future reference.
Surge Protection Device
Recommended
This product contains sensitive
electrical components that may be
damaged by electrical spikes, surges,
electric shock, lightning strikes, etc. Use
of surge protection systems is highly
recommended in order to protect and
extend the life of your equipment.
Safety &
Performance Notice
The transmission distances of HDMI
over UTP cables are measured using
TE CONNECTIVITY 1427071-6
EIA/TIA-568-B termination (T568B) of
cables is recommended for optimal
performance.
To minimise interference of the
unshielded twisted pairs in the
CAT5e/6/6a cable do not run the
HDBaseT™/ CAT5e/6/6a cabling with
or in close parallel proximity to mains
power cables.
Do not substitute or use any other
power supply other than the enclosed
unit, or a Blustream approved
replacement.
Do not disassemble either the
Transmitter or Receiver units for
any reason. Doing so will void the
manufacturer’s warranty.
Introduction & Key Features 03
Modular Matrix Options Overview 03
Panel Descriptions - 8x8 Chassis 04
Panel Descriptions - 16x16 Chassis 05
Modular Options - Main Communication Board 06
Modular Options - Input Boards 07 - 08
Modular Options - Output Boards 09 - 11
Automatic Smart Scaling Functionality in CSC 11
Modular Options - Feature Boards 12
Installing Modular Matrix Boards 13
HDBaseT™ Transmitter & Receiver Options 14
Matrix Front Panel Control 15
Advanced EDID Management 16
Terminating CAT Cables for use with HDBaseT™ 16
Understanding the HDBaseT™ Status LED’s 17
Audio Functionality 18
Infrared Distribution 19
Infrared Control 20
Example Schematic - 8x8 Chassis 21
Example Schematic - 16x16 Chassis 22
Specifications, Package Contents & Maintenance 23
Infrared Commands - 8x8 Matrix 24 - 25
Infrared Commands - 16x16 Matrix 26 - 27
RS-232 and Telnet Commands 38 - 30
Certifications 31
Notes 32
03
contact support@blustream.co.uk |support@blustream.com.au
CUSTOM PRO MATRIX USER MANUAL
Introduction
The Blustream Custom Pro matrix series achieves new levels of performance and flexibility. AV installers can now
easily specify their desired I/O structure and choose the additional control features required for a specific project.
The Custom Pro matrix chassis’ have been specifically designed to operate in challenging AV environments. The
robust housing and interlocking board configuration make both installation and maintenance a seamless experience.
Advanced features include audio breakout, IR routing, HDBaseT™ inputs, simultaneous HDBaseT™ / HDMI outputs, RS-
232 pass through and a web browser interface module for control and configuration of the matrix (subject to I/O card
specification).
• 2-way and 4-way interchangeable input & output boards
• Optional control boards: IR routing (8x8 chassis only), zone audio breakout, RS-232 pass-through to supported
HDBaseT™receivers
• Supports 4K UHD video up to 70m (4K @60Hz 4:4:4) and up to 100m 1080p using HDBaseT™ distribution for all 2nd
generation HDMI2.0 and HDBaseT™ CSC input / output boards (subject to output board specifications)
• Web browser interface for control and configuration of the matrix
• Control via front panel, IR, RS-232, TCP/IP, and iOS / Android apps (search: ‘Blustream Matrix’)
• Supports PoC (Power over Cable) to power compatible HDBaseT™ receivers
• 3rd party drivers available for major control brands - refer to Blustream website for more details
• Advanced EDID management
• HDCP 2.2 compliant
Feature & Control BoardsFeature & Control Boards
PRO-8IR* 8-Way IR Control Board (5V IR only)
PRO-8IR-V2* 8-Way IR Control Board w. 5V & 12V IR
PRO-8RS232 8-Way RS-232 Breakout Board
PRO-8AB 8-Way Audio Breakout Board
PRO-8AB-V2 8-Way Audio Breakout Board w. LL Volume
Modular Matrix Options Overview
Key Features
The Custom Pro series allows AV integrators to easily specify their desired input / output structure, choosing the
additional control features as required for a specific project. The available modular board options are shown below:
18Gbps Video Output Boards (4K 60Hz 4:4:4)18Gbps Video Output Boards (4K 60Hz 4:4:4)
PRO-OUT2H-V2 2-Way HDMI 2.0 Output Board
PRO-OUT4H-V2 4-Way HDMI 2.0 Output Board
PRO-OUT2TCS 2-Way HDBaseT™ CSC Output Board (100m 1080p)
PRO-OUT4TCS 4-Way HDBaseT™ CSC Output Board (100m 1080p)
PRO-OUT4HTCS 4-Way HDBaseT™ CSC / HDMI Output Board (100m
1080p)
PRO-OUT2TL-V2 2-Way HDBaseT™ CSC Output Board (70m 1080p)
PRO-OUT4TL-V2 4-Way HDBaseT™ CSC Output Board (70m 1080p)
PRO-OUT4TLS-V2 4-Way HDBaseT™ CSC / HDMI Output Board (70m 1080p)
ChassisChassis
CUSTOMPRO-HUB Custom Pro Matrix Hub (8x8)
CUSTOMPRO-HUB16 Custom Pro Matrix Hub (16x16)
18Gbps Video Input Boards (4K 60Hz 4:4:4)18Gbps Video Input Boards (4K 60Hz 4:4:4)
PRO-IN2HAB 2-Way HDMI 2.0 Input Board w. Audio B/O
PRO-IN4HAB 4-Way HDMI 2.0 Input Board w. Audio B/O
PRO-IN2H2V 4-Way HDMI 2.0 & VGA Input Board
PRO-IN2H2TCS 2-Way HDBaseT™ & HDMI 2.0 Input Board
* IR control boards are included within the CUSTOMPRO-HUB16
Please note that the legacy (HDMI1.4, HDBaseT™4K 60Hz 4:2:0) Custom Pro
input and output boards are not included within this user guide. Please contact
your authorised Blustream distributor or reseller for further information.
04 www.blustream.co.uk | www.blustream.com.au
CUSTOM PRO MATRIX USER MANUAL
Rear Panel
Front Panel
Panel Descriptions - 8x8 Chassis
1
8 9 q w e
2 3 4 5 6 7
1TCP/IP port - for control of the matrix from PC or third
party control processor
2RS-232 / serial connector - for control of the matrix (as
above)
3Analogue L/R line level input (3.5mm stereo jack)
audio can be embedded onto video inputs
4RS-232 control card slots - insert optional RS-232
control cards for serial control at HDBaseT™ receivers
5Audio output card slot - insert optional audio card for
zone / output audio breakout
6IR control card slot - insert optional IR control card for
2-way & Global IR control
7Mains power switch
8Video input card 1 (inputs 1-4) - insert video input
card to connect to source devices (mandatory)
9Video input card 2 (inputs 5-8) - insert video input
card to connect to source devices (optional)
qVideo output card 1 (outputs 1-4) - insert video output
card (mandatory)
wVideo output card 2 (outputs 5-8) - insert video output
card (optional)
ePower port – use supplied 24V 8A DC adaptor to
power matrix
1LCD display - shows the status of input / output
selection, EDID etc.
2IR receiver window
3Input / output selection buttons - select output
number first followed by the input to be viewed
4Up / Down / Le / Right selection buttons - for use
when navigating through matrix menu
5Menu button - press to enter menu structure - see
page 15 for more details
6Power button - press and hold for 2 seconds to power
o
7Exit / Cancel button - return to last menu page / exit
to main display page
8Enter / Confirm button
123 4 5 6
78
05
contact support@blustream.co.uk |support@blustream.com.au
CUSTOM PRO MATRIX USER MANUAL
Front Panel - touch panel shown only for illustrative purposes
Panel Descriptions - 16x16 Chassis
Rear Panel
1LCD display - shows the status of input / output
selection, EDID etc.
2IR receiver window
3Input / output selection buttons - select output
number first (up to 2 digits), followed by enter, then
input number
4Up / Down / Le / Right selection buttons
5Menu button -press to enter menu structure - see
page 15 for more details
6Power button - press and hold for 2 seconds to power
o
7Exit / Cancel button- return to last menu page / exit to
main display page
8Enter / Confirm button
1TCP/IP port - for control of the Matrix from PC or third
party control processor
2RS-232 / serial connector - for control of the matrix (as
above)
3Analogue L/R line level inputs (3.5mm stereo jack)
Audio can be embedded onto video outputs
4RS-232 control card slots - insert optional RS-232
control cards for serial control at HDBaseT™ receivers
5Audio output card slots - insert optional audio cards
for zone / output audio breakout
6IR control card slots - IR control card for 2-way &
Global IR control (supplied within 16x16 chassis)
7Mains power switch
8Video input card slots 1-4 (inputs 1-16) - insert video
input cards to connect to source devices (input card
slot 1 mandatory; 2-4 optional)
9Video output card slots 1-4 (outputs 1-16) - insert
video output cards (output card slot 1 mandatory; 2-4
optional)
qPower port – use supplied IEC cable to power matrix
1 2 3 4 5 6 7
8 9 q
1 2 3 4 5 6
78
06 www.blustream.co.uk | www.blustream.com.au
CUSTOM PRO MATRIX USER MANUAL
Custom Pro Matrix Modular Options
Each of the Custom Pro modular boards feature quick release card module fittings allowing simple installation into
the Custom Pro matrix chassis.
The following pages list the Custom Pro modular board options available for both chassis.
HDMI In HDMI In HDMI In HDMI In
Output
Output
Both Blustream Custom Pro matrix chassis’ include a web browser interface module for control and configuration of
the matrix, RS-232 for 3rd party control, as well as analogue audio embedding per zone. The Matrix Communication
Board is supplied as standard with both Custom Pro chassis’, the second communication board with 8 x L/R Audio
inputs is supplied within the 16x16 chassis as standard.
TCP/IP
The Blustream matrix can be fully controlled via TCP/IP. For a full list of protocols please see ‘RS-232 & Telnet
Commands’ located at the rear of this manual. A ‘straight-through’ RJ45 patch lead should be used.
RS-232
The Blustream matrix can be controlled via the 9-pin serial connection. For details of RS-232 pin assignment,
communication, and a full list of protocols please see ‘RS-232 & Telnet Commands’ located at the rear of this manual.
Matrix Communication Board
1TCP/IP – for control of matrix (RJ45 connector)
2RS-232 - 2-way (DB9) for 3rd party control of matrix
3L/R 2ch analogue audio input - embeds and replaces the associated video input audio signal
1 2 3
07
contact support@blustream.co.uk |support@blustream.com.au
CUSTOM PRO MATRIX USER MANUAL
Custom Pro Matrix Input Boards
PRO-IN4HAB - 4-Way HDMI 2.0 Input Board with Source Audio Breakout (4K 60Hz 4:4:4 - 18Gbps)
• 4 x HDMI 2.0, female
• L/R 3.5mm stereo jack audio breakouts - allow for 2ch source audio to be sent to separate audio distribution
system. Please Note: audio breakout does not down-mix multichannel audio to 2ch.
PRO-IN2HAB - 2-Way HDMI 2.0 Input Board with Source Audio Breakout (4K 60Hz 4:4:4 - 18Gbps)
HDMI In 1 Coax. Out 1 Coax. Out 2
HDMI In 2
IN2HAB
1HDMI Inputs
2L/R 3.5mm stereo audio breakout
HDMI In 1 HDMI In 2 HDMI In 3 HDMI In 4
IN4HAB
L/R L/R L/R L/R
1HDMI Inputs
2L/R 3.5mm stereo audio breakout
HDMI In 1 HDMI In 2 HDMI In 3 HDMI In 4
IN4HAB
L/R L/R L/R L/R
HDMI In 1 HDMI In 2 HDMI In 3 HDMI In 4
IN4HAB
L/R L/R L/R L/R
Web GUI
Custom configuration of the matrix can be achieved using the matrix web-GUI interface. By default, the matrix is set to
DHCP so will automatically obtain an IP address based on your routers configuration.
If you are unsure of the IP address of the Custom Pro matrix you can use the front panel menu to report the IP address
of the unit. See page 15 for more details. If not connected to a local network, a direct connection is to be made to the
matrix from a PC using a straight RJ45 CAT network patch cable. When the matrix is not assigned an IP address by a
router, the default IP address will be 192.168.0.200.
Default login details are:
Username: admin
Password: 1234
For further details and instructions on using the matrix web-GUI, please download the Blustream ‘Web GUI & App
Interface Guide’ from the Blustream website.
• 2 x HDMI 2.0, female
• L/R 3.5mm stereo jack audio breakouts - allow for 2ch source audio to be sent to separate audio distribution
system. Please Note: audio breakout does not down-mix multichannel audio to 2ch.
12
12
08 www.blustream.co.uk | www.blustream.com.au
CUSTOM PRO MATRIX USER MANUAL
Custom Pro Matrix Input Boards
PRO-IN2H2V - 4-Way VGA & HDMI 2.0 Input Board (4K 60Hz 4:4:4 - 18Gbps / WUXGA)
• 2 x HDMI 2.0, female
• 2 x VGA, DB15 - VGA signals up to 1920x1200 (WUXGA) @60Hz supported and converted within the card to
1920x1080 at the same refresh rate as the native signal.
Please Note: the associated audio inputs for the VGA connections are the L/R inputs on the matrix communication
board (supplied within chassis).
PRO-IN2H2TCS - 4-Way CSC HDBaseT™ & HDMI 2.0 Input Board (4K 60Hz 4:4:4 - 18Gbps)
• 2 x CSC HDBaseT™, RJ45
• 2 x HDMI 2.0, female
• Supports 70m at 4K 60Hz 4:4:4, or 100m at 1080p when used with the HEX100CS-TX (sold separately)
• HEX70CS-TX can be used where CAT cable distance is less than 40m at 4K 60Hz 4:4:4, or 70m at 1080p
Please Note: PoC (Power over Cable) is not supplied from the HDBaseT™ input ports. HEX70CS-TX or HEX100CS-TX
units must be powered locally using a Blustream 12V 2A power supply (part code: PS122) which must be purchased
separately.
1VGA Inputs
2HDMI Inputs
1HDBaseT™Inputs (RJ45)
2L/R 3.5mm stereo audio breakout
3IR RX 1 - 3.5mm Mono 5V IR output for routed control of remote source hardware
4HDMI Inputs
12
2 3 41
09
contact support@blustream.co.uk |support@blustream.com.au
CUSTOM PRO MATRIX USER MANUAL
Custom Pro Matrix Output Boards
PRO-OUT4H-V2 - 4-Way HDMI 2.0 Output Board (4K 60Hz 4:4:4 - 18Gbps)
• 4 x HDMI 2.0, female
PRO-OUT2H-V2 - 2-Way HDMI 2.0 Output Board (4K 60Hz 4:4:4 - 18Gbps)
• 2 x HDMI 2.0, female
Output
OUT2H-V2
1HDMI Outputs
Output
OUT4H-V2
1HDMI Outputs
HDMI In HDMI In
HDMI In HDMI In
HDMI In HDMI In
HDMI In HDMI In
HDMI In HDMI In
HDMI In HDMI In
PRO-OUT4HTCS - 4-Way HDBaseT™ CSC / HDMI 2.0 Output Board (4K 60Hz 4:4:4 - 18Gbps to 70m)
• 4 x HDBaseT™ CSC, RJ45
• 4 x simultaneous HDMI 2.0, female
• Supports 70m at 4K 60Hz 4:4:4, or 100m at 1080p when used with the HEX100CS-RX
• HEX70CS-RX can be used where CAT cable distance is less than 40m at 4K 60Hz 4:4:4, or 70m at 1080p
• Supports PoC (Power over Cable) to compatible Blustream HDBaseT™ receivers
OUT4HTCS
1HDBaseT™PoC Outputs (RJ45)
2HDMI Outputs
HDMI In HDMI In
HDMI In HDMI In
HDMI In HDMI In
HDMI In HDMI In
1
1
1 2
10 www.blustream.co.uk | www.blustream.com.au
CUSTOM PRO MATRIX USER MANUAL
OUT4TCS
Custom Pro Matrix Output Boards
PRO-OUT4TCS - 4-Way HDBaseT™ CSC Output Board (4K 60Hz 4:4:4 - 18Gbps to 70m)
• 4 x HDBaseT™ CSC, RJ45
• Supports 70m at 4K 60Hz 4:4:4, or 100m at 1080p when used with the HEX100CS-RX
• HEX70CS-RX can be used where CAT cable distance is less than 40m at 4K 60Hz 4:4:4, or 70m at 1080p
• Supports PoC (Power over Cable) to compatible Blustream HDBaseT™ receivers
PRO-OUT2TCS - 2-Way HDBaseT™ CSC Output Board (4K 60Hz 4:4:4 - 18Gbps to 70m)
• 2 x HDBaseT™ CSC, RJ45
• Supports 70m at 4K 60Hz 4:4:4, or 100m at 1080p when used with the HEX100CS-RX
• HEX70CS-RX can be used where CAT cable distance is less than 40m at 4K 60Hz 4:4:4, or 70m at 1080p
• Supports PoC (Power over Cable) to compatible Blustream HDBaseT™ receivers
1HDBaseT™ PoC Outputs (RJ45)
PRO-OUT4TLS-V2 - 4-Way HDBaseT™ CSC / HDMI2.0 Output Board (4K 60Hz 4:4:4 - 18Gbps to 40m)
• 4 x HDBaseT™ CSC, RJ45
• 4 x Simultaneous HDMI 2.0, female
• Supports 40m at 4K 60Hz 4:4:4, or 70m at 1080p when used with the HEX70CS-RX
• Supports PoC (Power over Cable) to compatible Blustream HDBaseT™ receivers
OUT4HTCS
1HDBaseT™PoC Outputs (RJ45)
2HDMI Outputs
HDMI In HDMI In
HDMI In HDMI In
HDMI In HDMI In
HDMI In HDMI In
OUT2TCS
OUT4TLS-V2
1
1
1 2
11
contact support@blustream.co.uk |support@blustream.com.au
CUSTOM PRO MATRIX USER MANUAL
OUT4TCS
Custom Pro Matrix Output Boards
PRO-OUT4TL-V2 - 4-Way HDBaseT™ CSC Output Board (4K 60Hz 4:4:4 - 18Gbps to 40m)
• 4 x HDBaseT™ CSC, RJ45
• Supports 40m at 4K 60Hz 4:4:4, or 70m at 1080p when used with the HEX70CS-RX
• Supports PoC (Power over Cable) to compatible Blustream HDBaseT™ receivers
PRO-OUT2TL-V2 - 2-Way HDBaseT™ CSC Output Board (4K 60Hz 4:4:4 - 18Gbps to 40m)
• 2 x HDBaseT™ CSC, RJ45
• Supports 40m at 4K 60Hz 4:4:4, or 70m at 1080p when used with the HEX70CS-RX
• Supports PoC (Power over Cable) to compatible Blustream HDBaseT™ receivers
1HDBaseT™ PoC Outputs (RJ45)
OUT2TCS
OUT4TL-V2
OUT2TL-V2
Automatic Smart Scaling Functionality in CSC
Blustream HDBaseT™ CSC output boards have an in-built automatic smart scaling feature allowing for a 4K video
signal to be independently downscaled per individual HDBaseT™ output connection. The output card will read the
EDID of the display attached to the HDBaseT™ receiver, downscaling the video resolution automatically where the
display cannot accept the native resolution being sent from the source device. CSC will auto-downscale either video
resolution or chroma sampling, it is not able to amend frame rate, colour depth or HDR elements within a signal.
Simultaneous HDMI outputs (where available) will continue to pass the native signal.
Smart Scaling Conversion TableSmart Scaling Conversion Table
Native Source Signal Smart Scaled Output Capability
4K xHz 4:4:4 4K xHz 4:2:0 (or) 1080p xHz
4K xHz 4:2:2 4K xHz 4:2:0 (or) 1080p xHz
4K xHz 4:2:0 1080p xHz x = frame rate, will be equal from native to converted/scaled
Please Note: smart scaling is automatic based on the EDID of the display and cannot be controlled or adjusted by the
user / integrator. To obtain resolutions lower than 1080p, a separate scaler device must be specified.
1
1
12 www.blustream.co.uk | www.blustream.com.au
CUSTOM PRO MATRIX USER MANUAL
Custom Pro Matrix Feature Boards
PRO-8RS232 - 8-Way RS-232 Routing Board
• 8 x bi-directional RS-232, 3-pin phoenix
• Supplied with 8 x 3-pin phoenix connector blocks
PRO-8ABV - 8-Way Audio Breakout Board with Line Level Volume Control
• 8 x coaxial digital, RCA
• 8 x simultaneous analogue L/R, 3.5mm stereo jack
Please Note: when using the analogue audio outputs, the audio input must be 2ch PCM audio as the Custom Pro
matrix does not down-mix multichannel audio signals.
1Analogue fixed 2ch output 3.5mm stereo jack
2Coaxial digital output
13-pin RS-232 phoenix connectors
PRO-8IR-V2 - 8-Way Bi-Directional IR Control Board
• 8 x IR inputs (IR Rx), 3.5mm stereo jack
• 8 x IR outputs (IR Tx), 3.5mm mono jack
• 1 x Global IR input (3.5mm stereo jack), 1 x Global IR output (3.5mm mono jack)
• As standard this card is set to accept / send 5V IR signals. To change to 12V, please remove the card from the
chassis and adjust the switch located towards the back of the main PCB of the control card
• 5V IR cabling supplied
Please Note: the PRO-8IR-V2 is not required for the CUSTOMPRO-HUB16. IR cards are supplied as standard within this
chassis.
18 x 3.5mm stereo 5V/12V IR inputs for distribution of IR to compatible HDBaseT™ receivers
28 x 3.5mm mono 5V/12V IR outputs for routed control of local source hardware from compatible HDBaseT™ receivers
31 x 3.5mm stereo 5V/12V IR input for global IR control (used for control of matrix and distribution of IR to all IR TX ports)
41 x 3.5mm mono 5V/12V IR output for global IR output (all matrix / HDBaseT™ extender IR RX signals will output on the
Global IR output)
1 2 3 4
1
1 2
13
contact support@blustream.co.uk |support@blustream.com.au
CUSTOM PRO MATRIX USER MANUAL
1. Power down the matrix and remove the external power supply prior to removing or installing the modular
boards.
2. Handle the boards with care, ensuring that components on the boards are not knocked or damaged during
installation.
3. Slide the board within the plastic guide rails on the inside of the chassis.
4. When installing the modular boards please make sure the board is located firmly within the chassis, and the
retaining screws are tightened by hand to secure the board into position. Do not overtighten.
5. The Custom Pro matrix can only support a maximum of 8 x inputs (2 x modular boards) and 8 x outputs (2 x
modular boards) for the 8x8 chassis, and a maximum of 16 x inputs (4 x modular boards) and 16 x outputs (4 x
modular boards) for the 16x16 chassis.
• Location/s A- main communication board only (supplied)
• Location/s B- RS-232 routing board/s only
• Location/s C - video input board/s only
• Location/s D- audio breakout board/s only
• Location/s E- bi-directional IR control board/s only (supplied in the 16x16 chassis)
• Location/s F - video output board/s only
Installing the modular matrix boards in the chassis is a simple process, but please note the following:
Installing Modular Matrix Boards
EE
Once all Custom Pro matrix modular boards are installed, connect the external power supply and power the matrix.
BB
CC
CC
AA
AA
BB
BB
CC
CC
CC
CC
DD
DD
FF
FF
DD
EE
EE
FF
FF
FF
FF
AA
14 www.blustream.co.uk | www.blustream.com.au
CUSTOM PRO MATRIX USER MANUAL
There are recommended Blustream HDBaseT™ transmitter and receiver options that are compatible with the
HDBaseT™ CSC input and output boards of the Custom Pro matrix:
HEX70CS-TX - HDBaseT™Transmitter
• HDBaseT™ CSC transmitter with HDMI loop out
• 2-Way 5V or 12V IR, and RS-232 pass-through
• Local EDID management
• Supports distances up to 40m @ 4K 60Hz 4:4:4, and 70m
@ 1080p
Please Note: IR routing requires PRO-8IR-V2 board. RS-232
routing requires PRO-8RS232 board.
HDBaseT™ Transmitter & Receiver Options
Using Other Blustream HDBaseT™ Receivers or Transmitters
Whilst HDBaseT™ as a technology is interoperable, and Blustream have designed their HDBaseT™ equipment to be
interoperable, using other HDBaseT™ receivers or transmitters will likely limit the performance of the system. The
HDBaseT™ receivers and transmitters noted above have been designed to specifically work, and are recommended
with the Custom Pro HDBaseT™ output and input boards.
HEX70CS-RX - HDBaseT™Receiver
• HDBaseT™ CSC receiver
• 2-Way IR, and RS-232 pass-through
• Audio breakout (simultaneous coaxial digital and 2x RCA
L/R analogue fixed 2ch output)
• Supports distances up to 40m @ 4K 60Hz 4:4:4, and 70m
@ 1080p
• PoC (Power over Cable) to power receiver from matrix
output
Please Note: IR routing requires PRO-8IR-V2 board. RS-232
routing requires PRO-8RS232 board.
HEX100CS-RX - HDBaseT™Receiver
• HDBaseT™ CSC receiver
• 2-Way IR, and RS-232 pass-through
• Audio breakout (simultaneous coaxial digital and 2x RCA
L/R analogue fixed 2ch output)
• Supports distances up to 70m @ 4K 60Hz 4:4:4, and 100m
@ 1080p
• PoC (Power over Cable) to power receiver from matrix
output
Please Note: IR routing requires PRO-8IR-V2 board. RS-232
routing requires PRO-8RS232 board.
HEX100CS-TX - HDBaseT™Transmitter
• HDBaseT™ CSC transmitter with HDMI loop out
• 2-Way 5V or 12V IR, and RS-232 pass-through
• Local EDID management
• Supports distances up to 70m @ 4K 60Hz 4:4:4, and 100m
@ 1080p
Please Note: IR routing requires PRO-8IR-V2 board. RS-232
routing requires PRO-8RS232 board.
15
contact support@blustream.co.uk |support@blustream.com.au
CUSTOM PRO MATRIX USER MANUAL
Matrix Front Panel Control
Front Panel Display - Input / Output Selection
The front display shows current source input / output selection for all zones on the 8x8 chassis. The 16x16 chassis will
display 4 x zones at a time, and will periodically scroll through all outputs with the relevant input selection displayed.
The front panel display will time out aer a period of inactivity - press any button to wake the screen. Time out can be
disabled by issuing a command to the matrix - see RS-232 and Telnet Commands towards the rear of this manual.
1. To change input selection first press ‘OUTPUT’ button (1-x), or combination of buttons to select the desired
zone.
2. Press desired ‘INPUT’ button (1-x), or combination of buttons to select the desired source input.
3. An ‘x’ on the front panel indicates that the zone output has been turned o. Zone outputs can be turned on /
o using RS-232 or TCP/IP commands. Zone outputs can be forced back on by powering OFF / ON the matrix.
All outputs will be turned on when the matrix is powered back on
Menu Structure
The following items can be accessed from the front panel of either chassis:
1. EDID Settings - choose the EDID required per input or as a global EDID setting for ALL inputs
2. Network Configuration - choose between: Auto or Static DHCP, view current IP address, set a new IP address,
Gateway, and Subnet Mask
3. F/W Version of the matrix. Please Note: matrix firmware cannot be upgraded from the front panel of the matrix.
Firmware upgrading is carried out using firmware upgrade soware. Please contact a member of the Blustream
Technical Support Team for more information.
OUT 1 2 X 4 5 6 7 8
IN 1 2 3 4 1 1 1 1
1 3
2
OUT 01 02 03 04
IN 01 02 03 04
8x8 chassis screen 16x16 chassis screen
16 www.blustream.co.uk | www.blustream.com.au
CUSTOM PRO MATRIX USER MANUAL
EDID (Extended Display Identification Data) is a data structure that is used between a display and a source. This data
is used by the source to find out what audio and video resolutions are supported by the display. From this information
the source will discover what the best audio and video resolutions need to be output.
Whilst the objective of EDID is to make connecting a digital display to a source a simple plug and play procedure,
issues can arise when multiple displays or video matrix switching is introduced because of the increased number of
variables.
By pre-determining the video resolution and audio format from the source, you can potentially reduce the time
needed for the EDID part of the handshake, thus making switching both quicker, and more reliable.
As standard, Blustream distribution products containing EDID management will be set to 1080p video resolution
with 2ch audio by default. This is for ease of obtaining both video and audio on first connection from most consumer
and commercial source devices on the market. The EDID can then be adjusted accordingly to obtain alternative
resolutions of video and audio, as required, per source device.
Configuration of matrix input EDID settings can be achieved in one of four ways:
1. Using the matrix web-GUI - see page 7 for details, or download the ‘Blustream Web Browser Interface Guide’ from
the Blustream website for more in depth instructions. Recommended - when setting EDID for multiple inputs.
2. Using TCP/IP or RS-232 commands - see API towards the rear of this manual for further details
3. Using the matrix front panel buttons - only recommended when setting an individual / global EDID
4. Using the supplied matrix IR remote control (8x8 matrix product only) - for further details see page 19 (only
recommended when setting an individual EDID where access to front panel or the web-GUI is not available*)
* The Custom Pro matrix does not feedback a prompt for successful setting of EDID using the IR remote control, therefore
it is only recommend to use this method where other options are not available.
Advanced EDID Management
Terminating CAT Cable for use with HDBaseT™
It is important that the interconnecting CAT cable between Blustream HDBaseT™ products is terminated using the
correct RJ45 pin configuration. The link CAT cable MUST be a ‘straight’ (pin-to-pin) CAT cable, and it is advised that this
is wired to the T568B wiring standard as this format is less prone to EMI (Electro-Magnetic Interference).
When installing CAT cables it is advised that you use the best possible CAT cable quality. HDMI distribution products
will only work if used with Cat5e standard cable or above. Blustream recommends using a Cat6 cable (or better) for
installations, especially when running longer distances, in areas of high EMI, or for 4K signal distribution. It is advised
that using any method of patch panel, wall plate, or join within the CAT cable is avoided as these can add degradation
to the signal. Blustream also recommend using RJ45 connectors that are recommended for use with the choice of CAT
cable.
RJ45 Wiring -
T568B
17
contact support@blustream.co.uk |support@blustream.com.au
CUSTOM PRO MATRIX USER MANUAL
Understanding the HDBaseT™ Status LED’s
The Custom Pro matrix and HDBaseT™ extender solutions include status LED indicators on the matrix, transmitter,
and receiver products to show all connections are active, and to help diagnose potential connectivity issues.
Understanding the Status Lights - Custom Pro Matrix:
• The yellow HDBaseT™ status link light will be OFF when the input / output has been turned o, PoC (Power over
Cable) has been turned o, or there is a problem with the specific matrix input / output
• The yellow HDBaseT™ status link light will BLINK when the input / output is on and working
• The green HDBaseT™ link light will BLINK if there is an unstable connection between the matrix and HDBaseT™
transmitter / receiver
• The green HDBaseT™ link light will be ON when a there is an active HDBaseT™ transmitter / receiver connected to
the matrix
• The green HDBaseT™ link light will be OFF when a there is no connection with a HDBaseT™ transmitter / receiver
Understanding the Status Lights - Blustream HDBaseT™ Transmitter / Receiver:
• The power link light will be OFF when no power is being received from either the matrix or from a local PSU
connected directly to the transmitter / receiver (Please Note: HDBaseT™ inputs of the Custom Pro matrix do not
supply PoC to Blustream HDBaseT™ transmitters)
• The power link light will be ON when power is being received from either the matrix or from a local PSU connected
directly to the transmitter / receiver
• The HDMI link light will be o when there is no connection with a source / repeater / display
• The HDMI link light will be ON when there is an active connection with a source / repeater / display (Please Note:
not all Blustream HDBaseT™ transmitters / receivers feature a HDMI status LED)
• The HDBaseT™ link light will be OFF when there is no CAT cable / active HDBaseT™ connection to the RJ45
HDBaseT™ input / output
• The HDBaseT™ link light will BLINK if there is an unstable connection between the matrix and HDBaseT™
transmitter / receiver
• The HDBaseT™ link light will be ON when a CAT cable is connected to the HDBaseT™ RJ45 input / output on the
matrix and an active connection is achieved with the Blustream HDBaseT™ transmitter / receiver
The link lights will only serve as an indication to the connectivity between matrix and remote transmitter and / or
receiver unit.
The LED’s will not indicate a termination, bandwidth, interference or cable length issue on a CAT cable run. Blustream
would always recommend qualifying / verifying / certifying a CAT cable run for suitability prior to the installation of
HDBaseT™ equipment.
18 www.blustream.co.uk | www.blustream.com.au
CUSTOM PRO MATRIX USER MANUAL
Audio Functionality
The Custom Pro matrix has the ability to embed or de-embed audio at various points of the system dependent on the
use-case for the install.
Audio Embedding:
The 3.5mm analogue stereo inputs located on the main chassis control card allow for 2ch audio to be embedded
onto the associated video input (i.e. L/R In 3 is permanently linked to video input 3). The original embedded audio is
discarded when embedding audio, the matrix will not mix the input audio with the original source audio. Where a VGA
is input using the PRO-IN2H2V card, the associated audio from the source device can be inserted here. Enabling the
audio stream from these inputs is carried out by issuing an RS-232 or TCP/IP command to the matrix. Please refer to
the RS-232 / Telnet command section later in this manual for further details.
Please Note: audio inputs cannot be routed independently to video.
Source Audio Breakout:
The 3.5mm L/R analogue outputs contained on the PRO-IN2HAB, PRO-IN4HAB and PRO-IN2H2TCS cards can be used
to breakout the 2ch PCM audio embedded from the source video input of the matrix. This signal can be used to feed
a separate audio matrix product that requires the source audio input, as opposed to a zone matrix output audio that
would change as the I/O structure of the matrix changes with switching.
Please Note: the L/R audio output does not down-mix multichannel audio signals to 2ch. The HDMI source audio
must be 2ch PCM to obtain a breakout from these 3.5mm outputs.
Zone Audio Breakout:
Both stereo and digital audio can be broken out from the audio breakout card/s. The audio from these outputs
changes with the I/O structure of the matrix - therefore, audio will follow the associated output of the video output
card/s (i.e. Coax and L/R 4 is permanently linked to video output 4). The video signal retains the embedded audio
signal with the video, to be carried through to the sink attached to the output.
Please Note: the Coax digital and L/R analogue audio outputs are concurrent and do not down-mix multichannel
audio signals. The Coax digital output can handle a digital audio stream up to 7.1ch.
The Custom Pro matrix solution does not support ARC (Audio Return Channel) through any of the input, output, or
audio board configurations.
HDMI In 1 HDMI In 2 HDMI I n 3 HDMI In 4
IN4HAB
L/R L/R L/R L/R
19
contact support@blustream.co.uk |support@blustream.com.au
CUSTOM PRO MATRIX USER MANUAL
The Blustream Custom Pro matrix products include multiple options for control and routing of IR when using the IR
control boards. IR matricing can be achieved (routed IR from zone to any matrix output, or matrix input to any receiver
output), using TCP/IP or serial commands to select the route an IR signal can be sent from / to.
The Blustream PRO-8IR-V2 control board, and the CUSTOMPRO-HUB16 are supplied with all necessary IR hardware
required (see Package Contents towards rear of this manual), and includes:
Infrared (IR) Distribution
IR Emitter - IRE1
Blustream 5V IR emitter designed for discrete IR control of
hardware.
IR Receiver - IRR
Blustream 5V IR receiver to receive IR signal and distribute
through Blustream products.
IR Control Cable - IRCAB
Blustream IR control cable 3.5mm stereo to 3.5mm mono
for linking 12V third party control solutions to Blustream 5V
products via IR.
Please Note: cable is directional as indicated.
Infrared 3.5mm Pin-Out
IR Emitter - Mono 3.5mm
IR Receiver - Stereo 3.5mm
Signal
5V
Ground
Signal
Ground
Please Note: Blustream IR hardware do not include flashing
diodes to indicate IR signals being emitted or received.
Relevant IR cabling is suppied with the 16x16 chassis, please
see package contents towards the rear of this manual.
When purchasing the PRO-8IR-V2 with the 8x8 chassis, the
following IR cables are provided:
• 9 x IR emitter (IRE1)
• 9 x IR receiver (IRR)
• 9 x IR 3.5mm - 3.5mm stereo to mono, 12V to 5V control
cable (IRCAB)
20 www.blustream.co.uk | www.blustream.com.au
CUSTOM PRO MATRIX USER MANUAL
Infrared (IR) Control
The Blustream Custom Pro matrix units are supplied with an IR Remote Control for source selection and general setup.
As well as controlling matrix solutions using the original Blustream remote, Blustream products can also be controlled
using the original Infrared NEC codes documented towards the rear of this manual.
OUTPUT AND INPUT SELECTION
The remote adjacent is supplied with the 8x8 chassis. The remote adjacent/below
is supplied with the 16x16 chassis.
When controlling the I/O structure of the matrix (issuing the command from the
remote, to the front of the matrix):
1. Select the OUTPUT you wish to change the input source of - numbers 1 - 8/16
correspond to the zone outputs 1 - 8/16 - highlighted in box A.
2. Select the INPUT you wish to change on the selected zone to - numbers 1 - 8/16
correspond to the source inputs 1 - 8/16 - highlighted in box B.
3. Press the PTP button if you wish to instantly mirror all inputs to corresponding
outputs (for example - input 1 to output 1, input 2 to output 2 etc).
When controlling the I/O structure of the matrix when located within a zone
(where IR is sent over HDBaseT™to the matrix), it is only necessary to press the
relevant INPUT button, or the le / right scrolling buttons.
Please Note: the POWER button will only work when the command is issued to
the front panel (IR window) of the matrix, not from an IR receiver within a zone.
EDID SET UP VIA REMOTE CONTROL
The Custom Pro matrix provides a comprehensive range of EDID settings. Below
are three examples of how to deploy the desired EDID setting when using the
supplied remote for the 8x8 Custom Pro matrix (not available with the 16x16*):
1. Fix EDID to an input, or ALL inputs: press the desired video resolution button
(1080i / 1080p / 3D / 4K), select the desired audio format (2.0ch / 5.1ch / 7.1ch),
then select the source input you want this EDID information allocated to by
pressing the INPUT 1 – 8, or the ALL button.
2. Copy EDID of output (X) to an input or ALL: Press the COPY button then select
the OUTPUT you wish to copy the EDID information from, then select the
source input you want to copy this EDID to by selecting the INPUT 1 - 8 or the
ALL button.
3. User defined EDID to an input, or ALL inputs: Press USER1 / USER2 button then
select the source you wish to assign this EDID to by selecting INPUT 1 - 8, or the
ALL button.
POWER
1
ALL PTP
OUTPUT
2 3 4
1
ALL
INPUT
2 3 4
POWER
1
ALL PTP
OUTPUT
2 3 4
5 6 7 8
1
ALL
INPUT
2 3 4
5 6 7 8
1080i 1080p 3D 4K
USER1 USER2 FN1
EDID
FN2
2.0CH 5.1CH 7.1CH COPY
1080i 1080p 3D 4K
USER1 USER2 FN1
EDID
FN2
2.0CH 5.1CH 7.1CH COPY
* EDID management for the 16x16 Matrix product can only be carried out using the web-GUI, front panel
buttons, Blustream Matrix App, or by issuing RS-232 / IP commmands to the unit, and not from the
supplied IR remote control.
A
B
C
B
A

This manual suits for next models

25

Other Blu Stream Matrix Switcher manuals

Blu Stream C44-KIT User manual

Blu Stream

Blu Stream C44-KIT User manual

Blu Stream HMXL44CS-KIT User manual

Blu Stream

Blu Stream HMXL44CS-KIT User manual

Blu Stream HMXL88ARC User manual

Blu Stream

Blu Stream HMXL88ARC User manual

Blu Stream HMXL66 User manual

Blu Stream

Blu Stream HMXL66 User manual

Blu Stream C88CS User manual

Blu Stream

Blu Stream C88CS User manual

Blu Stream CMX44AB User manual

Blu Stream

Blu Stream CMX44AB User manual

Blu Stream HMXL44AB User manual

Blu Stream

Blu Stream HMXL44AB User manual

Blu Stream Contractor CMX44CS User manual

Blu Stream

Blu Stream Contractor CMX44CS User manual

Blu Stream C44-KIT User manual

Blu Stream

Blu Stream C44-KIT User manual

Blu Stream C66CS User manual

Blu Stream

Blu Stream C66CS User manual

Blu Stream PLA88CS User manual

Blu Stream

Blu Stream PLA88CS User manual

Blu Stream MX44KVM User manual

Blu Stream

Blu Stream MX44KVM User manual

Blu Stream C66CS User manual

Blu Stream

Blu Stream C66CS User manual

Blu Stream Contractor CMX88AB User manual

Blu Stream

Blu Stream Contractor CMX88AB User manual

Blu Stream MX44KVM User manual

Blu Stream

Blu Stream MX44KVM User manual

Blu Stream HMXL88 V2 User manual

Blu Stream

Blu Stream HMXL88 V2 User manual

Blu Stream HMXL88 User manual

Blu Stream

Blu Stream HMXL88 User manual

Blu Stream HMXL44-KIT V2 User manual

Blu Stream

Blu Stream HMXL44-KIT V2 User manual

Blu Stream Essential HMXL42ARC-KIT User manual

Blu Stream

Blu Stream Essential HMXL42ARC-KIT User manual

Blu Stream MX42AB User manual

Blu Stream

Blu Stream MX42AB User manual

Blu Stream C88 User manual

Blu Stream

Blu Stream C88 User manual

Blu Stream MX44AB-V2 User manual

Blu Stream

Blu Stream MX44AB-V2 User manual

Blu Stream HMXL44AB User manual

Blu Stream

Blu Stream HMXL44AB User manual

Popular Matrix Switcher manuals by other brands

Kramer VS-1616SDI user manual

Kramer

Kramer VS-1616SDI user manual

Kramer Sierra Video 1616V3S Specifications

Kramer

Kramer Sierra Video 1616V3S Specifications

Ask HDMX0404 user manual

Ask

Ask HDMX0404 user manual

AMX AVS-OP-2020-547 Product View

AMX

AMX AVS-OP-2020-547 Product View

GoMax Electronics MA-5188C user manual

GoMax Electronics

GoMax Electronics MA-5188C user manual

Woxcon NPG-MX44-H2 user manual

Woxcon

Woxcon NPG-MX44-H2 user manual

Shenzhen hdm-944h100 Operation manual

Shenzhen

Shenzhen hdm-944h100 Operation manual

Key Digital KD-MSW4X2 operating instructions

Key Digital

Key Digital KD-MSW4X2 operating instructions

AMX AVS-OP-1616-217 Product View

AMX

AMX AVS-OP-1616-217 Product View

Rose electronics UltraMatrix AV Installation and operation manual

Rose electronics

Rose electronics UltraMatrix AV Installation and operation manual

Video Storm CMX1616A2 owner's manual

Video Storm

Video Storm CMX1616A2 owner's manual

Matrix Switch Corporation MSC-XD121S product manual

Matrix Switch Corporation

Matrix Switch Corporation MSC-XD121S product manual

Kramer VS-8FDxl quick start guide

Kramer

Kramer VS-8FDxl quick start guide

CYP CMSI-8H8CV Operation manual

CYP

CYP CMSI-8H8CV Operation manual

Octava UHD44MXA-IP manual

Octava

Octava UHD44MXA-IP manual

Atlona AT-HD-V24M user manual

Atlona

Atlona AT-HD-V24M user manual

Shinybow USA SB-5645 instruction manual

Shinybow USA

Shinybow USA SB-5645 instruction manual

MuxLab 500210 installation guide

MuxLab

MuxLab 500210 installation guide

manuals.online logo
manuals.online logoBrands
  • About & Mission
  • Contact us
  • Privacy Policy
  • Terms and Conditions

Copyright 2025 Manuals.Online. All Rights Reserved.