Bluerock Tools SDS200B Quick start guide

OPERATIONAL MANUAL
MODEL: SDS200BSECTIONAL DRAIN CLEANING
MACHINE
by BLUEROCK ® Tools
Volume
1.3

MWS-SDS200B PIPE DRAIN CLEANER
UNPACKING THE ITEM
Caution: This machine is packed together with items that may be sharp, oily and overly heavy objects. Remove the machine from
the packaging in a safe manner. Check to ensure all accessories are included with the item while unpacking. If any parts are found
to be missing, contact the retailer as soon as possible. Do not throw away the packaging until the item is out of the guarantee
period. Dispose of the packaging in an environmentally responsible manner. Recycle if possible. Keep all plastic bags away from
children due to risk of suffocation.
WEEE - Waste Electrical & Electronic Equipment. Note this machine should be disposed of as electrical & electronic waste.
©THE NEWMAN TRADING COMPANY LLC DBA BLUEROCK® TOOLS 2016
1100 SW 16th St • Suite D
Renton, WA 98057
Phone 206.604.8363 • Fax 425.572.5167
www.bluerocktools.com

S DS200B PIPE DRAIN CLEANER
Table&of&Contents&
SAFETY' 1!
PRE-OPERATIONAL SAFETY CHECKS! 1!
OPERATIONAL SAFETY CHECKS! 1!
SPECIFICATIONS' 3!
INCLUDED'ACCESSORIES' 3!
ADDITIONAL'AVAILABLE'ACCESSORIES' 3!
ADDITIONAL ACCESSORIES FOR THIS MACHINE CAN BE FOUND IN BLUEROCK ®TOOLS ONLINE SHOP AT
WWW.BLUEROCKTOOLS.COM OR FROM YOUR LOCAL RETAILER.! 3!
OPERATIONS' 4!
PURPOSE! 4!
MACHINE SET-UP! 4!
MACHINE COMPONENTS! 4!
PREPERATION FOR THREADING! 5!
RUNNING THE MACHINE! 8!
TROUBLESHOOTING'11!
CORRECTION'11!
GENERAL'MAINTENANCE'12!
PARTS'LIST'13!
BREAKDOWN'VIEW'14!

S DS200B PIPE DRAIN CLEANER
1
Safety
DO NOT USE THIS MACHINE UNLESS YOU HAVE READ THE OPERATING INSTRUCTIONS!
Safety glasses must be worn at all times in
work areas. Use a full face mask whenever
possible.
Long and loose hair must be
contained.
Appropriate footwear must be worn.
Close fitting/protective clothing
must be worn.
Safety gloves should be worn at all times and
jewelry must not be worn.
Hearing protection should be worn
when using this machine.
Read operational manual prior to use.
PRE-OPERATIONAL SAFETY CHECKS
ØExamine the power cord and plug for damage.
ØExamine the body of the machine and inspect for damage or defects.
ØExamine the cable and cutters to insure they are operable.
ØMake certain the on/off switch is in the off position before plugging into power to prevent unintentional starting.
OPERATIONAL SAFETY CHECKS
ØONLY to be operated by qualified personal who have read instructions.
oNOTE: Failure to read and follow instructions could result in electrical shock, fire, property damage and/or
serious injury!
ØDO ensure all non-essential people are clear of the immediate work area.
ØDO keep body parts, clothing & power cords clear of turning pieces.Stay alert and use common since when using
this tool.
ØDO always wear gloves when using this machine. Make sure not grasp turning cable with rags or gloves that are
loose fitting. Loose fitting gloves or rags can become wrapped around or lodged in-between cable causing serious
injury.
ØDO always wear eye protection to protect eyes from debris, fluids, chemicals or other compounds.
Chapter
1

S DS200B PIPE DRAIN CLEANER
2
ØDO always non-slip rubber soled shoes.
ØDO be extremely careful when cleaning drains where chemical cleaning compounds have been previously used.
ØDO only use this machine on a properly grounded circuit in accordance with all local and national standards. DO
NOT remove the grounding plug. If in doubt that this machine is properly grounded, consult an electrician.
ØDO always use relevant safety measures when working electrical machinery. Be aware that working in pipe drains
can cause water puddles, so make sure to use GFCI’s when necessary and personal protection devices like insulated
gloves, shoes and insulated standing pads.
ØDO remove adjusting keys or wrenches prior to turning machine on.
ØDO guard against electric shock by preventing body contact with grounded surfaces such as pipes, radiators, ranges,
refrigerators, etc.
ØDO keep the working area clean and brightly illuminated for optimum operational safety.
ØDO keep the machine balanced and stable at all times.
ØDO be mindful that power tools can expose an operator to vibrations transmitted trough contact with the machine.
Prolonged exposure can lead to medical issues, which should be discussed with a medical professional.
ØDO NOT make adjustments to machine while the machine is running.
ØDO NOT use cable exceeding 165’ (50M) from the machine. This could damage the machine.
ØDO NOT leave the machine running when not in use.
ØDO NOT hold drainpipe by hand or using the body. Always mechanically clamp or secure work pieces that are not
fixed.
ØDO NOT allow liquids or dust to enter the machine’s ventilation system.
ØDO NOT operate machine outside of machine specifications.
ØDO NOT touch moving parts while the machine is running as death or dismemberment could occur.
ØDO NOT remove machine’s panels while machine is connected to a power source. Only to be removed for service by
qualified personal and put back on the machine after service is complete.
ØDO NOT allow children or untrained personal to operate machine.
ØDO NOT use this machine in the rain or a wet environment. If using outdoors, make sure the machine is clean and
dry.
ØDO NOT operate in the presence of explosive materials as power tools create sparks which may ignite dust or fumes.
ØDO NOT use on a pipe that may contain a live electrical wire/circuit.
ØDO NOT use this machine if the ON/OFF switch is broken.
ØDO NOT operate this machine on the same work surface where welding is being performed. This could result in
severe damage to the machine or personal injury to the user.
ØDO NOT operate this machine on a lower voltage as this could limit the motor life and work efficiency.
oNOTE: Use of long small gauge power extension cords can result in decreased voltage. As local voltages
can vary, it may be a good idea to test the voltage at the end of the extension cord to ensure proper voltage
requirements are met. You might also consult an electrician to make sure the length of cord matches up
with the proper wire gauge for this size motor. Make sure to use outdoor cords when operating outdoors.
Use a GFCI circuit if using in wet locations.

S DS200B PIPE DRAIN CLEANER
3
Specifications
ELECTRICAL DATA
Voltage
110V, 60Hz Induction Motor
Current
10 Amps
Motor Size
1100W
Power Connection
US Standard 3 Prong Grounded Plug
MECHANICAL DATA
Pipe Capacity
2” to 8” Diameter (50mm-200mm)
Max Run-out
165’ (50M)
Gearbox
Forward and Reverse
Gear Housing
Aluminum
Machine Speed
700RMP
On/Off Switch
Manual
SHIPPING DATA
Shipping Weight
220lbs (100KG)
Shipping Carton
44” x 25” x 28”
Included Accessories
DESCRIPTION
QTY
Instruction Manual
1
1-1/4” Drain Cable 60’ (15’x4pcs)
With Cable Carrier
Interchangeable with RIDGID® C-11
1
Rubber Safety Hose
1
Cable Bits/Drills
6
Bit Key
1
Accessory Case
1
Additional Available Accessories
Additional accessories for this machine can be found in BLUEROCK ® Tools online shop at
www.bluerocktools.com or from your local retailer.
RIDGID® Marks are trademarks of RIDGID, Inc. and are used for product identification purposes only.
Chapter
2

SDS200B PIPE DRAIN CLEANER
4
Operations
Note
THOROUGHLY READ THROUGH THE ENTIRE MANUAL BEFORE OPERATING THIS MACHINE!
PURPOSE
ØThe purpose of the S200B is for cleaning the insides of drainpipes from 2” to 8” in diameter. This is a
heavy-duty professional use machine allowing a single user to easily clean pipes.
ØThis type of sectional drain cleaner uses individually lengths (sections) of cleaning cable. This machine
uses 16’ sections, which can be added or subtracted during cleaning operations.
oMaximum length of any particular run should be 165’ (50M).
MACHINE SET-UP
ØThe machine is designed pre-assembled. The user must only take the item out of the shipping crate.
oCAUTION: This machine is heavy lifting should be avoided whenever possible.
oDO NOT allow the cord or plug to drag along the floor when wheeling between locations.
ØMake certain the work area is dry.
oDO NOT place the machine in water.
ØUse barriers to keep non-essential personal away from rotating drain cable or other moving parts.
ØPlace machine away from passageways and make certain the operator is able to see all parts of the work-
piece.
ØDO NOT set-up or modify the machine in a manner that is not intended.
ØDO use a user provided functioning GFCI circuit when using this machine.
MACHINE COMPONENTS
ØThe main components of the S200B are motor housing, rotating clutch channel and main machine frame
assembly (see figure below). The motor drives the clutch rotationally and acts as the main drive
component of the machine.
oThese components must be not be removed except by a qualified technician. Power must be
disconnected prior to any service.
Chapter
3

SDS200B PIPE DRAIN CLEANER
5
ØThe machine has a main on/off switch with a forward and reverse position. These switches operate the
turning mechanism, which turn the machine clutch. When the motor switch is turned on, the user is able
to pull clutch handle, which starts the clutch rotation. When the handle is released the rotation
immediately stops.
PREPERATION FOR USING MACHINE
ØCAUTION: Before making any adjustments, ensure the main machine switch is in the “O” off position.
ØCAUTION: Before starting your job, it is vital to be aware of the distance from the sewer inlet pipe to the
main sewer pipe or septic tank. Overrunning the cable into large spaces can cause cable to form “knots”
and prevent the cable from being returned through the smaller pipe line. Avoid going into main sewer lines
farther than 10’. Avoid going into sewer tanks more than 3’.
ØClutch operations
oTo rotationally engage the clutch, pull the clutch handle down (towards the ground). The user
must hold the handle in the down position to keep the clutch rotating. To disengage the clutch,
allow the clutch handle to move to the up position (towards the ceiling).
oNOTE: Sectional drain cleaners do not spin the drain cleaner cable in/out (towards/away) from the
drain clog. Sections of the cable must be individually connected and manually fed to the point of
the clog. When the drain cleaner end reaches the point of the clog, the user engages the clutch
to spin the cutter in a forward of reverse rotation.
§CAUTION: Keep hands and fingers away from the clutch jaws and cutting pieces when
the machine is plugged into a power source. Closing clutch jaws can cause serious
damage to bodily parts.
ØMain On/Off Switch Operations
o“O” indicates “off” position.
o“L” indicates counter-clockwise rotation.
o“R” indicates clockwise rotation.

SDS200B PIPE DRAIN CLEANER
6
ØRubber Safety Hose Operations
oThe rubber safety hose is attached to the back of the clutch channel. See figure below.
oCAUTION: The rubber safety hose must be installed. It protects the user from potential
“whipping” action of the end of the sectional cable. Without it installed, damage to persons or
property are possible.
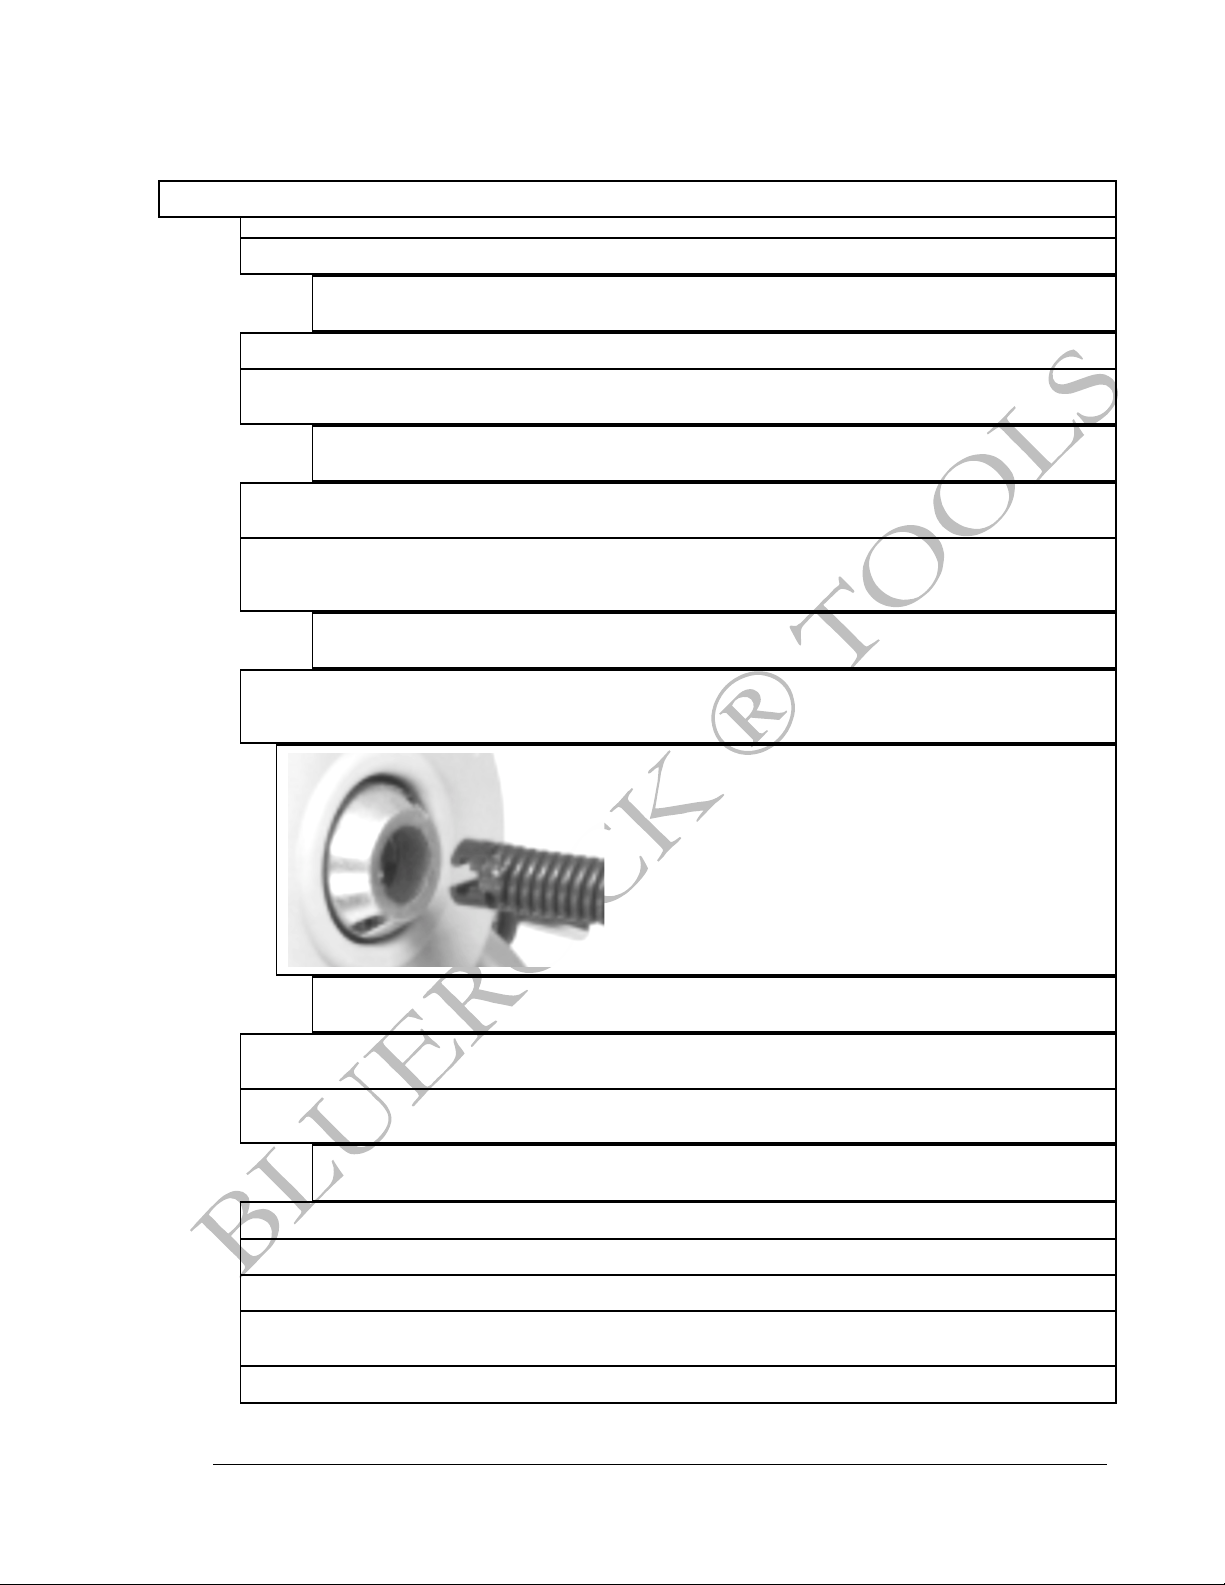
ØDrain cutter operations
oThe drain cutters attach to the end of the drain cleaner cable. These are only attached on the
front side of the machine cable.
oAttach the drain cleaner cutter once the end of the cable has been inserted into the front of the
machine clutch channel.
§Insert cutter and head facing T groove. The cutter will only install in one direction.
Push in the cutter until the pin locks the coupling.
§To remove the cutter, use the key (straight metal pin with sharp flat side). Put the key in
the hole on the cutter until the pin depresses. When it is depressed, the cutter should
slide out of the T groove.
oThere are a variety of drain cutters available for these units (see cutter/accessory table below).

SDS200B PIPE DRAIN CLEANER
7
§When deciding which cutter to use, the user should choose a cutter size that is at least
1” smaller than the drainpipe to be cleaned. The style of the tool is determined by the
operational needs of the job. This choice is generally left up to the experience of the
user.
ØCutter/Accessory Table
Sectional&Elastic&Soft&Shell&Cable&
Sectional&Elastic&Strong&Shell&Cable&
Rubber&Safety&Hose&
Made%with%high%quality%spring%wire,%assures%
sufficient%mechanical%flexibility,%as%well%as%
bending%resistance,%twisting%resistance%and%
durability%resistance.%%It%can%be%connected%for%
any%length.%%%
A%Shaft%made%in%heavy%load%with%intensive%wires.%%
Enhanced%mechanical%strength%and%twisting%
resistance,%suitable%for%complicated%working%
environment.%%%
This%safety%hose%is%made%to%prevent%injuries%
from%rotating%flexible%shaft%and%assure%
personal%safety.%%%
%
%
%
%
%
%
%
%
%
%
%
%
%
Straight&Helical&Cutter&
Olive&Shaped&Helical&Cutter&
Flexible&Olive&Shaped&Helical&Cutter&
For%exploring%the%pipe%blockage.%%Usually%
used%in%the%first%step%
For%guiding%the%flexible%shaft%through%the%
complicated%path%and%drilling%through%the%blockage.%%
Best%for%it's%guide%function.%
For%pipes%that%are%hard%to%drill.%%Good%
flexibility%and%optimal%guiding%function.%
%
%
%
%
%
%
%
%
%
%
%
%
%
Funnel&Shaped&Helical&Cutter&
Collection&Helical&Cutter&
4&Edge&Saw&Cutter&
Used%in%the%second%step%of%cutting%to%
effectively%remove%the%blockage%residue%left%
on%the%pipe%wall%by%straight%helical%cutting.%
For%collecting%the%broken%cable%or%drill%in%the%pipe.%%%
Used%to%remove%hard%materials%like%chemical%
deposits.%
%
%
%
%
%
%
%
%
%
%
%
%
%
Spade&Shaped&Cutter&
Helical&Cutter&Saw&
C-Shaped&Cutter&
Used%to%remove%the%grease%and%gunk%from%
the%pipe%wall%or%used%in%the%second%step%to%
remove%residues%on%the%pipe%wall.%
For%removing%blockages%like%roots,%branches,%debris%
or%grease%from%pipes%
For%removing%materials%like%cream,%soap%etc.%
that%adhere%to%the%pipe%wall.%
%
%
%
%
%
%
%
%
%
%
%
%
%
SDS200B PIPE DRAIN CLEANER
8
RUNNING THE MACHINE
ØDo all pre-operational and operational safety checks from Chapter 1.
ØConsider your security and stability as well as the orientation of the machine in the work area.
oConsider the work surface material, condition, strength, density and rigidity. These factors
directly affect the tools operation and user safety.
ØEnsure the machine handle is free of grease or oil.
ØInspect the cable and couplings for damage or wear. Cable should be replaced when they are severely
corroded. Worn cable can be identified when the outside of the coil becomes flat.
oCAUTION: Worn or damaged cables can be extremely dangerous. If they break they can cause
serious injury.
ØInspect the cutter edges for sharpness or damage. Dull or damaged cutters can lead to binding and cable
breakage.
ØIf on a wall location (clean out), position the machine so that the front of the machine is as level to the
sewer inlet as possible. If on a ground location (floor clean out), position the machine with the output
approximately 2 feet from the sewer inlet.
oCAUTION: Too much room in between sewer inlet and front of machine can result in the cable
kinking and/or twisting, which can lead to cable breakage.
ØFeed a section of cable into the front of the machine (see figure below). Make sure the cable goes into the
clutch carriage from the front of the machine. Fully feed the section all the way through leaving
approximately 1 foot remaining at the front.
oCAUTION: DO NOT couple more than one cable section at a time. Multiple sections should not be
allowed to come out the back of the machine (on the rubber safety hose side).
ØSelect appropriate cutter for the specific clog and pipe being cleaned. Install the cutter (see above section
for specifics on installing the cutter).
ØUser should be positioned in a way to safely keep control of the cable. They should be able to easily
release clutch handle and on/off switch.
oThe user should also be in a position where they have a hand on the cable between the front of
machine and pipe inlet to control the cable twisting action when an obstruction is reached.
ØPlace cable into the pipe being cleaned and push cable in until it reaches a point where it stops.
ØPlug the machine into power source.
ØMake sure to put on safety equipment.
ØPull enough extra cable through the machine until it forms a half circle between the front of machine and
the sewer inlet line.
ØHold the cable loosely in the gloved hand.

SDS200B PIPE DRAIN CLEANER
9
ØTurn the main machine switch to the “on” position (“R” for general cutting forward clockwise).
oNOTE: The machine will turn on, but the cable will not spin yet (until the clutch handle is
depressed.
ØWith gloved hand on the cable, pull down the clutch handle with the opposite hand. Push down on the half
circle of the cable until the cable advances downwards.
oNOTE: A quick action up or down on the clutch handle is preferred so as to keep the three-jaw set
in the clutch from wearing out too quickly.
ØAs soon as the cable half circle has advanced forward and there is no longer slack in the circle, release the
handle clutch so it stops spinning the cable.
ØPull 8”-10” of cable out with the gloved hand to form another half circle.
ØRepeat the feeding process until resistance or obstruction is encountered. This will be the blockage. The
can identify the blockage by difficulty feeding cable and a cable twisting motion in the operators hands.
ØIf more cable is required to reach an obstruction, the following procedure should be followed.
oTurn machine off.
oLoop the end of the cable that is currently in the line back in the line to secure it from moving.
oInsert another section of line through the front of the machine (female end first). Keep 1’ of the
line out.
oAttach the cable in the line to the cable in the machine.
oProceed with feeding cable operations.
ØIf the cable becomes overloaded in the clog, relieve the load tension by pulling back on the cable with
short jerking motion to free the cutter. Slowly advance the cutter forward into the clog. Repeat the
process until the clog is free.
oNOTE: Make sure cutters are always spinning when progressing into an obstruction and do not
force the cable. Progress and time taken in a clog depends on the nature of the obstruction and
cutters being used.
oCAUTION: DO NOT allow tension to build up in the drain cleaning cable. This can happen if the
cutter has stopped rotating due to a blockage, but the motor clutch and cable continue to spin.
This can cause a lot of torque on the cable causing it to suddenly twist potentially wrapping
around an arm or hand. Be extremely aware when cutting through a blockage. Cut slowly and
carefully when feeding the cable.
oNOTE: If the tool gets stuck in an obstruction and the manual dislodging procedure will not work,
there is a special procedure that can be tried using the reverse “L” counter-clockwise switch on
the on/off switch.
§The “L” reverse procedure should only be used to free an obstruction. Running the
machine in reverse can cause damage to the drain cleaning cable. Only switch to “L”
after motor has come to a complete stop. Switch to “L” engage clutch handle only until
cable is free. Release as soon as tool is free of obstruction. Turn unit off and turn to
“R” and commence normal cutting operation.
§WARNING: Never operate the machine in “L” reverse position for any other purposes.
Operating in reverse can cause damage to the cable and operator.
ØOnce obstruction is clear, turn the machine to “off “position.
ØTo retrieve the cable from the sewer line, the following process should be followed.
oLeave the machine in the “R” forward cutting position.
oEngage the clutch.

SDS200B PIPE DRAIN CLEANER
10
oWith gloved hand, pull the cable out or hold cable against the edge of the sewer inlet pipe until a
half circle is formed in the cable.
§This essentially threads the cable out of the pipe.
oRelease clutch.
oPush excess cable back through the machine from front to back.
§Remember to turn off machine and disconnect sections as they come out.
§When a section of cable is removed, insert the cable back into the cable carrier. Make
sure to reconnect the sections of cable to the last section of cable in the carrier.
oRepeat this operation until cable is fully out.
oTurn off machine. Disconnect Power. Remove safety hose.
oAfter using this machine, clean and flush cables, couplings and cutters with water.

SDS200B PIPE DRAIN CLEANER
11
Troubleshooting
Note
SERVICING SHOULD ONLY BE DONE BY A QUALIFIED TECHNICIAN.
DON’T FORGET TO UNPLUG POWER TO UNIT PRIOR TO SERVICE!
PROBLEM
CAUSE
CORRECTION
Motor does not
start
Machine unplugged
Plug into power source
Fuse blown
Replace the fuse
Capacitor blown
Replace capacitor
Bad on/off switch
Replace Switch
The cutters will not
cut
Cutting blade is dull
Replace or sharpen blade
Cutter is damaged
Replace cutter
Too much force being applied
Cut slower
Cable is not
turning
Main channel is rusted
Take apart and remove rust
Clutch is worn down
Replace clutch
Handle not pressed down all the way
Engage clutch handle down all the way
The cable spins,
but does not move
forward or reverse
This is a non-automatic forward/reverse drain
cleaner. This is a sectional type drain cleaner.
It does not go in and out automatically
Consult the operating manual for procedures on
standard operating procedures
Damaged Cable
Dull cutters
Replace cutters
Cutters not assembled in correct sequence
Put cutters in correct sequence
Low quality pipe
Make sure only pipe of good quality is used
Bad quality or insufficient thread cutting oil
Use only thread cutting oil in adequate quantity
Pipe turns while
threading
3-jaw clutch not tight
Tighten handwheel clutch
3-jaw clutch teeth dirty
Clean with wire brush
3 jaw clutch teeth damaged or dull
Replace 3-jaw clutch
Cable broken in the
Pipe
Incorrect operations
See operational protocols. Get drill with helical
shaft and extension to collect the broken cable
Prolonged use in “L” Reverse
Cable is stuck
Pipe has many turns and is very long
Increase push/pull force during operations
Change direction/angle of the cable
Cable will not cut
through blockage
Blockage too hard
Gently push and pull the cable rotating
clockwise. Have patience, sometimes
obstructions take a while to clear
Use a different set up, smaller or larger. Operator
experience comes into play on this
Complicated path to the blockage
Find a shorter route to the blockage
Chapter
4

SDS200B PIPE DRAIN CLEANER
12
General Maintenance
Note
SERVICING SHOULD ONLY BE DONE BY A QUALIFIED TECHNICIAN.
DON’T FORGET TO UNPLUG POWER TO UNIT PRIOR TO SERVICE!
ØInspect electrical cords and electrical connections.
ØKeep machine clean and free of debris.
ØFlush cables with water after each use. Occasionally lubricate cables and couplings.
ØCheck for misalignment, binding and breakage of all moving parts. If damaged, repair tool before use.
ØCheck the cutters for sharpness or damage.
ØClean clutch teeth with wire brush. Check the attrition on the 3-jaw clutch. If the points are worn, replace with
identical piece.
ØAfter each use coat all moving parts (including clutch driver) with corrosion resistant oil.
Occasional Maintenance
ØCheck brushes for wear and replace if worn.
ØGrease rocker arms and main bearings every 3-6 months.
ØGrease main bearings thru grease fitting inside clutch handle slot.
ØAfter a lot of use, clutch jaws may need to be replaced.
oRemove the screws that hold the front guard to the housing. Remove screws that hold the nosepiece on.
oSlide out clutch driver and replace jaws.
oPut nosepiece assembly and guards back on.
§WARNING: DO NOT operate machine with guards removed.
ØAfter a lot of use, the V-Belt may need to be tightened.
oRemove V-Belt Guard
oLoosen locknut, turn bolt until V-Belt tightens. Tighten lock nut back up. Replace guard.
Chapter
5

SDS200B PIPE DRAIN CLEANER
13
Parts List
Part
Description
Specification
Qty.
Part
Description
Specification
Qty.
1
Hull
1
39
Guard
74*74*40mm plastic
1
2
Inner hexagon screw
M5*35
2
40
Switch
LW8-10D
1
3
Gland
1
41
Half-round head screw
M5*8
8
4
Inner hexagon screw
M6*30
2
42
Link block
1
5
Inner hexagon screw
M6*50
2
43
Anchor plate
1
6
Brakes
3
44
Sunk screw
M10*16
2
7
Belt
A-800
1
45
Nut
M10
1
8
Washer
Φ3
3
46
Inner hexagon screw
M6*45
1
9
Rocker arm set
3
47
Motor
1
10
Perforated cylindrical pin
Φ6*45
3
48
Flat key
5*18
1
11
Cotter
Φ2*16
3
49
Small Pulley
1
12
Support
3
50
Damper
1
13
Half-round head screw
M5*8
7
51
Inner hexagon screw
M8*16
4
14
Tension spring
3
52
Washer
Φ10
4
15
Cap
M8*1
1
53
Spring washer
Φ10
4
16
Driving shaft
1
54
Nut
M8
4
17
Clutch cone
1
55
Fixed wire reel
6
18
Bearing
8112
1
56
Nut
M10
6
19
Cam
1
57
screw
Φ10
4
20
Handle
1
58
Support
2
21
Ball
1
59
2
22
Plate assembly
1
60
Washer
Φ18
2
23
Inner hexagon screw
M8*30
3
61
Ring
2
24
Jockey pulley
2
62
Wheel
70kg 8"
1
25
Pin
8*30
2
63
Washer
Φ12
2
26
Sleeve pipe
Plastic
1
64
Nut
M12
2
27
Cap
1
65
Inner hexagon screw
M8*75
4
28
Casing
1
66
Washer
Φ8
6
29
Ball bearing
208
1
67
Nut
M10
6
30
Bearing end cover
1
68
guard plate
1
31
Inner hexagon screw
M8*16
1
69
Black box
1
32
Guide hose pin
2
70
Box Cover
1
33
Strain relies
M12
2
71
Capacitor
100uf
1
34
Mains cable
1.02rubber
1
72
Capacitor
30uf
1
35
Nut
M8
1
73
screw
4
36
Strain relies
M8
3
74
Frame
1
37
Protective shield
1
75
handle
1
38
Insertion
1
76
plate
1
Chapter
6

SDS200B PIPE DRAIN CLEANER
14
Breakdown View
Table of contents
Other Bluerock Tools Cleaning Equipment manuals

Popular Cleaning Equipment manuals by other brands


Kärcher
Kärcher WD 4 manual

HCT
HCT HelioJET C-100 Installation operation & maintenance

Nilfisk-Advance
Nilfisk-Advance MultiFoamer Pegasus 120 Directions for use

Comet
Comet Premium Series manual

Sola-Tecs
Sola-Tecs F Series Assembly instructions

Ecosoft
Ecosoft HR-60 Technical data sheet and operation manual