Blueskysea B2M User manual
Thank you for your choosing Blueskysea B2M motorcycle camera. Please
read this user manual carefully before use, and keep it for future reference .
If you need any assistance please feel free to contact our customer support
team by email:support@blueskysea-inc.com
User Manual
B2M Motorcycle Camera

Main features
1.Blueskysea B2M motorcycle dashcam adopts digital signal
and metal aviation head 8-pin interface, which improves the
stability and anti-interference ability of video signal transm-
ission.
2.B2M motorcycle camera comes with 2 full HD 1080p cameras,
camera lens angle is 140 degrees. Both the front and rear cam-
eras record high-quality video 1080P at 30fps. Video is stored
in H.264 encoding and TS format, support loop recording,
supporting up to 256GB Micro SD Card (not include)
3.B2M motorcycle dash camera supports WiFi function,
Connect the B2M DVR to your mobile phone via WiFi, use your
mobile phone to easily control the B2M recorder, preview, save,
and delete videos or photos. APP Name:UCAM; Computer
Software: GPSplayer.exe
4.These lens are rainproof, the DVR waterproof level is IP55,
recommended to be installed under the seat
5. Additional functions include GPS, loop recording, WDR,
lock emergency file, G-Sensor, record audio, date stamp,
screen saver, wire controller.

-1- support@blueskysea-inc.com
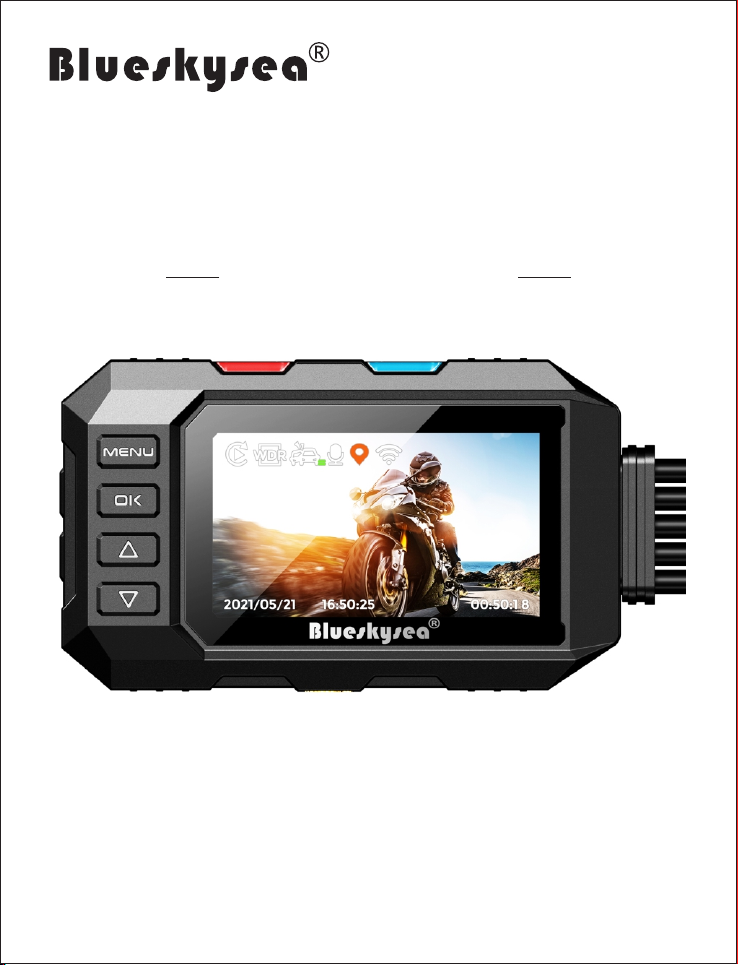
Structure Diagram
MENU Button
OK Button
UP Button
DOWN Button
Power
GPS
Wire controller
Front camera
Rear Camera
Red LED Blue LED
SD Card Slot
Power Button
MODE Button
Bracket slot

-2-
support@blueskysea-inc.com
Package Included
1 X B2M DVR Host
1 x Front Camera with Bracket
1 x Rear Camera with Bracket
2 x Lens Extend Cables
1 x DVR Host Bracket
1 x GPS Module
1 x Wire Controller
1 x Hardwire Kit
1 x User Manual
Button Basic operation
Button Function Operation
Power Turn ON/OFF Long-press for 3s to turn ON/OFF
MODE
WiFi
Playback
Long-press for 2s to turn on/off the WIFI
function
In the stop recording state, short press
once to enter/exit Playback state
MENU
Menu
Lock file
In the stop recording or menu state,
hort press once to enter/exit menu setup.
In the recording state, lock the current file
and take a photo.
In the playback state, short press to enter
delete, protect, unlock current file settings
OK
Stop/ Start REC
Confirm
Short press once to start or stop recording.
In the playback state and the menu setting
state, the function of the confirm key is
realized.

-3- support@blueskysea-inc.com
UP
Switch View
UP
By clicking "UP" to front camera view and
rear camera view are switched, side by side,
picture-in-picture display mode.
In the playback state and the menu setting
state, the up button function is realized.
Down
Stop/Start
Voice REC
Down
In the recording state and stop recording
state, short press to turn on/off the audio
recording.
In the playback state and menu setting state,
the down button function is realized.
Take Photo and
Lock File
Short-press the button will take a photo,
long-press for 3s will lock the current video
file.
Wire
Controller
Button
Basic operation:
Insert/Remove Micro SD Card:
1.Insert a micro SD card (Class 10, 32GB, or larger) into the camera and
push until it locks into place.
2.To remove the micro SD card, press the end of the micro SD card until it
clicks and releases from the slot, and then pull out the SD card.
Start Recording:
The camera will start recording automatically when the ignition is switched
on. The blue LED indicator light will solid while actively recording. You can
also start recording by short pressing the "OK" button.
Stop Recording:
The camera will stop recording automatically when the ignition is switched
off. You can also pause recording by short pressing the "OK" button.
Start/Stop WiFi:
Long press the “MODE” button on the DVR side for 3 seconds to start/stop
the WIFI function.

-4-
support@blueskysea-inc.com
Menu Settings
Menu Option
Resolution
1080P30
1080P+1080P
1080P+720P
Loop Recording OFF/1/3/5/10 Minutes
Record Audio OFF/ON
Format
Format remind
G-sensor of DVR
G-sensor of Park
Date Stamp
Cancel/OK
OFF/30 days
Off/Low/Medium/High
Off/Low/Medium/High
ON/OFF
WDR
WiFi
Frequency
Screen Saver
Language
ON/OFF
ON/OFF
50Hz/60HZ
Off/1 Minute/3 Minutes
English/简体中文,and more
Rear cam Mirror ON/OFF
Display
Plate Number
GPS Speed Unit
Front/ Rear/ Front + Rear
ON/OFF
Off/KMH/MPH
Time Zone GMT-12:00~GMT+12
Date/Time
Default Setting
Version
YYYY/MM/DD HH/MM/SS
Cancel/Ok
version info

-5- support@blueskysea-inc.com
Main Menu Settings
Format Memory Card:
Be careful! All files, including locked files, will be deleted if you choose to
format the memory card! It is recommended to use this function to format
the memory card when using it for the first time or when inserting a new card.
Loop Video Recording Setting:
The camera will continuously erase the oldest video as it records a new
video. However, any locked video files on the memory card will not be
overwritten as they are protected.
Find "Loop Recording" in the setting menu and choose 1/3/5/10 minutes to
select the video loop duration. This is the length of each video loop.
Find "Loop Recording" in the setting menu and choose "OFF" to stop the
video loop recording. Not recommended to turn off the loop recording
function.
WDR:
The full name of WDR is Wide Dynamic Range, this feature makes it
possible to display particularly dark or particularly bright parts of the
scene clearly. There are two options available: On/Off.
Record Audio:
There are two options available: On/Off,when you select ON, video and
audio will be recorded at the same time; when you select OFF, only video
without sound will be recorded.
G-sensor of DVR:
There are four options available: OFF/Low/Middle/High
The default level value is Middle. Video recordings will be locked autom-
atically if an impact is detected. Do not choose OFF if you intend to use the
video lock feature with the G-Sensor as it will disable the automatic lock that
occurs when a collision is detected.
Time Zone:
There are 25 available settings for time zone: GMT-12/-11/-10/-9/-8/-7/-6/
-5/-4/-3/-2/-1/0/1/2/3/4/5/6/7/8/9/10/11/12. It is recommended to set your
local time zone first and then set the system time.

-6-
support@blueskysea-inc.com
Restore factory settings:
Find "Default Setting" in the setting menu and select the "ok" to restore
factory settings, this setting restores the device to its original manufacturer
settings.
Date Stamp:
There are 2 options available: On/Off, when you choose "ON”, the video
screen will add a watermark included system time, speed, latitude and
longitude, license plate number, and other information, Set to “OFF”,
for no watermark.
Version:
This setting displays the current internal firmware version. When contacting
customer service or support (support@blueskysea-inc.com) please have
this information available.
LED Indicator
Indicator Detail
Blue LED-Right
Red LED-Left
Recording status, the blue LED
light is on, and the blue LED in
other statuses is off
1. In standby, playback, and menu
settings, the red LED lights up.
When recording, the red LED is off.
2. In an abnormal state (abnormal
video signal, abnormal SD card),
the red LED light is on.

-7- support@blueskysea-inc.com
Specification
Item Detail
Chipset NOVATEK Nt96663
Sensor
Lens Angle
Screen Size
Video resolution
Host Waterproof Level
SONY IMX323
140 Degree
3 Inches LCD
Front:1080P 30FPS, Rear:1080P 30FPS
IP64 (Not recommended for use in rainy weather)
Lens Waterproof Level IP67
Wi-Fi Support
Wi-Fi APP UCAM Dashcam
GPS Support
Memory Card Capacity Class 10, 256GB Maximum
Power
Speaker& MIC
Video Format
Image Format
Compression method
DC 5V
Support
TS
JPG
H.264
Language English,简体中文,and more
G-SENSOR Support
Loop Recording
Voice Recording
WDR
Item size
Support
Support
Support
4.7x2.7x0.7 inches
Working Temperature
Working Humidity
-20℃ ~ 80℃
15%~60%RH
-8-
support@blueskysea-inc.com
WiFi Application
1. Install APP
This function enables the connection between the DVR Host machine and
the mobile phone through the mobile phone APP. Find "UCAM DASH CAM"
on Google Play or the Apple Store and install it.
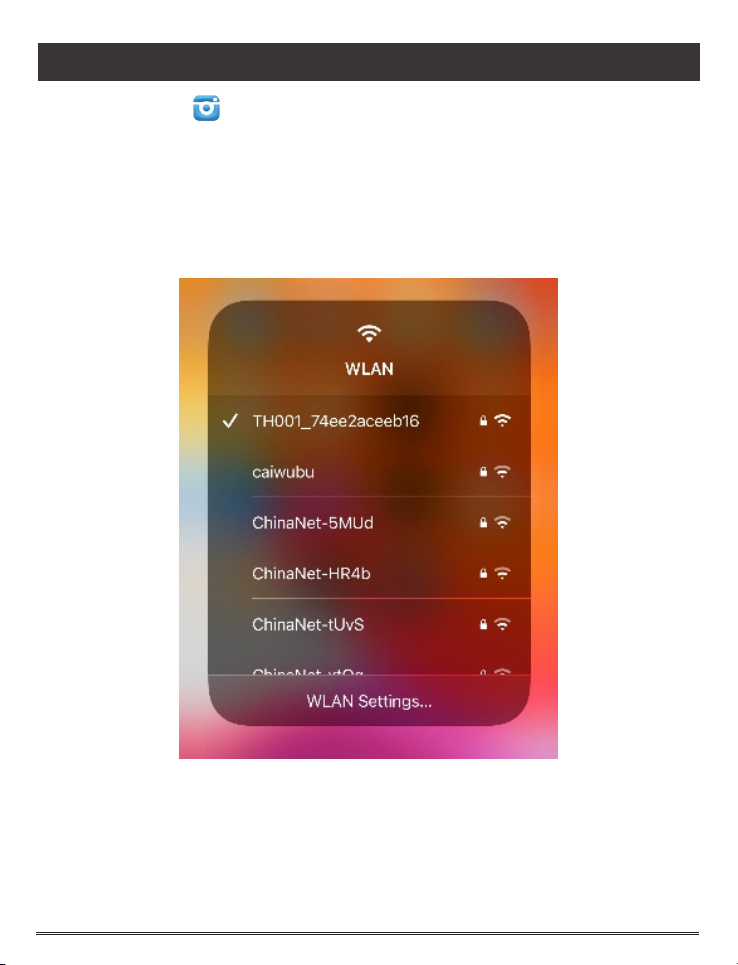
2. Connect WiFi
Connect to the device WiFI, find " TH001-xxxxxxx" in your phone's WiFi list,
it's B2M WiFi Hotpoint, enter default password"12345678" to connect.
Note: After connecting to the B2M WiFi Hotpoint, your smartphone may not
be able to access the Internet, please set the network data access authority
to UCAM. When the WiFi connection is unstable, try to set the phone to
airplane mode to reconnect.
-9- support@blueskysea-inc.com
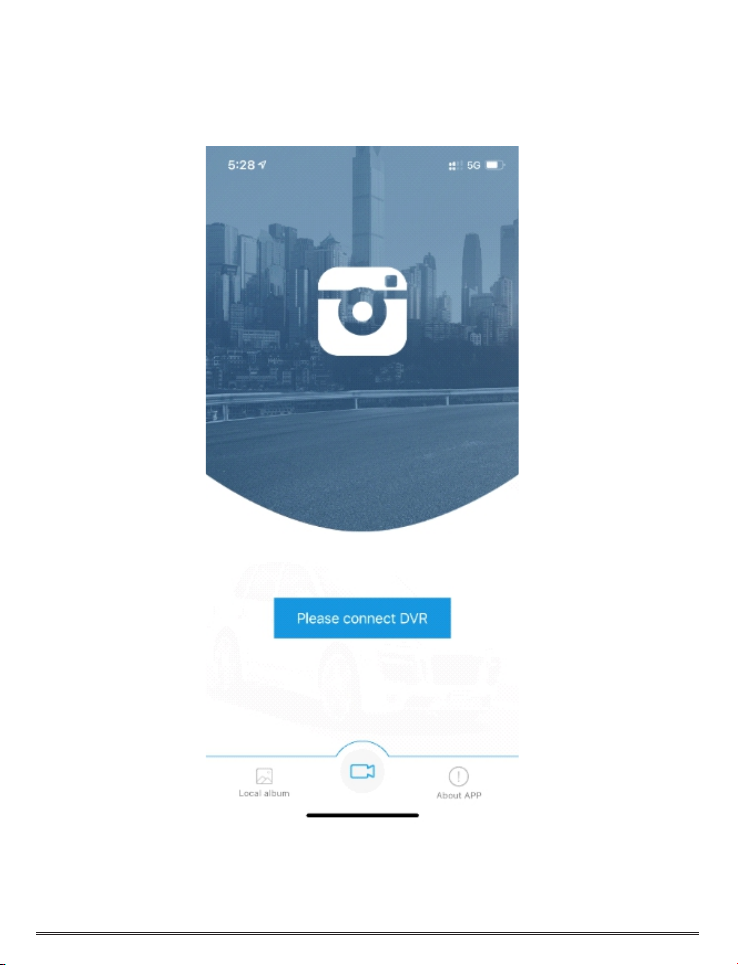
3. Access APP
Open the “UCAM” APP, and click the "Please connect DVR" to connect B2M
DVR. After the connection is successful, you can access B2M through the
smartphone.

4. UCAM APP Homepage Details
Open the “UCAM” APP, and click the "Please connect DVR" to connect B2M
DVR. After the connection is successful, you can access B2M through the
smartphone.
System Date & Time
Back System Setting
Switch View
Start/Stop REC
Fully Screen
Take photo
Photo /VideoFiles
Recording Current Resolution
Coordinate & Speed
-10-
support@blueskysea-inc.com
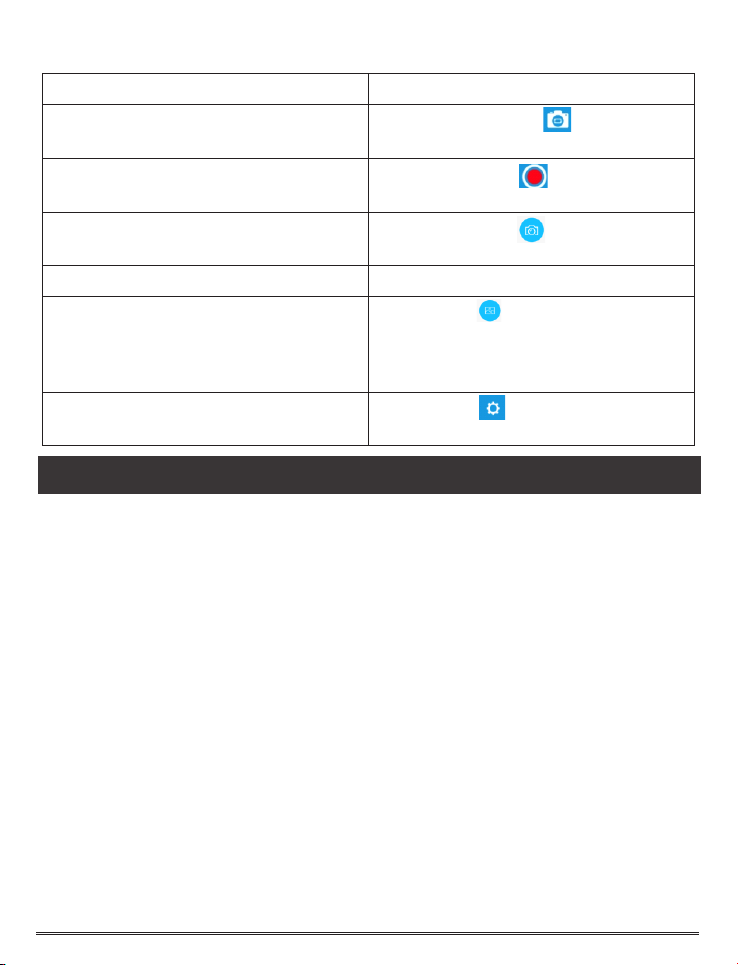
5. APP Basic Operation
Instructions Detail
Switch Camera View Click once on the " " to switch
the front and rear video view display.
Start/Stop Recording Click once the " " to start or stop
video recording.
Take a photo Click once the " " to take
one photo.
Fully Screen Display Fully Screen Display
Preview Video & Photo
Click this " " to access videos
and photos folder, and you can
preview, save, delete, etc. pictures
and videos
System Setup Click this " " to access the
system setting page.
Video Playback
Playback on phone:
Open the UCAM Dash Cam App, Press the file button, you will find video files
and playback.
Playback on PC:
1.Remove the Micro SD card from B2M DVR and connect to the computer
USB socket via a micro SD card reader. Once connected, open a file browser
and navigate to the SD card.
2.There will be 3 file folders when you access the memory card on the
computer: a “MOVIE” (Normal loop recording video files) folder, an RO
(Locked video files) video folder, and a PHOTO (Video snapshot files) folder
3.You can obtain information from the video file name. For example:
2021_0511_163812_001A.TS
2021_0511_163812_002B.TS
“2021_0511_163812 " indicates date/time.
“A” is for the front camera video files.
“B" is for the rear camera video files.
RO file folder contains any videos that have been locked
.TS is the video file format
-11- support@blueskysea-inc.com

Playback on DVR host:
In the stop recording state, short press once "MODE" to enter Playback
state. Select the video or photo you need to playback.
Quick Installation Guide
1.Locate the proper place to fix the front & rear camera, wired controller,
GPS tracker (optional), and DVR Unit (Recommended to be placed under
the seat or in the top case for touring bikes).
2.Plan the path of camera cables and power cable before installation. Most
bikes will require you to remove the fuel tank to properly run the cable for
the front camera.
The wired controller cable, and/or the GPS tracker cable may also have to
run under the tank so plan the mounting locations before putting your fuel
tank back on.
3.Fix and connect the front and rear cameras by the method of your choice
(3M tape, screws, cable ties) in the proper viewing location.
Note: If you plan on using 3M tape you should properly clean the surface, if
you use a topcoat paint product it can limit the ability of the 3M tape to
adhere properly.
4.Supplied power adapter connection.
It is recommended the supplied power adapter be connected to the ignition,
or any point after, such as fuse box, radio, lights. ... so the system starts up
and shuts down with your bike. However, you can connect to your battery,
but you need to make sure to turn the unit off manually after rides to avoid
draining the battery.
The position of the DVR Unit and camera cables should be away from the
high-voltage circuit like a xenon lamp, ignition plug, etc. If your motorcycle
is a traditional carburetor system please try to change a suitable R-value
ignition plug.
-12-
support@blueskysea-inc.com

Connect Detail
3 inch
ACC
BAT
GND
Rear Camera
Wire Controller
GPS
Power Supply Connect Detail:
1. Connect the Yellow wire of the hardwire kit to the positive 12V DC source
that is always on.
2. Connect the red wire to a positive 12VDC source that is controlled by
an ignition key (also known as ACC port).
3. Connect the Black wire to the negative source, battery or ground on the
bike.
Installation Detail
1. The waterproof level of the B2M DVR is IP65. It is recommended to put the
DVR under the seat or in a storage compartment. When the DVR is installed
on the handlebar of a motorcycle, it’s not recommended to drive on rainy
days.(if needed, use a plastic bag to cover the unit for added water protection)
2. The Lens wiring should be far away from strong electricity, strong magn-
etism, such as an engine, to avoid interference.
3. The GPS module should be installed outside the motorcycle in order to
receive good GPS signals.
-13- support@blueskysea-inc.com
Rear Camera
DVR
GPS
Wired Controller
Front Camera

Troubleshooting
Problem: Unit beeps when power is applied
Solution 1: No MicroSD card installed in DVR Unit, install approved
MicroSD card
Solution 2: Bad MicroSD card installed, try another card
Problem: Unable to connect to DVR Unit using UCAM DashCam App
Solution 1: Verify that you are connected to the wireless network
(TH1-xxxxxx)
Solution 2: Close the App on the phone, connect to the wireless network
and open the App
Solution 3: Power off the DVR Unit, close the App, and power off your
phone. Then Power on the DVR Unit, power on your phone, connect to
the wireless network (TH1-xxxxxx), open UCAM Dash Cam App.
Problem: The DVR machine crashed.
Solution 1: Disconnect the power and restart the B2M DVR.
Problem: The screen flickers and a purple bar appears.
Solution 1: If it happens occasionally, it is normal, you must check that
each connection part is secure.
Solution 2: If there are many occurrences and continues for a long period
of time, please contact us and we will carry out the warranty for you.
1. Please use the supplied power adapter only.
2. Never disassemble or attempt repair of this product. Doing so may damage
the DVR Unit, causing electronic shock and void your product warranty.
3. Never short-circuit the battery.
4. Exposing the DVR Unit to open flames can cause an explosion.
5. Due to local laws and vehicle safety considerations, do not operate the
device using the UCAM Dash Cam App while moving.
6. Please read the user manual carefully before operation.
Notice:
-14-
support@blueskysea-inc.com

Official Website: www.blueskysea-inc.com
Official Twitter: twitter@Bob59521
Official Facebook: FB@BSSDashcam
Tech Support Team: Support@blueskysea-inc.com
Customer Contact information
-15- support@blueskysea-inc.com
Table of contents
Other Blueskysea Dashcam manuals


