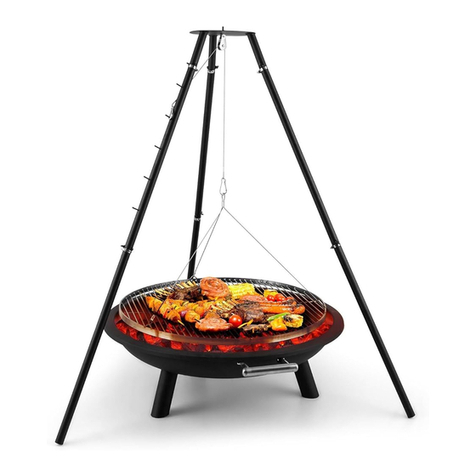
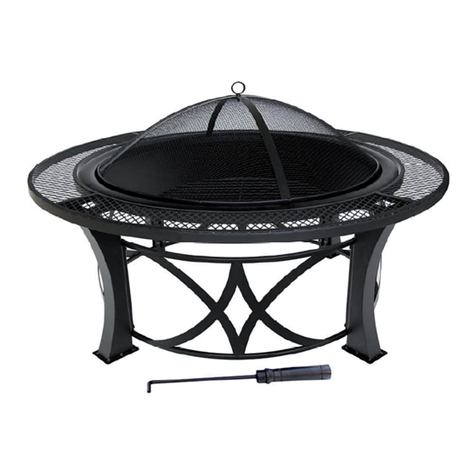
Blumfeldt Aguilera User manual

Aguilera
Feuerschale mit Grill
Fire Bowl with Grill
Braséro con parrilla
Braciere avec gril
Brasero con griglia
10041127 10041128


3
DE
Sehr geehrter Kunde,
wir gratulieren Ihnen zum Erwerb Ihres Gerätes.
Lesen Sie die folgenden Hinweise sorgfältig durch und
befolgen Sie diese, um möglichen Schäden vorzubeugen.
Für Schäden, die durch Missachtung der Hinweise und
unsachgemäßen Gebrauch entstehen, übernehmen wir
keine Haftung. Scannen Sie den folgenden QR-Code,
um Zugriff auf die aktuellste Bedienungsanleitung und
weitere Informationen rund um das Produkt zu erhalten:
INHALTSVERZEICHNIS
Sicherheitshinweise 4
Einzelteile 6
Zusammenbau 7
Benutzung 9
Reinigung und Pege 10
HERSTELLER & IMPORTEUR (UK)
Hersteller:
Chal-Tec GmbH, Wallstraße 16, 10179 Berlin, Deutschland.
Importeur für Großbritannien:
Berlin Brands Group UK Ltd
PO Box 1145
Oxford, OX1 9UW
United Kingdom
English 11
Français 19
Español 27
Italiano 35

4
DE
SICHERHEITSHINWEISE
WARNUNG
Erstickungsgefahr! Die Feuerschale ist nur zur Nutzung im
Freien bestimmt. Sie darf nicht in Gebäuden, Garagen oder
anderen geschlossenen Bereichen verwendet werden. Es
können sich giftige Dämpfe bilden, die zum Ersticken führen.
• Die Feuerschale ist nicht für gewerbliche Zwecke geeignet.
• Die Feuerschale darf nur von Erwachsenen verwendet werden. Kinder
und Haustiere müssen einen sicheren Abstand einhalten.
• Verwenden Sie zum Anzünden kein Benzin, Brennspiritus,
Feuerzeugbenzin oder Alkohol.
• Benutzen Sie die Feuerschale nicht, bevor sie nicht vollständig
zusammengebaut wurde und alle Teile fest sitzen.
• Verwenden Sie die Feuerschale nicht auf Untergründen aus Holz oder
anderen brennbaren Materialien.
• Leeren Sie die Feuerschale nach jeder Verwendung. Lassen Sie eine dünne
Ascheschicht darin, um den Boden zu schützen. Nehmen Sie die Asche erst
heraus, wenn die Kohle komplett abgebrannt und die Asche abgekühlt ist.
• Fassen Sie die Feuerschale erst an, wenn sie komplett abgekühlt ist.
Tragen Sie während des Betriebs hitzebeständige Handschuhe.
• Verstauen Sie die Feuerschale erst, wenn sie komplett abgekühlt ist und
die Asche entsorgt wurde.
• Verwenden Sie immer Werkzeuge und hitzebeständige Handschuhe,
wenn Sie Brennmaterial hinzufügen oder die Feuerschale bewegen.
• Lassen Sie die Feuerschale während der Benutzung nicht unbeaufsichtigt.
• Während der Benutzung kann heiße Glut aus der Feuerschale fallen.
• Überladen Sie die Feuerschale nicht mit Brennmaterial. Fügen Sie erst
dann neues Brennmaterial hinzu, wenn das Feuer heruntergebrannt ist.
• Halten Sie den Brennstoff von der Wand der Feuerschale fern, da die
Wand durch hohe Temperaturen beschädigt werden kann.
• Atmen Sie den Rauch nicht ein und lassen Sie ihn nicht in die Augen kommen.
• Untersuchen Sie die Feuerschale vor der Benutzung auf Beschädigungen.
• Durch die Benutzung kann sich die Metallober äche leicht verfärben.

5
DE
VORSICHT!
VERWENDEN SIE KEINEN ALKOHOL
ODER BENZIN ZUM ANZÜNDEN ODER
WIEDERANZÜNDEN!
Besondere Hinweise zu Grillgeräten
• Legen Sie das Grillgut erst auf, wenn der Brennstoff mit einer Ascheschicht
bedeckt ist!
• Das Gerät wird sehr heiß und darf während des Betriebes nicht bewegt
werden.
• Benutzen Sie da Gerät nicht in geschlossenen Räumen.
• Verwenden Sie zum Anzünden oder Wiederanzünden keinen Spiritus oder
Benzin. Verwenden Sie nur Anzündhilfen entsprechend EN1860-3.
• Halten Sie Kinder und Haustiere vom Gerät fern.

6
DE
EINZELTEILE
Nr. Bild Bezeichnung Menge
1Basis 1
2Holzlager 1
3Säule 1
4Feuerschale 1
5Ascheschale 1
6Kohlerost 1
7Grillrost 1
8a Funkenschutzhaube 1
8b Griff der Funkenschutzhaube 1
8c M6 x 12 mm Schraube 8
8d M6 Mutter 2
9Schürhaken 1
10 Regenhaube 1
11 Schraubendreher 1
12 Schraubenschlüssel 1

7
DE
ZUSAMMENBAU
1
Setzen Sie das Holzlager auf die Säule.
2
Verbinden Sie die Säule, das Holzlager und die Basis mit einer Schraube.
3
Drehen Sie die bereits befestigten Teile um 180° und befestigen Sie dann die
Feuerschale mit Schrauben oberhalb der Säule.
4
Setzen Sie die Ascheschale und den Kohlerost ein.

8
DE
5
Setzen Sie den Grillrost ein und setzen dann die Funkenschutzhaube auf.
Hinweise zum Funkenschutz und zur Regenhaube
So bauen Sie die Funkenschutzhaube zusammen
Wenn Sie die Feuerschale nicht
mehr benutzen, lassen Sie sie
vollständig abkühlen, reinigen
Sie sie und setzen Sie dann die
Regenhaube auf.

9
DE
BENUTZUNG
Feuer entzünden
1 Stellen Sie sicher, dass die Feuerschale auf einem festen, achen,
ebenen und hitzebeständigen Untergrund, entfernt von brennbaren
Gegenständen, aufgestellt ist.
2 Legen Sie Papier oder trockenes Brennholz in die Mitte des
Feuerschalenbodens.
Hinweis: Legen Sie Brennmaterial nicht direkt in die Feuerschale, sondern
immer auf das Papier bzw. das Brennholz.
3 Zünden Sie das Papier oder Brennholz an.
Hinweis: Entfachen Sie erst ein kleines Feuer und lassen Sie es dann langsam
größer werden. Wenn sich die Hitze zu schnell und zu stark entwickelt, kann
es zu Rissen in der Konstruktion kommen.
Das Feuer schüren
• Geben Sie weiteres Brennmaterial hinzu, um die Hitze langsam zu
steigern. Überladen Sie die Feuerschale nicht mit Brennmaterial. Drei
kleine Scheite sind ausreichend.
• Verwenden Sie beim Umschichten der Scheite das Schürwerkzeug.
Löschen
Um die Feuerschale zu löschen, geben Sie kein Brennmaterial mehr hinzu oder
ersticken Sie das Feuer mit Sand. Löschen Sie das Feuer auf keinen Fall mit
Wasser!
Verwendung als Grill
• Der Grill und die Gerätschaften müssen vor dem Grillen sauber und frei
von Rückständen sein.
• Geben Sie ca. 0,5 kg Kohle auf den Kohlerost und entzünden Sie die Kohle
nach den Anleitungen oben.
• Legen Sie den Grillrost auf die Feuerschale. Achten Sie darauf, dass der
Grillrost fest auiegt.
• Fangen Sie erst an zu grillen, wenn das Brennmaterial eine Ascheschicht hat.
• Das Grillgut muss vor dem Verzehr vollständig durchgegart sein.
• Entfernen Sie den Grillrost erst, wenn der Grill völlig abgekühlt ist.
• Reinigen Sie nach dem Grillen stets den Grillrost und das Grillbesteck.

10
DE
REINIGUNG UND PFLEGE
VORSICHT
Verbrennungsgefahr! Lassen Sie die Feuerschale vollständig
abkühlen, bevor Sie sie auf Schäden untersuchen oder reinigen.
Die Feuerschale auf Schäden untersuchen
Überprüfen Sie die Feuerschale regelmäßig auf Schäden, um die
Produktsicherheit und eine längere Lebensdauer zu gewährleisten.
1 Überprüfen Sie alle Teile, um sicherzustellen, dass sie fest sitzen.
2 Prüfen Sie die Komponenten auf Beschädigungen.
3 Wenn Sie Schäden an einer Komponente feststellen, lassen Sie die
Feuerschale reparieren, bevor Sie sie weiter benutzen.
Reinigung
• Versichern Sie sich, dass das Feuer vollständig gelöscht ist, wenn Sie die
Feuerschale nicht mehr verwenden.
• Stellen Sie sicher, dass das Feuer vollständig gelöscht ist und die
Feuerschale abgekühlt ist, bevor Sie die Asche entfernen.
• Verwenden Sie ein feuchtes Baumwolltuch, um Ruß zu entfernen.
Reinigen Sie die Feuerschale regelmäßig, um eine lange Lebensdauer zu
gewährleisten.
Hinweis: Nach mehrmaligem Gebrauch kann sich die Ober äche verfärben.
• Verwenden Sie keinen Ofenreiniger oder Scheuermittel, da diese das
Produkt beschädigen können.
• Reinigen Sie die Außenseite mit Wasser und einem milden
Geschirrspülmittel.
• Verwenden Sie bei hartnäckigen Flecken einen Reiniger auf Zitrusbasis
und eine Nylon-Bürste.

11
EN
Dear Customer,
Congratulations on purchasing this device. Please read
the following instructions carefully and follow them to
prevent possible damages. We assume no liability for
damage caused by disregard of the instructions and
improper use. Scan the QR code to get access to the
latest user manual and more product information.
CONTENTS
Safety Instructions 12
Individual Parts 14
Assembly 15
Operation 17
Cleaning and Care 18
MANUFACTURER & IMPORTER (UK)
Manufacturer:
Chal-Tec GmbH, Wallstrasse 16, 10179 Berlin, Germany.
Importer for Great Britain:
Berlin Brands Group UK Ltd
PO Box 1145
Oxford, OX1 9UW
United Kingdom

12
EN
SAFETY INSTRUCTIONS
WARNING
Risk of suffocation! This re bowl is for outdoor use only and
shall not be used in a building, garage or any other enclosed area.
Toxic carbon monoxide fumes can accumulate and cause
asphyxiation.
• This re bowl is not for commercial use.
• This re bowl should only be used by adults and all children and pets
should be kept at a safe distance.
• Do not use petrol, white spirit, lighter uid, alcohol or other similar
chemicals to light a re as a rapid increase in temperature could damage
the re bowl. This re bowl is only suitable for use with charcoal,
untreated wood or dry logs. Do not use coal.
• Do not use this re bowl until it is completely assembled and all parts are
securely fastened and tightened.
• Do not use the re bowl on decking or any other ammable surfaces such
as dry grass, wood chips, leaves.
• Always empty this re bowl after use. Leave a thin layer of ash to protect
the bottom. Do not remove ashes or charcoal until they are completely
and fully extinguished.
• Do not touch the re bowl until it is completely cooled unless you are
wearing heat resistant gloves as it is hot when in use.
• Do not handle or move the re bowl when in use as it is hot.
• Do not attempt to store the re bowl until all ashes and charcoals are
completely extinguished.
• Always use a safety tool and heat resistant gloves when adding or moving fuel.
• Do not leave a burning re unattended.
• Fire hazard-Hot embers may emit while in use.
• Do not overload the re bowl with fuel. Do not add additional fuel until
the re burns down. If an portion of the re bowl is growing red, it is
overloaded.
• Do not burn fuel directly on the re bowl base.
• Do keep the fuel away from the wall of the re bowl as the high
temperature may damage it.
• Avoid breathing smoke from the re and avoid getting it into your eyes.
• Always thoroughly inspect the re bowl before use.
• A slight discolouration of nish may occur after use.

13
EN
CAUTION!
DO NOT USE SPIRIT OR PETROL
FOR LIGHTING OR RE-LIGHTING!
Special instructions for grills
• Do not place the food on the grill until the fuel is covered with a layer of
ash!
• The appliance becomes very hot and must not be moved during operation.
• Do not use the appliance in closed rooms.
• Do not use spirit or petrol for ignition or reignition. Only use ignition aids
in accordance with EN 1860-3.
• Keep children and pets away from the appliance.

14
EN
INDIVIDUAL PARTS
No. Picture Designation Quantity
1Base 1
2Log store 1
3Column 1
4Fire bowl 1
5Ash pan 1
6Charcoal grate 1
7Grill grate 1
8a Spark protection hood 1
8b Handle of the spark protection hood 1
8c M6 x 12 mm screw 8
8d M6 nut 2
9Poker 1
10 Rain hood 1
11 Screwdriver 1
12 Wrench 1

15
EN
ASSEMBLY
1
Place the log store on the column.
2
Connect the column, the log store and the base with a screw.
3
Turn the already attached parts by 180° and then attach the re bowl with
screws above the column.
4
Insert the ash pan and the charcoal grate.

16
EN
5
Insert the grill grate and then put on the spark protection cover.
Notes on the spark protection and the rain hood
To assemble the spark arrestor hood
When you are nished using
the re bowl, allow it to cool
completely, clean it, and then put
on the rain cover.

17
EN
OPERATION
Ignite Fire
1 Make sure that the re bowl is placed on a rm, at, level and heat-
resistant surface away from ammable objects.
2 Place paper or dry rewood in the middle of the re tray base.
Note: Do not place fuel directly in the re bowl but always on the paper or
the rewood.
3 Light the paper or rewood.
Note: Light a small re rst and then let it slowly grow. If the heat develops
too quickly and too strongly, cracks may occur in the construction.
Stoke the Fire
• Add more fuel to slowly increase the heat. Do not overload the re bowl
with fuel. Three small logs are sufcient.
• Use the scraping tool when rearranging the logs.
Extinguish Fire
To extinguish the re bowl, do not add fuel or suffocate the re with sand. Do
not extinguish the re with water!
Use as a grill
• The grill and the equipment must be clean and free of residues before
grilling.
• Put approx. 0.5 kg of coal on the coal grid and ignite the coal according to
the instructions above.
• Place the grill on the re bowl. Make sure that the grille is rmly in place.
• Start grilling when the fuel has an ash layer.
• The food must be completely cooked before consumption.
• Do not remove the grate until the grill has completely cooled down.
• Always clean the grill rack and cutlery after grilling.

18
EN
CLEANING AND CARE
CAUTION
Danger of burns! Allow the re bowl to cool completely before
inspecting or cleaning it for damage.
Inspect the fi re bowl for damage
Check the re bowl regularly for damage to ensure product safety and a longer
service life.
1 Check all parts to make sure they are tight.
2 Check the components for damage.
3 If you nd damage to a component, have the re bowl repaired before
continuing to use it.
Cleaning
• Make sure that the re is completely extinguished when you no longer use
the re bowl.
• Make sure the re is completely extinguished and the re bowl has cooled
down before removing the ashes.
• Use a damp cotton cloth to remove soot. Clean the re bowl regularly to
ensure a long service life.
Note: The surface may discolour after repeated use.
• Do not use oven cleaner or scouring agents, as these can damage the
product.
• Clean the outside with water and a mild dishwashing liquid.
• For stubborn stains, use a citrus-based cleaner and a nylon brush.

19
FR
Cher client, chère cliente,
Toutes nos félicitations pour l’acquisition de ce nouvel
appareil. Lisez attentivement les indications suivantes
et suivez-les pour éviter d'éventuels dommages. Nous
ne saurions être tenus pour responsables des dommages
dus au non-respect des consignes et à la mauvaise
utilisation de l’appareil. Scannez le QR-Code pour
obtenir la dernière version du mode d'emploi ainsi que
d'autres informations concernant le produit :
SOMMAIRE
Consignes de sécurité 20
Pièces détachées 22
Assemblage 23
Utilisation 25
Nettoyage et entretien 26
FABRICANT ET IMPORTATEUR (UK)
Fabricant :
Chal-Tec GmbH, Wallstraße 16, 10179 Berlin, Allemagne.
Importateur pour la Grande Bretagne :
Berlin Brands Group UK Ltd
PO Box 1145
Oxford, OX1 9UW
United Kingdom

20
FR
CONSIGNES DE SÉCURITÉ
MISE EN GARDE
Risque d'étouffement ! Le braséro est uniquement destiné à une
utilisation en
extérieur. Il ne doit pas être utilisé dans un bâtiment, un garage
ou d'autres espaces clos. Des fumées toxiques peuvent se former
et provoquer un étouffement.
• Le braséro n'est pas adapté à une utilisation commerciale.
• Le braséro ne peut être utilisé que par des adultes. Les enfants et les
animaux doivent rester à distance de sécurité.
• N'utilisez pas d'essence, d'alcool dénaturé, d'essence à briquet ou d'alcool
pour allumer le feu.
• N'utilisez pas le braséro avant qu'il ne soit complètement assemblé et que
toutes les pièces ne soient bien en place.
• N'utilisez pas le braséro sur des surfaces en bois ou d'autres matériaux
in ammables.
• Videz le braséro après chaque utilisation. Laissez-y une ne couche de
cendres pour protéger le fond. Ne retirez pas les cendres tant que le
charbon n'a pas complètement brûlé et que les cendres n'ont pas refroidi.
• Ne touchez pas le braséro tant qu'il n'a pas complètement refroidi. Portez
des gants résistants à la chaleur pendant le fonctionnement.
• Ne rangez pas le braséro tant qu'il n'a pas complètement refroidi et que les
cendres n'ont pas été retirées.
• Utilisez toujours des outils et des gants résistants à la chaleur lorsque vous
ajoutez du combustible ou déplacez le braséro.
• Ne laissez jamais le braséro sans surveillance pendant son
fonctionnement.
• Pendant l'utilisation, des braises chaudes peuvent tomber du braséro.
• Ne surchargez pas le braséro avec du combustible. N'ajoutez pas de
nouveau combustible tant que le feu n'a pas tout brûlé.
• Éloignez le combustible de la paroi du brasier car elle peut être
endommagée par des températures élevées.
• N'inhalez pas la fumée et ne la laissez pas pénétrer dans vos yeux.
• Examinez le braséro et assurez-vous qu'il est en bon état avant utilisation.
• La surface métallique peut se décolorer légèrement à l'usage.
This manual suits for next models
2
Table of contents
Languages:
Other Blumfeldt Grill manuals

Blumfeldt
Blumfeldt Milos Alto User manual

Blumfeldt
Blumfeldt Lombardia User manual

Blumfeldt
Blumfeldt 10028486 User manual

Blumfeldt
Blumfeldt Arco Trino User manual

Blumfeldt
Blumfeldt Sorrento User manual

Blumfeldt
Blumfeldt 10028488 User manual

Blumfeldt
Blumfeldt 10028487 User manual

Blumfeldt
Blumfeldt 10028487 User manual

Blumfeldt
Blumfeldt 10028583 User manual