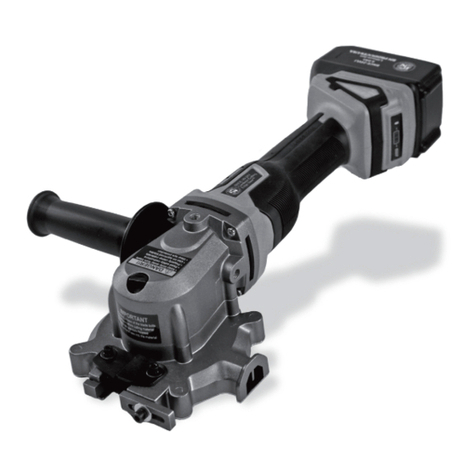
BN Products BNRJ-100 User manual

Page | 1
BNRJ-100
e Robo Joiner
Instruction Manual
BNRJ-100 Robo Joiner Tech Manual2.indd

Page | 2
This product should be used in the relationship of ap-
plying Control Joints to finished Concrete that was
placed on the same day. Do not use this cordless tool
for any other use. This product is intended for indoor
and outdoor use, using 110V-240V/50Hz-60Hz, A.C.
standard outlet to power the electric battery charger
that is included. Use only with residential electric wir-
ing that is in good working order and that meets appli-
cation codes and ordinances. If you have any questions
about the adequacy of your wiring, consult a qualified
electrician.
In using this cordless tool, you should follow the IM-
PORTANT SAFETY INSTRUCTIONS listed below. As part
of those instructions, we have used the words “WARN-
ING” and “CAUTION” to indicate the level of hazard:
WARNING – indicates a hazard, which if not avoided,
could result in death or injury.
CAUTION – indicates a hazard, which if not avoided,
could result in damage to the product or property.
When using electrical devices, especially devices that
may come into contact with water, basic safety precau-
tions should always be followed to reduce the risk of
electric shock and injury to persons, including the fol-
lowing:
READ ALL INSTRUCTIONS BEFORE USING THIS CORD-
LESS TOOL. WARNING: ABSOLUTELY UNDER NO CIR-
CUMSTANCES DO NOT SUBMERGE THE CORDLESS
TOOL AND ANY OF THE OTHER RELATED DEVICE
(CHARGER) UNDER WATER. MOIST CONDITIONS IN-
SIDE THE MOTOR DRIVE UNIT OF THE CORDLESS
TOOL MAY RESULT IN TOOL’S FAILURE AND OR HARM
TO THE TOOL, THUS POSSIBLE ELECTRIC SHOCK OR
INJURY TO PERSONS.
WARNING: Use this cordless tool only as described in
this manual. Any other use not recommended by the
manufacture may cause electric shock or injury to per-
sons.
WARNING: Do not come into contact with flammable
liquids. This cordless tool is intended to operate within
the normal parameters of finish concrete work. WARN-
ING: Extreme caution is necessary when any cordless
tool is used by or near children, invalids or pets and
whenever the cordless tool is left unattended. WARN-
ING: Do not place ANY electrical device (charger) that is
not intended to be used in conjunction with this cord-
less tool as part of this tool which is not intended for
that use. Doing so could cause electric shock and could
result in death or injury.
WARNING: BE SURE NOT TO POINT THE LASER LIGHT
AT YOU OR ANY OTHER PERSONS EYE DIRECTION.
THIS MAY CAUSE A HARMFUL RESULT, SUCH AS A POS-
SIBLE INJURY.
CAUTION: Make sure that any exterior related appliance
(charger) that is related to the use of this tool is se-
curely installed in a place that is outside of wet condi-
tions that could bring harm to the person(s) using this
tool and the related appliance. Do not place the related
appliance on an uneven, small and/or unstable surface,
which may allow it to tip and fall. Use caution when de-
ciding where to place your related appliance. Do not in-
stall or store any of the related appliances and/or where
it will be exposed to the weather or to temperatures
below freezing. Do not place the related appliance in or
on areas that are most likely be near flammable materi-
als, such as display’s near furniture and or carpets that
could easily catch fire.
WARNING: To avoid the possibility of the related appli-
ance (charger) plug or outlet from getting wet, place
the charger on a flat level surface to one side of a wall
mounted outlet that is indoor, and if outdoors, an outlet
that is on a grounded protected circuit, with the charger
protected from rain and other wet conditions. If plug
and outlet does get wet, DO NOT un-plug the cord. Dis-
connect the fuse or breaker that supplies power to this
circuit. Confirm that the charger is off and then unplug
the unit. Wait some time for plug and outlet to dry be-
fore turning on the circuit and using again.
CAUTION: Place the Cordless Tool and Charger within
the Tool Box provided and in a suitable environment to
sustain the life of the tool and any of the related appli-
ances inside. Do not place the Tool Box or any of the
contents on heaters, stoves, washing machines, dryers,
on top or in refrigerators and freezers, in the direct path
of any forced air heating vent, in or near direct sunlight
causing sunlight magnification, thus possible fire.
INTENDED USE
IMPORTANT SAFETY INSTRUCTIONS

Page | 3
CAUTION: Do not operate the Cordless Tool if air tem-
perature is above 95˚F (35˚C), or in too cold of tem-
peratures such as freezing that effects the safety and
condition of the tool, placement of the concrete, and/
or the proper time and installation of the control Joints.
Consult your Concrete Expert as to the best times and
conditions.
CAUTION: Do not insert or allow foreign objects to en-
ter the Cordless Tool, except through its normal use, as
this may cause the Cordless Tool to be damaged in such
a way that will reduce the life of the tool. The Cordless
Tool is intended to operate relatively cool and efficiently
if it is used within the standards set inside this manual.
WARNING: Always unplug the related appliance (char-
ger) when not in use, and when not actively servicing
(charging) any of the Cordless Tools Batteries. Never
yank cord to pull plug from outlet. Grasp the plug and
pull straight out to disconnect.
CAUTION: Do not operate the Cordless Tool and/or
charger if you observe any signs of the components
leaking fluid, damaged cord or plug, or if the Cordless
Tool and/or charger is malfunctioning or is dropped
or damaged in any manner. Do not attempt to repair
any of the Cordless Tools components yourself. For re-
pairs covered under warranty, see warranty statement.
For all other repairs, contact Robo Working Tools cus-
tomer service by telephone or E-Mail. WARNING: Do
not connect any supplied charger to any voltage other
than 110V-240V /50Hz-60Hz, A.C. standard outlet. Con-
nect to properly grounded outlets only. Use the related
appliance (charger) only with adequate wiring that is
up to Code. The National Electric Code requires that a
“Ground Fault Circuit Interrupter” (GFCI) be used in the
branch circuit supplying electric power to any device
(charger) related to a Cordless Tool Device. A cord rated
for less amperes or watts than the appliance rating may
overheat. Care should be taken to arrange the cord so
that it will not be tripped over or pulled.
WARNING: The power supply cord may have a polarized
plug. As a safety feature this plug will fit in a polarized
outlet only one way. If it does not fit fully in the outlet,
reverse the plug. If it still does not fit, contact a quali-
fied electrician. DO NOT attempt to defeat this safety
feature.
WARNING: DO NOT run the cord under carpeting. DO
NOT cover cord with throw rugs, runners, etc. Place the
cord away from traffic areas and where it will not be
tripped over.
CAUTION: Avoid the use of an extension cord.
ASSEMBLY AND USE
When you open the Tool Box that makes up the total
and complete operating Tool, the “Robo Joiner™; be
sure to locate the individual instructions that pertain
to that device. Inside this manual, as well as the draw-
ings and/or instructions that come with this Cordless
Tool that was specifically designed for the use in which
you should have purchased it; there is beneficial infor-
mation provided for your convenience. You will notice
from the start, your cordless tool is almost ready to be
used from the moment you open the box. Please be
sure that your purchase has come with the instruction
manual, as well as additional drawings/instructions
which were written onto any of the related appliances
(Charger). Please retain the total information for your
safe keeping. Use this information for the proper as-
sembly, as well as for later in case of general mainte-
nance and questions that you might have in keeping
your purchase well maintained.
As far as the use of this Cordless Tool, please consult
with the appropriate expert that you made this pur-
chase from. It is this construction expert that will be
familiar with your local building codes and any oth-
er local standards such as the kind of control joints
used based on the known soil conditions in your area.
Therefore, please rely on their expertise and the ex-
pertise of the various contractors from which you
may have purchased products specifically designed to
maintain a healthy appearance in your concrete. Con-
sulting with your concrete expert will generally save
you a lot of time and disappointments. See CAUTION,
Top of Page 5.
ADDING LIFE TO YOUR CONCRETE
Here again, your concrete expert is someone who can
specifically recommend certain control joints based on
what you are trying to achieve in a pattern that does
not take away from the strength of the concrete, and in
some cases can add to it . Due to local soil problems
that may be prevalent in your area, they can recom-
mend certain procedures, techniques, and avoidances
that will prevent you from experiencing certain con-

Page | 4
ditions that will affect the appearance of the concrete.
Therefore, consulting with people who can show you
the various joint uses that affect the appearance of the
concrete and yet provides the added strength to the
over-all concrete; those choices should be in consulta-
tion with your concrete expert. All of your purchases for
finishing concrete should always be made on the bases
of your actual experience in the industry, and/or with
consultation of a concrete expert. Deciding these things
should always be made from well established facilities
that are skilled in recognizing un-healthy conditions
and finishes that are not only unsightly, but bring safety
concerns to the forefront; all because the placement of
the control joints, was not adequate.
When placing concrete, always be sure that your con-
crete is of the required strength and finish for which it
is intended. The best way to assure this is by purchasing
concrete that comes from a
facility that is skilled in supplying a pre-controlled mix,
with enough experience to assure structural strength
and integrity. Always buy from a well established facility
that has the technical knowledge to assure the mini-
mal chance of getting un-controlled checks and cracks
that affect the appearance and safety of the concrete.
For added safety and understanding, you might want to
read up on technical journals that your concrete expert
recommends. This will of course provide you with more
product and technical information to keep you well in-
formed, and maybe some peace of mind.
CLEANING AND MAINTENANCE
OF YOUR CORDLESS TOOL
Each of the Cordless Tool(s) you just purchased has
been inspected during and after assembly. Yet, we also
realize that the proper maintenance of the tool is im-
portant, therefore we have strived to create a tool that
has little maintenance as possible so the tool can be
used continuously without the least amount of down
time. The owner of this tool is only required TO WIPE
OR WASH WITH A MOIST BRUSH OR CLOTH THE 3/4”
BLADE AND THE DEEP GROVE TRIM PLATE. THESE
PARTS ARE CONNECTED TO THE DRIVE UNIT AND
MUST BE WASHED WITH CARE AFTER EACH USE. WA-
TER DAMAGE WILL NOT BE COVERED IN ANY WAR-
RANTY CLAIM. Be sure not to get any water into the
tool. The internal part of the tool has been well lubricat-
ed assuring a continuous use without adding additional
lubrication inside the tools housing.
Other tools that are manufactured may require differ-
ent procedures for cleaning and maintenance. The rea-
son for this; is because there are many different types
of uses for the various tools on the market, and how
they may or may not have been able to protect the tool
in the final design that was achieved, requires differ-
ent maintenance procedures. Therefore, be sure to keep
the outside of this Cordless Tool clean of all debris, oils,
hardening concrete, and/or other foreign matter that
is conducive in keeping it well maintained and clean.
That is why again we recommend that you consult with
your concrete expert who has the working knowledge
of what is a properly cleaned and maintained Cord-
less Tool. They will of course be familiar far better with
your installation and have the inside tract as to what
to recommend. Yet, it can’t be said enough, there are
some common steps that should be taken regarding
any product that operates in conjunction with electri-
cal devices.
Disconnect the main plug and/or battery from the elec-
trical supply before carrying out any maintenance. The
motor unit of the tool is sealed and therefore requires
no lubrication or other maintenance. Regular mainte-
nance of the exterior housing of the tool is expected and
required. Under no circumstances should the grounded
end of the related appliance (charger) unit be removed.
If you do not have a proper grounded receptacle to plug
the charger into, consult your local licensed electrician
for the proper recommended procedure to follow in or-
der to achieve the proper ground.
PARTS IDENTIFICATION AND FUNCTION

Page | 5
Rubberized Grip: This assures a good grip of the tool
without the typical build up of sweat that occurs in
many instances when a hand is in a tight grip of a tool
under typical weather conditions that concrete is usu-
ally being applied. To keep the handle from degrading,
be sure to keep out of direct sun when not in use. Store
inside the tool box provided.
Laser Guided On Off Switch: This switch allows the user
to turn on the laser light of the tool when they feel that
the striking of a laser line in front of the tool that is fol-
lowing a pre-struck wet and/or string line; making sure
the joint is straight and true. The laser light mounted in
this tool is of good quality material and should last for
several hundred hours of operation, with no mainte-
nance, other than replacement when needed.
WARNING: BE SURE NOT TO POINT THE LASER LIGHT
AT YOU OR ANY OTHER PERSONS EYE DIRECTION.
THIS MAY CAUSE A HARMFUL RESULT, SUCH AS A POS-
SIBLE INJURY.
Also, if being used during times of excessive tempera-
ture, make sure to use when needed, and not left on in
direct sunlight, thus shorten the laser’s life and of the
battery. Excessive use of this feature shortens the bat-
tery life between re-charges.
20 Volt Lithium Ion Batteries: This type of battery uses
the latest technology in battery development. The bat-
teries hold their full charge up to the point it is in de-
mand by the tool itself. Yet built into the battery case is
series of LED indicator lights which provides the status
of the batteries usefulness before needing recharging.
Thus, these lights indicate enough warning to remind
you to be sure that the second battery which comes
with this tool is being fully charged or is being charged
at the moment the tool is being used. The charger that
comes with the batteries is for a quick charge of no lon-
ger than 1 hour for a fully discharged battery.
Please note the five indicator light patterns just to the
right of the connecting point for the battery on the
charger. These five indicator color combinations which
are shown by the label on the charger from top to bot-
tom below the two color lights itself, provides you the
following indications shown from top to bottom of the
charger label. A solid Green; fully charged; Blinking
Green; being charged and working; A full Red; Needs
to be Charged; A blinking green and Red; Over Heat-
ing, shutting off for cooling; A solid green and Red; Bat-
tery no Longer Good. There are the same combinations
light indicators at the bottom inside half of the battery
itself which indicates the status of the battery.
Please note the blue button above the lights which al-
low you to turn these lights on and off for what that
status of the battery is at that moment. Please keep the
battery disconnected from the Tool at all times when in
storage inside the tool case.
Variable Speed with Locking Trigger: This tool has a
speed that varies from 0-2,400 R.P.M., thus is consid-
ered a variable speed cordless tool. Essentially more
speed is needed the harder the concrete is. It is advised
that the operator familiarize themselves to the speed
and strength of this tool, before tackling the cutting of
longer joints than can be cut beyond what they would
cut in a normal day with a hand tool. Once you are fully
familiar with the tool, you can add more footage to your
day’s goal. You will find that the power of this tool is
because of the heavy duty motor within the housing.
That does not mean that you can run this tool at full
throttle at all times. It depends on the quality and hard-
ness of the concrete. Experience will allow you to de-
termine what are the best factors to use this tool given
your present ability at that time. Be aware to lock the
trigger in place when not in use in order to keep the
tool from discharging (coming on) when it is not appro-
priate. Also, we remind you again, disconnect the bat-
tery from the tool when not in consistent use, or stored
inside the tool case provided. This way the battery is
prevented from discharging when not appropriate, thus
may contribute to over-heating.
Face Plate/Shaft Guides: This part of the tool has been
built to some rugged standards, more than called for in
the rest of the outer shell. Purpose: To protect some vi-
tal parts inside the tool, such as the Laser system, criti-
cal switches, the solid vertical shaft, and access to the
rest of the internal parts of the tool. This face plate has
been powder coated for added ruggedness and beauty.
In order to get access to the other internal parts, the
face plate and shaft guides have to be un- screwed and
then removed after the blade is removed first. It is ad-
vised that the owner of this tool read the warranty on
page 12, and if you have decided to go forward, have
someone trained in all aspects of the tool before allow-
ing them to take apart, repair and assemble this tool.

Page | 6
The shaft assembly that is behind the face plate is built
of hardened solid steel. You will notice that just behind
the shaft are two plastic mounted shaft guides built of
high temperature high impact plastic as guides for the
shaft to move vertically up and down without being
forced out of place as the tool goes forward through
hardening concrete. These pieces have been mounted
by four screws to the face of the vertical part of the shaft
guides, and the horizontal piece that the shaft passes
through, mounted to the internal ribbing behind the
face plate by four screws. If there is a need to remove
any of these parts, be sure to not leave loosen screws or
over-tightening them during assembly.
Figure 2
Protective Shield / Bridge Support: These parts were
created so that the forces being put upon this tool by
its use as a concrete control joint maker, does not cause
undue harm to the tool. The Bridge Support serves sev-
eral functions such as; a better mounting bracket be-
tween the Trim Plate and the Protective Shield. The Pro-
tective Shield keeps the main housing of the tool from
separating due to the vertical movement of the tool and
the forces put upon it as the concrete comes in con-
tact with the main housing. Thus this concrete which
is kicked up by the tools movement going forward is
prevented from entering the tools main housing by the
shield. This is important in that the concrete being of an
acidic base degrades the life of the tool if it enters the
main housing.
3/4” Blade: This part is shown in figure 1 and figure 2
above. Of all of the parts that make up this tool, it is
the one singular part that comes into constant contact
with the concrete. Having said that; it is imperative that
this part is kept clean and viable, for it actually makes
the cut into the concrete for which the control joint is
being made. Yet because of the stainless steel material
it is made of, it is considered durable, yet it still might
not outlive the expected lifetime of this tool. But in the
concrete industry it is well known that unclean and not
well kept parts like trowels and other tools wear and
distort the profile for which they were intended. Please
be sure not to allow any build-up of materials like con-
crete on the Blade, adding to the Blades distortion.
Locking Pin and Clip: These two parts allow for the
quick disconnect between the tool and the two Trim
Plates that fit this tool. The 3/4” Deep Grove Trim Plate
comes only with this tool set. The 1/4” Saw Cut Trim
Plate is offered as a separate Kit for purchase. Contact
your retailer and/or Robo Work Tools Dealer for further
information and purchase. Below is the image of the
tool showing the various parts that need to be removed
for exchanging the two Trim Plates for either 3/4” or
1/4” Blades. The ones pictured in this manual is the 3/4”
Blade.
Figure 3
As you can see in Figure 3, there are only four parts that
need to be removed in order to exchange the two differ-
ent types of Trim Plates. Also pictured are the two wrin-
ches that come in the tool box for removing the Bridge
assembly and the Blade which is simply anchored to
the shaft by the two screws shown in figure 3 using the
larger of the two tools.

Page | 7
3/4”Deep Grove Trim Plate: This part was specifically
designed for the easy addition and removal from the
Bridge Support that is attached to the Tool. Because of
its design, the 3/4” Deep Grove Trim Plate can be re-
moved without having to remove the Blade first. What
this does is allow for easier removal in case of clean-
ing the tool, and yet allow the tool owner to get easy
access to wiping the Blade after each use. This again
allows further cleaning of the bridge and the Locking
Pin and Clip, thus providing a further cleaning. The trim
Plate was Powder Coated for additional protection of
the aluminum plate. Even though Powder Coating pro-
tects the outer finish of the aluminum, normal wear
and tear from the Abrasive Concrete wears the finish off
these surfaces rather quickly depending on use. This is
normal. The tool will perform way beyond the time the
finish wears off, and after you notice some normal wear
marks on the Trim Plate itself.
WRITTEN ONE YEAR LIMITED
WARRANTY FOR TOOL
Every Robo Joiner™ Tool is thoroughly inspected before
leaving the factory and again during packaging proce-
dures. The manufacturer warrants each tool unit to be
free from defects of workmanship and materials for a
period of one year from date of original purchase. War-
ranty does not apply to Cordless Tool being dropped
onto hard surfaces, driven over, or any other mistreated
uses. Should any trouble develop during this one year
of period, return the defective unit freight prepaid, or by
hand to the store from which it was purchased, along
with receipt. If inspection shows the trouble to be the
result of defective workmanship or material, the man-
ufacturer will replace the defective unit at our option
without charge.
THIS WARRANTY DOES NOT APPLY WHERE:
Repairs have been made or attempted by others with-
out manufactuers approval; Replacement is required
because of improper use; The unit has been abused or
improperly maintained, and/or Aterations have been
made to the unit (Robo Joiner™).
WRITTEN SIX MONTH LIMITED
WARRANTY FOR CHARGER
Every Robo CHARGER UNIT (includes Battery) is thor-
oughly inspected before leaving the factory and again
during packaging procedures. The manufacturer war-
rants each Charger unit including Battery(s) to be free
from defects of workmanship and materials for a pe-
riod of six months (180 days) from date of original pur-
chase. Warranty does not apply to battery and/or char-
ger being dropped onto hard surfaces, driven over, or
any other mistreated uses. Should any trouble develop
during this six month period, return the defective unit
freight prepaid, or by hand to the store from which it
was purchased, along with receipt. If inspection shows
the trouble to be the result of defective workmanship
or material, the manufacturer will replace the defective
unit at our option without charge.
THIS WARRANTY DOES NOT APPLY WHERE:
Repairs have been made or have been attempted by
others without manufactures approval; Replacement is
required because of improper use; The unit has been
abused or improperly maintained, and/or Alterations
made.
Robo Joiner™, Trademarked, Patented and other Patent
Pendings.
Please do not duplicate any of the written materials and
images by any means without written permission from
BN Products-USA, LLC. All rights reserved.

Page | 8
BNRJ-100 Robo Joiner Tech Manual2.indd
Table of contents
Other BN Products Power Tools manuals
