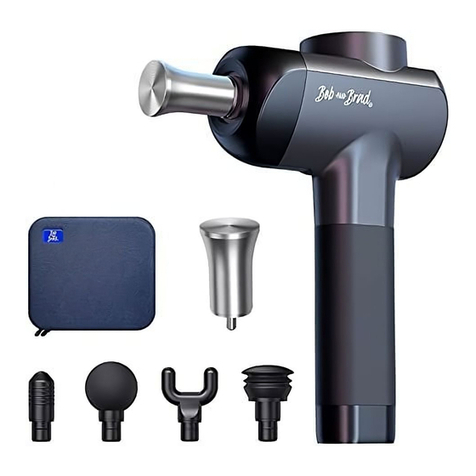
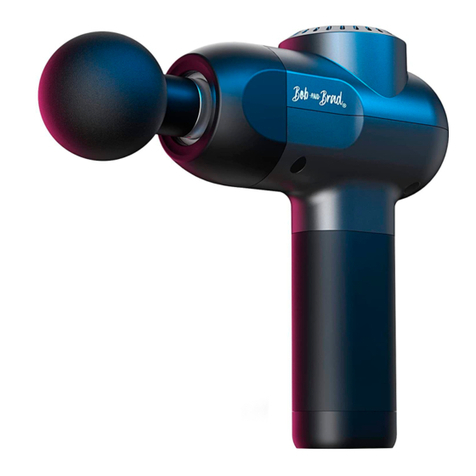
Bob and Brad QL/DMS.T2-C User manual

User Manual
QL/DMS.T2-C
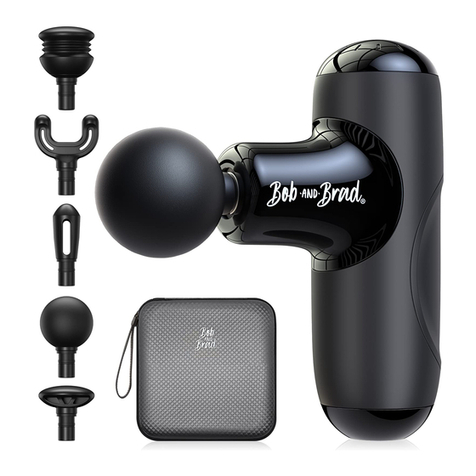
Massage Gun


1
Maintenance
Warnings and Safety Precautions
FCC Statement
FCC Statement NOTE:
The battery in this device is not designed to be removed or exchanged by
the user. If there is any problem with the power supply, please contact us
immediately.
DO NOT attempt to open or repair the device by taking it apart yourself.
Tampering with the mechanics of the device in any way will result in an
automatic voiding of the product's warranty.
Before connecting the device to the power supply, please ensure that the
supply voltage stated on the rating plate is compatible with the unit.
Please charge the new batteries fully before the first use.
DO NOT submerge the device in water or any other liquid.
DO NOT use the device for more than 30 minutes at a time. Wait 5 minutes
prior to using the device again, following a 30-minute session with the
device.
DO NOT apply directly or around your head or genitals.
DO NOT use the device to supplement or replace any medical treatment.
Please consult your physician before using the device if you are
experiencing unexplained pain, receiving medical treatment, or using
medical equipment.
This device complies with Part-15 of the FCC Rules. Operation is subject to
the following two conditions:
(1)
(2)
This equipment has been tested and found to comply with the limits for a
Class B digital device, pursuant to Part 15 of the FCC Rules. These limits are
designed to provide reasonable protection against harmful interference in
residential installation. This equipment generates, uses, and can radiate
radio frequency energy and, if not installed and used in accordance with
This device may not cause harmful interference.
This device must accept any interference received, including
interference that may cause undesired operation.

2
Disclaimer
the instructions. However, there is no guarantee that interference will not
occur in a particular installation. If this equipment does cause any harmful
interference to radio or television reception, which can be determined by
turning the equipment off and on, the user is encouraged to try to correct
the interference by one or more of the following measures:
Please contact your physician before using the Bob and Brad
QL/DMS.T2-C Massage Gun if you have any physical health concerns or
have any of the following conditions:
pregnancy, diabetes, epilepsy, migraines, herniated disks,
spondylolisthesis, recent joint replacements or IUDs. Please also contact
your physician before use if you have undergone recent surgery or have
any metal pins or plates in your body.
•
•
•
•
Reorient or relocate the receiving antenna.
Increase the separation between the equipment and the receiver.
Plug the equipment into the outlet on a circuit different from that to
which the receiver is connected.
Consult the dealer or an experienced radio/TV technician for help with
the supplied fastener. DO NOT hang the unit by the power cord.

3
Main Structure and Fittings
Removable and Interchangeable Massage Head
Gear Indicator
Power / Level Gear
Silicone Handle
Battery Indicator
*LED1 flashing indicates the battery is
below 10%
LED1 LED2 LED3 LED4
25% 50% 75% 100%
Charging Port
Bottom
Fork Head Ball Head
Bullet Head Air Cushion Head
Flat Head
Longer muscles such as
calves, forearms,
biceps, and ankle /
Achilles area.
Sore muscles and a
great starter
attachment for larger
muscle groups.
Trigger points found in
glutes,hips, traps,
shoulders, and other
complex muscle
groups.
Sensitive areas such as
wrists, ankles, knees,
traps, and around the
neck.
Larger surface areas
such as quads,
hamstrings, back, and
chest.

4
Operation Steps
*LED1 flashing indicates the battery is below 10%
25% 50% 75% 100%
LED1 LED2 LED3 LED4
Battery display
1. Connect the massage head to the device when the device is powered
off. Insert the massage head completely with pressure and ensure the
head is correctly positioned and the buckle is inserted into the slot.
(Note: The Fork Head should be positioned for installation. When the
buckle is inserted into the slot, the installation is in place. If the massage
head is not installed in place, there will be a risk of falling out while in
use.) To remove a massage head, simply turn off the device and pull out
the interchangeable massage head.
2.
3.
In the shutdown state, long press the " " button on the panel for 2
seconds to turn on and start the first speed. Promptly press the " "
button on the panel to switch speeds between levels 0-5. When the
device is running in levels 1-5, press the " " button and return to the
level 0 position for 2 seconds to stop the output. Long press the " "
button for 2 seconds while the device is in level 0 to shut down the
device.
Apply the required pressure at each preset vibration frequency to
massage target muscle groups.
•
•
•
After 10 minutes of operation, the device automatically turns off.
LED lights indicate the corresponding strike frequency level from
lowest (level 1) to highest (level 5).
When the device is on standby (level 0), it will automatically shut
down after 20 seconds of inactivity.

5
When the first indicator light (LED1) is on: 25% of the battery remains.
When the second indicator light (LED2) is on: 50% of the battery remains.
When the third indicator light (LED3) is on: 75% of the battery remains.
When the fourth indicator light (LED4) is on: 100% of the battery remains.
About Charging
When the first indicator light (LED1) flashes, the battery power is below
10% and requires recharging.
It is not recommended that the battery power be depleted below 25%.
•
•
•
•
•
•
Before the first use, please fully charge the device using the USB-A to
USB-C Cable that came with the massage gun. A full charge takes about
4.5 hours. The device will not take charge using a USB-C to USB-C Cable.
Connect the output end of the connection line to the DC charging port at
the bottom of the device. Then connect the input end of the connection
line to the mobile power source or mobile adapter for outlets (5V/2A; if
the charging current or voltage is less than 5V/2A, charging time will be
longer. Any regular phone adapter will be able to charge the massage
gun without a problem).
The battery icon on the handle flickers regularly. The digital display on
the handle shows the battery power and indicates when the battery is
being charged and the level of power remaining.
When the battery icon on the handle stops flickering and remains on, the
digital display shows that 100% of the battery is full.
The battery can be recharged at any level of battery power. When
charging, please ensure that the device is shut down. When the device is
in operation, the charging will be automatically protected.
The average working time with a full charge is about 2~5 hours.
However, this varies depending on vibration frequency and massage
pressure during use.
Note:
1.
2.

6
Technical Details:
Guarantee
This product comes with a one-year warranty from the date of purchase.
Warranty will be voided due to any of the following:
•
•
•
•
•
•
•
•
Product Name: Massage Gun
Product Model: QL/DMS.T2-C
Speed: 2000-3200 r/min
Rated Power: 25W
Dimensions: 5.4"x2.4"x7.6"
Rated Voltage: 7.3V
Battery Capacity: 4000mAh
Charging Time: 270 minutes
•
•
•
Damaged due to improper usage or storage.
Damaged by attempting to repair or disassemble the device.
Period of warranty exceeded.
Recharge fully using the USB-A to
USB-C Cable for 3-4 hours. It will
not take charge if you are using
USB-C to USB-C cable.
The battery lights should be
flickering when taking charge.
Press and hold the power button
for 3-5 seconds.
How to Fix Your Massage Gun if it Stops Working
1.
2.
Only works with
USB-A to USB-C
cable
Use with 5V 2A
charger output
USB-A USB-C
5V 2A

7
Utilize the Bob and Brad massage gun before, during, or after your workout for maximum benefits. This
massage gun can help accelerate muscle tissue responsiveness by increasing hydration, range of motion, and
function to tight muscles.
Indication Action Speed Pressure
Warm Up /
Activation
Activate and prime
muscles prior to
exercise.
Reduce risk of injury.
Level 3
Light to
Moderate
Mid Workout /
Myofascial
Mobility
Help muscle recovery
and reactivation. Level 4
Heavy
(especially
for large
muscle
groups)
Recovery
Relax muscles and aid
recovery.
Down-regulate or turn
off muscles.
Level 1
or 2
M
oderate to
Heavy
P
ain Modulation
Reduction in pain to
increase movement.
Level 1
Light
Body
Awareness
Improve movement or
mechanics of a joint.
Activation of a muscle.
Draw attention to a
muscle
All
Levels
Light to
Moderate
Indication
Warm UP
/Activation
Mid Workout /
Myofascial
Mobility
Recovery
Pain
Modulation
Body
Duration Muscle Position Movement
30 sec or
less
Relaxed. Move
along the muscle.
Quick, high
speed over
area.
8-12 sec Target specific
area. Localised
90 sec or
more
Move along the
muscle.
Slow
movement
along the
muscle
10 to 30
sec
Relaxed.
Localised spot.
Over painful
area.
10 to 20
sec
Relaxed or with
movement
Over specific
target area or
movement
over area.

8
ATTACHMENT:
PROTOCOL: Sweep from A to B on
each sice for 1 minute
BALL HEAD
DURATION: 2 minutes
2 Minutes
CHEST
ATTACHMENT:
PROTOCOL: Sweep from A to B on
each sice for 1 minute
BALL HEAD
DURATION: 2 minutes
2 Minutes
ABS

9
ATTACHMENT:
PROTOCOL: Sweep from A to B on each
side for 30 seconds
BALL HEAD
DURATION: 1 minute
1 Minute
UPPER TRAPS
ATTACHMENT: BALL HEAD
PROTOCOL: Sweep from A to B on
each side for 1 minute
STEP 1: Upper back
DURATION: 2 minutes
PROTOCOL: Sweep from A to B
on each side for 1 minute
STEP 2: Lower back
DURATION: 2 minutes
4 Minutes
UPPER BACK

10
ATTACHMENT:
PROTOCOL: Sweep from A to B on
each side for 1 minute
BALL HEAD
DURATION: 2 minutes
2 Minutes
SHOULDERS
ATTACHMENT:
PROTOCOL: Sweep from A to B on
each side for 1 minute
BALL HEAD
DURATION: 2 minutes
2 Minute
BICEPS

11
ATTACHMENT:
PROTOCOL: Sweep from A to B on each
side for 2 minutes
BALL HEAD
DURATION: 4 minutes
4 Minutes
TRICEPS
ATTACHMENT:
PROTOCOL: Sweep from A to B on
each sice for 1 minute
BALL HEAD
DURATION: 2 minutes
2 Minutes
FOREARM

12
ATTACHMENT:
PROTOCOL: Sweep from A to B on each
side for 30 seconds
BALL HEAD
DURATION: 1 minutes
1 Minute
HANDS
ATTACHMENT:
PROTOCOL: Sweep from A to B on
each sice for 1 minute
BALL HEAD
DURATION: 2 minutes
2 Minutes
HIP FLEXORS

13
ATTACHMENT:
PROTOCOL: Sweep from A to B on
each sice for 30 seconds
BALL HEAD
DURATION: 1 minute
1 Minute
SHINS
ATTACHMENT:
PROTOCOL: Sweep from A to B on
each side for 2 minutes
FLAT HEAD
DURATION: 4 minutes
4 Minutes
GLUTES

14
ATTACHMENT:
PROTOCOL: Sweep from A to B on
each sice for 1 minute
BALL HEAD
DURATION: 2 minutes
2 Minutes
HAMSTRINGS
ATTACHMENT:
PROTOCOL: Sweep from A to B on
each sice for 1 minute
BALL HEAD
DURATION: 2 minutes
2 Minutes
CALVES

15
ATTACHMENT:
PROTOCOL: Sweep from A to B on
each sice for 2 minutes
BALL HEAD
DURATION: 4 minutes
4 Minutes
FEET

16
Every Bob and Brad product is backed by a 1-year warranty and an
award-winning customer service team. If you are in any way dissatisfied
with a product you ordered, we’ll exchange it, replace it or refund your
money under the warranty. Simply email us the problem, and we’ll take
care of it.
A Dedicated Team Just For You
Answer questions about
your device and best
practices.
Product Knowledge
Place New Orders
Help you solve any
issues with your device.
Troubleshoot
Initiate Returns
Provide instructions for
replacements, returns
and refunds.
Help with placing
orders online and/or
authorized resellers.
Call: +1 (612) 567-3035 Mon-Fri 9:00AM-4:30PM (CST)
Email: [email protected]
FLIGE Products LLC
3001 Esperanza Crossing Austin,TX 78758
Get in Touch.
Table of contents
Other Bob and Brad Massager manuals
Bob and Brad
Bob and Brad 721 User manual

Bob and Brad
Bob and Brad QL/DMS.X6-C User manual

Bob and Brad
Bob and Brad K38S User manual

Bob and Brad
Bob and Brad QL/MINI.Q2-D User manual
Bob and Brad
Bob and Brad QL/MINI.Q2-D User manual

Bob and Brad
Bob and Brad QL/DMS.C2-D User manual

Bob and Brad
Bob and Brad M00042AE12-US User manual

Bob and Brad
Bob and Brad F00042AA00-US User manual