manuals.online logo
Brands
  1. Home
  2. •
  3. Brands
  4. •
  5. BOB
  6. •
  7. Accessories
  8. •
  9. BOB Sun Shield OMA12A User manual

BOB Sun Shield OMA12A User manual

Congratulations on your
purchase of the BOB Sun
Shield. It is designed to
protect your childs delicate
eyes and skin from heat,
glare, and ultraviolet
( VA/ VB) rays.
It also provides protection
from wind and flying
insects. Proper installation
and care will provide years
of reliable service.
Before attempting to use
or attach your new Sun
Shield, read and
understand these
instructions completely
to insure proper
assembly and operation.
If you are unclear on any
point, contact your dealer
or BOB before use.
Warnings
.
This product is designed
exclusively for use with
BOB Duallie and
Ironman Duallie
strollers. It is not
intended for use with
other strollers or
products.
.
The Sun Shield is not
designed to work with
optional Infant Car Seat
Adapter and car seat.
.
Never leave child
unattended.
.
The Sun Shield reduces
the exposure to sun and
heat but does not
eliminate it. Avoid
exposing your child to
prolonged sun and heat.
.
It is possible for small
insects to enter through
the small gaps between
the shield and the stroller.
.
When not in use, keep
out of reach of children.
.
When the Sun Shield is
used, the rear canopy
flap must be in correct
position as described
below. This will insure
proper air flow and
ventilation for your child.
INSTALLATION
INSTRUCTIONS:
1. Set stroller Parking
Brake (refer to Parking
Brake section of stroller
Owners Manual). Place
each sun canopy into
position to receive the Sun
Shield as shown in Fig.1.
2. Pull each canopy
drawstring in order to
gather extra material under
canopy. Cinch cord lock
against canopy to retract
and hold material, as
shown in Fig. 2.
3. Locate rear canopy flap
and fold forward. Attach
canopy flap Velcro on flap
to respective Velcro mate
on top outboard side of
each canopy as shown in
Fig. 3). Warning tag on rear
canopy flap also describes
and illustrates this critical
step.
ery Important: When the
Sun Shield is used, the
rear canopy flap must be
in correct position as
described below. This
will insure proper air flow
and ventilation for your
child.
4. Inspect opening at back
of stroller to make sure the
air passages between top
of seat back and canopy
are unobstructed (see Fig.
4). We recommend
reclining each seat back
slightly to optimize airflow
(refer to Reclining Seat
section of stroller Owners
Manual).
5. Place Sun Shield on the
stroller so the rear flap
drapes over back (between
the handlebars) and the
seam above the window is
aligned with the forward
Sun Canopy supports (see
Fig. 5).
6. Stretch the elastic cord
on each side under each
respective black shock
knob as shown in Fig. 6.
There is an opening mid
way up each side (with
silver reflective fabric on
each end) where the elastic
cord is exposed.
7. Attach each looped end
of the elastic cords
(800) 893-2447 www.bobgear.com email- info@bobgear.com Ph: (208) 375-5171
Fax: (208) 375-5172, BOB Trailers, Inc. 5475 Gage St. Boise, ID 83706
du
du
allie sun shield ins
tr
tr
uctions
uctions
Rear
Canopy
Flap
Fig. 1 Canopy Supports in position.
Aft Canopy
Supports fully
rotated back
Forward Canopy
Supports
Cinch each
Cord Lock
tight against
each Canopy
Fig. 2 Canopy Drawstring Adjustment
Fig. 3 Rear Canopy Flap in position.
Velcro
Fastened
Velcro
Fastened
Rear Canopy
Flap folded
over top
Fig. 4 Rear Vents unobstructed.
Air Passages
Fig. 5 Shield placed on Canopy
Align Sun
Shield
Seam with
Forward
Canopy
Supports
Elastic
Cord
End
Loop
Fig. 8 Elastic properly routed
under frame sides and ends.
Fig. 7 Front attachment:
Insert Stay ends into holes.
Ends of metal Stay
plastic Plugs with holes
Fig. 6 Elastic cord attachment
Silver
Reflective
Fabric
Elastic Loop
Around Black
Shock Knob
Elastic Cord
nder Black
Shock Knob
OMA29 P1
(protruding out sides of
back flap) around each
black shock knob on
respective side of stroller,
as shown in Fig. 6 (right
side shown). The cord
locks allow the loop to be
enlarged or reduced,
thereby adjusting the
tension.
8. Locate black plastic
end plugs at outboard
ends of stroller. Note hole
on top of each plug. Locate
metal wire stay at front of
Sun Shield (see Fig. 8).
Pull Sun Shield forward
and insert ends of metal
stay into holes on the black
plastic plugs.
9. Stretch each elastic
edge of the Sun Shield and
route under each
respective side of frame
tube as shown in Fig. 8.
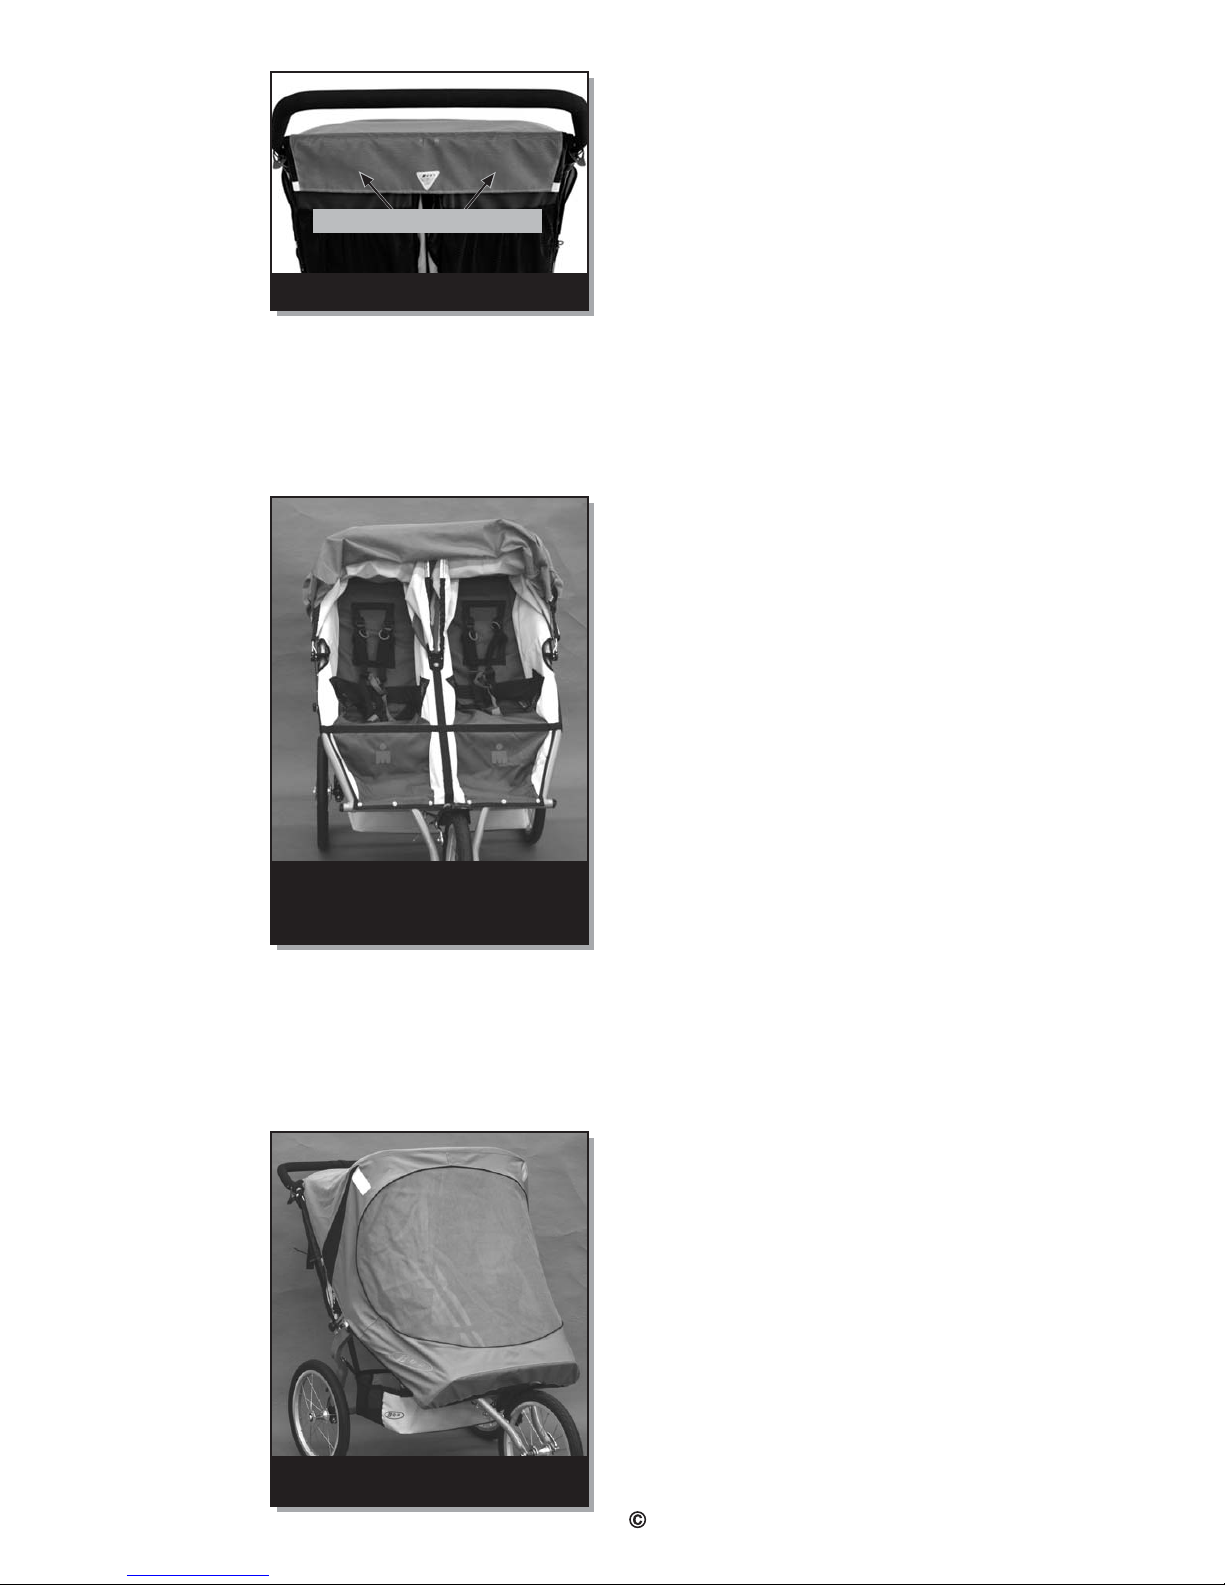
10. Center rear flap of Sun
Shield on stroller
handlebar. Inspect air
passages above stroller
seat. Make sure air
openings are not
obstructed (Fig. 9).
11. To place passenger(s)
in the stroller, pull the front
of the Sun Shield off the
front of stroller, then lift up,
stretch and roll over the
forward edge of stroller
canopy as shown in Fig.
10. This will temporarily
hold the Sun Shield out of
your way while you place
each child into the seat(s).
12. Once your child is
secured in the safety
harness (refer to your
stroller Owners Manual,
Seat Safety Harness
section), release the Sun
Shield from canopy and
re-secure wire stay into
holes on end plugs and
elastic under frame sides.
Fig. 11 shows a Duallie
Sun Shield correctly
installed.
CARE
INSTRUCTIONS:
Hand wash cold and hang
dry. Do not dry clean, iron,
or place in dryer.
LIMITED WARRANT :
BOB Trailers Inc. takes pride in
its workmanship and strives to
manufacture the best products
possible. Therefore, we warranty
the Duallie Sun Shield against
defects in material and
workmanship subject to the
conditions listed below. Since no
product is indestructible, it does
not cover defects attributable to
or resulting from normal wear,
abuse or alteration.
.
The Duallie Sun Shield is
warranted for one year from
the date of original purchase.
.
Warranty is only valid for the
original purchaser.
.
Proof of purchase is required
to exercise this warranty.
.
Labor and freight charges are
not included.
.
Normal wear, neglect, abuse,
accidents, improper use are
not covered by this warranty.
.
Warranty claims must be made
through an authorized dealer.
.
This warranty is limited to the
repair or replacement of the
defective part. BOB shall in no
event be responsible for
consequential or special
damages.
.
This limited warranty is the
only express or implied
warranty applicable to BOB.
Any implied warranties,
including warranties of
merchantability and fitness
shall be limited in scope and
duration in accordance with
this limited warranty.
Fig. 9 Rear Flap centered on bar.
Air Passages unobstructed
P2
BOB Trailers, Inc. 2006
Fig. 11 Sun Shield correctly
installed on Duallie
Fig. 10 Sun Shield shown placed
over Forward Canopy Supports
for loading & unloading.
OMA29

Other BOB Accessories manuals

BOB OMA23 User manual

BOB

BOB OMA23 User manual

BOB Weather Shield User manual

BOB

BOB Weather Shield User manual

BOB Revolution Weather Shield Weather Shield User manual

BOB

BOB Revolution Weather Shield Weather Shield User manual

BOB Sun Shield User manual

BOB

BOB Sun Shield User manual

BOB Weather Shield User manual

BOB

BOB Weather Shield User manual

BOB Handlebar Console None User manual

BOB

BOB Handlebar Console None User manual

BOB Weather Shield User manual

BOB

BOB Weather Shield User manual

Popular Accessories manuals by other brands

TriStar KB-7145 instruction manual

TriStar

TriStar KB-7145 instruction manual

ACU-RITE PRO+ 06014 instruction manual

ACU-RITE

ACU-RITE PRO+ 06014 instruction manual

Silvercrest SAPZ 1 A1 quick start guide

Silvercrest

Silvercrest SAPZ 1 A1 quick start guide

Oki B 4350N Reference

Oki

Oki B 4350N Reference

Avtech RMA-MOT2-SEN Installation note

Avtech

Avtech RMA-MOT2-SEN Installation note

High Adventure BEAMER 3 owner's manual

High Adventure

High Adventure BEAMER 3 owner's manual

Smart Life DH-JS01W Start guide

Smart Life

Smart Life DH-JS01W Start guide

Black Box AC130A Specifications

Black Box

Black Box AC130A Specifications

Glastender LP60 Operation manual

Glastender

Glastender LP60 Operation manual

Sensor Switch CM 9 WR instructions

Sensor Switch

Sensor Switch CM 9 WR instructions

Sound Sation ZEPHIRO 2000ST HAZE user manual

Sound Sation

Sound Sation ZEPHIRO 2000ST HAZE user manual

Pegasus Astro POCKET POWERBOX product manual

Pegasus Astro

Pegasus Astro POCKET POWERBOX product manual

Silvercrest STKK 17 A1 quick start guide

Silvercrest

Silvercrest STKK 17 A1 quick start guide

Inakustik Exzellenz user manual

Inakustik

Inakustik Exzellenz user manual

Avtech RMA-F008-SEN Installation note

Avtech

Avtech RMA-F008-SEN Installation note

Entrematic AXP2 installation manual

Entrematic

Entrematic AXP2 installation manual

MaxiCosi TS377 instructions

MaxiCosi

MaxiCosi TS377 instructions

Bitron Video AV2010/22A quick start guide

Bitron Video

Bitron Video AV2010/22A quick start guide

manuals.online logo
manuals.online logoBrands
  • About & Mission
  • Contact us
  • Privacy Policy
  • Terms and Conditions

Copyright 2025 Manuals.Online. All Rights Reserved.