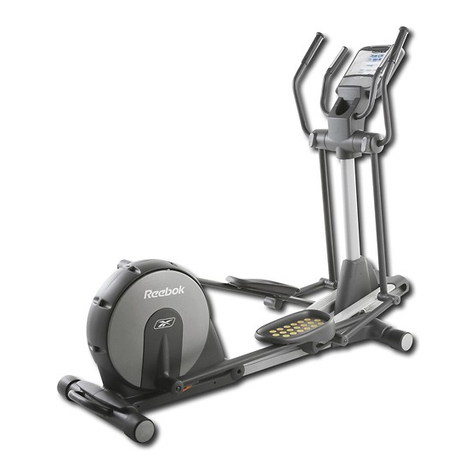
Bodyguard E330X Operator's manual

691035
Ellipticals
USER’S
INSTRUCTION MANUAL
Designed and engineered in Canada
Bodyguard, cardiovascular exercise
machine manufacturer since 1969
Part. no. 691035

ELLIPTICALS USER’S MANUAL
2
TABLE OF CONTENTS
THANK YOU FOR PURCHASING A BODYGUARD FITNESS ELLIPTICAL............................................................3!
1.!OPERATING YOUR E330X AND E390X...............................................................................................................5!
1.1.!GETTING TO KNOW THE COMPUTER DISPLAY MONITOR ........................................................................................ 5!
1.1.1.!E330X..................................................................................................................................................................... 5!
1.1.2.!E390X..................................................................................................................................................................... 6!
1.1.3.!Console and parameters glossary ......................................................................................................................... 7!
1.2.!GETTING TO KNOW THE BASIC FUNCTIONS OF THE ELLIPTICAL ........................................................................... 8!
1.2.1.!Pause during an exercise....................................................................................................................................... 8!
1.2.2.!Viewing exercise parameters ................................................................................................................................. 9!
1.2.3.!Auto Power OFF..................................................................................................................................................... 9!
2.!SETTING UP THE COMPUTER TO YOUR ENVIRONMENT..............................................................................10!
2.1.!ACCESS TO SETTINGS MENU ..................................................................................................................................... 10!
2.2.!LANGUAGE SELECTION ............................................................................................................................................... 10!
2.3.!DISTANCE UNIT ............................................................................................................................................................. 10!
2.4.!WEIGHT UNIT.................................................................................................................................................................10!
2.5.!WARM UP ....................................................................................................................................................................... 11!
2.6.!COOL DOWN .................................................................................................................................................................. 11!
2.7.!BEEPER .......................................................................................................................................................................... 11!
2.8.!USER IDENTIFICATION ................................................................................................................................................. 11!
2.9.!PAUSE TIME................................................................................................................................................................... 13!
2.10.!EDIT WELCOME MESSAGE .......................................................................................................................................... 13!
2.11.!SAVING OPTION ............................................................................................................................................................ 13!
2.12.!CLOCK OPTION ............................................................................................................................................................. 14!
2.13.!SEGMENT DURATION ................................................................................................................................................... 14!
2.14.!AUTO POWER OFF........................................................................................................................................................ 15!
3.!E330X AND E390X EXERCICE PROGRAMS .....................................................................................................16!
PROGRAM CATEGORIES GRID ............................................................................................................................................ 17!
3.1.!JUSTGOTM....................................................................................................................................................................... 18!
3.2.!BE ACTIVE...................................................................................................................................................................... 18!
3.3.!BODY SHAPE .................................................................................................................................................................22!
3.4.!HEART RATE.................................................................................................................................................................. 24!
3.5.!CUSTOM PROGRAM ..................................................................................................................................................... 26!
3.6.!OUTDOOR (E390X ONLY) ............................................................................................................................................. 27!
3.7.!SPORTS TRAINING (E390X ONLY)............................................................................................................................... 28!
3.8.!FITNESS TEST (E390X ONLY) ...................................................................................................................................... 31!
3.9.!ADD TIME (E390X ONLY) .............................................................................................................................................. 31!
4.!HEART RATE MONITORING ..............................................................................................................................32!
4.1.!CONTACT HEART RATE SYSTEM................................................................................................................................ 32!
4.2.!HEART RATE CHEST STRAP........................................................................................................................................ 32!
5.!COMPUTER DIAGNOSTICS ...............................................................................................................................34!
5.1.!NVRAM TEST .................................................................................................................................................................34!
5.2.!KEYPAD TEST................................................................................................................................................................ 34!
5.3.!DISPLAY TEST ............................................................................................................................................................... 35!
5.4.!HEART RATE TEST........................................................................................................................................................ 35!
5.5.!CLOCK TEST .................................................................................................................................................................. 35!
5.6.!SMART CARD TEST....................................................................................................................................................... 35!
5.7.!SOUND TEST .................................................................................................................................................................35!
5.8.!BRAKE TEST .................................................................................................................................................................. 35!
5.9.!SPEED SENSOR TEST .................................................................................................................................................. 36!
5.10.!STATISTICS.................................................................................................................................................................... 36!
6.!MAINTENANCE INFORMATION .........................................................................................................................37!
6.1.!GENERAL CARE ............................................................................................................................................................ 37!
6.2.!QUICK TROUBLESHOOTING CHECKLIST................................................................................................................... 37!
6.3.!ELECTROMAGNETIC INTERFERENCE REQUIREMENTS.......................................................................................... 38!
7.!VISUAL PARTS REFERENCE ............................................................................................................................39!

ELLIPTICALS USER’S MANUAL
3
THANK YOU FOR PURCHASING A BODYGUARD FITNESS ELLIPTICAL
Bodyguard Fitness is dedicated to designing and manufacturing the very best performing fitness equipment on the market.
This manual outlines the use, safety, and basic maintenance on your Bodyguard elliptical.
Whenever you require service for your fitness equipment, be prepared to provide your Bodyguard Fitness dealer with the
machine’s model number, serial number and date of purchase. The model number and serial numbers are located at the
front of the machine. Be sure to write the related information in the space provided.
Product Name
Model Number
Serial Number
Date Purchased
Dealer Store Name
Dealer Phone Number
Please fill out the warranty registration card and return it to Bodyguard Fitness within 30 days of date of purchase for
registration of your E330X or E390X warranty. Your returned warranty registration card is important in helping us keep you
up-to-date with all the latest E330X and E390X product additions. Also, the warranty card is used to establish the actual sale
date. Note that you can also quickly register online at bodyguardfitness.com.
NOTE – The warranty card is use to establish the beginning of the warranty of your elliptical. If you omit to send your
warranty card to Bodyguard Fitness, we will use the dealer purchase date to honor the warranty time. Please note that
equipment warranty is only valid to the original owner and is not transferable.
Important Safety Notice
READ THIS MANUAL THOROUGHLY BEFORE ATTEMPTING TO ASSEMBLE OR USE THIS EXERCISE EQUIPMENT
To ensure that you get the maximum benefit from the engineering that has gone into your machine, we recommend that you
read this manual carefully before attempting to assemble and use the E330X or E390X. Save these instructions and refer to
this manual if you are unfamiliar with the operation of the machine.
WARNING –Before using any of this equipment, read this owner’s manual carefully. Use of this equipment by people with
heart or other medical problems may result in serious injury. Consult your physician before using this equipment, and
continue to do so periodically as you continue to use this equipment. Cease exercising immediately if you feel dizzy, faint or
short of breath. Using this equipment improperly or in a manner other than that prescribed by these instructions may result in
serious injury.
AVERTISSEMENT –Il est recommandé de lire attentivement ce manuel d’instructions avant de commencer à utiliser cet
appareil. Son utilisation peut provoquer des blessures graves chez les personnes souffrant de troubles cardiaques ou
d’autres problèmes de santé. Il est recommandé de consulter un médecin avant d’utiliser cet appareil. Il est aussi
recommandé de consulter régulièrement un médecin si vous décidez de poursuivre l’entraînement. En cas de vertiges ou
d’étourdissements, de pertes de conscience ou d’essoufflements, cessez immédiatement l’exercice. L’utilisation inadéquate
de cet appareil ou une utilisation autre que celle indiquée dans le manuel d’instructions peut entraîner des blessures graves.

ELLIPTICALS USER’S MANUAL
4
For Your Personal Safety
•Do not place towels or clothing on any part of the elliptical.
•Do not place liquids near the electric power plug, ON/OFF switch, or any other part of the elliptical. Only the bottle
holder is allowed.
•Before disconnecting the power supply, exit the program screen, then turn the power OFF. To reduce any risk of
electrical shock, do not unplug the machine by pulling on the power cord. Gently remove the plug from the wall outlet.
•Do not operate the elliptical if the power cord is damaged or if the elliptical isn’t working correctly. If the power cord is
damaged, please contact your distributor or manufacturer to get it replaced.
•Keep the power cord away from all moving parts of the elliptical, such as the rear wheels and transport wheels.
•If you need to use an extension cord, make sure it is of the same gauge as the power cord (18 AWG). Keep all
extension cords clear of all moving parts of the elliptical.
•Place the machine in a way that the power can be easily disconnected by pulling the power cord.
•Do not let children near the elliptical when it is in operation or if they are unsupervised.
•The elliptical must never be used by more than one person at a time.
•Always face the computer when using the machine.
•Do not store the elliptical too close to furniture or other obstacles. Keep the sides and rear clear of any obstacles.
•Wear proper exercise clothing when using the elliptical.
Electrical Information
WARNING – To prevent the risk of fire or electric shock, do not expose this machine to rain or moisture. Refer servicing to
qualified Bodyguard Service personnel only. If you have any questions about the assembly, proper use or repair of your
elliptical, please contact your local Bodyguard Dealer. All necessary adjustments or repairs during the warranty period must
be made by an authorized Bodyguard dealer.
NOTE – Should you need more information, you can call our Customer Service Department at: 1-418-228-8934 or 1-888-
407-3784.
Know Your Heart Rate
To determine your recommended heart rate level, select the type of exercise program you wish to follow. Your maximum
heart rate (MHR) is calculated as follows: MHR = 220 –Age. See the graphic below.
Zone: 60-70% = Fat Burning Zone, 70-80% = Healthy Heart Zone, 80%-90% = Aerobic Zone.

ELLIPTICALS USER’S MANUAL
5
1. OPERATING YOUR E330X AND E390X
Each elliptical contains a L.E.D (light emitting diode) computer display monitor. The control functions, unique programs and
features have been designed with you in mind, to offer the best possible exercise by displaying important and clear
information regarding your exercise progress. Please familiarize yourself with the functions of the computer display monitor
and the programs. These features will help you have the best workout and exercise experience.
1.1. GETTING TO KNOW THE COMPUTER DISPLAY MONITOR
1.1.1. E330X
The E330X contains a 10.5 cm X 7.5 cm screen (4.25’’ X 2.75’’) L.E.D computer display monitor. The large, easy-to-read,
two-tone screen displays your exercise program’s braking resistance and target speed. Resistance and speed are
represented along the vertical axis. Each dot represents a higher level of resistance and speed. Each exercise program starts
from the left hand side of the screen and ends when it reaches the right hand side (dark green: braking resistance / light
green: target speed).
Refer to the glossary at the 1.1.3 section to find information about the E330X console: PROFILE DISPLAY, HEART RATE
WINDOW, SCROLLING SCREEN, DATA WINDOWS, MAIN KEYPAD, CLOCK, SELECT KEYS, X-CARDTM SLOT. In the
1.1.3 section, you will also find information about the parameters displayed by the E330X: CALORIES, CALORIES/HOUR,
ELAPSED TIME, LEVEL, DISTANCE, PACE, RPM, WATTS, SPEED, TARGET SPEED. HEART RATE.

ELLIPTICALS USER’S MANUAL
6
1.1.2. E390X
The E390X contains a 10.5 cm X 7.5 cm screen (4.25’’ X 2.75’’) L.E.D computer display monitor. The large, easy-to-read,
three colors screen displays your exercise program’s breaking resistance, speed and progression. Resistance and speed are
represented along the vertical axis. Each dot represents a higher level of resistance and speed. Each exercise program starts
from the left hand side of the screen and ends when it reaches the right hand side (red line: target speed / green line: braking
resistance / orange line: exercise progression).
Refer to the glossary at the 1.1.3 section to find information about the E390X console: PROFILE DISPLAY, HEART RATE
WINDOW, SCROLLING SCREEN, DATA WINDOWS, MAIN KEYPAD, CLOCK, SELECT KEYS, X-CARDTM SLOT,
PROGRAM EVOLUTION DISPLAY, NUMERIC KEYPAD, PROGRAM QUICKEYS, HEART RATE TRAINING ZONE. In the
1.1.3 section, you will also find information about the parameters displayed the E390X: CALORIES, CALORIES/HOUR,
ELAPSED TIME, LEVEL, DISTANCE, PACE, RPM, WATTS, SPEED, TARGET SPEED, BODY POSITION.

ELLIPTICALS USER’S MANUAL
7
1.1.3. Console and parameters glossary
CLOCK. Allows you to see the time of day when you’re exercising. To adjust the clock, see section 2.12.
HEART RATE TRAINING ZONE. The heart rate training zone lets you keep track of the zone you are currently exercising in:
Fat Burning, Healthy Heart or Aerobic. Go to Know your heart rate on page 4 for information.
HEART RATE WINDOW. The heart rate window lets you monitor your heart rate at a glance. The number displayed
represents beats per minute (BPM).
MAIN KEYPAD. The main keypad contains silicones keys. The buttons of the main keypad are: JustGoTM, STOP, PAUSE,
COOL DOWN, INCREASE/DECREASE LEVEL keys and INCREASE/DECREASE RESISTANCE keys.
JustGoTM.Allows you to simply push the button and start the workout. Press this key twice to start the JustGoTM
program or to save your setting.
STOP. Lets you cancel a program, exit the current program or get out of a menu.
PAUSE. Lets you temporarily stop the program and hold the current workout without erasing the parameters. Press
JustGoTM to resume.
INCREASE/DECREASE LEVEL. These keys allow you to modify the level of difficulty of the program. These keys
also allow you select programs and parameters before you exercise.
INCREASE/DECREASE SEGMENT. These keys allow you to modify a segment’s resistance during a program.
These keys also allow you select programs and parameters before you exercise.
NUMERIC KEYPAD. Use the numeric keypad to enter exercise duration and distance, your weight, or your target heart rate.
These keys also become quick keys.
QUICK RESISTANCE KEYS. Use these keys to change the resistance without having to
press the INCREASE/DECREASE SPEED keys. Simply select the speed with the numeric
keypad and press the JustGoTM key.
BACKSPACE. This key allows you to go back if you made a mistake when entering settings
into program.
ENTER. This key allows you to validate your settings in a program. You may also use
JustGoTM.
PROGRAM EVOLUTION DISPLAY. The goal display provides the percentage remaining to your goal determined in time,
calories or distance.
PROGRAM QUICKEYS. These keys allow you to quickly select the program of your choice. See the grid at chapter 3 for
more information about the programs.
SELECT KEYS. During an exercise, you can change the value displayed on the scrolling screen by pressing the adjacent
select key. If you wish to have values displayed in alternating mode, simply hold down the select key for three seconds. To
cancel the alternating mode, simply press the select key again.
SCROLLING SCREEN AND DATA WINDOWS. The scrolling screen and the data windows show a lot of parameters while
you’re exercising (SPEED, TIME, LEVEL, and more) and some final results after the exercise (CALORIES BURNED,
AVERAGE SPEED and more). The 16 digit alphanumeric scrolling screen allows you to easily enter your personal
information prior to starting your program.
PACE. Indicates how long it will take to complete one mile or one kilometer at your current speed. Pace per mile or
kilometer is shown in minutes and seconds.
CALORIES. Indicate your total caloric expenditure from the start of the exercise.
This parameter displays an evaluation of the real values of your exercise. The evaluations are based on formal
information, tests and are supported by specialists and physicians.

ELLIPTICALS USER’S MANUAL
8
CALORIES BURNED. Displays the approximate caloric expenditure for the entire exercise.
CALORIES/HOUR. Indicates your hourly caloric expenditure based on your weight input and actual exercise intensity
level.
DISTANCE. Displays the total distance in miles or kilometers from the start of the exercise, ranging from 0.00 to 99.99
miles or 0.00 to 99.9 km.
TOTAL DISTANCE. Displays the distance traveled for the entire exercise.
TOTAL EXERCICE TIME. Displays the length of the exercise in minutes and seconds.
HEART RATE. Displays your current heart rate as read by the optional chest strap or your hands on the contact heart
rate bar. The heart rate is calculated in beats per minute (BPM).
LEVEL. Indicates the level you are. It can vary from 1 to 15 for the programs with levels of difficulty and it can vary
from 1 to 20 for programs with resistance levels.
BODY POSITION. Appears during certain programs. Each body position should be held until the next position
appears.
RPM. Displays revolutions per minute.
ELAPSED TIME. Indicates the amount of time accumulated from the start of each program. The time will range from 0
to 99.99 minutes (during JustGoTM program) and 0 to 6 hours (during other programs).
SPEED. Indicates speed in miles per hour or kilometers per hour.
SPEED TARGET. When displayed, indicates the target speed in RPM. An arrow in the RPM display space indicates
whether you should increase or decrease your speed in order to maintain target speed.
WATTS. Indicates the level of efforts related to the RPM.
X-CARD™ SLOT. This user-friendly card provides access to the personal trainer program package of your choice so you can
enjoy programs adapted to your specific fitness level and needs. Contact your dealer or our service department at 1 888 407-
3784 for more information.
1.2. GETTING TO KNOW THE BASIC FUNCTIONS OF THE ELLIPTICAL
Before starting your workout, read the following functions of your elliptical and then, in section 2, get to know the various
console settings.
1.2.1. Pause during an exercise
You can stop temporarily during any exercise by pressing the PAUSE key. To pause during an exercise:
1. Press the PAUSE key whenever you feel the need to stop for a moment during an exercise. A message indicating the
pause time remaining will appear on the screen. The countdown will start as soon as you press the key.
2. If you wish to continue exercising, simply press the JustGoTM key to resume the program.
3. If you want to stop exercising completely, simply press the STOP key, and the exercise will be terminated. A summary
of your exercise parameters will be displayed, along with the SAVING option if this option is activated and available for
this program.
NOTE – If your pause time runs out, the exercise will be terminated automatically.

ELLIPTICALS USER’S MANUAL
9
1.2.2. Viewing exercise parameters
At the end of each exercise program, the computer will display three exercise parameters: TOTAL DISTANCE, CALORIES
BURNED and TOTAL EXERCISE TIME (find information about these parameters at the section 1.1.3).
The exercise parameters on the E330X will loop for 2 minutes or until you press the STOP key to return to the welcome
screen. If you do not wish to view the exercise parameters, press the STOP key to return to the welcome screen. On the
E390X, the exercise parameters will loop for 30 seconds (default value, if you want change it, refer to section 2.14).
1.2.3. Auto Power OFF
After a period of inactivity (15 minutes by default), your E330X will switch automatically to sleep mode (30 seconds for the
E390X). This option is ON by default, but you can turn it OFF. See section 2.14 for further instructions.

ELLIPTICALS USER’S MANUAL
10
2. SETTING UP THE COMPUTER TO YOUR ENVIRONMENT
The E330X and the E390X ellipticals offer unique features allowing users to personalize their settings. The computer can
also display a series of diagnostics and features.
The E330X and the E390X ellipticals allow you to select and adjust the following settings:
2.1 Access to settings menu 2.8 User identification
2.2 Language selection (French/English) 2.9 Pause duration
2.3 Distance unit (kilometers or miles) 2.10 Edit welcome message
2.4 Weight unit (kilograms or pounds) 2.11 Saving option
2.5 Warm up 2.12 Clock option
2.6 Cool down 2.13 Segment duration
2.7 Beeper (On/Off) 2.14 Auto power Off
2.1. ACCESS TO SETTINGS MENU
To view the above settings, enter the SETTINGS Menu as follows:
1. When the welcome screen displays, press the third select key (3) and hold it for 3 seconds.
2. Press the INCREASE/DECREASE LEVEL or INCREASE/DECREASE SEGMENT keys to choose the setting you wish to
adjust.
2.2. LANGUAGE SELECTION
All instructions can be displayed on the screen in two languages.
To select a language, enter the SETTINGS Menu (see section 2.1).
1. Select the LANGUAGE option and press the JustGoTM key to accept.
2. Select the language (Français or English) you wish to appear on the screen by pressing the INCREASE/DECREASE
LEVEL or INCREASE/DECREASE SEGMENT keys.
3. Press the JustGoTM key to accept. Messages will now appear in the selected language.
2.3. DISTANCE UNIT
Distance can be displayed in kilometers or miles.
To select a distance unit, enter the SETTINGS menu (see section 2.1).
1. Select the DISTANCE UNIT option and press the JustGoTM key to accept.
2. Select the distance unit you want to appear on the screen. Choose from KILOMETERS or MILES by pressing the
INCREASE/DECREASE LEVEL or INCREASE/DECREASE SEGMENT keys.
3. Press the JustGoTM key to accept. Distance values will now appear in the selected distance unit.
2.4. WEIGHT UNIT
Weight units can be displayed in pounds or kilograms.
To select a weight unit, enter the SETTINGS Menu (see section 2.1).
1. Select the WEIGHT UNIT option and press the JustGoTM key to accept.
2. Select the weight unit you want to appear on the screen. Choose between KILOGRAMS or POUNDS by pressing the
INCREASE/DECREASE LEVEL or INCREASE/DECREASE SEGMENT keys.
3. Press the JustGoTM key to accept. Weight units will now appear in the selected unit.

ELLIPTICALS USER’S MANUAL
11
2.5. WARM UP
Doing a warm up period before you exercise is strongly recommended for your safety. Your E330X or E390X elliptical has a
feature that allows you to warm up on your elliptical. If the WARM UP option is activated, a warm up screen will be displayed
prior to each exercise. Note that the warm up screen is not available for the JustGoTM program, which requires you to
establish your own warm up period.
The warm up period is adjustable for 1 to 10 minutes and is divided into 3 parts. The default duration of the warm up is 3
minutes. Time, distance, and calories are not recorded during the warm up period. Note that the program RACE can not be
saved because of the randomly nature of this program.
Part 1: 40% of the intensity of the first segment of the exercise.
Part 2: 60% of the intensity of the first segment of the exercise.
Part 3: 80% of the intensity of the first segment of the exercise.
To activate or deactivate THE WARM UP function, enter the SETTINGS Menu (see section 2.1).
1. Select the WARM UP option and press the JustGoTM key to accept.
2. Select ON or OFF. Press the INCREASE/DECREASE LEVEL or INCREASE/DECREASE SEGMENT keys to make your
selection, then press the JustGoTM key to accept.
3. To adjust the duration of the warm up, use the INCREASE/DECREASE LEVEL or INCREASE/DECREASE SEGMENT
keys or the numeric keypad (E390X). The WARM UP option is now either ON or OFF, depending on your selection.
NOTE – If you wish to cancel the warm up before the designated period has expired, simply press the STOP key.
2.6. COOL DOWN
Doing a cool down period after you exercise is strongly recommended for your safety. Your E330X or E390X elliptical has a
feature that allows you to cool down on your elliptical. If the COOL DOWN option is activated, a cool down screen will be
displayed prior to each exercise. Note that the cool down screen is not available for the JustGoTM program, which requires
you to establish your own cool down period.
The cool down period is adjustable for 1 to 10 minutes and has only one part. The default duration of the cool down period is
3 minutes. TIME, DISTANCE and CALORIES are not recorded during the cool down period.
To activate or deactivate the COOL DOWN function, enter the SETTINGS Menu (see section 2.1).
1. Select the COOL DOWN option and press the JustGoTM key to accept.
2. Select ON or OFF. Press the INCREASE/DECREASE LEVEL or INCREASE/DECREASE SEGMENT keys to make your
selection, then press the JustGoTM to accept.
3. To adjust the duration of the cool down, use the INCREASE/DECREASE LEVEL or INCREASE/DECREASE SEGMENT
keys or the numeric keypad (E390X). The WARM UP option is now either ON or OFF, depending on your selection.
NOTE – If you wish to cancel the cool down before the designated period has expired, simply press the STOP key.
2.7. BEEPER
The beeper can be turned ON or OFF.
To turn the beeper ON or OFF, enter the SETTINGS Menu (see section 2.1).
1. Select the BEEPER option and press the JustGoTM key to accept.
2. Select ON or OFF. Press the INCREASE/DECREASE LEVEL or INCREASE/DECREASE SEGMENT keys to make your
selection. Press the JustGoTM to accept. The BEEPER function is now ON or OFF, depending on your selection.
2.8. USER IDENTIFICATION
When activated, the USER ID feature lets the elliptical recognize individuals and automatically enter their weight and
whatever other information is required. The E330X model will recognize up to 2 users and the E390X model will recognize up
to 4 users. Using this feature means not having to enter your weight because the program automatically does it for you. Your
age is also automatically entered into the heart rate monitor programs in order to calculate your maximum heart rate.

ELLIPTICALS USER’S MANUAL
12
The USER ID feature lets you access to the following options:
2.8.1. Activate User
To activate a user, enter the SETTINGS Menu (see section 2.1).
1. Select the USER ID option and press the JustGoTM key to accept.
2. Select the ACTIVATE USER ID option and press the JustGoTM key to accept.
3. Press the INCREASE/DECREASE LEVEL or INCREASE/DECREASE SEGMENT keys to select ON or OFF, and press
the JustGoTM key to accept.
Now that the USER ID feature has been activated, you will be prompted to select a user at the start of each program.
2.8.2. Create User
To create a user, enter the SETTINGS Menu (see section 2.1).
1. Select the USER ID option and press the JustGoTM key to accept.
2. Select CREATE USER and press the JustGoTM key to accept. The cursor will go to the last available space in the
memory. If the memory is full, go to the DELETE USER option.
3. A total of 5 (five) alphanumeric characters can be used to create a User ID name. Use the INCREASE/DECREASE
LEVEL keys to navigate between spaces 1 to 5. The arrow pointing up moves left and the arrow pointing down moves
right.
Use the INCREASE/DECREASE SEGMENT keys to select any character from A to Z or any number from 0 to 9 to fill in
spaces 1 to 5. If you wish to leave a space between characters, simply use the blank character between 9 and A. Once a
space is filled, move to the next. Repeat this procedure to create a user ID name. If you wish to change a character
before all five spaces have been accepted, press the INCREASE/DECREASE LEVEL keys to backspace. Press the
JustGoTM key to validate the user ID name.
4. You can enter your age by pressing the INCREASE/DECREASE LEVEL or INCREASE/DECREASE SEGMENT keys or
using the numeric keypad (E390X). Press JustGoTM to accept.
5. Enter your weight (20 to 158 kg or 50 to 350 pounds) by pressing the INCREASE/DECREASE LEVEL keys to increase
or decrease by increments of 10 and/or the INCREASE/DECREASE SEGMENT keys to increase or decrease by
increments of 1, or use the numeric keypad (E390X). Press the JustGoTM key to validate the weight.
6. Press the STOP key to return to the USER ID Menu.
2.8.3. Edit User
To edit a user, enter the SETTINGS Menu (see section 2.1).
1. Select the USER ID option and press the JustGoTM key to accept.
2. Select EDIT USER and press JustGoTM.
3. Select the user you want to edit using the INCREASE/DECREASE LEVEL or INCREASE/DECREASE SEGMENT keys
and press JustGoTM to accept.
4. Enter the name using the INCREASE/DECREASE LEVEL and INCREASE/DECREASE SEGMENT keys (see CREATE
USER) and press the JustGoTM key to validate.
5. Now enter your age using the INCREASE/DECREASE LEVEL or INCREASE/DECREASE SEGMENT keys or the
numeric keypad (E390X) and press the JustGoTM key to accept.
6. Enter your weight (20 to 158 kg or 50 to 350 pounds) by pressing the INCREASE/DECREASE LEVEL keys to increase
or decrease by increments of 10 and/or the INCREASE/DECREASE SEGMENT keys to increase or decrease by
increments of 1, or using the numeric keypad (E390X). Press the JustGoTM key to validate the weight.
7. Press the STOP key to return to the main USER ID menu.
2.8.4. Delete User
To delete a user, select DELETE USER in the SETTINGS Menu and press the JustGoTM key to accept.Select the user you
wish to delete. Press the JustGoTM key to delete the user. If you do not wish to delete this user, press STOP.
NOTE – If you delete a user, all parameters saved under that user ID name will be lost.

ELLIPTICALS USER’S MANUAL
13
2.8.5. View Statistics
To view the statistics of a user, select STATISTICS in the SETTINGS Menu and press the JustGoTM key to accept. Select
the user ID for which you want to view the statistics. The following parameters are accumulated when the USER ID feature is
activated: TOTAL DISTANCE, TOTAL CALORIES and TOTAL TIME (find information about these parameters at the section
1.1.3).
2.8.6. Resert Statistics
To reset the statistics of a user, select the RESET STATISTICS option in the SETTINGS Menu and press the JustGoTM key
to accept. Select the user whose statistics you wish to reset and press the JustGoTM key to validate.
2.9. PAUSE TIME
To change the pause time, enter the SETTINGS Menu (see section 2.1).
1. Select the PAUSE TIME option and press the JustGoTM key to accept.
2. You can set the pause time for 1 to 30 minutes. To make your selection, press the INCREASE/DECREASE LEVEL or
INCREASE/DECREASE SEGMENT keys or the numeric keypad (E390X). Press JustGoTM to accept the change.
2.10. EDIT WELCOME MESSAGE
The EDIT WELCOME MESSAGEfeature lets you change the welcome message that appears on your screen. There is a
standard welcome message entered into your elliptical. This message is displayed in the language you have selected (see
section 2.2). If you wish to edit this message, it will only be changed in your selected language.
To edit the welcome message, enter the SETTINGS Menu (see section 2.1).
1. Select the EDIT WELCOME MESSAGE option and press the JustGoTM key to accept. To edit the welcome message,
enter the letters and special characters one at a time. A total of 100 alphanumeric characters can be entered.
2. Select ON or OFF to activate or desactivate the message and press the JustGoTM key to validate.
3. If you select ON, use the INCREASE/DECREASE LEVEL keys to move from one space to the next. The arrow pointing
up moves left and the arrow pointing down moves right.
4. Use the INCREASE or DECREASE SEGMENT keys to select any character from A to Z or any number from 0 to 9 to fill
in spaces 1 to 100. If you wish to leave a space between characters, simply use the blank character between 9 and A.
Once a space is filled, move to the next. Repeat this procedure to create a welcome message. If you wish to change a
character before all spaces have been accepted, move the cursor forwards or backwards using the
INCREASE/DECREASE LEVEL keys.
5. Once you have completed your message, press the JustGoTM key to save. Your new welcome message will now be
displayed on the welcome screen.
2.11. SAVING OPTION
To edit the SAVING option at the end of a program, enter the SETTINGS Menu (see section 2.1).
1. Select SAVING option and press the JustGoTM key to accept.
2. Use the INCREASE/DECREASE LEVEL or INCREASE/DECREASE SEGMENT keys to turn the option ON or OFF.
3. Press the JustGoTM key to accept.

ELLIPTICALS USER’S MANUAL
14
2.12. CLOCK OPTION
To edit the various clock settings, enter the SETTINGS Menu (see section 2.1).
2.12.1. Clock On/Off
1. Select the CLOCK option and press the JustGoTM key to accept.
2. To turn the clock ON or OFF, select CLOCK ON/OFF and press the JustGoTM key to validate.
3. Select ON or OFF using the INCREASE/DECREASE LEVEL or INCREASE/DECREASE SEGMENT keys. Press
JustGoTM to validate.
2.12.2. Clock Mode
1. Select the CLOCK option and press the JustGoTM key to accept.
2. To select a 12 or 24 hours display, select CLOCK MODE and press the JustGoTM key to accept.
3. Select the 24 hours or 12 hours mode using the INCREASE/DECREASE LEVEL or INCREASE/DECREASE SEGMENT
keys. Press JustGoTM to validate your choice.
2.12.3. Time Set
1. Select the CLOCK option and press the JustGoTM key to accept.
2. Select TIME SET and press the JustGoTM key to accept.
3. Enter the time using the INCREASE/DECREASE LEVEL or INCREASE/DECREASE SEGMENT keys or the numeric
keypad (E390X). Choose between 0 and 23 (24 hr mode) or 1 and 12 (12 hr mode), and press JustGoTM.
4. Choose between AM and PM if you are in 12 hours mode. Press the JustGoTM key to accept.
5. Enter the minutes using the INCREASE/DECREASE LEVEL or INCREASE/DECREASE SEGMENT keys or the numeric
keypad (E390X). Press the JustGoTM keys to validate.
2.12.4. Set Date
1. Select the CLOCK option and press the JustGoTM key to accept.
2. Select SET DATE and press the JustGoTM key to accept.
3. Enter the year using the INCREASE/DECREASE LEVEL or INCREASE/DECREASE SEGMENT keys or the numeric
keypad (E390X). You can select a year between 2000 and 2099. Press the JustGoTM key to validate.
4. Enter the month using the INCREASE/DECREASE LEVEL or INCREASE/DECREASE SEGMENT keys or the numeric
keypad (E390X). You can choose between 1 and 12. Press the JustGoTM key to validate.
5. Enter the day using the INCREASE/DECREASE LEVEL or INCREASE/DECREASE SEGMENT keys or the numeric
keypad (E390X). You can choose between 1 and 31. Press the JustGoTM key to validate.
2.13. SEGMENT DURATION
A segment is a round dot on screen.
To modify the segment duration, enter the SETTINGS Menu (see section 2.1). Segment duration can be set according to
time, distance, or calories.
1. Select SEGMENT DURATION and press JustGoTM to accept.
2. Choose between SEGMENT DURATION (time), CALORIES PER SEGMENT (calories) or SEGMENT LENGTH
(distance), using the INCREASE/DECREASE LEVEL or INCREASE/DECREASE SEGMENT keys. Press JustGoTM.
3. According to your previous selection, use the INCREASE/DECREASE LEVEL or INCREASE/DECREASE SEGMENT
keys to modify the segments as follows:
•Time: 15 seconds, 30 seconds, 1 minute, 2 minutes, or 4 minutes
•Distance: 0.01, 0.02, 0.05, 0.1 or 0.5 (miles or kilometers)
•Calories: 1, 2, 5, 10, or 15 calories
4. Press the JustGoTM key to accept.
NOTE – Press STOP to exit and return to the main menu.

ELLIPTICALS USER’S MANUAL
15
2.14. AUTO POWER OFF
This feature will extinguish the display to save energy. Just press any key to have the display to light up again.
To modify the STANDBY feature, enter the SETTINGS Menu (see section 2.1).
1. Select the AUTO POWER OFF option and press the JustGoTM key to accept.
2. Use INCREASE/DECREASE SEGMENT keys to select ON or OFF press the JustGoTM key to accept.
3. If your model is an E330X, select from 1 to 30 minutes time before power shuts off using the INCREASE/DECREASE
LEVEL or INCREASE/DECREASE SEGMENT keys. If your model is an E390X, select from 5 to 30 seconds time before
power shuts off using the INCREASE/DECREASE LEVEL or INCREASE/DECREASE SEGMENT keys or the numeric
keypad.
4. Press the JustGoTM key to accept.
NOTE – For the E390X, the default value for the AUTO POWER OFF option is 30 seconds. If you turn it OFF, the elliptical
display will turn off, soon as you stop pedaling.

ELLIPTICALS USER’S MANUAL
16
3. E330X AND E390X EXERCICE PROGRAMS
The E330X and E390X exercise programs are designed to help you achieve your personal fitness goals and stay in shape.
They have been organized by category so you can quickly and easily find the best program(s) for your needs. Each exercise
program includes a series of preset resistance profiles that offer you a variety of training programs and intensity levels.
In addition, to help you meet your muscular and cardiovascular goals and keep you motivated, some Bodyguard programs
feature target speed profiles. The console interacts with you by means of scrolling messages on target speed and an arrow
that tells you when you need to go faster or slower to reach your target speed.
EXAMPLE: Target speed display
To take your training even further, the elliptical boasts innovative programs to help you work more efficiently and target
specific parts of your body. Once again, the interactive console indicates the various body positions for you to take
throughout your exercise session.
EXAMPLE: Position display
The E330X and E390X display console is there to guide you throughout your workout to help you meet your personal goals.
Some programs combine speed profiles and body positions. You can always stop the scrolling messages and return to your
regular exercise settings by pressing one of the three select keys.
Programs features between 15 and 20 levels of difficulty, depending on the type of program. By increasing or decreasing the
level difficulty, you may change the target speed and/or resistance profiles. When a program has levels of difficulty, the
selected level is displayed in the middle of the scrolling screen if the LEVEL (red LED light) is selected.
NOTE – TARGET SPEED profiles are suggested speeds only. They are in no way mandatory, but simply a guide to help you
get the most out of your workout. If a speed seems too high or low, we suggest that you find a rhythm that suits you.
NOTE – The BODY POSITION feature is there to help you get the most out of your workout. The suggested positions are in
no way mandatory. If a position is uncomfortable, do not take it.
NOTE – When you change the resistance of a segment in programs with 15 levels of difficulties, the resistance value will
appear in the middle of the scrolling screen before being replaced by the selected Profile Level if the level (red LED light) is
selected.
Arrow indicating
you have to
pedal faster
Arrow
indicating you
have to pedal
slower

ELLIPTICALS USER’S MANUAL
17
PROGRAM CATEGORIES GRID
Programs categories
Programs
E330X
E390X
3.1 JustGoTM
JustGoTM
3.2 Be Active
Manual
Race
Beat my Race
Smart ReverseTM
Hill
Intervals
Distance Goal
Target Watts
3.3 Body Shape
Goodbye Fat
Ultimate Thighs
Total Body Strength
Buns of Steel
Calorie Goal
3.4 Heart Rate
Target HRT
Heart Rate Intervals
Optimal Weight Loss
3.5 Custom
Memory
Learn Programs
Statistics
3.6 Outdoors
Mountain Run
Mountain Walk
Hill
3.7 Sports Training
Golf
Football
Soccer
Hockey
Olympic Track
3.8 Fitness Test
Fitness Test
3.9 Add Time
Add Time

ELLIPTICALS USER’S MANUAL
18
3.1. JUSTGOTM
The JustGoTM program allows you to start a manual exercise at the touch of one key. Since JustGoTM is the initial
program, it will always be displayed first for easy selection. You have total control of the pedal resistance at all
times during this program. Use the JustGoTM program if you like to exercise at fairly constant speeds with little or
no changes during the exercise.
During the workout, the selected resistance will stay the same until you change it. A flashing dot indicates your progress. You
may adjust the resistance at any time by pressing the INCREASE/DECREASE LEVEL keys if you want to change the entire
profile or the INCREASE/DECREASE SEGMENT keys if you just want to change a segment. The JustGoTM program does
not allow you to predetermine your exercise time or enter your weight. As a result, the calories burned and calories per hour
values are based on a user weighing 68 kg (150 lbs.). The calories burned values in the JustGoTM program should be used
only as a reference. Moreover, the exercise time is automatically set its maximum of 99 minutes.
There are two ways to access the JustGoTM program.To start the JustGoTM program:
1. Press the JustGoTM key twice and begin exercising
OR
2. Press the INCREASE/DECREASE SEGMENT keys to select the JustGoTM program. Once you have chosen your
program, press the JustGoTM key to confirm and begin exercising.
3.2. BE ACTIVE
This category is designed to let you get in shape and/or maintain your fitness level. It offers a good variety of
interesting programs to help you reach your goals.
A. MANUAL
The Manual program allows you to create your own exercise as you progress in the program. Resistance is completely
controlled by the user. At a glance, the JustGoTM and Manual programs seem very similar since the user controls
resistance throughout the exercise. The difference is that the Manual program lets you enter your weight and the exercise
duration for a more accurate caloric display.
During the workout, the selected resistance will stay the same until you change it. A flashing dot indicates your progress. You
may change the resistance at any time by pressing the INCREASE/DECREASE LEVEL keys if you want to change the
entire profile or the INCREASE/DECREASE SEGMENT keys if you just want to change a segment. This program has 20
levels of difficulty and up to 20 different resistance values per segment.
To select the Manual program:
1. Press the INCREASE/DECREASE SEGMENT keys to select the BE ACTIVE category. Once your selection is made,
press JustGoTM key. If you have an E390X, press the BE ACTIVE key to access your category directly.
2. Choose the Manual program using the INCREASE/DECREASE SEGMENT keys or by repeatedly pressing the BE
ACTIVE key (E390X). Once you have selected the program, press JustGoTM key to access the program.
3. Enter your weight by pressing the INCREASE/DECREASE LEVEL keys to adjust the value in increments of +/–10 and
the INCREASE/DECREASE SEGMENT keys to adjust the value by increments of +/–1 or by using the numeric keypad
(E390X). Once you have entered your weight, press the JustGoTM key to validate.
4. Enter your workout time by pressing the INCREASE/DECREASE SEGMENT keys to enter the time in minutes and the
INCREASE/DECREASE LEVEL keys to enter the time in hours or by using the numeric keypad (E390X). Once you have
entered your time, press the JustGoTM key to validate and begin exercising.
B. RACE
The Race program gives you the chance to compete against three other challengers. The multi-lane display in the last 14
segments lets you see your position and your competitors. When you first start the program, your own progress will be visible
and you will be able to see your competitors. This lets you exercise at your own pace while letting you put yourself to the test
in the final 14 segments. Throughout the program, the resistance levels will stay the same until you change them. A flashing
dot indicates your position throughout the exercise. A solid colored dot represents your opponents.

ELLIPTICALS USER’S MANUAL
19
You may adjust the resistance at any time during the exercise by pressing the INCREASE/DECREASE SEGMENT or
INCREASE/DECREASE LEVEL keys if you want to change a segment. This program does not have a profile level. You
cannot save your race. The minimum distance is 0.2 miles.
NOTE – The flashing solid dot, green on the E330X or yellow on the E390X, in the top lane of the display is you. The lanes
are light green.
To select the Race program:
1. Press the INCREASE/DECREASE SEGMENT keys to select the BE ACTIVE category. Once your selection is made,
press JustGoTM key. If you have an E390X, press the BE ACTIVE key to access your category directly.
2. Choose the Race program using the INCREASE/DECREASE SEGMENT keys or by repeatedly pressing the BE
ACTIVE key (E390X). Once you have selected the program, press JustGoTM key to access the program.
3. Enter your weight by pressing the INCREASE/DECREASE LEVEL keys to adjust the value in increments of +/–10 and
the INCREASE/DECREASE SEGMENT keys to adjust the value by increments of +/–1 or by using the numeric keypad
(E390X). Once you have entered your weight, press the JustGoTM key to validate.
4. Enter the desired distance by pressing the INCREASE/DECREASE SEGMENT keys for increments of +/– 10 or by using
the numeric keypad (E390X). Once you have entered the distance, press JustGoTM key to validate.
5. Select the number of challengers by pressing the INCREASE/DECREASE SEGMENT keys. Once you have entered the
number of challengers, press JustGoTM key to validate and begin exercising.
C. BEAT MY RACE (E390X ONLY)
The Beat My Race program gives you the chance to compete against yourself, challenging yourself to beat the time of your
previous race. This program requires a user ID, which you may create in the setting menu (see section 2.8). After entering
your user ID, start the program. It will recall the distance you did on your previous race. You also have the possibility of
changing the distance. On the display, the green dots are the track that you are following. A flashing orange dot indicates
your position throughout the exercise.
Throughout the program, the resistance levels will stay the same until you change them. You may adjust the resistance at
any time during the exercise by pressing the INCREASE/DECREASE SEGMENT or INCREASE/DECREASE LEVEL keys if
you want to change a segment. This program does not have a profile level. This program has 20 different resistance values
per segment. Your race is saved automatically and the statistics are stored under your User ID (see section 2.8 for more
details). The minimum distance is 0.2 miles.
NOTE – If you change the automatically proposed distance before beginning your exercise, you will erase all the settings
from your previous race and you will not be racing against your last performance. The statistics of your current race will be
saved under your user ID for future use.
To select the Beat My Race program:
1. Press the INCREASE/DECREASE SEGMENT keys to select the BE ACTIVE category. Once your selection is made,
press JustGoTM key. You can also press the BE ACTIVE key to access your category directly.
2. Choose the Beat My Race program using the INCREASE/DECREASE SEGMENT keys or by repeatedly pressing the
BE ACTIVE key (E390X). Once you have selected the program, press JustGoTM key to access the program.
3. Select your user ID by pressing the INCREASE/DECREASE SEGMENT keys. Once you have selected your user ID,
press the JustGoTM key to validate.
4. Validate your previous distance by simply pressing JustGoTM key to access the program. To change it, press the
INCREASE/DECREASE SEGMENT keys to enter the new distance and press the JustGoTM key to validate and begin
exercising.
D. SMART REVERSEMC (E390X ONLY)
Like any other program, the Smart ReverseTM program guides you and helps you train in both directions, forward and
backward. The interactive console indicates when you have to pedal forward and backward. During a change of direction
(ex: forward to backward), the console asks you to SLOW DOWN while the resistance on the pedal increases to help you
slow down. You will also see the downward arrow to indicate that you should reduce your speed (see beginning of Chapter
3). Then PEDAL BACKWARD appears on the display. If you pedal the wrong way, PEDAL FORWARD or PEDAL
BACKWARD appears on the display to help you remember the direction you were supposed to take. If you are pedaling in
the right direction, “MAINTAIN THIS DIRECTION” appears and a sound is heard.

ELLIPTICALS USER’S MANUAL
20
This program features 15 levels of difficulties and up to 20 different resistance values per segment. A flashing orange dot
indicates your position throughout the exercise. You may change the resistance of a segment or the level of difficulty at any
time by pressing respectively the INCREASE/DECREASE SEGMENT keys and/or the INCREASE/DECREASE LEVEL
keys if you find the exercise too hard or too easy.
NOTE – When you pedal backward, the speed value on the display is negative. Ex: -40 RPM.
To select the Smart ReverseTM program:
1. Press the INCREASE/DECREASE SEGMENT keys to select the BE ACTIVE category. Once your selection is made,
press JustGoTM key.You can also press the BE ACTIVE key to access your category directly.
2. Select the Smart ReverseTM program with the INCREASE/DECREASE SEGMENT keys or by repeatedly pressing the
BE ACTIVE key (E390X).Once you have selected the program, press JustGoTM key to access the program.
3. Enter your weight by pressing the INCREASE/DECREASE LEVEL keys to adjust the value in increments of +/–10 and
the INCREASE/DECREASE SEGMENT keys to adjust the value by increments of +/–1 or by using the numeric keypad
(E390X). Once you have entered your weight, press the JustGoTM key to validate.
4. Enter your workout time (minimum time: 14 minutes). Press the INCREASE/DECREASE SEGMENT keys to enter the
time in minutes, the INCREASE/DECREASE LEVEL key to enter the time in hours, or use the numeric keypad
(E390X). Once you have entered your time, press the JustGoTM key to validate.
5. Enter your level. Press the INCREASE/DECREASE LEVEL key to choose your level, or use the numeric keypad
(E390X). Once you have entered your level, press the JustGoTM key to validate and begin exercising.
E. HILL (E330X ONLY)
The Hill program simulates climbing a hill using a preset hill profile. This program features 15 profiles and up to 20 different
resistance values per segment. You may adjust the resistance at any time by pressing the INCREASE/DECREASE LEVEL
keys if you want to change the entire profile or the INCREASE/DECREASE SEGMENT keys if you just want to change a
segment. A flashing dot indicates your position throughout the program.
NOTE – If you have an E390X, this program will only be available in the OUTDOORS category.
To select the Hill program:
1. Press the INCREASE/DECREASE SEGMENT keys to select the BE ACTIVE category. Once your selection is made,
press JustGoTM key to accept.
2. Select the Hill program by pressing the INCREASE/DECREASE SEGMENT keys. Once you have selected the program,
press JustGoTM key to access the program.
3. Enter your weight by pressing the INCREASE/DECREASE LEVEL keys to adjust the value in increments of +/–10 and
the INCREASE/DECREASE SEGMENT keys to adjust the value by increments of +/–1. Once you have entered your
weight, press the JustGoTM key to validate.
4. Enter your workout time by pressing the INCREASE/DECREASE SEGMENT keys to enter the time in minutes and the
INCREASE/DECREASE LEVEL keys to enter the time in hours. Once you have entered your time, press the
JustGoTM key to validate.
5. Choose your level using the INCREASE/DECREASE LEVEL keys. Press JustGoTM key to validate your selection and
begin exercising.
F. INTERVALS (1:1 –1:2 –2:1)
The Intervals program will help increase your cardiovascular strength while allowing you to alternate between high intensity
work and low intensity rest periods. You may create your exercise profile by selecting the best work and rest resistance value
for you. You may change your work or rest intensity at any time. A flashing dot indicates your position throughout the
exercise. You may change the resistance of a segment at any time by pressing the INCREASE/DECREASE SEGMENT keys
because this program features a range of 20 resistances value per segment. You may change the level of difficulty of your
profile at any time using the INCREASE/DECREASE LEVEL keys.
NOTE – A 1:2 interval means 1 rest segment for 2 segments of work. Work resistance can’t be lower than rest resistance.
To select the Intervals program:
1. Press the INCREASE/DECREASE SEGMENT keys to select the BE ACTIVE category. Once your selection is made,
press JustGoTM key.If you have an E390X, press the BE ACTIVE key to access your category directly.
2. Choose the Intervals program using the INCREASE/DECREASE SEGMENT keys or by repeatedly pressing the BE
ACTIVE key (E390X). Once you have selected the program, press the JustGoTM key to access the program.
This manual suits for next models
1
Table of contents
Other Bodyguard Elliptical Trainer manuals
Popular Elliptical Trainer manuals by other brands

Sportplus
Sportplus SP-ET-9910-W-iE Instructions for use

NordicTrack
NordicTrack Cx 1000 Elliptical Manuel de l'utilisateur

NordicTrack
NordicTrack E11.0 Elliptical Bedienungsanleitung

Domyos
Domyos VE 230 Assembly & instruction manual

Keys Fitness
Keys Fitness Stepper Machine 840EL Specification sheet

BLADEZ
BLADEZ SX4i owner's manual