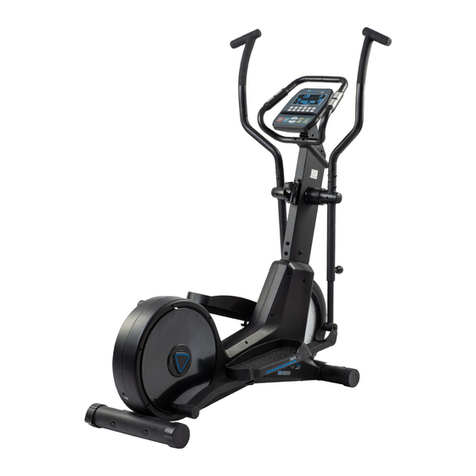
Bodyworx E2000 User manual

E2000
Power Stride 21 Elliptical

PRODUCT SAFETY ---------------------------------------------------------- 1
PART DRAWING & CONTENTS ------------------------------------------ 2
HARDWARE & TOOLS ------------------------------------------------------ 3
ASSEMBLY --------------------------------------------------------------------- 4
ADJUSTMENTS --------------------------------------------------------------- 16
TROUBLE SHOOTING & MAINTENANCE ----------------------------- 17
COMPUTER -------------------------------------------------------------------- 18
WARM UP ----------------------------------------------------------------------- 28
PART LIST ---------------------------------------------------------------------- 29
EXPLODED VIEW ------------------------------------------------------------ #
WARRANTY -------------------------------------------------------------------- 31

Basic precautions should always be followed, including the following safety instructions when
using this equipment: Read all instructions before using this equipment.
1. Read all the instructions in this manual and do warm up exercises before using this equipment.
2. Before exercise, in order to avoid injuring your muscles, warm-up exercise for every muscle group is
highly recommended. Please refer to the Warm Up pages for pre and post workout.
3. Please make sure all components are not damaged and in w3+orking order before use. This
equipment should be placed on a flat surface while in use. Using a mat or other material on the
ground is recommended.
4. Please wear proper clothes and shoes when using this equipment; do not wear clothes that might
catch in any part of the equipment.
5. Do not attempt any maintenance or adjustments other than those described in this manual. Should
any problems arise, discontinue use and consult an Authorized Service Representative.
6. Be careful when stepping on or leaving the pedals. Always hold the handlebars first and make sure the
pedal at your side is at its lowest position. Step on the pedal, and stride over the main frame then step
on the other pedal. When using, please hold onto the handlebars. To ensure the pedals run smoothly
push or pull on the handlebars first, then follow with leg motion. When stepping off the machine, make
sure one pedal is at its lowest position and step out of there before stepping out of the pedal at the
highest position.
7. Do not use the equipment outdoors.
8. This equipment is for household use only.
9. Only one person should be on the equipment while in use.
10. Keep children and pets away from the product while in use. This machine is designed for adults only.
This product requires a minimum of 6 feet of space for safe operation.
11. If you feel any chest pains, nausea, dizziness, or short of breath, you should stop exercising
immediately and consult your physician before continuing.
12. The maximum weight capacity for this product is 330 lbs / 150 kgs.
WARNING:Before beginning any exercise program consult your physician.
This is especially important for the persons who are over 35 years old or who have pre-
existing health problems. Read all instructions before using any fitness equipment.
CAUTION:Read all instructions carefully before operating this product. Retain
this Owner’s Manual for future reference.
1

BOX A
A01
Main Frame 1Set
A12
U Shape Guide Rail 1Set
A16
Hand Pulse
Handlebar 1Set
A09
Front Stabilizer 1Set
D02
Computer 1PC
C12
Pedal 2PC
C27
Bottle Holder 1PC
Water Bottle 1PC
BOX B
A13/A14
Handrail 2Set
A03/A05/A07
A04/A06/A08
Left/Right
Foot Bar Set 2Set
A02
Upright Post 1Set
D15
AC Adaptor 1PC
C17/C18
Handrail Arm (A/B)
Decorative Cover 2Set
C07/C08
Upright Post
Decorative Cover 1Set
C11
Nut Cap 8PC
C28
Foot Pedal Plug 8PC
Lubricant 1PC
2
F02

B20(1) 2PC
Bolt 3/8”x64mm
B33(2) 4PC
Washer 5/16”x20x2.0t
B47(3) 2PC
Bolt M8x25mm
B32(4) 4PC
Hexagon Head Bolt M8x16mm
B21(5) 4PC
Washer 3/8”x20x2.0t
B30(6) 4PC
Curve Washer M8x20x1.5t
B28(7) 4PC
Bolt M8x50mm
B40(8) 10PC
Screw M5x16mm
B44(9) 4PC
Bolt M8x20mm
B22(13) 2PC
Dome Nut 3/8”
B29(14) 4PC
Nut M8
(10) 1PC
Hex Tool with Phillips Screwdriver (13mm/14mm)
(11) 1PC
Allen Key (M5)
(12) 1PC
Allen Key (M4)
B23 8PC
Bolt M6x15mm
3

(B20) Bolt 3/8"x64mm 2 PCS
(B21) Washer 3/8"x20x2.0T 4 PCS
(B22) Dome Nut 3/8" 2 PCS
1. Front Stabilizer Installation
Place a Block of Wood to raise the Main Frame (A01) for easier to install the Front Stabilizer (A09).
Position the Front Stabilizer in front of Main Frame and align bolt holes.
Attach the Front Stabilizer onto the front curve of the Main Frame with Two 3/8"x64mm Bolts (B20),
Four 3/8"x20x2.0T Washers (B21), and Two 3/8" Dome Nuts (B22).
[Tighten bolts with the Hex Tool with Phillips Screwdriver provided.]
Hardware:
4
Hex Tool with Phillips
Screwdriver (14mm)
Tool:

2. U Shape Guide Rail Installation
Place a Block of Wood to raise the Main Frame (A01) for easier to install the U Shape Guide Rail
(A12).
Remove Eight M8x20x1.5T Curve Washers (B30) and Eight M8x16mm Bolts (B41) from the Main
Frame.
Attach the U Shape Guide Rail onto the tubes of the Main Frame with Eight M8x20x1.5T Curve
Washers and Eight M8x16mm Bolts which were removed.
[Remove/Tighten bolts with the M5Allen Key provided.]
5
Allen Key (M5)
Tool:

(B44) Bolt M8x20mm 4 PCS
3. Adjusting the Adjustable Leveler
Turn the Adjustable Levelers (C05, C29) on the Front Stabilizer (A09), Main Frame (A01) and U
Shape Guide Rail (A12) as needed to level the elliptical trainer.
The elliptical trainer has to be leveled to prevent from wobble or shaking during the exercise.
4. Upright Post Installation
Pull out the Sensor Wire II (D05) from the Main Frame. Connect the Sensor Wire II (D05) from the
Main Frame to the Sensor Wire I (D04) from the Upright Post (A02) and carefully tuck the Wires into
the Main Frame before attaching the Upright Post onto the Main Frame.
Attach the Upright Post onto the Main Frame with Four M8x20mm Bolts (B44).
[Tighten bolts with the Hex Tool with Phillips Screwdriver provided.]
NOTE: Please do not fully tighten M8x20mm bolts (B44) with the Hex Tool with Phillips Screwdriver
provided, only hand tighten.
Hardware:
6
Hex Tool with Phillips
Screwdriver (13mm)
Tool:
D04
D05

5. Lubricating the Horizontal Axle and Crank Axle
Put some lubricants onto both horizontal axles of the Upright Post (A02) and both axles of the Crank
(A11).
Remark: Gently apply lubricant evenly on Upright Post (A02). Brush tool is recommended.
7
Lubricant
1 PC
Lubricating the horizontal axle
and crank axle.

(B32) Hexagon Head Bolt
M8x16mm
1 PC
(B33) Washer
5/16"x20x2.0T
1 PC
(B32) Hexagon Head Bolt
M8x16mm
1 PC
(B33) Washer
5/16"x20x2.0T
1 PC
6. Left and Right Foot Bar Sets Installation
Remove One M8x92 Bolt (B24), One M8 Nylon Nut (B29), and 5/16”x20x2.0T Washer (B33) from the
Right Foot Bar (A06). Then pull Right Handrail Arm (A04) and Right Foot Bar apart from each other.
Remove the tapes from both joints of the Right Handrail Arm (A04) and Right Rotate Bar (A08).
Insert the Right Handrail Arm (A04) all the way onto the horizontal axle of the Upright Post (A02) and
secure the Right HandrailArm in position with One M8x16mm Hexagon Head Bolt (B32) and One
5/16"x20x2.0T Washer (B33).
[Tighten bolt with the Hex Tool with Phillips Screwdriver provided.]
Insert the Right Rotate Bar (A08) onto the Crank (A11) axle. The Rotate Bar Wheel (C20) has to be
placed on the Aluminum Plate (F01) of U Shape Guide Rail (A12).
Secure the Right Rotate Bar (A08) in position with One M8x16mm Hexagon Head Bolt (B32) and
One 5/16"x20x2.0T Washer (B33).
[Tighten bolt with the Hex Tool with Phillips Screwdriver provided.]
8
A04
B29
B33
A06
B24
A08
CAUTION: Make sure the bush
(C21) was perfectly in position
before securing the bolts.

Hex Tool with Phillips
Screwdriver (13mm)
Pull the Right Foot Bar (A06) up onto the Right HandrailArm (A04) and align bolt holes.
Then attach the Right Foot Bar onto the Right HandrailArm with One M8x92 Bolt (B24), One M8
Nylon Nut (B29), and 5/16”x20x2.0T Washer (B33) which were removed.
Install Four M8 Nut Caps (C11) onto One M8 Nylon Nut (B29) and Three M8x16mm Hexagon Head
Bolts (B32).
Repeat above steps to install Left Handrail Arm (A03) onto the horizontal axle of the Upright Post
(A02) and Left Rotate Bar (A07) onto the Crank (A11) axle.
NOTE: Please fully tighten M8x20mm bolts (B44) with the Hex Tool with Phillips Screwdriver
provided in Step 4.
9
A04
B29
B33
A06
B24
A08
Tool:
INCORRECT
CORRECT

(B23) Bolt M6x15mm
8 PCS
7. Foot Pedal & Foot Pedal Plug Installation
Assemble the Foot Pedal (C12) onto the Left Foot Bar (A05) with aligning the bolt holes, then secure
it with Four M6x15 Bolts (B23).
Slide the Foot Pedal Plug (C28) into the bolt holes of the Foot Pedal (C12).
Use the same step to assemble the Right Foot Bar (A06).
[Tighten bolt with the Hex Tool with Phillips Screwdriver provided.]
Hardware:
Hex Tool with Phillips
Screwdriver (13mm)
Tool:
10

(B28) Bolt M8x50mm
4 PCS
(B29) Nylon Nut M8x7.7T
4 PCS
(B30) Curve Washer
M8x20x1.5T
4 PCS
8. Left and Right Handrails Installation
Connect the plugs of Left/Right Quick Key (D11L/D11R) to the Extension Wire II (D14), and connect
the plugs of Big Hand Pulse (D12) to the Extension Wire I (D13).
Attach the Left/Right Handrails (A13, A14) into the Left/Right Handrail Arms (A03, A04) with Four
M8x50mm Bolts (B28), Four M8 Nylon Nuts (B29), and Four M8x20x1.5T Curve Washers (B30).
[Tighten nylon nuts with the Hex Tool with Phillips Screwdriver provided.]
Hardware:
11
Hex Tool with Phillips
Screwdriver (13mm)
Tool:

(B47) Bolt M8x25mm
2 PCS
9. Hand Pulse Handlebar Installation
Insert the all cables from the Upright Post (A02) into the hole on the Hand Pulse Handlebar (A16) and
then pull it out from the Hand Pulse Handlebar.
Attach the Hand Pulse Handlebar onto the Upright Post with Two M8x25mm Bolts (B47).
[Tighten bolts with the M5 Allen Key provided.]
Hardware:
12
Allen Key (M5)
Tool:

(B40) Screw M5x16mm
2 PCS
10. Left/Right Upright Post Decorative Covers Installation
Attach the Left/Right Upright Post Decorative Covers (C07, C08) onto the Upright Post (A02) with
Two M5x16mm Screws (B40).
[Tighten screws with the Hex Tool with Phillips Screwdriver provided.]
Hardware:
13
Hex Tool with Phillips Screwdriver
Tool:

(B40) Screw M5x16mm
8 PCS
11. Handrail Arm Decorative Covers-A/B Installation
Attach the Handrail Arm Decorative Cover-A (C18) and Handrail Arm Decorative Cover-B (C17) onto
the Left Handrail Arm (A03) with Four M5x16mm Screws (B40).
Attach the Handrail Arm Decorative Cover-A and Handrail Arm Decorative Cover-B onto the Right
Handrail Arm (A04) with Four M5x16mm Screws.
[Tighten screws with the Hex Tool with Phillips Screwdriver provided.]
Hardware:
14
Hex Tool with Phillips Screwdriver
Tool:

12. Bottle Holder Installation
Remove Two M5x12mm Bolts (B45) from the Upright Post (A02).
Attach the Bottle Holder (C27) onto the Upright Post with Two M5x12mm Bolts which were removed.
[Remove/Tighten bolts with the M4 Allen Key provided.]
13. Computer Installation
Remove Four M5x15mm Screws (B17) from the back of the Computer (D02).
Connect the all cables to the wires that come from the Computer and then attach the Computer onto
the top end of the Hand Pulse Handlebar (A16) with Four M5x15mm Bolts which were removed.
[Remove/Tighten bolts with the Hex Tool with Phillips Screwdriver provided.]
15
Allen Key (M4)
Tool:
Hex Tool with Phillips Screwdriver
Tool:

Adjusting the Adjustable Leveler
Turn the adjustable leveler on the Front Stabilizer, Main Frame, or U Shape Guide Rail as
needed to level the elliptical trainer.
The elliptical trainer has to be leveled to prevent from wobble or shaking during the
exercise.
16
Adjustable Leveler

TROUBLE SHOOTING
Computer not working correctly
Check to make sure the computer cable is connected securely.
The elliptical trainer wobbles when in use
Turn the adjustable leveler on the Front Stabilizer, Main Frame, or U Shape Guide Rail
as needed to level the elliptical trainer.
Squeaking noise when in use
The bolts may be loose on the elliptical trainer, please inspect the bolts and tighten
the loose ones.
No inconsistent, or erratic heart rate reading
Always hold on to the handlebar grip sensors with two hands instead of just one.
Try to maintain moderate pressure while holding onto the hand pulse sensors.
Make sure that the wire connections for the hand pulse sensors are secure.
MAINTENANCE
Cleaning
The elliptical trainer can be cleaned with a soft cloth and mild detergent. Do not
use abrasives or solvents on plastic parts. Please wipe your perspiration off the
elliptical trainer after each use. Be careful not get excessive moisture on the
computer display panel as this might cause an electrical hazard or electronics to fail.
Please keep the elliptical trainer, specially, the computer console, out of direct
sunlight to prevent screen damage. Please inspect all assembly bolts and pedals
on the machine for proper tightness every week.
Storage
Store the elliptical trainer in a clean and dry environment away from children.
17

Owner’s Manual of Monitor
The monitor is designed for programmable magnetic bike and elliptical trainer and introduced with
the following categories:
-Key Functions
-Displays
-Operating Ranges
-Notice Before Exercise
-Operation Instructions
Key Functions
There are total 6 keys including UP, DOWN, ENTER, START/STOP, RECOVERY AND MODE.
A. UP (▲): Selects or increases the values of PROGRAMS, GENDER, TIME, HEIGHT,
WEIGHT, WATT, CALORIES, TARGET HEART RATE, AGE, DISTANCE and 10 columns.
B. DOWN (▼): Selects or decreases the values of PROGRAMS, GENDER, TIME, HEIGHT,
WEIGHT, WATT, CALORIES, TARGET HEART RATE, AGE, DISTANCE and 10 columns.
C.ENTER: Chooses the functions from PROGRAMS, GENDER, TIME, HEIGHT, WEIGHT,
WATT, CALORIES, TARGET HEART RATE, AGE, DISTANCE and 10 columns. The chosen
function shall flash. Please note that not all the functions can be selected in every program
according to the types of each program.
D.START/STOP: Starts or stops the program chosen. And, keep pressing for 2 seconds to
resets the monitor.
E. RECOVERY: Starts the function of PULSE RECOVERY.
F. MODE: Changes the display of the values between CALORIES or WATT, DISTANCE or ODO
and SPEED or RPM.
18
Table of contents
Other Bodyworx Elliptical Trainer manuals

Bodyworx
Bodyworx E1000 User manual

Bodyworx
Bodyworx EX900 User manual
Bodyworx
Bodyworx A732 User manual

Bodyworx
Bodyworx EX8 User manual
Bodyworx
Bodyworx MULTI GYM LX7000HG User manual

Bodyworx
Bodyworx E816 User manual

Bodyworx
Bodyworx E708 Premier Series Operation and maintenance manual
Bodyworx
Bodyworx E400 User manual
Bodyworx
Bodyworx EXT600 User manual

Bodyworx
Bodyworx Avalanche User manual


