manuals.online logo
Brands
  1. Home
  2. •
  3. Brands
  4. •
  5. Bodyworx
  6. •
  7. Exercise Bike
  8. •
  9. Bodyworx A260M User manual

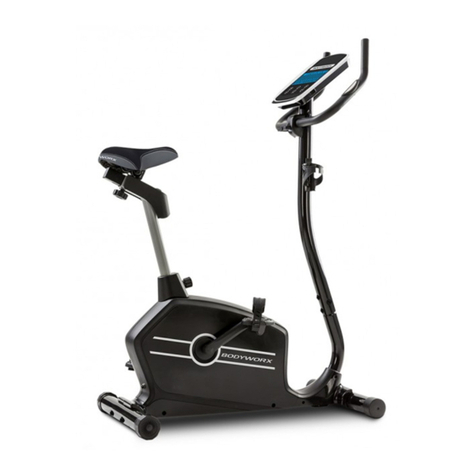
Bodyworx A260M User manual

Model No: A260M
Magnetic Bike

Table of Contents
2 Check list
3 Hardware packing
4 Assembly
9 Diagram
10 Part list
12 Monitor Instruction
14 Training Pulse Rate
15 Training instruction
16 Safety precautions

Check-list
34
PRE-ASSEMBLY CHECK LIST
PART DESCRIPTION Q’TY PART DESCRIPTION Q’TY
19 Main frame 1 32 Seat post 1
22/24/4 Front stabilizer w/2 Transportation
wheel caps, 2 screws 1set 35/23/
4
Rear stabilizer w/2 caps, 2
screws 1set
2/5/3/1 Handlebar w/2 hand pulse, 2 foam
grip, 2 plug 1set 66/67 Bottle w/bottle bracket 1 set
15/9/11 Front post w/middle section
sensor wire, tension control 1set
7/65 Monitor w/extension sensor
wire, extension hand pulse
wire, extension power supply
cableɼ2 screws
1set
29/39/38/3
7/40/41
Seat w/ seat slide tube,2 square
plugs ,3 washers, 3 nuts 1set 30/31
Front post decoration
cover/seat post decoration
cover
1set
20 Seat extension sleeve 1 Inner box 1
HARDWARE PACKING LIST
PART DESCRIPTION Q’TY SKETCH
42
27
Spring washer 4
28 4
Curve washer
21 Carriage bolt M8*75mm 4
44R Pedal (right) 1
44L Pedal (left) 1
43R/43L Pedal strap (R/L) 1p
14 Wing nut 1
12 Sleeve 13*8.4*12.5mm 1
13 Clamp decoration cover 1
42
Machine screw M4*15L
34 Quick release 1
36 Knob 1
68 1
Allen wrench
69 Universal wrench 1
NOTE:
1. Above described parts are all the parts you need to assemble this machine. Before you
start to assemble, please check the hardware packing to make sure they are included.
2. All the other parts described on page 11-12 (parts list) are pre-assembled at the factory.
4
Cap nut M8

ASSEMBLY INSTRUCTION
GENERAL
REMOVE ALL THE PART OF YOUR CYCLE FROM THE CARTON AND PLACE THEM ON THE FLOOR
CAREFULLY.
ASSEMBLING YOUR CYCLE IS SIMPLE.
FOLLOW THESE INSTRUCTIONS CAREFULLY AND IT SHOULD TAKE YOU AROUND 15-20 MINUTES.
STEP 1. ATTACH REAR STABILIZER
• Attach the rear stabilizer (35) with 2 end caps (23) to rear curve bracket of main frame
(19), using 2 carriage bolts (21), 2 curve washers (28), 2 spring washers (27) and 2 cap
nuts (42). Note: you can use the caps (23) to level the bike.
ATTACH FRONT STABILIZER
• Attach the front stabilizer (22) with 2 transportation wheel caps (24) to front curve bracket
of main frame (19), using 2 carriage bolts (21), 2 curve washers (28), 2 spring washers
(27) and 2 cap nuts (42).
NOTE: Make sure you fasten the bolts securely to avoid shaking and discomfort when
cycling.

STEP 2. ATTACH THE SEAT AND SEAT POST
• Attach seat (29) with seat slide bracket (39), 4 washers (40) and 4 nylon locknuts (41) to
seat post (32) with knob (36).
NOTE: The seat slide tube (39) and seat (29) are pre-assembled by manufacturer.
• Attach seat post decoration cover (31) to seat post mounting tube of main frame (19).
• Pull seat extend sleeve (20) to seat post (32).Note the bigger section of seat extension
sleeve (20) orient bottom.
• Insert seat post (32) to seat post mounting tube of main frame (19) and secure in position
with the seat post quick release (34).
• After assembling seat post, please move the hole of seat post to adjust the desired
position.
HOW TO ADJUST SEAT POST QUICK RELEASE
) TIGHTEN QUICK RELEASE
(1) Insert quick release (34) through the hole of seat post mounting tube (19) and seat post
(32).
(2) Tighten quick release (34) with clockwise direction.
Please note quick release is with +/- mark on surface.
B) LOOSEN QUICK RELEASE
(1) Loosen quick release (34) with counterclockwise direction.
(2) Pull pin of quick release (34) and move hole of seat post (32).
(3) After that, put pin of quick release back and tighten with clockwise direction.
NOTE: Make sure you fasten the bolts securely to avoid shaking and discomfort when
cycling.
34

A
STEP 3. ATTACH THE FRONT POST
• Remove the pre-assembled 4 allen head bolts (26), 4 spring washers (27) and 4 curve
washers (28) from front post mounting tube of main frame (19).
• Slide front post decoration cover (30) to front post (15). Note the slide direction is from
end of front post.
• Connect the plug of sensor wire (25) to the socket of middle section sensor wire (9).
• Connect the lead head of middle section tension cable (11) to the C bracket of
lower section tension cable (55) . (See figure A1-A4)
• Put front post (15) to front post mounting tube of main frame (19) and secure, using 4
allen head bolts (26), 4 spring washers (27) and 4 curve washers (28).
• Slide front post decoration cover (30) onto end of front post (15).
NOTE: Be careful to avoid pinching the wires and cables.

STEP 4. ATTACH THE HANDLEBAR
• Attach the middle thread of handlebar (2)
with 2 hand pulses (5) to welded metal
clamp of upper front post (15) and secure
with welded metal clamp, spacer (12),
deco
clamp ration cover (13) and wing knob
(14).
NOTE: Be careful to avoid pinching the wires
and cables.
STEP 5. ATTACH THE MONITOR
• Remove the pre-assembled 2 screws (65)
from the monitor (7).
• Connect the plug of middle section sensor
wire (9) to the socket of top section sensor
wire which comes from monitor (7).
• Attach the monitor (7) to top monitor
bracket of front post (15) with 2 screws
(65).
• Insert the plug of hand pulse wire (6) to the
jack of the monitor (7).
STEP 5. ATTACH THE BOTTLE BRACKET
AND BOTTLE
• Attach the bottle bracket (66) to front post
(15) with 2 screws (4).
• Insert bottle (67) into the bottle bracket
(66) .

STEP 6. ATTACH THE PEDAL
• Attach the pedal straps (43R/43L) to the pedals (44R/44L).
NOTE: The end with 4 adjustable holes must be set outwards.
• The pedals (44R/44L) and crank arms (45) are marked with “R” & “L”(right and left).
Connect each pedal (44R / 44L) to the matching crank arm (45).
NOTE: The right pedal “R” should be threaded on clockwise. The left pedal “L” should
be threaded on counter-clockwise.

DIAGRAM
16
34
27
33
26
39
38
37
4
49
1
PART NO. DESCRIPTION Q’TY
1 Plug 2
2 Handlebar 1
3 Foam grip 2
4 Screw M4*15mm 8
5 Hand Pulse 2
6 Hand pulse wire 1
7 Monitor w/sensor wire 1
8 Cable protector 1
9 Middle section sensor wire 1
10 Round head screw M5*50mm 1
11 Tension control 1
12 Space13*8.4*12.5mm 1
13 Clamp decoration cover 1
14 Wing nut 1
15 Front post 1
16 Machine screw M5*25mm 4
17R/L Chain cover (Right / Left) 1P
18 Machine screw M5*15mm 5
19 Main frame 1
20 Seat extension sleeve 1
21 Carriage bolt M8*75mm 4
22 Front stabilizer 1
23 Rear stabilizer cap 2
24 Transportation wheel cap 2
25 Sensor w/wire 1
26 Allen head bolt M8*20mm 4
27 Spring washer M8 8
28 Curve washer M8 8
29 Seat 1
30 Front post decoration cover 1
31 Seat post decoration cover 1
32 Seat post 1
33 Seat post sleeve 1
34 Seat post quick release 1
35 Rear stabilizer 1
36 Knob 1
37 Square plug 2
38 Foam 1
39 Seat slide tube 1
40 Flat washer 16*8.5*1.5mm 4
41 Nylon nut 4
42 Cap nut 4
43R/L Pedal strap (Right / Left) 1P
44R/L Pedal (Right / Left) 1P
45 Crank 1
46 Pulley 1
PARTS LIST:
1
1
PART NO. DESCRIPTION Q’TY
47 Magnet 1
48 Belt 1
49 Crank bearing set 1set
50 Magnetic flywheel 1
51 Eyebolt set 2set
52 Nut 3/8”*26w*7mm 2
53 Nut 3/8”*26w*9mm 1
54 Nut3/8”*26w*4mm 1
55 Bottom section tension cable 1
56 Spring 1
57 Press wheel bracket 1
58 Allen head bolt M10*20mm 1
59 Allen head bolt M10*40mm 1
60 Sleeve 15*10*18mm 1
61 Idler wheel 1
62 Nylon locknut M8*7mm 2
63 Flat washer 21*10.4*1mm 1
64 Crank cover 2
65 Screw M5*15mm 4
66 Bottle bracket 1
67 Bottle 1
68 Allen wrench 1
69 Universal wrench 1
MONITOR INSTRUCTION
A. GENERAL DESCRIPTION
1. Power: DC 3V (2 pieces alkaline batteries)
2. Function: Speed, Time, Distance, Calorie, Pulse, Temperature, Scan
3. Key: Set, Mode, Reset
4. Auto Start / Stop: As long as you are exercising, it will be in action.
B. POWER ON
1. To connect the middle section sensor wire with the monitor.
2. To load 2 pieces of UM-3 or 1.5C batteries into the battery house on the back of monitor.
3. If the battery symbol “LO” appears on the screen, you should replace the batteries with new ones.
4. After being powered on, all LCD segments will be showed for 2 seconds with a sound of the buzzer.
Then the system goes into the initial state.
C. KEY AND FUNCTION
1. MODE
To press this key, you select a new function. If you press it for more than 3 seconds, the CPU will
erase all data values and it will go back to the initial state.
2. SET
When you select one function (Time, distance, Calories and so on), you can press SET key to set
your desired value. Had you set your pulse target value, the monitor will give alarm when your
pulse rate reaches to it.
If you want to change the target value quickly, do not release the key before you are satisfied.
3. RESET
To press it, you can erase the data values to 0.
This key can make you get a lower exercise resistance level.
1
D. The Statement of Function
1. SPEED: Displaying the current speed values that you are exercising.
2. TIME: Displaying the time you are exercising.
3. CALORIE: Displaying the current calorie values that you are exercising.
4. PULSE: Displaying the current pulse value that is exercising.
5. TEMP: Displaying the temperature of the environment where you are exercising.
6. DISTANCE: Displaying the distance values, which it has added during you are exercising.
7. SCAN: Automatically scan through, the function of DISTANCE, CALORIE and so on.
Training Pulse Rate
The owner’s manual is only for the customer reference.
We can‘t guarantee for mistakes occurring due to translation or change in technical
specification of the product.
1
Training instruction
To achieve a considerable improvement of your
physical resistance and your health, some aspects
of how to find the most efficient amount of
training should be followed:
If you have not been physically active for a
longer period of time and also to avoid health
risks you should consult your general physician
before starting to exercise.
Intensity
To achieve maximum results the right intensity
has to be chosen.
The heart rate is used as guideline.
As a rule of thumb the following formula is
commonly used:
Maximum pulse rate = 220 -
Age
While exercising the pulse rate should always be
between 60% - 85% of the maximum pulse rate.
For your personal training rates please see the
attached pulse rate chart on page 10.
When starting to exercise you should keep your
rate at 60% of your maximum pulse rate in the
first couple of weeks.
With increasing improvement of fitness the pulse
rate should be slowly increased to 85% of your
maximum pulse rate.
Fat burning
The body starts to burn fat at approx. 60% of the
maximum pulse rate.
To reach an optimum at burning rate, it is
advisable to keep the pulse rate between 60% –
70% of the maximum pulse rate.
The optimum training amount consists of three
workouts per week 30 minutes each.
Example:
You are 52 years of age and would like to start
exercising.
Maximum pulse rate = 220 - 52(age) = 168
pulse/min
Minimum pulse rate = 168 x 0.6 = 101 pulse/min
Highest pulse rate = 168 x 0.7 = 117 pulse/min
During the first weeks it is advisable to start with
a pulse rate of 101, afterwards increase it to 117.
With increasing improvement of fitness the
training intensity should be increased to 70% -
85% of your maximum pulse rate.
This can be done by increasing the resistance, a
higher frequency or longer training periods.
Training Organization
Warm-up:
Before every training you should warm-up for
5-10 minutes.
Here you can do some stretching and training
with low resistance.
Training session:
During the actual training a rate of 70% -85% of
the maximum pulse rate should be chosen.
The time-length of your training session can be
calculated with the following rule of thumb:
daily training session: approx. 10 min. per
unit
2-3 x per week: approx. 30 min.
per unit
1-2 x per week: approx. 60 min.
per unit
Cool down:
To introduce an effective cool-down of the
muscles and the metabolism the intensity should
be drastically decreased during the last 5 – 10
minutes.
Stretching is also helpful for the prevention of
muscle aches.
Success
Even after a short period of regular exercises you
will notice that you constantly have to increase
the resistance to reach your optimum pulse rate.
The units will be continuously easier and you
will feel a lot fitter during your normal day.
For this achievement you should motivate
yourself to exercise regularly.
Choose fixed hours for your training session and
do not start training too aggressively.
An old quote amongst sportsmen says:
“The most difficult thing about training is to start
it.”
1
SAFETY PRECAUTIONS
Thank you for purchasing our product. Even though we go to great efforts to ensure the
quality of each product we produce, occasional errors and /or omissions do occur. In any
event should you find this product to has either a defective or missing part please contact us
for a replacement.
This product has been designed for home use only. Product liability and guarantee conditions
will not be applicable to products being subjected to professional use or products being used
in a gym center.
This exercise equipment was designed and built for optimum safety. However, certain
precautions apply whenever you operate a piece of exercise equipment. Be sure to read the
entire manual before assembly and operation of this machine. Also, please note the following
safety precautions:
.
1Keep children and pets away from this equipment at all times.
2. Only one person at a time should use this equipment.
3. If dizziness, nausea, chest pains, or any other abnormal symptoms are expe
rienced while using
this equipment, STOP the workout at once. CONSULT A PHYSICIAN IMMEDIATELY.
4. Always use this equipment on a clear and level surface. Do not use outdoors or near water.
5. Keep hands and feet away from any moving parts.
6. Do not insert any object into any openings
7. Read all instruction before assembly and operation.
8. Before using this equipment to exercise, always do stretching exercises to properly warm up.
9. Use this equipment only for its intended use as described in this manual.
10. Always wear appropriate workout clothing and shoes when exercising, do not wear robs or other
clothing that could become caught in the equipment.
WARNING: BEFORE BEGINNING ANY EXERCISE PROGRAM CONSULT YOUR PHYSICIAN. THIS IS
ESPECIALLY IMPORTANT FOR INDIVIDUALS OVER THE AGE OF 35 OR PERSON WITH
PRE-EXISTING HEALTH PROBLEMS. READ ALL INSTRUCTIONS BEFORE USING ANY
FITNESS EQUIPMENT. WE ASSUME NO RESPONSILITY FOR PEROSNAL INJURY OR
PROPERTY DAMAGE SUSTAINS BY OR THROUGH THE USE OF THIS PRODUCT.
1
BODYWORX
BODYWORX

Other Bodyworx Exercise Bike manuals

Bodyworx ABX250AT User manual

Bodyworx

Bodyworx ABX250AT User manual

Bodyworx AELEGANCE User manual

Bodyworx

Bodyworx AELEGANCE User manual

Bodyworx A790P User manual

Bodyworx

Bodyworx A790P User manual

Bodyworx ABX350AT User manual

Bodyworx

Bodyworx ABX350AT User manual

Bodyworx ABX450AT User manual

Bodyworx

Bodyworx ABX450AT User manual

Bodyworx AKASIA 250U User manual

Bodyworx

Bodyworx AKASIA 250U User manual

Bodyworx ABX600 User manual

Bodyworx

Bodyworx ABX600 User manual

Bodyworx ABX190M User manual

Bodyworx

Bodyworx ABX190M User manual

Bodyworx A790U User manual

Bodyworx

Bodyworx A790U User manual

Bodyworx ABX250M User manual

Bodyworx

Bodyworx ABX250M User manual

Bodyworx A115B SPIN BIKE User manual

Bodyworx

Bodyworx A115B SPIN BIKE User manual

Bodyworx AM900 User manual

Bodyworx

Bodyworx AM900 User manual

Bodyworx AC270M User manual

Bodyworx

Bodyworx AC270M User manual

Bodyworx KR6611 User manual

Bodyworx

Bodyworx KR6611 User manual

Bodyworx ABX350M User manual

Bodyworx

Bodyworx ABX350M User manual

Bodyworx A260AT User manual

Bodyworx

Bodyworx A260AT User manual

Bodyworx AR350P User manual

Bodyworx

Bodyworx AR350P User manual

Bodyworx A811 User manual

Bodyworx

Bodyworx A811 User manual

Bodyworx ABX800 User manual

Bodyworx

Bodyworx ABX800 User manual

Bodyworx AIC850 User manual

Bodyworx

Bodyworx AIC850 User manual

Bodyworx AC270AT User manual

Bodyworx

Bodyworx AC270AT User manual

Bodyworx A630U User manual

Bodyworx

Bodyworx A630U User manual

Bodyworx ABK3.0 User manual

Bodyworx

Bodyworx ABK3.0 User manual

Bodyworx AB170M User manual

Bodyworx

Bodyworx AB170M User manual

Popular Exercise Bike manuals by other brands

Exerpeutic EXERWORK 1000 owner's manual

Exerpeutic

Exerpeutic EXERWORK 1000 owner's manual

Spirit CE800 ENT owner's manual

Spirit

Spirit CE800 ENT owner's manual

Flywheel Sports Fly Anywhere user manual

Flywheel Sports

Flywheel Sports Fly Anywhere user manual

Tunturi Pure U bike 10.1 user manual

Tunturi

Tunturi Pure U bike 10.1 user manual

Schwinn 270 Recumbent Bike Service manual

Schwinn

Schwinn 270 Recumbent Bike Service manual

NordicTrack U100 Bike Bedienungsanleitung

NordicTrack

NordicTrack U100 Bike Bedienungsanleitung

Matrix H3XE-01 Service manual

Matrix

Matrix H3XE-01 Service manual

Sunny Health & Fitness SF-RB4958 user manual

Sunny Health & Fitness

Sunny Health & Fitness SF-RB4958 user manual

Schwinn 10 Series Bike owner's manual

Schwinn

Schwinn 10 Series Bike owner's manual

Kettler Stratos S Assembly instruction

Kettler

Kettler Stratos S Assembly instruction

Reebok Rb 310 Exercise Bike Manuel de l'utilisateur

Reebok

Reebok Rb 310 Exercise Bike Manuel de l'utilisateur

Revbox Erg MK6 instruction manual

Revbox

Revbox Erg MK6 instruction manual

Tunturi S30 user manual

Tunturi

Tunturi S30 user manual

CAPITAL SPORTS 10035533 manual

CAPITAL SPORTS

CAPITAL SPORTS 10035533 manual

Sole Fitness 16208768000 owner's manual

Sole Fitness

Sole Fitness 16208768000 owner's manual

Christopeit Sport 1725 Assembly and exercise instructions

Christopeit Sport

Christopeit Sport 1725 Assembly and exercise instructions

Fuel FE 100 user manual

Fuel

Fuel FE 100 user manual

Image Fitness 4.0 Ex Bike Manuale d'istruzioni

Image Fitness

Image Fitness 4.0 Ex Bike Manuale d'istruzioni

manuals.online logo
manuals.online logoBrands
  • About & Mission
  • Contact us
  • Privacy Policy
  • Terms and Conditions

Copyright 2025 Manuals.Online. All Rights Reserved.