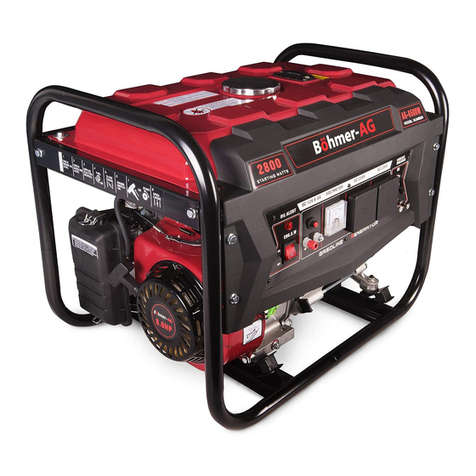
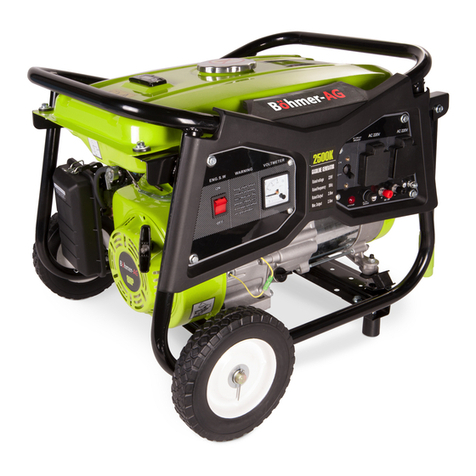
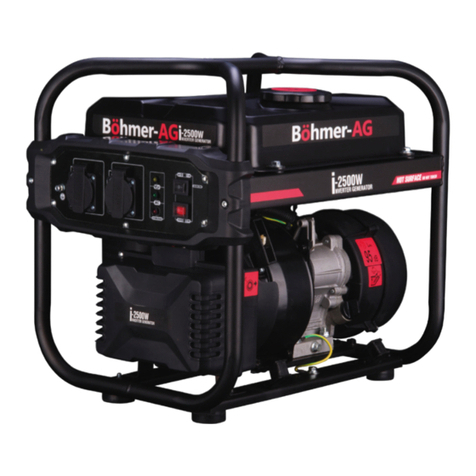
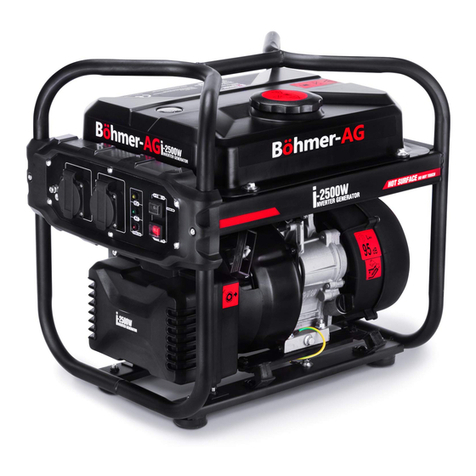
Bohmer-AG K Series User manual

K Series Generators
2500K / 3000K / 3800K / 3800K-E / 5000K-E / 7000K-E
OPERATION MANUAL
Read this manual carefully before use and keep it for future reference. Failure to do so
may result in injury, property damage and may void the warranty.
Products covered by this manual may vary in appearance, assembly, inclusions,
specications, description or packaging.
V 3.0
English Français Deutsch Italiano Español

K Series
© Böhmer-AG
2
English
02 - Contents
03 - Important safety information
04 - Quick start guide
04 Parts Diagram 2500K / 3000K / 3800K
05 Parts Diagram 3800K-E / 5000K-E / 7000K-E
06 Before starting (all models)
07 Starting 2500K / 3000K / 3800K
07 Starting 3800K-E / 5000K-E / 7000K-E
08 Assembly
09 - Maintenance
09 Oil change
09 Spark plug
10 Fuel lter
10 Air lter
11 Maintenance schedule
12 - Troubleshooting
13 - Specications
14 - CE Declaration of Conformity
15 - Français
29 - Deutsch
43 - Italiano
57 - Español
Contents Languages

K Series
© Böhmer-AG © Böhmer-AG 3
English
Important safety information
• Do not attempt to modify the product In any way.
• Service regularly and only use replacement parts supplied by the manufacturer.
• Only use fresh, clean and good quality fuel in the engine.
• Never operate the engine without oil.
• Never refuel in close proximity to naked ames, sparks, other sources of ignition e.g. cigarettes, if the
engine is hot or if the engine is still running.
• Do not refuel when the engine it hot or engine is running.
• Wipe up and correctly dispose of any fuel spillage immediately
• Move away from the refuelling areas before restarting the engine. Store fuel for short periods only in a
suitable container away from heat and direct sunlight.
• Clean the generator thoroughly after each use.
• Regularly check external nuts and xings to ensure vibration caused by normal use has not loosened
them.
• Empty the fuel tank before storing in a secure dry location out of reach of children.
• Do not use indoors.
It is essential you fully read this manual to ensure you are familiar with the general safety
features, precautions and functions necessary to operate your generator, failure to do so may
result in injury, damage to your generator or personal items.

K Series
© Böhmer-AG
4
English
Quick start guide
The following steps describe the quickest method to get your
generator up and running.
Before use, you must ensure the
oil is topped up to the upper limit
or the generator’s safety
mechanisms will not allow the engine to start.
Parts Diagram 2500K / 3000K / 3800K
1. Engine on switch
2. Voltmeter
3. Circuit breaker
4. 12V DC outlet
5. 240V AC dual plug outlet
6. Recoil handle
7. Air lter
8. Fuel tap
9. Choke lever
10. Fuel gauge
11. Fuel ller cap
1
2
3
4
5
6
7
10
8
9
11

K Series
© Böhmer-AG © Böhmer-AG 5
English
The K Series electric start generators use a key ignition for added
convenience however, they also feature the Gen III Recoil starting system
as a backup. For starting procedures using this method please refer to
the non ‘E’ variation instructions on page 7 of this manual for starting
procedure.
1. Engine on ignition barrel
2. Voltmeter
3. Battery
4. Circuit breaker
5. 12V DC outlet
6. 240V AC dual plug outlet
7. Recoil handle
8. Air lter
9. Fuel tap
10. Choke lever
11. Fuel ller cap
12. Fuel gauge
Parts Diagram 3800K-E / 5000K-E / 7000K-E
12
4
5
6
7
8
10
9
11
3
12

K Series
© Böhmer-AG
6
English
Before starting (all models)
Add fuel:
1. Open the ller cap
2. Fill with unleaded petrol up to the lter
3. Replace ller cap
Add oil:
Note: The generator will automatically shut down if
insufcient oil is detected.
1. Place generator on a level surface
2. Open the oil dipstick
3. Fill with 10W-40 semi-synthetic oil up to the threads
4. Replace oil dipstick
nhk

K Series
© Böhmer-AG © Böhmer-AG 7
English
Starting 2500K / 3000K / 3800K
Starting 3800K-E / 5000K-E / 7000K-E
1. Turn the circuit breaker on and then connect your devices:
• AC: Connect device’s plug to 3-pin plug outlet
• DC: Connect your device’s black wire to the black negative terminal, the red wire to the red positive
terminal. This can be used to charge the battery (electric start models only).
• Turn the fuel tap to the on position.
2. Push the choke lever to the left (closed position).
3. Pull recoil handle until engine starts.
4. Once warm push choke lever to right (open position)
1. Turn the circuit breaker on and then connect your devices:
• AC: Connect device’s plug to 3-pin plug outlet
• DC: Connect your device’s black wire to the black negative terminal, the red wire to the red positive
terminal. This can be used to charge the battery (electric start models only).
• Turn the fuel tap to the ON position.
2. Push the choke lever to the left (closed position).
3. Turn the ignition key to the ON position
4. Once warm push choke lever to right (open position)
Fuel tap
ON
OFF
Choke lever Circuit breaker
OFF
ON
Recoil handle
Ignition key
OFF ON START

K Series
© Böhmer-AG
8
English
Assembly
The axle mounts
are located on the
left underside of the
generator.
The front feet are tted to the pre-drilled holes
on the subframe.
The 5000K-E and
7000K-E have
additional foot mounts
which must be tted
between the feet and
the frame.
The handles are tted
to the right side of the
machine next to the
fuel tank.
Locate the holes and
secure the handles
with the nuts and long
bolts.
The battery is
connected black to
‘-’ negative, red to ‘+’
positive. Secure with
nut and bolt then shield
with terminal covers.
Slot the two axles through the mount and
secure with the nut.
Secure the wheel with
the split pin.
Fit the front rubber feet to the subframe and
secure with the nut.

K Series
© Böhmer-AG © Böhmer-AG 9
English
1. Remove spark plug cap and unscrew the spark
plug using the supplied tool.
2. Carefully clean any carbon build-up on the tip.
3. Check the gap using a gauge. The gap should
be between
0.7-0.8mm
.
4. Adjust as necessary then reinstall the plug and
cap taking care not to cross-thread the spark
plug.
Maintenance
Spark plug
1. Unscrew the oil dipstick
2. Undo the oil drain plug and drain the oil
3. Install and tighten the oil drain plug
4. Add 10W-40 semi-synthetic oil to the upper
limit of the ller hole
5. Install dipstick
Oil dipstickOil drain plug
Filler hole
Oil change

K Series
© Böhmer-AG
10
English
Fuel lter
Air lter
1. Switch off the fuel tap.
2. Remove sediment cup and ltering mesh.
3. Clean sediment cup and ltering mesh
4. Install sediment cup and ltering mesh.
The air lter is installed on the intake system of the engine. It allows clean air to ow into the engine to
provide the correct air/fuel mixture.
To check/clean
1. Open air lter cover
2. Check air lter to ensure it is free of dirt build-up
3. If dirty, remove lter and clean with a solvent cleaning solution
4. Squeeze to remove water and allow to dry
5. Add a few drops of oil
6. Squeeze tight to distribute oil and remove any excess
7. Install air lter and cover

K Series
© Böhmer-AG © Böhmer-AG 11
English
Maintenance schedule
Component/Task Every use After rst 5
hours use
First month or
20 hours use
Every 3 months
or 50 hours use
Every 6 months
or 100 hours use
Every year or
300 hours use
Engine oil Check level Replace Replace Replace
Oil leaks Check / repair
as necessary
Air lter Check / Clean Clean / replace as
necessary
Clean / replace as
necessary
Valve clearance Adjust as
necessary
Combustion
chamber
De-coke as
necessary
Idle speed Check / adjust as
necessary
Nuts & bolts
Check /
tighten as
necessary
Fuel tank Check level Flush and clean
Fuel line Check Check level Replace as
necessary
Replace as
necessary
Fuel lter Check Check/clean Clean and replace
as necessary
Clean and replace
as necessary
Spark plug Check/clean Clean and replace
as necessary
Clean and replace
as necessary

K Series
© Böhmer-AG
12
English
Troubleshooting
Issue Probable Cause Solution
Engine will not start
No fuel in the tank Check / refuel as necessary
Not enough engine oil Check and top up as
necessary
No spark Check spark plug. Clean /
replace as necessary
Fuel not reaching
carburettor Clean fuel sediment cup
No electricity being
produced
DC circuit breaker is OFF Check and ensure DC
circuit breaker is ON
Connected appliances
faulty
Check fuses / test other
equipment

K Series
© Böhmer-AG © Böhmer-AG 13
English
Specications
2500K
3000K 3800K 3800K-E 5000K-E 7000K-E
Max Output 2200 W
2700 W 3000 W 3000 W 3000 W 9500 W
Rated Output 2000 W
2500 W 2700 W 27000 W 5000 W 7000 W
Rated AC
Voltage 240 V
240 V 240 V 240 V 240 V 240 V
Rated DC
Voltage 12 V
12 V 12 V 12 V 12 V 12 V
Engine
Output 6 HP
7 HP 8 HP 8 HP 13 HP 16 HP
Fuel Capacity 15 L
15 L 15 L 15 L 25 L 25 L
Oil Capacity 0.6 L
0.6 L 0.6 L 0.6 L 0.6 L 0.6 L
Continuous
Runtime 10 Hours
10 Hours 10 Hours 10 Hours 12 Hours 12 Hours
Engine
Displacement 163 CC
196 CC 210 CC 210 CC 400 CC 450 CC
Oil Type 10W-30 /
10W-40
10W-30 /
10W-40
10W-30 /
10W-40
10W-30 /
10W-40
10W-30 /
10W-40
10W-30 /
10W-40
Starting Type Recoil
Recoil Recoil Recoil /
Electric
Recoil /
Electric
Recoil /
Electric

© Böhmer-AG
K Series
© Böhmer-AG
14
English
We hereby declare that the machine described below complies with the relevant basic safety and health
requirements of the EU Directives, both in its basic design and construction as well as in the version put
into circulation by us. This declaration shall cease to be valid if the machine is modied without our prior
approval.
The undersigned: Michael S McQuaide
as authorised by: Union Mart Ltd
Declares that
Description: Petrol Generator
Identication code: WX-2500K, WX-3000K, WX-3800K, WX-3800K-E,
WX-5000K-E, WX-7000K-E
Conforms to the following directives and standards:
• MD 2006/42/EC Machinery Directive
• EMC 2014/30/EU Electromagnetic Compatibility Directive
--
And Complies with the provisions of the following standards:
EN ISO 12100:2010,EN 1679-1:1998+A1:2011,EN 60204-1:2006+A1:2009+AC:2010, EN
12601:2010,EN 61000-6-1:2007,EN 61000-6-3:2007+A1:2011
--
Notied body: ENTE CERTIFICAZIONE MACCHINE SRL
The technical documentation is kept by: Union Mart Ltd
Date: 10/02/2017
Signed:
Michael S McQuaide
Chief Executive Ofcer
Name and address of the manufacturer:
Union Mart Ltd, Company No. 8384155. Registered address: Unit 4 Mauretania Road,
Nursling Industrial Estate, Southampton, SO16 0YS, United Kingdom.
CE Declaration of Conformity

K Series
© Böhmer-AG © Böhmer-AG 15
Français
© Böhmer-AG
Lisez attentivement ce manuel avant toute utilisation et conservez-le à titre de référence. Dans le cas contraire,
vous risquez de vous blesser, d’endommager des biens matériels et d’annuler la garantie.
Les produits présentés dans ce manuel peuvent présenter une apparence, un assemblage, des inclusions, des
spécifications, une description ou un emballage différent.
Générateurs Série K
2500K / 3000K / 3800K / 3800K-E / 5000K-E / 7000K-E
FRANÇAIS

K Series
© Böhmer-AG
16
Français
Sommaire
16 Sommaire
17 Consignes de sécurité importantes
18 Guide de démarrage rapide
18 Schéma des pièces 2500K / 3000K / 3800K
19 Schéma des pièces 3800K-E / 5000K-E / 7000K-E
20 Avant de commencer (tous modèles)
21 Démarrage 2500K / 3000K / 3800K
21 Démarrage 3800K-E / 5000K-E / 7000K-E
22 Assemblage
23 Maintenance
23 Vidange d’huile
23 Bougie d’allumage
24 Filtre à carburant
24 Filtre à air
24 Calendrier de maintenance
26 Dépannage
27 Spécications
28 Déclaration de conformité CE

K Series
© Böhmer-AG © Böhmer-AG 17
Français
Consignes de sécurité importantes
• N’essayez en aucun cas de modier la machine.
• Faites régulièrement l’entretien selon le calendrier d’entretien.
• Mettez uniquement du carburant neuf, propre et de bonne qualité dans le moteur.
• Ne faites jamais fonctionner le moteur sans huile.
• Ne faites jamais le plein d’essence à proximité de ammes, d’étincelles ou d’autres sources
d’inammation, comme des cigarettes par exemple.
• Ne faites pas le plein lorsque le moteur est chaud ou que le moteur tourne.
• Essuyez et éliminez correctement et sans attendre tout déversement de carburant conformément aux
directives.
• Éloignez-vous des zones de ravitaillement en carburant avant de redémarrer le moteur. Stocker le
carburant pendant de courtes périodes uniquement dans un récipient approprié, à l’abri de la chaleur
et des rayons directs du soleil.
• Nettoyez le générateur à fond après chaque utilisation.
• Vériez régulièrement les écrous et les xations externes an de vous assurer que les vibrations
(causées par une utilisation normale) ne les aient pas desserrés.
• Videz le réservoir de carburant avant stockage dans un endroit sec et sécurisé, hors de portée des
enfants.
• Ne pas utiliser à l’intérieur
Merci de lire attentivement le manuel pour vous familiariser avec les caractéristiques de sécurité
générales, les précautions et les fonctions nécessaires au fonctionnement de votre groupe
électrogène. Dans le cas contraire, vous risquez d’engendrer des blessures, ou de provoquer des
dommages à votre générateur ou à vos objets personnels

K Series
© Böhmer-AG
18
Français
Guide de démarrage rapide
Les étapes suivantes décrivent la méthode la plus rapide pour mettre votre
groupe électrogène en marche. Avant toute utilisation, vous devez vous assurer
que l’huile est remplie jusqu’au niveau maximum, sinon les mécanismes de
sécurité du générateur ne permettront pas au moteur de démarrer.
Oil : huile / Upper level : Niveau maximum
Schéma des pièces 2500K / 3000K / 3800K
1. Moteur en marche
2. Voltmètre
3. Disjoncteur
4. Sortie 12V DC
5. Double prise de courant 240V AC
6. Poignée de recul
7. Filtre à air
8. Robinet d’essence
9. Levier de starter
10. Jauge de carburant
11. Bouchon de remplissage
1
2
3
4
5
6
7
10
8
9
11

K Series
© Böhmer-AG © Böhmer-AG 19
Français
Les générateurs à démarrage électrique de la série K utilisent un
allumage par clé pour plus de facilité. Ils disposent également du système
de démarrage Gen III à recul en guise de sécurité. Pour les procédures de
démarrage utilisant cette méthode, veuillez vous reporter aux instructions
de variation autres que “E”, à la page 7 de ce manuel.
1. Moteur sur canon d’allumage
2. Voltmètre
3. Batterie
4. Disjoncteur
5. Sortie 12V DC
6. Double prise de courant alternatif 240V
7. Poignée de recul
8. Filtre à air
9. Robinet d’essence
10. Levier de starter
11. Bouchon de remplissage
12. Jauge de carburant
Schéma des pièces 3800K-E / 5000K-E / 7000K-E
12
4
5
6
7
8
10
9
11
3
12

K Series
© Böhmer-AG
20
Français
Avant de commencer (tous modèles)
Ajoutez du carburant :
1. Ouvrez le bouchon de remplissage
2. Remplissez-le d’essence sans plomb jusqu’au ltre
3. Remettez le bouchon de remplissage
Ajoutez de l’huile :
Remarque: le générateur s’éteindra automatiquement
si une quantité insufsante d’huile est détectée.
1. Placez le générateur sur une surface plane
2. Ouvrez le bouchon de remplissage d’huile
3. Remplissez-le d’huile semi-synthétique 10W-40
jusqu’au letage
4. Remettez le bouchon de remplissage d’huile
nhk
Jauge à carburant / bouchon
de remplissage
Jauge d’huile
Other manuals for K Series
1
This manual suits for next models
6
Table of contents
Languages:
Other Bohmer-AG Portable Generator manuals
Popular Portable Generator manuals by other brands
Generac Power Systems
Generac Power Systems XP Series owner's manual
ESAB
ESAB LAF 1251 BR User manual and spare parts

Power Tech Generators
Power Tech Generators PT-8000 Operator's manual
Multi-Power
Multi-Power MP7500E owner's manual
FUXTEC
FUXTEC FX-IG13 manual
Grozone Control
Grozone Control LP5 Repair & Maintenance Guide
