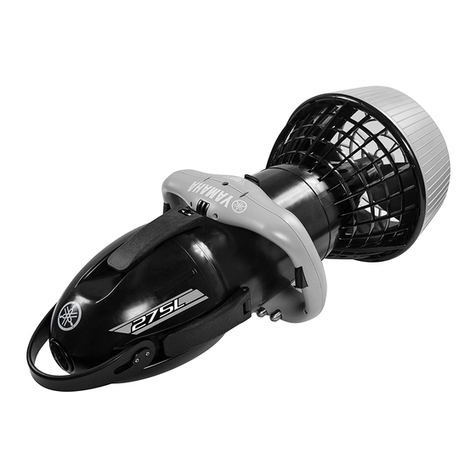
Bonex ECOS User manual

BONEX-SCOOTER
Instruction for use
Version: 2016_08
INSTRUCTION FOR USE
BONEX-SCOOTER
ECOS
REFERENCE
DISCOVERY
REFERENCE RS
DISCOVERY RS

BONEX-SCOOTER
Instruction for use
Version: 2016_08
Content
1. Safety Instructions .................................................................................... 1
1.1 User Instructions ................................................................................ 1
1.2 To Be Noted ....................................................................................... 1
1.3 Warnin Instructions .......................................................................... 3
2. Brief instructions for Bonex-Scooter ......................................................... 4
3. Purpose ..................................................................................................... 6
4. Guarantee ................................................................................................. 7
5. Disclaimer ................................................................................................. 8
6. Technical Data .......................................................................................... 9
7. Technical description .............................................................................. 10
Illustration 7a (Scooter schematic drawin ) .......................................... 10
Illustration 7b (Scooter top side) ............................................................ 10
Illustration 7c (Scooter bottom side) ...................................................... 11
8. Startin up............................................................................................... 13
8.1 Proper openin / closin procedure of Bonex-Scooters .................. 14
8.2 Scoter Trim ...................................................................................... 17
8.3 Controls to perform before startin up ............................................. 17
9. Use .......................................................................................................... 20
9.1 Most important points to be mentioned ........................................... 21
9.2 Avera e performance and ran e ..................................................... 22
9.2a UNIVERSAL-Model „ECOS“ .......................................................... 22
9.2b „EXPLORER“ Models .................................................................... 23
9.2c „PERFORMANCE“ Models (RS) ................................................... 24
10. Transport and stora e .......................................................................... 25
11. Char in the battery ............................................................................. 26
12. Maintenance and care .......................................................................... 27
12.1 Maintenance intervals of Bonex-Scooter ....................................... 27
12.2 Table of performed maintenance................................................... 28
13. Accessories and spare parts ................................................................ 29
13.1a Accessories ................................................................................. 29
13.1b Accessories ................................................................................. 30
13.2 Spare parts .................................................................................... 31
13.3 Blow-up drawin Scooter ............................................................... 32
14. Troubleshootin .................................................................................... 35
15. Declaration of Conformity ................ Fehler! Text arke nicht definiert.


BONEX-SCOOTER
Instruction for use
Version: 2016_08 Pa e 1
1. Safety Instructions
The Bonex-Scooter is a top quality product made in Germany. However,
the product is only as ood as can be uaranteed with proper, careful
handlin and care of all parts.
We therefore ask you to read the followin instructions for use and care of
the scooter carefully.
Please read and understand the instructions for use carefully, before
using your Bonex-Scooter for the first ti e! (PRTFM ☺)
1.1 User Instructions
Check that the scooter has been assembled properly before
use.
All screw connections and seals ust be checked
carefully!
The scooter is pre-char ed and ready to use.
However the battery only reaches its maximum capacity
after bein char ed three or four times!
The scooter must be opened to char e the battery and for
inspection purposes.
It is necessary to re ove the Tube co plete!
The scooter is fitted with an „ON“ / „OFF“ switch.
However, the connectin cable must be connected to the
battery before first use.
DISCOVERY (RS) with 2 batteries and connecting cables!
The speed of the scooter can be re ulated durin normal
operation mode by a rotary switch.
Dependin on model, the scooter is equipped with an
emer ency drive switch.
The emer ency drive switch is intended for operatin in divin
situations in which normal operation is no lon er possible.
In such cases, the driving speed cannot be controlled!
1.2 To Be Noted

BONEX-SCOOTER
Instruction for use
Version: 2016_08 Pa e 2
The scooter has double seals on all shaft openin s and
housin seals.
To ensure that the seals seal perfectly, the seals ust be
cleaned and greased regularly!
The scooter is supplied with a control volta e after switchin
on the main switch. The scooter therefore consumes power
even when the scooter is not in use (approx. 3W).
Make sure that the main switch is turned to „OFF“ after use.
In case of lon er transports we stron advise you to
disconnect the plu from the battery.
Failure to do so ay lead to a total discharge of battery
over a prolonged ti e and this can cause irreparable
battery da age!
The scooter must be locked accordin to the instructions prior
to usa e.
The scooter ay only be operated closed and with the
silver eccentric locking lever in the folded locked
position!
Batter
y
should not be thrown in the do estic waste but
disposed of separately!
Either return the used battery to the manufacturer (disposal is
free of char e) or take them alon to a collection point for
used batteries.
The battery may not be exposed to direct sunli ht.
Temperatures below freezin point should also be avoided
durin stora e.
Heating or very low te peratures reduce the service life
of the battery!
The battery should ideally be stored in a safe, dry place
between 15°C and 20°C.
If you will store the scooter for a prolonged ti e, keep
the battery partially charged, this will ensure a long
service life of battery!

BONEX-SCOOTER
Instruction for use
Version: 2016_08 Pa e 3
1.3 Warning Instructions
In case any flooding,
stop i ediately the driving and
use. In case of a flooded battery, the battery and the
scooter can burn or explode. This is extre ely
dangerous. The extinguishing can only be done with the
fire extinguishing device for lithiu batteries.
Batter
y
ay not co e into contact with water!
Do not atte pt to drill through battery, disasse ble or
expose the to force!
Battery may only be rechar ed with suitable battery char ers.
Never leave the scooter unattended during charging!
Only operate the scooter in perfect condition!
Defective cables, switches, plugs, power packs, drive
otors or seals ust be replaced i ediately!
Ensure that persons who use the scooter are instructed on
how to do so.
For a perfect, skilful handlin of your scooter we stron ly
recommend a proper trainin course!
When operatin , make sure that no part of your equipment is
han in loose so that it ets cau ht in the propeller!
When operatin do not reach into the rotatin propeller!
There is a danger of injury despite the saftey cut off!
In case of undefined and vague ter s of description the
instructions entioned in the „Ger an-Version” of the
„Instruction for use” are binding!
Should the English translation differ fro the Ger an
original, the Ger an version is binding!

BONEX-SCOOTER
Instruction for use
Version: 2016_08 Pa e 4
2. Brief instructions for Bonex-Scooter
1. Read the anual carefully before operating the device!
2. Storage:
Main switch „OFF (otherwise total dama e of battery is possible!)
Place scooter with “Shroud“ down on flat round or store it in the
transport box with the label “TOP” on the top.
Place scooter in shadow (sun heats up the interior)!
Remove Tube O-rin s before prolon ed stora e!
Store the battery in partially char ed conditions!
(Rechar e battery immediately before intended usa e)
3. Transport (with parcel service etc.):
Remove battery plu and put safety cap on battery connector!
Check the reliable fit of the battery inside the scooter!
Transport the scooter only in the ori inal transport box or in the
additional transport ba fitted in a carton with foam!
4. Starting up:
Char e battery (or check status with capacitance meter)!
Check the battery connector cable for proper connection to battery!
ATTENTION AT DISCOVERY SERIES THERE ARE 2 BATTERIES!
BOTH BATTERIES HAS TO BE CHARGED AND CONNECTED!
Remove all dirt (hair, dust, reenery, etc.) from the seal seats!
Li htly rease all Tube O-rin s!
Li htly rease Tube at both seal seats!
For saltwater use, mount the salt water lead on top of the basic lead!
Mount the Tube with the „Bottom-Sticker” in direction to the shroud
and ali n it towards the zinc anode!
Wron mountin of Tube can cause leaka e!
Don’t place the scooter in direct sun (Battery can be dama ed)!

BONEX-SCOOTER
Instruction for use
Version: 2016_08 Pa e 5
5. Aftertreat ent:
Rinse the scooter completely well after operatin in saltwater!
After usa e in saltwater remove the propeller and rinse the lide
sealin from the outside!
DO NOT ATTEMPT TO CLEAN GLIDE SEAL MECHANICALY!
Switch „OFF scooter on main switch!
Check the inside of the scooter occasionally.
Re ove Tube during charging operations!
Char e each battery separately (DISCOVERY series)!
6. Maintenance:
Clean occasionally and wipe the scooter backend with silicon spray!
Check Tube O-rin s after 6 month and chan e them at least once a
year (lon stora e will cause deformation of the O-rin s)!
Once a year rease the shaft of all switches (disassemble the knob)!
Once a year rease the O-rin s of the slide sealin !
Once a year rease the O-rin s of the shaft inside the nose!
(Lift up the pressure plate)
Exchan e all O-rin s every two to three years!
Occasionally check or exchan e the zinc anode.
Please heed the advice for a smooth run of the scooter and a lon joy over
your Bonex-Scooter! This is just a quick check. This does not show the
complete maintenance.
If desired, Bonex will do the service for you.

BONEX-SCOOTER
Instruction for use
Version: 2016_08 Pa e 6
3. Purpose
The Bonex-Scooter was desi ned and developed for use under water.
Use on land, or in media other then water, is not an intended use.
Operation in other media can lead to malfunctions or overheatin of the
motor and to dama e or even destruction of the Bonex-Scooter.
The Bonex-Scooter is desi ned to pull a diver and his personal and
auxiliary equipment.
The maximum performance values depend on the wei ht and the
streamlined arran ement of the equipment in the water.
With increased loads the maximal possible drive speed is reduced.
The Bonex-Scooter has been desi ned for private use.
All kinds of commercial use necessitate special precautions for instruction
and use of the Bonex-Scooter!

BONEX-SCOOTER
Instruction for use
Version: 2016_08 Pa e 7
4. Guarantee
Under consideration of the followin instructions for use and care we
provide the followin manufacturer’s uarantee for private users:
We provide a two year uarantee on all housin and control elements
made of aluminium, plastic, carbon and stainless steel.
We provide a 12 month uarantee on all electronic components and
battery.
Sensors, sprin s, propellers and seals are wearable parts and are
excluded as such from this uarantee.
Intervention in the housin and electronic connections by unauthorised
persons or workshops will lead to voidin of the uarantee.
Defective sealin elements must be replaced immediately.
Bonex will accept no liability for penetration by water (especially salt water)
which is due to defective elements and poor maintenance.
The replacement or exchan e of sin le parts (i.e. battery) does not extend
the uarantee.
Severability Clause:
In case one clause should prove to be or become ineffective or incomplete
these terms and conditions shall remain in le al effect.

BONEX-SCOOTER
Instruction for use
Version: 2016_08 Pa e 8
5. Disclai er
The owner is solely responsible for the trouble-free, proper and orderly
operation of the Bonex-Scooter!
Bonex will accept no liability for dama e due to improper use of the
scooter. This includes dama e to natural banks, jetties and harbours and
divin in private, protected and security areas.
Bonex will not accept liability either for collisions which take place in
restricted visibility conditions or due to failure to observe safety distances.
Liability for personal injury on exceedin the depth limits and failure to
observe surfacin speeds and decompression obli ations is also excluded.
Bonex will not be liable for consequential dama e resultin from failure to
function or malfunctionin of the Bonex-Scooter.
This includes property dama e and personal injury.
Severability Clause:
In case one clause should prove to be or become ineffective or incomplete
these terms and conditions shall remain in le al effect.

BONEX-SCOOTER
Instruction for use
Version: 2016_08 Pa e 9
6. Technical Data
Model
ECOS ECOS Plus
ECOS S
REFERENCE
RS
DISCOVERY
RS
Dimensions:
Ø 223/300
L 600 mm
Ø 223/300
L 600 mm
Ø 223/300
L 600 mm
Ø 218/300
L 690 mm
Ø 218/300
L 850 mm
Battery:
25,2 V
1x Akku
25,2 V
1x Akku
25,2 V
1x Akku
43,2 V
1x Akku
43,2 V
2x Akku
Wei ht:
15 k 15 k 15 k 19 k
25 k
Battery
wei ht:
3,2 k 3,2 k 3,2 k 5,6 k
11,2 k
Operatin
depth:
120 / 200 m* 200 m 200 m 200 m 150 / 200 m*
Operatin
temp.:
0° - 40°C 0° - 40°C 0° - 40°C 0° - 40°C
0° - 40°C
Runtime
Max.:
200 min 200 min 200 min 210 min
420 min
Runtime
Min.:
110 min 100 min 90 min 105 min
210 min
Ran e Max.:
8 km 8 km 8 km 9 km
18 km
Thrust Max.:
220 N 260 N 270 N 330 N
330 N
Speed Max.:
60 m/min 67 m/min 70 m/min 85 m/min
85 m/min
Trim:
neutral neutral neutral neutral
neutral
Char er:
230V-50Hz
110V-60Hz
230V-50Hz
110V-60Hz
230V-50Hz
110V-60Hz
230V-50Hz
110V-60Hz
230V-50Hz
110V-60Hz
Char in
time:
4-5 hrs. 4-5 hrs. 4-5 hrs. 4 hrs.
8 hrs.
*
Standard Tube operating depth 120 / 150 , 200 Tube as optional order!

BONEX-SCOOTER
Instruction for use
Version: 2016_08 Pa e 10
7. Technical description
Illustration 7a (Scooter sche atic drawing)
Scooter nose
Syste handle
Battery
(2X at DISCOVERY series!)
Stop ring
(Battery fixation)
Connecting rod
Tube
Motor
Main switch
(ECOS with 5 speed steps)
Zinc anode
Cross e ber
Tow cord fixation point
E ergency drive
-
switch
(NOT at ECOS)
Round handle
Drive switch (Trigger)
Main switch
Speed governor
(NOT at ECOS)
E ergency drive
switch
(NOT at ECOS)
Propeller
Shroud

BONEX-SCOOTER
Instruction for use
Version: 2016_08 Pa e 11

BONEX-SCOOTER
Instruction for use
Version: 2016_08 Pa e 12

BONEX-SCOOTER
Instruction for use
Version: 2016_08 Pa e 13
8. Starting up
The Bonex-Scooter is prepared for startin already prior to delivery.
The battery is char ed and the scooter is parameterized with the latest
software.
On manufacture, the scooter is subjected to a function and pressure test.
Before usin for the first time, remove the scooter from the transport
packa in .
Please keep the ori inal transport packa in for further usa e (return of
scooter in case of maintenance / repair)!
Open the scooter at the silver eccentric lever.
To do this, set down the scooter with the jet on a level surface and pull the
lever up so that it is pointin vertically upwards, turn it 90° and pull out
completely.
To pull off the nose, fix the scooter on the jet with one foot to obtain
sufficient holdin force.
The nose can then be pulled up and off to ether with the lock.
Hold the Tube ti ht with both hands and also pull this up.
NOSE CLOSED NOSE OPEN
Below you will find an illustrated instruction for proper „Opening“ and
„Closing“ procedure of Bonex-Scooters.

BONEX-SCOOTER
Instruction for use
Version: 2016_08 Pa e 14
8.1 Proper opening / closing procedure of Bonex-Scooters
Closed state of scooter in „Nose view”
Lift the silver eccentric lever up to complete
vertical position.
Now two red dots arran ed
in ali nment are
visible.
Turn the
silver eccentric lever to left or ri ht
side for 90°.
Now the two red dots lose their ali nment
:
One stays fix at 6 a clock, the inner
red dot
moves ri ht to 3 a clock or alternative left at
9 a clock.
Now lift the silver eccentric lever complete.
Performin this way you can hear a
sort of
„ventin noise“.
Now you are able to pull off the nose.
For removin the nose put
one hand at the
silver eccentric lever
the other hand at the
system handle and one foot on the shroud,
fixin the scooter for obtainin a
sufficient
holdin force.
Now you can lift he nose
strai ht upwards.

BONEX-SCOOTER
Instruction for use
Version: 2016_08 Pa e 15
View of scooter with nose removed.
If Tube has not been removed for a lon er
time it is possible that the two O-rin
,
displace
the smear layer and you need an
intensified force to remove the Tube.
In case of this, use the proper fixed „Tube-
Remover“ as shown in the picture.
View of the lower Tube ed e after Tube
has
been lifted sli htly.
You will find the „Bottom-Sticker”
normally
at the inner surface of the Tube and it
is
ali ned to the zinc anode.
View of the scooter after removin the
nose
and the Tube
Inner view of the Tube with the „Bottom-
Sticker“ at lower ed e.
This ed e
must be ali ned downwards in
direction to the propeller.
It is advised to ali n the „Bottom-Sticker“
towards the zinc anode.

BONEX-SCOOTER
Instruction for use
Version: 2016_08 Pa e 16
When refittin the T
ube pay attention to the
correct position of the “Lo o-Si ns”.
Push
the nose with sli ht force downwards to
refit
it to the scooter.
To do this way,
the system handle must be
ali ned to the drive switch (tri er).
To close the nose,
the red dot on the
pres
sure plate must be ali ned to a position
at 3 a clock or a position at 9 a clock.
D
urin this procedure the second red dot
remains at 6 a clock.
Push the silver eccentric lever downwards
until it ets in contact to the pressure plate.
Durin this procedure the lever is orientated
backwards.
Now turn the silver eccentric lever to th
e
ri ht or the left side for 90°,
until the two red
dots are ali ned a ain.
To do so, the lever must be ali ned into a
complete vertical position.
At least force the silver eccentric
lever
downwards until it becomes
contact to the
nose surface.
The scooter is now closed.
### NEVER USE EXTREME FORCE TO
CLOSE THE SCOOTER ###
If necessary control complete mountin !

BONEX-SCOOTER
Instruction for use
Version: 2016_08 Pa e 17
8.2 Scooter Tri :
For usin our scooters in saltwater, please use the additional lead balance
wei hts as follows:
For determination of the needed quantity of lead, please put your scooter
into saltwater and put some of the bi lead (thin and/or thick) on the front
of the tube. Only until the tube of the scooter is under water. For a sli ht
positive trim, the system handle should stay outside of the water.
Please repeat this with the back/bottom of the scooter – put here the small
lead onto the shroud. The main handle should stay half outside of
the water (as you can see in the attached picture).
Now you know the exact amount of lead to be added. Now take your
scooter out of the water, dry it, open the scooter and screw the bi front
lead plates into the nose and the rear lead onto the motor bracket.
Please, keep attention, that the lead will only be added on top of the inside
existin lead.
For the assemblin please use an Allen key with ball button, so as not to
dama e the screws.
For military use, it mi ht be necessary to trim the scooter ne ative. In this
case, add more lead.

BONEX-SCOOTER
Instruction for use
Version: 2016_08 Pa e 18
8.3 Controls to perfor before starting up
Ensure that the power pack is sittin ti ht and connect the battery plu . The
battery plu only fits in one position so that the union nut also en a es.
Screw the union nut of the battery plu to the end of its thread so that the
plu is also ti ht.
Make sure that the cable is laid without twistin and in one loop upwards.
Look at Illustration 7b (Scooter top side) pa e 11.
(ATTENTION: DISCOVERY series owns 2 battery connectors)
Make sure that all balancin wei hts are firmly in place and no loose parts
fall around in the scooter. Check visually that all the cable plu s are ti ht
and the cables are not dama ed.
Check the firm fittin of the battery pack(s).
Grease the sealin rin s and the inside ed e of the Tube li htly with
silicone rease. Push the Tube downwards („Botto -Sticker“ ust be
aligned towards the zinc anode) until it came in contact to the housin .
Please act in same procedure with scooter nose. In the nose there are two
center poles to be ali ned to the traverse. Please note that the scooter
housin cannot be closed correctly if the center poles in the nose are not
ali ned in correct position and the tube isn´t assembled in the ri ht
direction. While mountin the nose the System handle has to be on the
opposite side of the zinc anode!
Hold the silver eccentric lever up when settin down the nose and push the
nose in up to the mechanical stop.
To close the nose, the red dot on the pressure plate must be ali ned to a
position at 3 a clock or a position at 9 a clock. Durin this procedure the
second red dot remains at 6 a clock. Push the silver eccentric lever
downwards until it ets in contact to the pressure plate. Now turn the silver
eccentric lever to the ri ht or the left side for 90°, until the two red dots are
ali ned a ain. At least force the silver eccentric lever downwards until it
becomes contact to the nose surface.
NEVER USE EXTREME FORCE TO CLOSE THE SCOOTER
If necessary control co plete ounting procedure!
At the delivery the scooter is trimmed a little bit positive (approx. 50 r). If
you assemble additional ear at the scooter, it could become necessary to
trim it a ain. Also you have to trim the scooter a ain if you intend to use it
in saltwater. For this option you can add some additional balance wei hts
inside the scooter nose and in the back tail underneath the screws. Optimal
trim is reached if front system handle is approx. 25mm outside water and
round handle at tail is approx. 15mm outside water surface. Please take
care that the flattened lead plate inside the nose are assembled at last!
This manual suits for next models
5
Table of contents
Other Bonex Diving Vehicle manuals