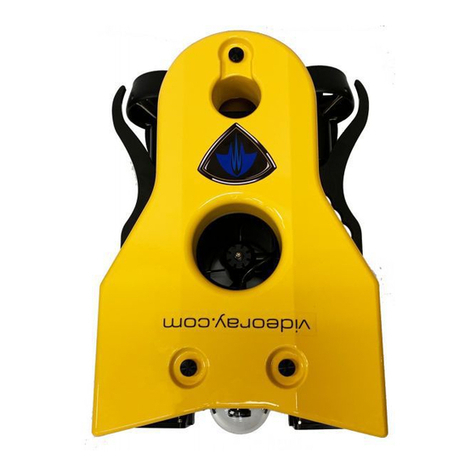
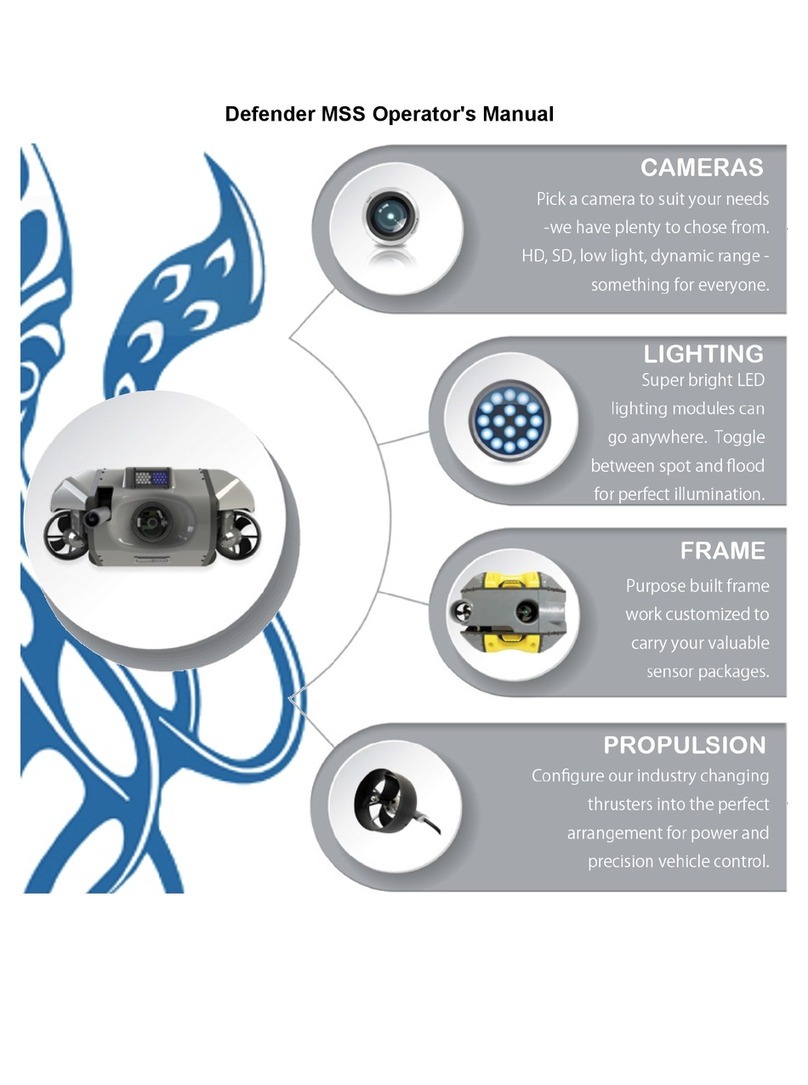
VideoRay Defender MSS User manual

MSS Defender Operator's Manual

MSS Defender
Operator's Manual, 1.00.00
Copyright Notice
This material is copyright protected. No material may be reproduced or transmitted in any form or by
any means for any purpose without expressed written consent of VideoRay LLC.
Copyright © 2019, VideoRay LLC - The Global Leader in Micro-ROV Technology

MSS Defender
Operator's Manual, 1.00.00
Table of Contents
Copyright
Table of Contents
About this Document
How to Get Help
Before Contacting Support
Product Overview
MSS Vehicle Configurations
Quick Start Instructions
Safety First
System Components
Pre-Dive Preparations
Dive Operations
Post-Dive Operations
ROV System Specifications
ROV Modules Specifications
Power Module
Communications Module
AHRS Module
Thruster Module
Camera Module
LED Light Module
ROV Accessories Specifications
Tether Specifications
System Voltage Advisory
Equipment Guide
ROV Submersible
ROV Nomenclature
Power Module
Communications Module
AHRS Module
Thruster Module
Camera Module
Light Module
ROV Connections
User Control Console
Safety Circuits
Switches and Connections
Computer
HD Monitor
Hand Controller
Forward / Reverse Control
Lateral Control
Yaw Control
Depth Control
Pitch Up
Pitch Down
Pitch / Roll Reset
All Autos Off
Lights Intensity

Camera Tilt Up
Camera Tilt Down
Camera Focus In
Camera Focus Out
Snapshot
Video Record
Manipulator Open
Manipulator Close
Manipulator Rotate
Common Controller Inputs
Pitch/Roll Mode
Sonar Mode
Camera/Lights Mode
Manipulator Mode
Raw Inputs
Tether
Tether Specifications
Strain Relief
ROV to Tether
Tether to Tether
Connections Summary
Accessories
Included Accessories
Optional Accessories
Sonar
Blueprint Subsea
Oculus M750d
Manipulator
Inuktun
Rotating Manipulator
DVL
Nortek
DVL 500-300m
GPS
VideoRay
ROV GPS
GlobalSat
USB 5 Hz
Lowrance
Point 1
USBL
Blueprint Subsea
SeaTrac
Mission Support Accessories
Software Guide
Greensea Interface Overview
VideoRay Interface Overview
Software Management
Folder Structure
Software Updates
Module Configuration
Configuration Commands
Command: vr_refresh
Updating Firmware
Command: vr_enum
Command: vr_setid

Command: vr_debug_putty
Command: vr_create_virtport
ROV Materials List
ROV Project Management
Maintenance Guide
User Maintenance Policy
Configuration / Calibration
Compass Calibration
Module Replacement
Power Module
Communications Module
AHRS Module
Thruster Module
Camera Module
LED Light Module
MSS Operator's Manuals

MSS Defender
Operator's Manual, 1.00.00
About this Document
Online Manual
This Quick Start Guide is a subset of the full version of this manual, which is available on the MSS
Defender control panel and online in the following formats:
Installed on the MSS Defender control panel at: Home/VideoRay/documentation/_mss_defender
for viewing the HMTL locally.
http://download.videoray.com/_mss_defender for viewing the HMTL online.
http://download.videoray.com/documentation/mss/pdf/videoray_doc__mss_defender.pdf for
viewing the PDF online.
http://download.videoray.com/documentation/mss/zip/videoray_doc__mss_defender.exe for
downloading the HTML and PDF files.
Document Conventions
Several symbols are used throughout this documentation to add emphasis and to assist in relocating
important information. The following table describes these symbols and their uses.
SYMBOL DESCRIPTION
The Danger icon is used to indicate there is a potential risk of personal injury or death.
Extra care should be taken to understand the risks, and all personnel should exercise
caution. It may also be appropriate to warn others in the immediate vicinity.
The Caution icon is used to indicate there is a potential risk of damage to the
equipment or surrounding property. Personnel should receive training in the appropriate
procedures before attempting to operate or maintain the equipment.
The Do Not icon is used to indicate that an action or activity should NOT be performed.
The Note icon is used to highlight a specific detail or point of information.
The Tip icon is used to highlight a suggestion or recommendation.
Beyond this Document
There is no substitute for experience and/or training, especially with respect to the real purpose for
which you plan to use this equipment. We encourage you to explore options beyond the scope of
these materials to expand your knowledge and skills necessary to support your applications. In
addition to this documentation, VideoRay offers training and technical support and hosts a general
user discussion forum and user image gallery.
We also realize that collectively, users of our products spend considerably more time operating our
systems than we do ourselves. Users also encounter more diverse operating environments across an
extremely broad range of applications. We highly value this vast experience base, and invite and
encourage you to share your experiences and suggestions with us. Please feel free to contact us by
any of the methods listed below.
Quality Commitment
VideoRay strives to design, manufacture, deliver and support the highest quality products and
services, including this documentation. We have made every effort to ensure that this documentation
is accurate and provides you with the most up-to-date information.
If you find any errors in this documentation or have suggestions for improvements, each page contains
a "Help us improve this document" feedback link in the left margin (you must be connected to the
Internet to use this link).
Address
VideoRay LLC
212 East High Street
Pottstown, PA 19464
USA
Email
info@videoray.com General Information and Sales
support@videoray.com
Technical Support
Telephone
+1 610-458-3000 Office
+1 610-458-3010 Fax
Disclaimer
This document is deemed accurate at the time of its writing, however it is not a legal contract and the
information contained herein should not be construed to represent any form of commitment. This
document as well as the associated products and services are subject to change without notice.

MSS Defender
Operator's Manual, 1.00.00
How to Get Help
Help for your MSS Defender is available through several channels.
All Hours Self-Service / Crowd-Source Tools
Operator's Manuals and Standard Operating Procedures www.videoray.com/support/manuals.html
Software Downloads www.videoray.com/support/downloads.html
Frequently Asked Questions www.rovfaq.com
ROV User Forum www.rovinfo.com
Global Support
Email support@videoray.com
Phone +1 610-458-3000 (select option 1)
Skype videoray.support (by appointment )
Remote Sessions www.videoray.com/support/remote-support.html (by appointment )
Regional Support
VideoRay Authorized Dealers and Service Centers www.videoray.com/dealer.html
Training
Operator Training www.videoray.com/learn-more/training.html
Advanced Maintenance
Training
http://www.videoray.com/learn-more/training/advanced-maintenance-
training.html
Operational Strategies and Tactics Support
If you need help understanding how to apply your system to a specific project, contact VideoRay or
you local VideoRay dealer. We can provide guidance or help you find a certified consultant.
Before Contacting Support
Please make sure to consider the following information before contacting VideoRay's Technical
Support to report a problem. The following information should available:
User name and contact information
Name of the owner if not the same as the user
System model
Serial Number of the affected component(s)
Accessories in use
Detailed information about the issue:
Symptoms
Operating conditions that create the symptoms
Anything new or unusually about the system or operations
In addition, please review VideoRay's Support website for additional information about:
Principles of Customer Interactions
Customer Care Philosophy
Technical Support Policy

Accessory Support Statement

MSS Defender
Operator's Manual, 1.00.00
MSS Defender Overview
The VideoRay Mission Specialist Series is the world's first ROV to deliver custom purpose-built
vehicles using a standard production packaging process. Mission Specialist ROVs are literally built
around the payload using core modules instead of figuring out how to adapt an existing vehicle
platform in order to mount the payload. The overall system represents the difference between a pickup
truck and purpose-built construction vehicles, with equal differences in performance for specific
applications.
Based on modular components and standard interfaces, the development a specific Mission Specialist
Series ROV is orders of magnitude faster than designing a vehicle form the ground up or customizing
an existing monolithic vehicle.
Modular Primary Components
Standard Interfaces
Rapid Prototyping
Additive Manufacturing
Sensor Integration

MSS Defender
Operator's Manual, 1.00.00
Quick Start Instructions
These Quick Start Instructions are streamlined to cover just the essentials of operating your MSS Defender
system. They are provided to get you started as quickly as possible, while keeping you and the equipment
safe. They cover the equipment set up and basic operation, but are not intended to result in a
comprehensive base of knowledge or set of operational and piloting skills. The remaining sections of this
documentation should be referenced for a complete understanding of the features, capabilities, operating
procedures and maintenance requirements of your MSS Defender system.
Topics in this Section
Safety First
System Components
Pre-Dive Preparations
Dive Operations
Post-Dive Operations
Safety First
Operating electrical devices in and near the water can be dangerous. There
is always a risk of drowning or electrocution in such an environment. Reduce these risks by using
common sense and observing safety regulations and recommended safe practices including the
following:
Never handle power cords while in contact with water or allow power cord connectors or the
control panel to enter the water. The only components that can safely be placed in water are the
submersible, any onboard accessories and tether, and only after making sure the connections
are secure.
Always test the safety components, such as GFCI switches and interlock devices, before
beginning operations. Follow the procedures described in this manual for.
Have proper safety equipment, such as PFDs (Personal Flotation Devices), on hand and make
sure you know how to use them before you need them.

Keep fingers, hair, loose clothing and other objects away from VideoRay's propellers and other
pinch points.
Monitor weather and sea conditions and heed any warnings or alerts.
Be aware of and follow any legal ordinances or regulations in your area regarding operation of
vessels and underwater equipment in the water.
Before setting up for or commencing any dive, it is a good practice to make sure there are no
hazards to people or the equipment on land or in the water. If there are other people in the water
nearby, you should advise them that you are going to be operating the ROV. As the owner/operator, it
is your responsibility to ensure the safety of those around you as well as that of the equipment and
nearby property.
How Safe Is Safe Enough?
Addressing all aspects of safety while working in a water environment is beyond the scope of this
documentation. VideoRay encourages you to participate in safety training appropriate for your industry
and applications, including such topics as vessel operations, first aid, survival and other relevant
topics.
Introduction to the System Components
Unpack the system and familiarize yourself with the components.
ROV
The ROV, or Remotely Operated Vehicle, carries the
cameras, lights and sensors or accessories to the
underwater places you want to observe. Thrusters provide
mobility and these systems are controlled from the surface
using the control panel and hand controller.
See the ROV section of the Equipment Guide for more
information.
User Control Console
The User Control Console includes the system's power and
communications modules, computer and hand controller,
and serves as the operator's control interface and video
display. Open the User Control Console and familiarize
yourself with the components and primary controls on the
hand controller. See the User Control Console and Hand
Controller sections of the Equipment Guide for a complete
description of all of the controls and connections.
See the Control Panel section of the Equipment Guide for
more information.
Hand Controller
The hand controller is used to pilot the VideoRay and
operate other features like the lights, camera controls and

manipulator. The hand controller is pre-programmed, but
can be customized to meet specific user or operational
needs.
See the Hand Controller section of the Equipment Guide
for more information.
Tether
The tether connects the ROV to the control panel. It
delivers power and control signals to the ROV, and returns
video and sensor data (optional) from the ROV to the
surface. Some systems come with a TDS (Tether
Deployment System), that makes the work of managing the
tether easier. The tether is also often referred to as the
umbilical.
See the Tether section of the Equipment Guide for more
information.
Additional Items
Additional items may be supplied with your system including tools, spare parts and other items. If
included, these items are described in other sections of this documentation.
Some items shown may be optional and not included with your configuration.
Pre-Dive Preparations
Select a safe and preferably level area to set up the User Control Console. See the On-site
Operations section of the Project Management Guide for more information about site selection and set
up.
The pre-dive preparations consist of five parts:
1. Visual inspection before setting up the system
2. Setting up the system including making connections
3. Power on tests of the system's safety circuits
4. Primary functions test of the systems features
5. Adjusting the ballast for the desired buoyancy (to be completed in the next phase)
Conduct a Visual Inspection
Assuming this is your first time using the VideoRay, everything should be in proper working order and
ready to go, but it is good practice to perform a pre-dive inspection before every dive, even your first. If
any problems are noticed, they should be addressed before continuing.
1. Inspect the ROV and other system components to make sure there are no visible signs of
damage or loose or worn parts. Also check for water inside any pressure hull modules, such as
the camera.

2. Check the horizontal thrusters to make sure that the shafts are not bent and the propellers are
free to spin and are not fouled, loose or binding on the thruster guards.
3. Check the vertical thruster(s) to make sure the shaft is not bent and the propeller is not fouled or
loose or binding on the float block.
Make the Connections
It is best to start making connections at the ROV and working your way to connecting the system to
the power source.
Connecting or disconnecting cables while the system is powered on is not
recommended.
Make sure the User Control Console power switch is set to the Off position and make sure the
ROV power switch is set to the off position by pressing it.
Top View

Side View
Some of the cables have been connected at the factory. See the appropriate sections of the
Equipment Guide for detailed information about each of the connections.
You will typically need to connect only the ROV, tether, strain relief hand controller, and power cord.
1. Connect the female end of the tether connector to the ROV. The connectors have one pin that is
offset towards the center of the connector. Make sure the connectors are clean, align the pins,
and push the connectors together - do not twist the connectors. Secure the locking collar by
screwing the halves together.
2. Connect the braided strain relief from the tether to the rear of the ROV using the retaining
screw. See the strain relief section for more information.
3. Connect the male end of the tether to the User Control Console. When not in use, keep the
tether connectors clean and protected for the best performance and reliability.
4. Connect the hand controller to one of the USB ports on the User Control Console
5. Plug the User Control Console power cord into a conventional power source (100-240 Volts AC,
50,60 Hz). Power can be supplied through a land-based power outlet, generator or battery and
inverter. See the User Control Console section of the Equipment Guide for power source
requirements.
Power On Tests
If the system does not pass any of the following tests, it should not be used
until the problem is identified and corrected.
The VideoRay MSS includes two circuit safety components.
GFCI (Ground Fault Circuit Interrupter)
LIM (Line Insulation Monitor)
Testing the Circuit Safety Components
Connect the power cord to a suitable power source.
The GFCI can be found inline in the power cord.
1. Press the GFCI Reset button to turn on the GFCI. The green LED should illuminate.
2. Press the test switch on the GFCI. The GFCI should interrupt power and the green LED should
go out.

3. Press the GFCI Reset button to restore power and continue the pre-dive steps.
When using a power source that includes a GFCI, the VideoRay supplied GFCI is not needed and
can be removed from the power cord.
Power On and LIM Tests
Set the Power switch to the On position. The green Power On indicator light should turn on. If the
green Power On indicator light is not on, make sure the system is connected to a working power
source and the GFCI switch is turned on.
Twist the ROV Power switch to the On position. The green 400 V Power On indicator light should turn
on. If the green 400 V Power On indicator light is not on, make sure the system is connected to a
working power source and the GFCI and main power switches are turned on.
Test the LIM. The LIM can be found on the right side of the User Control Console. The GFCI switch
and the main and 400 V Power switches must both be set to On in order to perform this test.
1. The yellow Alarm light should be off. If the yellow light is on, press and hold the Reset button
until the yellow Alarm light turns off.
2. To test the LIM, press and hold the Test button until the yellow Alarm light turns on. This may
take up to 10 seconds. Release the button when the yellow Alarm light turns on.
3. Press and hold the Reset button to reset the LIM. The yellow Alarm light should turn off.
Release the button when the yellow Alarm light turns off.
Starting the VideoRay Control Software
Make sure the system is connected to a working power source and the GFCI / Circuit Breaker and
Power switches are turned on.
1. Turn on the User Control Console and wait for the system to complete the boot up process.
2. To start the MSS EOD Workspace control software, double click on the Defender icon on
the desktop.
See the Software Guide for more information about the VideoRay control software.
Testing the System's Functions
The next step is to ensure that the essential features of the ROV are functioning properly. Use the
hand controller to perform the following tests. The manipulator functions listed below do not
necessarily represent the full capabilities of the system. See the Hand Controller section of the
Equipment Guide for the complete list of functions and more information about using the hand
controller.
1 Horizontal Control joystick
2 Depth Control knob
3 Camera Tilt Up button
4 Camera Tilt Down button
5 Camera Focus In button
6 Camera Focus Out button
9 Lights Intensity knob

Additional features and controls may be available depending on the system configuration. These
tests represent the minimum set for all configurations.
Test the thrusters
For the next two steps, make sure no one is near the thrusters and do not
operate the thrusters out of water for more than 30 seconds to avoid overheating or premature wear of
the seals.
1. Gently move the joystick forward and backward and left and right - the horizontal thruster
motors should turn the propellers. Release the joystick - it will return to center on its own, and
the propellers will stop turning.
2. Rotate the Depth Control knob - the vertical thruster motor should turn the propeller. Return the
Depth Control knob to center to cease the vertical propeller rotation.
Test the lights
For the next two steps, do not leave the lights on bright for more than 30 seconds while
the ROV is out of water to avoid overheating.
1. Rotate the Lights Intensity knob clockwise to increase the intensity of the lights - the lights
should get brighter.
2. Rotate the Lights Intensity knob counter clockwise to dim the lights - the lights should dim.
Test the camera functions
1. Press and hold the Camera Tilt Up button - the camera should tilt up smoothly through its entire
range.
2. Press and hold the Camera Tilt Down button - the camera should tilt down smoothly through its
entire range.
3. Press and hold the Camera Focus In button - the camera should focus in smoothly through its
entire range.
4. Press and hold the Camera Focus Out button - the camera should focus out smoothly through
its entire range.
If a manipulator or other accessories are attached, these items should be checked at this time.
Good Advice
The time to catch small problems before they become big problems is during the pre-dive inspection.
Dive Operations
After the previous four pre-dive checks and tests have been completed successfully, you are almost
ready to commence the dive. But, there is one more issue to address that could affect the performance
of the ROV. The ROV is designed to be operated in a near neutrally buoyant configuration, so the last
step before launching your VideoRay is to check the buoyancy, and adjust the ballast if necessary. For
most operations, the buoyancy is optimal when the top of the float block is even with the water surface
and the ROV is level. If the ROV is too buoyant or too heavy, the vertical position may be hard to
maintain or control.
Buoyancy will need to be adjusted for use in fresh water versus salt water and depending upon
whether accessories are used with the ROV.

Buoyancy Check and Adjustment
To determine if the buoyancy is correct, lower the ROV and at least 3 meters (10 feet) of tether into the
water. You can lower the ROV by the tether - it will not hurt the tether because there is Kevlar in it.
Observe the ROV in the water - it should not be floating too high or sink. It should also be floating level
and not tipped to one side or pitched up or down. If the ROV floats too high, you will need to add some
ballast weights. If the ROV sinks, you will need to remove some ballast weights. If the ROV is not
floating level, you can change the locations of the weights.
The buoyancy can be adjusted by adding or removing the supplied ballast weights to the vehicle. The
weights can be added to or removed from the slots by hand. For most operations, the weights should
be evenly distributed to provide a balanced attitude of the ROV in water.
Commence the Dive
Once the buoyancy has been adjusted the ROV is ready to launch. Lower it into the water and operate
the controls to maneuver it. The ROV can be lowered using the tether.
Start with the ROV on the surface and push the joystick forward slightly to make the ROV move
forward. Move the joystick to the left or right to make it turn left or right. Get a feel for how agile
the ROV is.
Observe the video display as well as the ROV to become acquainted with the camera's wide
angle lens and its affect on depth perception underwater.
Once you feel comfortable with the horizontal maneuverability of the ROV, rotate the depth
control knob to dive the ROV. Tilt the camera down as you dive so you can see towards the
bottom. Rotate the depth control knob to bring the ROV back to the surface. Tilt the camera up
as you surface so you can see towards the surface.
Change the lights settings, and adjust the camera focus. If you have a manipulator, tilt the
camera down so you can see it and open and close the jaws.
As you get familiar with maneuvering the ROV, you can start to observe some of the on-screen
displays including the depth, heading, camera settings and other data.
For your first dives, practice until you are comfortable operating the controls without looking at them
and you are able to control the ROV with some precision.
See the Hand Controller section of the Equipment Guide for complete information about using the
hand controller and see the Piloting section of the Operations Guide for more advanced tips on piloting
the MSS.
Automated Flight Operations
Automated flight operations require additional configuration and tuning to ensure accurate flight
dynamics and control. See the Automated Flight Operations section for more details.
Practice Makes Perfect
Developing the skills to operate your MSS Defender like an expert may take some time. Practicing on
a regular basis is highly recommended.
Post-Dive Operations
At the conclusion of your dive, retrieve the VideoRay and power down the system by closing VideoRay
Balefire software, turning off the ROV power switch, shutting down the computer and then turning off
the main power switch.. Make sure the ROV is secure before disconnecting the tether. After
disconnecting the tether, keep the tether connectors clean and do not let them drag on the ground.

Proper maintenance of your VideoRay system ensures a long service life and that it will be ready to
operate when you are. After each dive, you should visually inspect the system for damage that might
have occurred during your operation.
Keeping the ROV clean is one of the most important aspects of good preventative maintenance
practices, especially after using it in salt water. If you use your ROV in salt water, or water with
contaminants, you should first rinse it, and then soak it in clean fresh water for at least one-half hour.
After cleaning the ROV and tether, they should be allowed to air dry before being put away for storage.
Failure to properly maintain the ROV by thoroughly cleaning it after use may dramatically
reduce its service life.
Debriefing
Congratulations! You are well on your way to becoming an accomplished micro-ROV operator, but
there are still many things to learn and skills to master. Continue learning about the system by
reviewing the additional sections of this documentation and, most importantly, practice, practice,
practice.
If you encountered any difficulties or have any questions, review these Quick Start Instructions and the
other documentation that came with your system, including the Equipment Guide. If you still have
difficulty or questions, contact VideoRay. Your success is our success, and we are here to help you get
the most out of your VideoRay.
VideoRay contact information is available on the About this Documentation page.
Ready to Learn More?
To accelerate your learning and receive recognition for your knowledge and skills, VideoRay offers in-
person classes and online training as well as the Micro-ROV User Certificate program. Training can be
delivered at your site and customized to your needs. To learn more about these opportunities, click on
the training link above to visit the VideoRay Educational Resources website.
ROV System Specifications
Other manuals for Defender MSS
1
Table of contents
Other VideoRay Diving Vehicle manuals