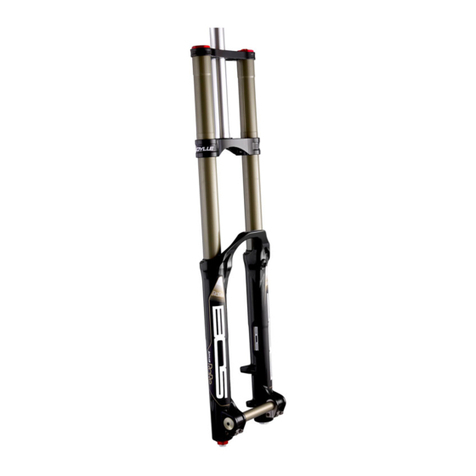
BOS Suspension IDYLLE 2014 User manual

0
Manual type
Model Year XXXX to XXXX
IDYLLE since year 2014
All serial numbers
Service manual
SM_150707_A

1
SM_150707_A
Service Manual IDYLLE since year 2014
Table o contents
BOS S.A.R.L. Warranty ....................................................................................................................................................... 1
Terms ........................................................................................................................................................................ 1
Limits ......................................................................................................................................................................... 1
Warranty exclusions .................................................................................................................................................. 1
Warranty procedure ................................................................................................................................................. 1
1 Environment .............................................................................................................................................................. 2
2 Glossary o terms ...................................................................................................................................................... 2
3 Exploded views o the ork ........................................................................................................................................ 4
3.1 Idylle Rare FCV (Ø37mm stanchions) ................................................................................................................ 4
3.2 Idylle Air (Ø36mm stanchions) .......................................................................................................................... 5
4 BOS Suspension Service ............................................................................................................................................ 6
4.1 Sa ety ................................................................................................................................................................ 6
4.2 Cleanliness ........................................................................................................................................................ 6
4.3 Tools required or service ................................................................................................................................. 7
4.4 Components required or service ..................................................................................................................... 8
4.5 Periodical Service In ormation .......................................................................................................................... 8
4.6 Fluid Table ......................................................................................................................................................... 8
4.7 Traveler or service control (printable document) ......................................................................................... 10
5 Operations Summary .............................................................................................................................................. 11
5.1 Step by step chart ........................................................................................................................................... 11
5.2 How to use this document? ............................................................................................................................ 11
6 Step by Step ............................................................................................................................................................ 12
6.1 Cleaning ........................................................................................................................................................... 12
6.2 Disassemble .................................................................................................................................................... 13
6.3 Slide Bushings replacement ............................................................................................................................ 26
6.4 Reassemble ..................................................................................................................................................... 30
6.5 Oil cartridge opening....................................................................................................................................... 39
6.6 Stickers replacement ....................................................................................................................................... 45
7 Stickers templates ................................................................................................................................................... 46
8 Additional In ormation ............................................................................................................................................ 47
8.1 Settings ............................................................................................................................................................ 47
8.2 F.A.Q. ............................................................................................................................................................... 48

1
SM_150707_A
Service Manual IDYLLE since year 2014
BOS MTB o ers warranty on its products on the ollowing terms:
BOS MTB guarantees to the original purchaser that the BOS product or which they received
this warranty is ree rom de ects in material and workmanship or one year rom the date o
original retail purchase. A proo a purchase will be asked or any warranty claim. This warranty
is not trans erable to a subsequent purchaser.
Wear and tear parts such as dust seals, O-rings, bushings, rear shock mounting hardware,
stanchions, threaded parts and bolts are not covered under this warranty.
Terms
This warranty is subject to legal jurisdictional or warranty rights o the country where it has
been originally purchased, which will prevail i di erent rom the terms herein listed.
Limits
BOS MTB cannot be liable or any loss, inconvenience damages, whether direct, incidental,
consequential, resulting rom the use o its products, local legislation prevailing.
Warranty exclusions
This warranty does not cover the ollowing cases:
• Damage to products resulting rom improper assembly other than listed below
• Products that have been modi ied by the owner or a third party
• Improper use
• Damages resulting rom an accident, crash under any circumstances
• Invalid servicing procedures and servicing time rame not respected
• Replacement o the original parts by parts rom others manu acturers
• Products whose serial numbers has been altered, de aced or removed.
Warranty procedure
The owner should always re er to an approved BOS center or any warranty claim. A proo a
purchase is compulsory or any warranty claim. Otherwise the warranty claim will not be
considered. Always contact BOS MTB warranty department be ore returning any products that
may all under this warranty. I “the aulty parts” do not all under warranty, the customer will
be charged or any costs in respect with warranty such as transport and package back and orth.
BOS S.A.R.L. Warranty

2
SM_150707_A
Service Manual IDYLLE since year 2014
1Environment
Mountain biking is a marvelous sport which gives you a lot o happiness. However
it is potentially a source o environmental con lict with other people.
A responsible behavior when using your bicycle automatically de use problems
and con licts.
To ensure the sustainability o the mountain bike sport, be sure that you stay in
the legal ramework, be respect ul towards the environment and recognize the rights
o the others.
2Glossary o terms
Base Valve: Base valves are located at the base o the ork leg or on the shock’s reservoir and generally unction to control high speed
compression. Base valves or “BV” are ixed & the piston that is attached to a sha t is re erred to as the mid-valve or “MV”. Both orks and
shocks can have a “BV” and a “MV”.
Bottoming Out: When your suspension reaches the end o its travel on an impact. You generally want to reach ull bottom on occasion but
NOT all the time. Continual bottoming can wreak havoc on the suspension system leading to breakage.
Closed Cartridge Dampers: Closed Cartridge Dampers are the opposite o an Open Bath Damper, in a closed system the oil solely contained
within a cartridge tube and does not low into the ork leg. There ore, additional oil or lubricant is added to the inside o the leg to lubricate
the seals and bushings.
Compression Damping: This is what gives your bike it’s eeling o plushness, or sti ness. Compression determines how ast the suspension
can compress when hitting a bump. I your suspension is too “sti ”, the system won’t compress ast enough to absorb a bump orce. When
there is not enough damping, the bike has so t, mushy eeling to it and will compress through its travel with little damping resistance.
Fork Oil Level: The level o oil inside the ork. It’s typically measured in cc’s by ully compressing the ork without the spring installed. It is
used in tuning the amount o air contained inside the ork. Since compressing air acts like a spring, raising the oil level leaves less room or
air, resulting in a rising rate throughout the ork’s travel.
Free Sag: The amount the bike settles under its own weight without the rider. With mountain bikes becoming lighter and lighter, ree sag
is really not a critical tuning element but still worth mentioning.
igh-Speed Damping: Damping eature that controls ast suspension movements. High-speed damping comes into e ect on ast, rough,
technical trails, g-outs, hard landings. HSD re ers to the sha t speed o the suspension and not the actual riding speed. HSD is controlled
through a high speed oil circuit best located in the base valve.
Low-Speed Damping: Damping eature to control slower vertical movements such as climbing or slower paced trails and bumpy whoop
sections. A good example o low speed is rolling slowly over a large rock and riding to its downside, this is where the suspension will ully
compress but at a slower rate and low speed compression circuit comes into play. LSD re ers to the sha t speed o the suspension and not
the actual riding speed. LS damping is best controlled through a low speed oil circuit and or shim stack.
Mid-Valve: Mid valves are located on the piston sha t and unction in the middle part o the stroke. Mid valves can play an important
unction in keeping a long travel ork rom diving too ar into its travel. Mid valves “”MV” unction when oil passes through the “MV” rom
one side o the chamber to the other. The rebound valve is also located on the “MV”.

3
SM_150707_A
Service Manual IDYLLE since year 2014
Negative Spring: A negative spring unctions to control the return o the suspension when it reaches ull extension. Negative springs can
be air, coil spring, rubber bumper or a combination o both. A negative spring also unctions to so ten the “top out eel” when the
wheel/suspension rapidly extends and it also helps initiate compression providing a smoother or more sensitive initial eel. An adjustable
negative spring o ers the greatest tuning range or rider’s weight, or example a heavy rider will need a higher or sti er spring to resist
pre-compression, but the high spring rate may also completely compress the negative spring rendering it ine ective to control top out.
Open Bath Dampers: Open Bath re ers to a cartridge that is NOT closed and allows oil to low rom the inside o the damper to the outside
o the cartridge or inside o the ork legs. Open Bath Dampers use oil or damping, lubrication, cooling, and end stroke “ramp up” or
“progression”. But the downside o all this oil is the added weight o all the excess oil that is used to ill the entire ork leg.
Packing: An issue caused rom too much rebound damping. When a series o bumps are encountered, the suspension doesn’t rebound
ast enough to absorb the next bump. The suspension keeps compressing more and more a ter each bump and it gives the rider a very
harsh eeling and even loss o traction and control because the wheels no longer ollows the contour o the terrain.
Platform Damping: A plat orm is generally re erred to as resistance to initial suspension compression usually generated by pedaling or
rider induced orces. A plat orm can be achieved by various methods and usually the best way to limit suspension “bobbing” is to restrict
oil low through the low speed circuit. Depending on what technology you have and there are various designs out there, choking o the
low speed circuit can be achieved by either adjusting a pressure spring on the shim stack, adjusting the depth o a bleed needle or changing
the size o an ori ice via a slide. These are just a ew o the most common methods to deliver plat orm damping eel to improve pedaling
e iciency.
Rebound Damping: Once your suspension has hit a bump and compresses, now it’s time or your rebound damping to kick in. Rebound
controls how ast the ork extends back rom compression to keep the wheel on the ground. Rebound can a ect your traction as well. Too
much rebound damping will keep the suspension compressed when it should be extending to stay on the ground on the downside o a
bump, and the wheel will lose contact with the ground. This is called “Packing”. Too little rebound damping will cause the suspension to
“bounce” and “hop” also causing a loss o traction and control. Proper rebound control is equally important as compression and it is very
important to properly tune this per ormance eature. The rebound valve is best located on the “MV” with a tapered shim stack controlling
oil low. Damping systems that use ori ice or small holes to control damping simply cannot control the dynamics o high per ormance
suspension.
Spring Preload: The preload ring or collar compresses the shock or ork spring and either shortens or extends the spring to its original
length. Preload is used to adjust the suspension to the correct range o operation within the suspension’s travel- more spring preload will
the raise the bike up and less preload will lower it.
Spring Type: Springs can either be coil or air and both are widely used in mountain bike suspension systems. Springs work to resist pre-
compression o the suspension under the rider’s weight and is independent o the compression system which re ers to damping. Too sti
o a spring rate delivers a harsh and uncontrolled eel, i your spring rate is too so t, the suspension will sit too ar into its travel and will
eel mushy and easily bottom out. It’s important to have the correct spring rate or each rider and setting up “SAG” will determine whether
you have the correct rate or not.
Stiction: Or static riction, is a term that describes riction that occurs rom parts rubbing or gliding across one another. For example, on
both the rebound and compression stroke, the stanchion tubes must glide against the bushings, O-rings, seals, and other parts. The parts
that come in contact with one another create riction and when a bending load is applied the stiction can increase causing the suspension
to bind and eel notchy. Stiction can also dramatically increase a ter seals become dry resulting in the loss o small bump sensitivity.
Twin Tube Dampers: Twin Tube systems generally combine the technology o an “Open Bath” Damper and a “Closed Cartridge” system.
With a Twin Tube design, the cartridge damper is inside o a tube (hence twin tube) allowing oil to low rom the cartridge damper into
and rom the twin tube providing additional oil low and damping per ormance without the added weight o “excess” oil that is needed to
ill the ork leg.
Valving: The mechanical hardware that creates compression or rebound damping. Valving is a combination o check valves, holes, ports,
shims, springs, etc. The best valving arises out o piston with a series o tapered shim stacks which are very thin high quality steel “washers”
that when combined together produce a smooth yet linear lex pattern when oil lows around them. Shims provide the resistance to the
oil lowing through the piston at various speeds. The lower amount o shims used typically means the damping quality is less. Systems that
use one or two shims deliver a harsh eel on high speed hits, un ortunately, many so-called high per ormance suspension designs use very
ew shims and/or only small holes to control damping orces. I your clickers are ine ective or have a very small range, this is due to
improper piston & shim stack design.

4
SM_150707_A
Service Manual IDYLLE since year 2014
3Exploded views o the ork
3.1 IDYLLE RARE FCV (Ø37MM STANC IONS)
Oil cartridge
cap
Air
cartridge
body
Air
cartridge
cap
Air valve cap
Air
cartridge
sha t
Purge screw
Oil cartridge
sha t
Oil cartridge
body
Oil cartridge
nut
Air
cartridge
nut

5
SM_150707_A
Service Manual IDYLLE since year 2014
3.2 IDYLLE AIR (Ø36MM STANC IONS)
Oil cartridge
cap
Air
cartridge
body
Air
cartridge
cap
Air valve cap
Air
cartridge
sha t
Purge screw
Oil cartridge
sha t
Oil cartridge
body
Oil cartridge
nut
Air
cartridge
nut

6
SM_150707_A
Service Manual IDYLLE since year 2014
4BOS Suspension Service
4.1 SAFETY
While working on BOS suspension please wear appropriate sa ety equipment’s as apron, sa ety gloves and glasses.
When manipulating suspension oil, please wear nitrile gloves and glasses.
4.2 CLEANLINESS
When servicing your BOS suspension, be sure that you are working in conditions that will not a ect the per ormance:
•Work in dust ree environment
•Work on clean and organized workstation
•Use aluminum so t jaws to protect the equipment when using a vice
•Do not scratch any o the sur ace when using tools
•Clean elements when your disassemble them
•Drop sub-assemblies on your station in order to easily ind how to reassemble them together
•Wear long sleeves is recommended or shaved arms
I you are servicing your BOS suspension outside a workshop, you should have at least:
•Avoid dust and air low around your working area
•A clean tarpaulin to place underneath the suspension on the loor
•A bicycle repair stand to lock and maintain the suspension
•An oil pan
•All necessary tools listed below

7
SM_150707_A
Service Manual IDYLLE since year 2014
4.3 TOOLS REQUIRED FOR SERVICE
Cleaning + Safety:
- Sa ety glasses - Clean, lint- ree rags - Soap (+ hot water)
- Nitrile gloves - Long plastic or wooden dowel - Pressure washer
- Apron - Oil pan - Isopropyl alcohol
- Bottlebrush - Spray bottle - Oil ountain (optional)
Standard tools:
- 1.5 / 4 / 6 mm HEX wrenches - 10 / 13 / 14 / 16 / 19 / 21 / 24 mm open end wrenches
- Torque wrench - Socket wrench - Large internal retaining ring pliers
- 10mm socket - 21mm socket (6 sides) - Small screwdriver grounded
- 13mm open end socket - 19mm open end socket - 24mm open end socket
- Bench vise with aluminum so t jaws - Reglet - Silicone paint brush
- Air pump - Syringe - Rubber mallet
- Graduated pitcher - Internal extending micrometer 30-40mm - Universal grease
- Downhill tire lever - Bicycle stand (optional)
BOS specific tools – Pack 1:
- 32mm socket / re . 150707-O-108 - BOS suspension vise block / re . 150707-O-011
- Oil level gauge / re . 150707-SEO-002 - BOS Push air sha t / re . 150707-O-063
BOS specific tools – Pack 2:
- BOS seal installation tools / re . 150707-SEO-001 - BOS slide bushing extractor / re . 150707-SE-003A
BOS specific tools – Pack 3:
- Hal shell Ø10 / re . 150707-O-058 - Hal shell Ø21 / re . 150707-O-060
- Hal shell Ø27 / re . 150707-O-061
BOS suspension vise block BOS oil gauge
BOS half shell BOS lower slide bushing tool
BOS upper slide bushing tool BOS scraper seal tool

8
SM_150707_A
Service Manual IDYLLE since year 2014
4.4 COMPONENTS REQUIRED FOR SERVICE
For operations on the suspension, you may have to order components according to the table below:
*Choose your sticker kit ollowing this table:
Idylle Air Idylle Rare FCV
Re . stickers:
150707-S-002 Re . stickers:
KITSTICKIDLRARR15
Older versions and OEM stickers exists, please contact BOS or more in ormation.
4.5 PERIODICAL SERVICE INFORMATION
To ensure that your ork will keep its best per ormance, be sure to respect the ollowing program:
Item New Every
ride
Every
6 months
Every
year
Every
two years
Set sag x
Set adjustments x
Clean fork exterior x
Basic Service
et/Muddy conditions x
Racing/frequent use x
Dry/dusty conditions x
Complete service
et/Muddy conditions x
Racing/frequent use x
Dry/dusty conditions x
Inspect Bushings
et/Muddy conditions x
Racing/frequent use x
Dry/dusty conditions x
Operations Components Quantity Tools required Step by step
Basic Service:
Change Oil
Bio Oil
0.4 L Standard + Pack 1 § 6.1, 6.2, 6.4:
Complete service:
Change Oil
Traveler checker replacement
Scraper seals replacement
Air piston O-ring replacement
Stickers replacement
Bio Oil
IDYLLE service kit
re . 151108-SE-002
Kit stickers*
0.4 L
1
1
Standard + Pack 1 / 2 § 6.1, 6.2, 6.4:
Slide bushings replacement IDYLLE bushing kit 1 Standard + Pack 1 / 2 § 6.3
Oil cartridge opening Standard + Pack 1 / 2 / 3 § 6.5
Stickers replacement Kit stickers* 1 Standard § 6.6

9
SM_150707_A
Service Manual IDYLLE since year 2014
4.6 FLUID TABLE
Cartridge Lubrication
Serial n° Product Oil quantity
(ml)
Oil level
(mm) Oil type Oil quantity
left air (ml)
Oil quantity
right (ml)
002xxxx IDYLLE 2014 330 185 Bio Oil 155 x
006xxxx IDYLLE Rare 2014 380 130 Bio Oil 10 x
007xxxx IDYLLE Air 2014 330 185 Bio Oil 10 x
008xxxx IDYLLE SC Air Tapered 270 55 Bio Oil 10 x
IDYLLE SC Air Tapered YT03 270 55 Bio Oil 10 x
009xxxx IDYLLE SC Air 270 55 Bio Oil 10 x
012xxxx IDYLLE SCR 3 Voies Tapered
013xxxx IDYLLE Air 650B 330 185 Bio Oil 10 x
IDYLLE Air 650B COM06 330 185 Bio Oil 10 x
014xxxx IDYLLE Rare 650B 380 130 Bio Oil 10 x
IDYLLE Rare 650B COM07 380 130 Bio Oil 10 x
015xxxx
IDYLLE Rare FCV 2015 365 155 Bio Oil 20 in the casting +
3 in the cartridge
x
IDYLLE Rare FCV 2015 RM03 365 155 Bio Oil 20 in the casting +
3 in the cartridge
x
IDYLLE Rare FCV 2015 YT06 365 155 Bio Oil 20 in the casting +
3 in the cartridge
x
017xxxx
IDYLLE Air 650B 3 Voies 330 185 Bio Oil 10 x
IDYLLE Air 650B 3 Voies RM02
018xxxx IDYLLE 650B COM08 330 185 Bio Oil 155 x
IDYLLE 650B RM01S/M/L 330 185 Bio Oil 155 x

10
SM_150707_A
Service Manual IDYLLE since year 2014
4.7 TRAVELER FOR SERVICE CONTROL (PRINTABLE DOCUMENT)
General information:
Product Designation: ___________________________________ Serial number: ___________________________
Owner o the product: __________________________________ Date o service: ___________________________
Technician: __________________________ VISA: _________________ Shop Order #: _______________
Customer initial settings:
Pressure (psi) Low speed (clicks) igh speed (clicks) Rebound (clicks)
Services check list
Basic service operations:
Cleaning: YES NO – Note: _____________________________________________
Oil change: YES NO – Note: _____________________________________________
Basic control: YES NO – Note: _____________________________________________
Travel checker replacement: YES NO – Note: _____________________________________________
Complete service operations:
Cleaning: YES NO – Note: _____________________________________________
Oil change: YES NO – Note: _____________________________________________
Complete control: YES NO – Note: _____________________________________________
Travel checker replacement: YES NO – Note: _____________________________________________
Oil and dust seals replacement: YES NO – Note: _____________________________________________
Air piston O-ring replacement: YES NO – Note: _____________________________________________
Stickers replacement: YES NO – Note: _____________________________________________
Slide bushing replacement
Comments / Parts changed:
__________________________________________________________________________________________________
__________________________________________________________________________________________________

11
SM_150707_A
Service Manual IDYLLE since year 2014
5Operations Summary
5.1 STEP BY STEP C ART
For all BOS suspension’s service, the ollowing chart is ollowed:
1. Receive the suspension
a. Fill the traveler included in this manual page 10
b. Attribute a shop order #, apply this # on the traveler and on the suspension thanks to a tape
2. Control the suspension
a. Oil leakages
b. General condition (scratches, damages…)
c. Establish a potential quotation or repairing the suspension
d. Check settings consistency
3. Clean the suspension. There is multiple way to clean:
a. Pressure washing
b. Hot water + soap
c. Oil bath + brush
d. Alcohol spray
4. Note the customer’s settings o the suspension. You could use page 10 o this manual to do so.
5. Disassemble the suspension ollowing the §6 – Step by Step
6. Clean the sub-assemblies and control them when removing rom the suspension
7. Change parts, reassemble and control the suspension
8. Apply back the suspension’s settings.
9. Clean the suspension be ore packaging
10. Complete traveler with all in ormation and join it with the suspension
5.2 OW TO USE T IS DOCUMENT?
Step number in the routine
Color code re erring to
service type (see page 8)
Localization o the step on
the suspension
Additional Caution or
In ormation linked to the step
Tool(s) required or the step
Pictures describing the steps

12
SM_150707_A
Service Manual IDYLLE since year 2014
1
2
6Step by Step
6.1 CLEANING
Cleaning is very important and part of the BOS service. Do not forget the cleaning steps during service.
Inspect the ork:
-Check eventual loose
-Control parts damaged
-Seek or oil leakages (see picture)
I one o those inspection points shows that something needs to be replaced, you
should quote it to the customer and replace it.
Tool(s) required :
-n/a (by hand)
Clean the ork:
-Washer.
OR (i not equipped):
-Hot water + soap.
Tool(s) required :
-Washer
-Soap
CAUTION
CAUTION

13
SM_150707_A
Service Manual IDYLLE since year 2014
3
2
1
6.2 DISASSEMBLE
Unscrew the 4x screws rom axle wheel.
Remove the wheel axle.
Clean the quick release system and wheel axle.
Use sand paper to remove rust on the wheel axle i necessary.
Tool(s) required :
-4mm HEX wrench
-6mm HEX wrench
-600 sand paper
Place the ork on the vise block thanks to the speci ic tool.
Tighten the screws to hold the ork on the vise block.
Tool(s) required :
-BOS suspension vise block / re . 151108-O-021A
-4mm HEX wrench
Loosen the air valve cap.
Clean it.
Store it.
Tool(s) required :
-n/a (by hand)
CAUTION
1
2
1
2

14
SM_150707_A
Service Manual IDYLLE since year 2014
5
4
6
Connect air pump on the valve.
Read the pressure.
Save this in ormation on the traveler (page 10 o this manual).
De late slowly the ork by pushing the grey button.
Tool(s) required :
-Air pump
Save the rebound setting:
-Screw clockwise the knob
-While screwing, count the number o clicks until the stop
-Write down the number o clicks on the traveler (included in this manual)
Tool(s) required :
-Screwdriver
Remove the superior crown:
-Untighten the screws
-Extract the crown rom the ork
Remove the bumpers i installed.
Tool(s) required :
-4mm HEX wrench
CAUTION
INFORMATION
De lating slowly the ork will allow balancing o the air chambers.
1
2
1
2

15
SM_150707_A
Service Manual IDYLLE since year 2014
9
8
7
Untighten the oil and air cartridge cap.
Tool(s) required :
-32mm socket
-Socket wrench
Remove the in erior crown:
-Measure and save the height rom the cap to the crown
-Untighten the screws
-Extract the crown rom the ork
Tool(s) required :
-4mm HEX wrench
Rotate the ork upside down on its vise block.
Save the low speed compression setting (grey knob):
-Screw clockwise the knob
-While screwing, count the number o clicks until the stop
-Write down the number o clicks on the traveler (included in this manual)
Unscrew the grey knob (anticlockwise) at its maximum
Tool(s) required :
-Screwdriver
1
2 3

16
SM_150707_A
Service Manual IDYLLE since year 2014
11
10
12
Save the high speed compression setting (red knob):
-Screw clockwise the knob
-While screwing, count the number o clicks until the stop
-Write down the number o clicks on the traveler (included in this manual)
Tool(s) required :
-21mm open ends wrench
Loosen the air cartridge nut.
Clean the bolt and seals (x2).
Store it.
Tool(s) required :
-21mm open ends wrench
Untighten the high speed compression screw and remove the knob.
Loosen the oil cartridge nut.
Clean it.
Store it.
Tool(s) required :
-21mm socket
-Socket wrench
-1.5mm HEX wrench
CAUTION
While loosening the nut, oil may drop rom the bottom o the ork. Be
sure to apply oil pan under the ork.
INFORMATION
The low comp setting will turn with the high speed. This is normal!
1
2
1 2
3 4

17
SM_150707_A
Service Manual IDYLLE since year 2014
13
14
15
Place an oil pan under the ork.
Pull the stanchion out rom the ork.
Tool(s) required :
-n/a (by hand)
Purge the oil cartridge:
-Let the cartridge inside the stanchion.
-Pull back and orth the cartridge until no more oil comes out.
Tool(s) required :
-n/a (by hand)
Unscrew the oil cartridge cap rom the stanchion.
Remove the oil cartridge by pulling it up rom the stanchion.
Clean and inspect the cartridge.
Store it.
Tool(s) required :
-n/a (by hand)
CAUTION
Act slowly to avoid splash.
1 2
3
1
2

18
SM_150707_A
Service Manual IDYLLE since year 2014
17
18
16
Clean the stanchion, use a long dowel to clean inside.
Store it.
Tool(s) required :
-Spray o isopropyl alcohol
-Rag
-Long dowel
Remove the air stanchion rom the ork.
Empty the oil rom the stanchion into an oil pan.
Clean and inspect the cartridge.
Tool(s) required :
-n/a (by hand)
There is 2 di erent air cartridge, and 2 di erent way to open it:
-Sha t guide clamped with a circlip (picture 1)
-Sha t guide screwed on the cartridge (picture 2)
Follow the bold description on the next steps according to your ork.
Tool(s) required :
-n/a (by hand)
1 2
3
1 2
3
This manual suits for next models
19
Table of contents
Other BOS Suspension Bicycle Accessories manuals

BOS Suspension
BOS Suspension KIRK User manual
BOS Suspension
BOS Suspension Deville 35 User manual

BOS Suspension
BOS Suspension RARE FCV Series User manual

BOS Suspension
BOS Suspension Deville 35 User manual

BOS Suspension
BOS Suspension iDYLLE 39 FCV User manual
BOS Suspension
BOS Suspension IDYLLE User manual

BOS Suspension
BOS Suspension iDYLLE 39 SC User manual
BOS Suspension
BOS Suspension DEVILLE 35 FCV User manual

BOS Suspension
BOS Suspension iDYLLE 39 SE User manual
BOS Suspension
BOS Suspension VOID2 User manual

