manuals.online logo
Brands
  1. Home
  2. •
  3. Brands
  4. •
  5. Bosch
  6. •
  7. Power Tools
  8. •
  9. Bosch JS260 User manual

Bosch JS260 User manual

Other manuals for JS260

2

Other Bosch Power Tools manuals

Bosch GOP 10,8 V-LI Professional User manual

Bosch

Bosch GOP 10,8 V-LI Professional User manual

Bosch Rexroth Nexo User manual

Bosch

Bosch Rexroth Nexo User manual

Bosch GDR 14 User manual

Bosch

Bosch GDR 14 User manual

Bosch GTR Professional 550 User manual

Bosch

Bosch GTR Professional 550 User manual

Bosch GST Professional 135 CE User manual

Bosch

Bosch GST Professional 135 CE User manual

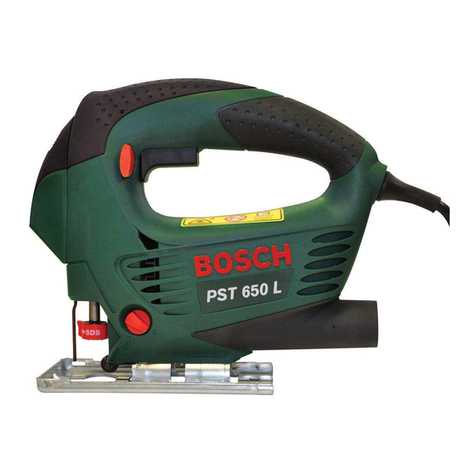
Bosch PST 650 L User manual

Bosch

Bosch PST 650 L User manual

Bosch GMS 120 Professional User manual

Bosch

Bosch GMS 120 Professional User manual

Bosch GWS Professional 12-U User manual

Bosch

Bosch GWS Professional 12-U User manual

Bosch JS120 Assembly instructions

Bosch

Bosch JS120 Assembly instructions

Bosch 1590EVSK - NA Precision Control Top Handle Jig... Assembly instructions

Bosch

Bosch 1590EVSK - NA Precision Control Top Handle Jig... Assembly instructions

Bosch Exaction 18 V-LI 8-1100 User manual

Bosch

Bosch Exaction 18 V-LI 8-1100 User manual

Bosch NTI 1000 User manual

Bosch

Bosch NTI 1000 User manual

Bosch EXACT 2 User manual

Bosch

Bosch EXACT 2 User manual

Bosch GDS18V-330C Assembly instructions

Bosch

Bosch GDS18V-330C Assembly instructions

Bosch GST Professional 18V-155 SC User manual

Bosch

Bosch GST Professional 18V-155 SC User manual

Bosch GSH 5 CE Professional User manual

Bosch

Bosch GSH 5 CE Professional User manual

Bosch 1773AK - 10 Amp Concrete Surfacing Grinder Assembly instructions

Bosch

Bosch 1773AK - 10 Amp Concrete Surfacing Grinder Assembly instructions

Bosch Rexroth ErgoSpin Series User manual

Bosch

Bosch Rexroth ErgoSpin Series User manual

Bosch GBS 75 AE Professional User manual

Bosch

Bosch GBS 75 AE Professional User manual

Bosch PST 650 PE User manual

Bosch

Bosch PST 650 PE User manual

Bosch GSA 36 V-LI User manual

Bosch

Bosch GSA 36 V-LI User manual

Bosch PMF 180 E Multi User manual

Bosch

Bosch PMF 180 E Multi User manual

Bosch GDS18V-740 Assembly instructions

Bosch

Bosch GDS18V-740 Assembly instructions

Bosch GST 650 Professional User manual

Bosch

Bosch GST 650 Professional User manual

Popular Power Tools manuals by other brands

ISLAND HOPPER Power Egg HT-309 operating instructions

ISLAND HOPPER

ISLAND HOPPER Power Egg HT-309 operating instructions

Sioux Tools SSR6P25 Instructions-parts list

Sioux Tools

Sioux Tools SSR6P25 Instructions-parts list

Makita HM1317C technical information

Makita

Makita HM1317C technical information

ABB Smart Tool + quick start guide

ABB

ABB Smart Tool + quick start guide

Baumr-AG BMJK-24S user manual

Baumr-AG

Baumr-AG BMJK-24S user manual

Ronix RA-2702 quick start guide

Ronix

Ronix RA-2702 quick start guide

Nordson ProBlue user guide

Nordson

Nordson ProBlue user guide

aoyue int6028 instruction manual

aoyue

aoyue int6028 instruction manual

Hitachi CJ 65VA2 Instruction manual and safety instructions

Hitachi

Hitachi CJ 65VA2 Instruction manual and safety instructions

Makita HM1304 instruction manual

Makita

Makita HM1304 instruction manual

Kurtz Ersa Ersa X-TOOL VARIO operating instructions

Kurtz Ersa

Kurtz Ersa Ersa X-TOOL VARIO operating instructions

SCHUNK KSO 65 Installation and operating instruction

SCHUNK

SCHUNK KSO 65 Installation and operating instruction

Harken LokHead 500 user manual

Harken

Harken LokHead 500 user manual

Senco DuraSpin ExTPro installation instructions

Senco

Senco DuraSpin ExTPro installation instructions

Ferm JSM1020 Original instructions

Ferm

Ferm JSM1020 Original instructions

Milwaukee M12 FUEL 2559-20 Operator's manual

Milwaukee

Milwaukee M12 FUEL 2559-20 Operator's manual

EINHELL BT-CD 12/2 operating instructions

EINHELL

EINHELL BT-CD 12/2 operating instructions

Evolution HDG200 instruction manual

Evolution

Evolution HDG200 instruction manual

manuals.online logo
manuals.online logoBrands
  • About & Mission
  • Contact us
  • Privacy Policy
  • Terms and Conditions

Copyright 2025 Manuals.Online. All Rights Reserved.

BLADE INSTALLATION
Insert the saw blade (teeth in cutting direction) into the slot in the blade
clamp until the blade ejector lever rotates to the LEFT, indicating that
the clamp has engaged. (When inserting the saw blade, the back of
the blade must rest in the groove of the guide roller.)
BLADE EJECTION
The tool should be held so that the blade is safely ejected. To remove
the saw blade, rotate the blade ejector lever to the center stop to the
RIGHT; this releases and ejects the saw blade.
JS260 BLADE CLAMP INSTRUCTIONS
To prevent damage, do not turn blade ejector lever when there is no blade in the blade clamp or when inserting the blade.
!
CAUTION
BLADE CLAMP RESET – There are two situations in which it is necessary to reset the blade clamp:
RESET Type A: If the blade ejection lever is rotated improperly, the “fingers” within the clamp may slip into the blade insert slot. To reset the
clamp:
Step 1 – sing a a screwdriver, push down on blade clamp fingers (as viewed from the bottom of the jig saw), until clamp can be rotated.
Step 2 – Rotate blade ejector lever to the RIGHT until it locks into place.
The clamp is now ready for use.
RESET Type B: If the two fingers inside the blade clamp accidentally get pushed too far into the plunger, they will prevent insertion of a blade. To
bring the fingers back to their correction positions:
Step 1 – Turn the blade ejector lever to the RIGHT (as viewed from the bottom of the jig saw)
Step 2 – Continue the rotation unto fingers will snap into the correct open position.
The clamp is now ready for use.
BLADE CLAMP IN OPEN POSITION
(As vi w d from th bottom)
BLADE CLAMP
LEVER
FINGERS
BLADE CLAMP IN LOCKED POSITION
(As vi w d from th bottom)
BLADE
CLAMP
LEVER
FINGERS
BLADE CLAMP
LEVER BLADE
CLAMP
LEVER
INSTALLATION DE LA LAME
Insérez la lame de la scie (avec les dents positionnées dans le sens
de la coupe) dans la fente de la bride de fixation de lame jusqu’à ce
que le levier de l’éjecteur de lame tourne vers la GA CHE, ce qui in-
dique que la bride s’est engagée. (Lors de l’insertion de la lame de la
scie, l’arrière de la lame doit reposer dans la rainure du galet de
guidage.)
ÉJECTION DE LA LAME
L’outil doit être tenu de telle sorte que la lame puisse être éjectée sans
danger. Pour enlever la lame de la scie, tournez le levier de l’éjecteur
de la lame vers la butée centrale à DROITE ; ceci libère et éjecte la
lame de la scie.
INSTRUCTIONS POUR LA BRIDE DE FIXATION DE LAME JS260
Pour éviter tout risque de dommage, ne tournez pas le levier de l’éjecteur de lame quand il n’y a pas de lame dans la bride
de fixation de lame ou pendant que vous insérez la lame.
REMISE DE LA BRIDE DE FIXATION DE LAME DANS SA POSITION INITIALE – Il existe deux situations dans lesquelles il est nécessaire de
remettre la bride de ixation de lame dans sa position initiale :
RÉINITIALISATION de type A – Si le levier d’éjection de la lame a été tourné de façon incorrecte, les « doigts » dans la bride de fixation risquent de
glisser dans la fente d’insertion de la lame. Pour remettre la bride de fixation dans sa position initiale :
Première étape – En utilisant un tournevis, appuyez sur les doigts de la bride de fixation de la lame (en regardant depuis le bas de la scie sauteuse)
jusqu’à ce que la bride de fixation puisse tourner.
Deuxième étape – Faites tourner le levier de l’éjecteur de la lame vers la DROITE jusqu’à ce qu’il se bloque en place.
La bride de fixation est alors prête à être utilisée.
RÉINITIALISATION de type B : Si les deux doigts à l’intérieur de la bride de fixation de la lame sont poussés accidentellement trop loin à l’intérieur
du piston, ils empêcheront toute insertion de lame. Pour remettre les doigts dans leurs positions correctes :
Première étape – Faites tourner le levier de l’éjecteur de la lame vers la DROITE (en regardant depuis le bas de la scie sauteuse).
Deuxième étape – Continuez la rotation jusqu’à ce que les doigts se coincent dans la position ouverte correcte.
La bride de fixation est alors prête à être utilisée.
ROTATE IN
DIRECTION OF
ARROW TO
EJECT BLADE
ÉJECTEUR DE LAME EN POSITION OUVERTE
(t l qu vu d puis l bas)
DOIGTS
ÉJECTEUR DE LAME EN POSITION FERMÉE
(t l qu vu d puis l bas)
DOIGTS
LEVIER DE
L’ÉJECTEUR
DE LA LAME
TOURNER
DANS LE SENS
DE LA FLÈCHE
POUR ÉJECTER
LA LAME
LEVIER DE
L’ÉJECTEUR
DE LA LAME
LEVIER DE
L’ÉJECTEUR
DE LA LAME
LEVIER DE
L’ÉJECTEUR
DE LA LAME
MISE EN GARDE
!
INSTALACIÓN DE LA HOJA
Inserte la hoja de sierra (con los dientes en el sentido de corte) en la
ranura ubicada en la abrazadera de la hoja hasta que la palanca eye-
ctora de la hoja rote hacia la IZQ IERDA, indicando que la abrazadera
se ha acoplado. (Cuando inserte la hoja de sierra, el dorso de la hoja
debe descansar en la ranura del rodillo de guía.)
EYECCIÓN DE LA HOJA
La herramienta se debe sujetar de manera que la hoja sea eyectada
de manera segura. Para retirar la hoja de sierra, rote la palanca eyec-
tora de la hoja hasta el tope central ubicado a la DERECHA; esto libera
y eyecta la hoja de sierra.
INSTRUCCIONES PARA LA ABRAZADERA DE LA HOJA JS260
Para prevenir daños, no gire la palanca eyectora de la hoja cuando no haya una hoja en la abrazadera de la hoja ni cuando in-
serte la hoja.
REAJUSTE DE LA ABRAZADERA DE LA HOJA: Hay dos situaciones en las cuales es necesario reajustar la abrazadera de la hoja:
REAJUSTE tipo A: Si la palanca de eyección de la hoja se rota inapropiadamente, los “dedos” ubicados en el interior de la abrazadera podrían
resbalar al interior de la ranura del inserto para la hoja. Para reajustar la abrazadera:
Paso 1: tilizando un destornillador, empuje hacia abajo sobre los dedos de la abrazadera de la hoja (según se ve desde la parte inferior de la
sierra caladora), hasta que se pueda rotar la abrazadera.
Paso 2: Rote la palanca eyectora de la hoja hacia la DERECHA hasta que quede fija en su sitio.
Ahora la abrazadera estará lista para utilizarse.
REAJUSTE tipo B: Si los dos dedos ubicados en el interior de la abrazadera de la hoja son empujados accidentalmente demasiado hacia el
interior del émbolo, impedirán la inserción de una hoja. Para llevar los dedos de vuelta a sus posiciones de corrección:
Paso 1: Gire la palanca eyectora de la hoja hacia la DERECHA (según se ve desde la parte inferior de la sierra caladora).
Paso 2: Continúe la rotación hasta que los dedos se acoplen a presión en la posición abierta correcta.
Ahora la abrazadera estará lista para utilizarse.
1619X07309 12/11
© Robert Bosch Tool Corporation 1800 W. Central Road Mt. Prospect, IL 60056-2230
Exportado por: Robert Bosch Tool Corporation Mt. Prospect, IL 60056-2230, E.U.A.
Importado a México por: Robert Bosch, S.A. de C.V., Calle Robert Bosch No. 405, ona Industrial, Toluca, Edo. de
México, C.P. 50070, Tel. (722) 2792300
!1619X07309!
ABRAZADERA DE LA HOJA EN POSICIÓN ABIERTA
(s gún s v d sd la part inf rior)
DEDOS
ABRAZADERA DE LA HOJA EN POSICIÓN BLOQUEADA
(s gún s v d sd la part inf rior)
DEDOS
PALANCA DE LA
ABRAZADERA DE
LA HOJA
ROTE EN EL
SENTIDO DE LA
FLECHA PARA
EYECTAR LA
HOJA
PRECAUCION
!
PALANCA DE LA
ABRAZADERA DE
LA HOJA
PALANCA DE LA
ABRAZADERA
DE LA HOJA
PALANCA DE LA
ABRAZADERA
DE LA HOJA