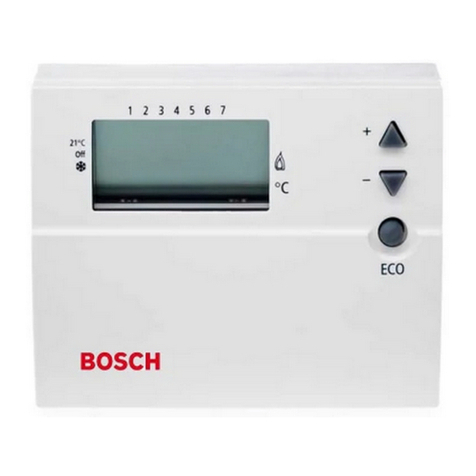
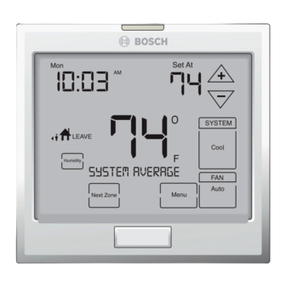
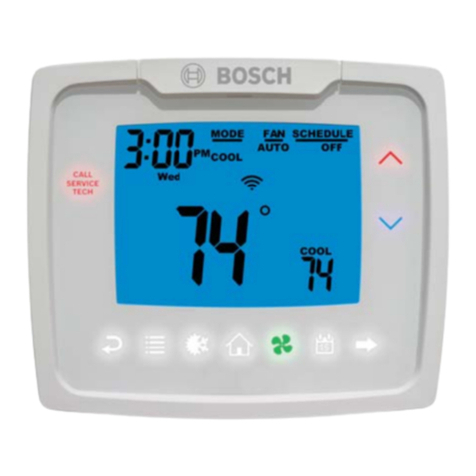
Bosch TSTBT4H2CP-M--A User manual

Owner’s Manual Thermostat
Series
BOSCH COMMUNICATING THERMOSTATS
TSTBT4H2CP SERIES
TSTBT4H2CP-M--A
TSTBT4H2CPHM--A
6 720 220 380 Revised 06-13

6 720 220 380 Subject to change without prior notice Revised 06-13
2TSTBT4H2CP SERIES
TABLE OF CONTENTS
The TSTBT4H2CP Series offers:................................... 3
Thermostat Application Guide ..................................... 3
TSTBT4H2CP Series Thermostat Quick Reference ...... 4
Features of the Transmitting and Receiving Module
(TRM)........................................................................... 5
Installing the TSTBT4H2CP Thermostat Series............ 6
Wall Locations ............................................................. 6
Installing the TRM Receiving Module ........................... 6
Temperature Sensor Connections ............................... 7
TS1 and TS2 ................................................................ 7
Remove the Battery Tab ............................................... 8
Install the Thermostat on the Sub-Base ....................... 8
Displaying and Resetting the Service Messages .......... 9
Fault Codes.................................................................. 9
Enabling Fault Code Messages..................................... 9
Displaying Equipment Service Messages..................... 9
High Pressure Alert ...................................................... 9
Low Pressure Alert....................................................... 9
Freeze Condition Alert ............................................... 10
Condensate Line Alert ............................................... 10
Brownout Alert .......................................................... 10
Evaporator Freeze Alert ............................................. 10
Lost Equipment Communication ............................... 11
Lost Gateway Communication ................................... 11
Low Heating Output................................................... 11
Low Cooling Output................................................... 11
Lost Power................................................................. 11
Initial Thermostat Settings ........................................ 12
Selecting Heating or Cooling ..................................... 12
Selecting Auto or Cont Fan ........................................ 12
Adjusting the Temperature Setting. ........................... 12
Adjusting RH Setpoints for Humidity Control............. 12
Selecting Operating Mode ......................................... 12
Setting the Time and Day of the Week........................ 13
Schedule Programming.............................................. 13
7 Day Program Schedule............................................ 14
Custom Program Schedule ........................................ 14
Locking the Thermostat ............................................. 15
Hidden Lock key......................................................... 15
Displaying the Time and Temperature Schedule ........ 15
TSTBT4H2CP Thermostat Series Installation
Troubleshooting ........................................................ 17
Available Accessories for the
TSTBT4H2CP Thermostat Series ............................... 18
Product Limited Warranty.......................................... 19
Warranty Coverage .................................................... 19
Items Not Covered ..................................................... 19
Limited Warranty ....................................................... 20
Warranty Claims Process ........................................... 20

6 720 220 380
Revised 06-13 Subject to change without prior notice
TSTBT4H2CP SERIES 3
Thermostat Application Guide
The Bosch TSTBT4H2CP Thermostat Series consists of
4-wire MODBUS communicating thermostats. Utilizing
RS485 MODBUS protocol, the TSTBT4H2CP Thermostat
Series can communicate with the equipment, monitor the
performance, and report the status of the equipment.
The MODBUS protocol is received and then translated to
pulses to be received by the HVAC equipment. This
translation is performed by the TRM (Transmitting and
Receiving Module). The thermostat and TRM
communicate via 2 wire MODBUS, the TRM and the HVAC
equipment communicates via 4-12 wires utilizing pulses.
The Bosch TSTBT4H2CP Thermostat Series
communicates utilizing MODBUS protocol to the TRM
THE TSTBT4H2CP SERIES OFFERS:
• ModbusthermostatwithlargeLCDandtouch
screenwith blue LED back lighting
• Lowbacklightlevelwhentouchkeysnotused
• Fourschedulesperday,7-dayprogrammable
• Uptofour-stageheatingand2-stagecooling
• Optionalautomaticfanoperationduringdaytimeon
selected days
• Compatiblewithconventionalanddualfuelheatpumps
and gas electric systems
• Optionaltemperaturesensorsfordis-chargeair
temperature and outdoor air temperature
• Optionalremotespacetemperaturesensors
• Diagnosticmonitorindicatesequipmentalertsandloss
of communications
• Servicemonitorsforlter,UVBulbandhumidierpad
• Optionalkeyboardlock
• ReceivingModuleCOMLEDblinksduring
Modbuscommunication and turns red if communication
with thermostat is lost
• Optionalreturnairtemperaturesensormaintainssafe
space temperature if communication with thermostat is
lost for 10 minutes
THERMOSTAT APPLICATION GUIDE
Description Available
Gas or Oil Heat Yes
Electric Furnace Yes
Heat Pump (No Aux. or Emergency Heat) Yes
Heat Pump (With Aux. or Emergency Heat) Yes
Multi-Stage Systems Yes
Heat Only Systems Yes
Cool Only Systems Yes
Dual Fuel Systems Yes
Milivolt Yes
Humidier Control Yes
Auto Changeover Yes
MODBUS Communicating Yes

6 720 220 380 Subject to change without prior notice Revised 06-13
4TSTBT4H2CP SERIES
TSTBT4H2CP SERIES THERMOSTAT QUICK REFERENCE
Getting to know your thermostat
Insid e
We
Day
HEAT
Schedule
AUTO
FANMENU MODE NEXT ENTER
Heat
Set To
SYSTEM
AM
Displays heating, cooling or RH setpoint.*
Up and Down keys used
to adjust setpoints.*
System key selects Off, Heat only,
Em Heat, Cool only or Autmatic
Heat/Cool.
Displays the indoor temperature when
setting the heating or cooling or the indoor
RH% when setting the RH setpoint*.
Switches the setpoint display between
heating, cooling or RH%*.
Mode key selects between Schedule,
temporary Hold or continuous Hold.
Menu key used to display
User menu selection.
Battery charge indicator
(program saving battery
only; the battery will not
power the thermostat)
.
Displays the schedule period,
Morning, Daytime, Evening or Night.
Displays the operating mode,
Schedule, Temporary Hold or Hold.
Displays time of day and weekday
Inside
Outside
Option
Message
Filter
HumPad
UV Bulb
Zone
WeTuMo
MornDay EveNight
Th Fr Sa Su
Home
Locked
AuxHeat RH%
ON
HEAT
AUTO
OFF
COOL
Schedule
Temp Hold
Vacant
Clean
AUTO
FANMENU MODE NEXT ENTER
EmHeat
Com
HeatCool RH%
FrAi r
Set To
SYSTEM
PM
AM
Filter, HumPad or UV Bulb will blink when
service is required. Press the hidden key
area to reset the service timers after
servicing the equipment.
Press the hidden Lock key when
the Lock feature is enabled to
lock or unlock the keys using the
2-digit code.
Press the hidden clock key to set the
time of day and weekday.
Press the hidden Message key
when blinking to display the
equipment alert messages.
Press the hidden schedule key
to program the Morning, Day,
Evening and Night schedules.
When in a menu setup, this
MODE button is blank and is
used as a Cancel button.
*Humidity Features only available with the TSTBT4H2CPHM--A model and the TSTBT4H2CPHMW-A model.
Fan key selectsAutomatic or On.
Previous key when in programming mode
Quick Reference
Caution
MENU, MODE, NEXT, & ENTER buttons change
functionalities during programming or other type of menu
setting changes. Their function is described for that specifi c
function within the Tech Setup Section.
Insid e
We
Day
HEAT
Schedule
AUTO
FANMENU MODE NEXT ENTER
Heat
Set To
SYSTEM
AM
Displays heating, cooling or RH setpoint.*
Up and Down keys used
to adjust setpoints.*
System key selects Off, Heat only,
Em Heat, Cool only or Autmatic
Heat/Cool.
Displays the indoor temperature when
setting the heating or cooling or the indoor
RH% when setting the RH setpoint*.
Switches the setpoint display between
heating, cooling or RH%*.
Mode key selects between Schedule,
temporary Hold or continuous Hold.
Menu key used to display
User menu selection.
Battery charge indicator
(program saving battery
only; the battery will not
power the thermostat)
.
Displays the schedule period,
Morning, Daytime, Evening or Night.
Displays the operating mode,
Schedule, Temporary Hold or Hold.
Displays time of day and weekday
Inside
Outside
Option
Message
Filter
HumPad
UV Bulb
Zone
WeTuMo
MornDay EveNight
Th Fr Sa Su
Home
Locked
AuxHeat RH%
ON
HEAT
AUTO
OFF
COOL
Schedule
Temp Hold
Vacant
Clean
AUTO
FANMENU MODE NEXT ENTER
EmHeat
Com
HeatCool RH%
FrAi r
Set To
SYSTEM
PM
AM
Filter, HumPad or UV Bulb will blink when
service is required. Press the hidden key
area to reset the service timers after
servicing the equipment.
Press the hidden Lock key when
the Lock feature is enabled to
lock or unlock the keys using the
2-digit code.
Press the hidden clock key to set the
time of day and weekday.
Press the hidden Message key
when blinking to display the
equipment alert messages.
Press the hidden schedule key
to program the Morning, Day,
Evening and Night schedules.
When in a menu setup, this
MODE button is blank and is
used as a Cancel button.
*Humidity Features only available with the TSTBT4H2CPHM--A model and the TSTBT4H2CPHMW-A model.
Fan key selectsAutomatic or On.
Previous key when in programming mode

6 720 220 380
Revised 06-13 Subject to change without prior notice
TSTBT4H2CP SERIES 5
Transmitting and Receiving Module
FEATURES OF THE TRANSMITTING AND RECEIVING MODULE (TRM)
Relay
Relay
Relay
Relay
Relay
Relay
Relay
Relay
Features, Receiving Module HVAC Status
Optional Return Air Temperature Sensor
Optional Temperature Sensors
Modbus Thermostat Communication
De-Humidication Control
Humidifier Control
Equipment Monitor
Communication Status
HVAC Control
Red if heating call, blinks during second stage heating call.
If communication is lost between the Receiving
Module and Thermostat for 10 minutes, the sensor
is used to control the space temperature.
TS1 and TS2 can be used to monitor dis-charge air temperature,
outdoor temperature or can be used as remote space temperature
sensors. See Installer options 13 and 14.
A 4-wire thermostat cable between the Receiving
Module and the Thermostat provides Modbus
communication using RS485.
The HUM terminal can be used to
control de-humidification using the
cooling or hot gas reheat.
These terminals are used to
control a humidifier.
The PDU terminal is used to monitor
Bosch equipment and indicate any
alert messages at the Thermostat.
Blinks green during Modbus communication
with thermostat and turns red if communication with
thermostat fails 10 times.
Terminals can be configured for
conventional or dual fuel heat
pumps or gas/electric systems.
Yellow if cooling call, blinks during second stage cooling call.
Green if fan call.
Caution
Mercury Notice: All Bosch thermostats are
mercury free. However, if the product you are
replacing contains mercury, dispose of it properly.
Your local waste management authority can give
you instructions on recycling.

6 720 220 380 Subject to change without prior notice Revised 06-13
6TSTBT4H2CP SERIES
INSTALLING THE TSTBT4H2CP
THERMOSTAT SERIES
Caution
A trained, experienced technician must install this
product. Carefully read these instructions. You could
damage this product or cause a hazardous condition if
you fail to follow these instructions. See the product
specifi cations at the end of this manual prior to installing.
WALL LOCATIONS
Do not install thermostats in locations that are:
• OnanexteriorWall
• Indirectsunlight
• Wheretheremaybeconcealedchimneysorpipes
behind the wall
• Closetoawindowordoorleadingoutside
• Closetoobjectsradiatingheatsuchasreplaces,
lighting, space radiators, or any other applicance
• Inareasthatdonotrequireconditioning
• Indeadspotsorwheredraftscanoccur(behinddoors
or in corners)
• Closetohotorcoldairducts
Caution
Pick an installation location that is easy for the
user to access. The temperature of the location
should be representative of the building.
Mounting the Thermostat
First,separatethethermostatandsub-baseusingaat
blade screw driver as shown below.
Screw driver
Rotate the screw driver tip so the thermostat separates
from the sub-base and then pull the thermostat away from
the sub-base.
Align the 4 tabs on the subbase with corresponding slots
on the back of the thermostat or base module. Then push
gently until the thermostat or base module.
Caution
To insure a solid fi t between the thermostat
and the subbase:
1. Mount subbase to a fl at wall
2. Use screws provided
3. Drywall anchors should be fl ush with the wall
4. Wires should be pushed into the wall
INSTALLING THE TRM RECEIVING MODULE
TRM stands for Transmitting and Receiving Module. The
TRM communicates with the TSTBT4H2CP Thermostat
Series using the MODBUS protocol and then translates
the MODBUS protocol to pulses and relays these signals
to the HVAC equipment.
The Receiving Module can be installed adjcent to or
within the HVAC equipment.
Secure to wall or equipment
with screws at top and bottom.
Remove these screws (4)
to access terminals.
Descriptive Part#
TSTB-TRM--6--A
P/N 7738002948
Receiving Module
24VAC, 2VA, No Load
Made in USA
COM
HVAC
There are two LED lights on the TRM. One is the COM
light which blinks green when communication is
happening between the TRM and the thermostat. This
light will normally blink about every 10 seconds as the
thermostat and TRM are in constant communication for
status updates. If communication is lost for more than 10
minutes,theCOMLEDwillbecomered.Acertied
licensed technician should be called to service the system
if this occurs.
The other LED is labeled HVAC. This light indicates if the unit
is actively heating or cooling. If the unit is cooling, then the
LED is yellow, if the unit is in heating, then the LED is red. If
thethermostatissatised,thentheLEDifoff.
Installing the Thermostat

6 720 220 380
Revised 06-13 Subject to change without prior notice
TSTBT4H2CP SERIES 7
Terminal Designations on the TSTBT4H2CP Thermostat Series
3 Heat / 2 Cool Conventional System 3 Heat / 2 Cool Heat Pump System 4 Heat / 2 Cool Heat Pump System
C24 Volt Common 24 Volt Common 24 Volt Common
R24 Volt Power 24 Volt Power 24 Volt Power
OEnergized in Cooling Energize Reversing Valve in Cooling Energize Reversing Valve in Cooling
BEnergized in Heating Energize Reversing Valve in Heating Energize Reversing Valve in Heating
W1 Heating - 1st Stage Aux Heating - 1st Stage Aux Heating - 1st Stage Aux / Emergency Heat
W2 Heating - 2nd Stage Aux Emergency Heat Relay Heating - 2nd Stage Aux
Y1 Compressor - 1st Stage Cooling Compressor - 1st Stage Heating/Cooling Compressor - 1st Stage Heating/Cooling
Y2 Compressor - 2nd Stage Cooling Compressor - 2nd Stage Heating/Cooling Compressor - 2nd Stage Cooling
GFan Relay Fan Relay Fan Relay
DH "Cool to Dehumidify Relay
(Cooling Mode Only)”
“Cool to Dehumidify Relay
(Cooling Mode Only)”
“Cool to Dehumidify Relay
(Cooling Mode Only)”
HUM "Humidi er Contact Relay
(Dry Contact-Heating Mode Only)”
“Humidi er Contact Relay
(Dry Contact-Heating Mode Only)”
“Humidi er Contact Relay
(Dry Contact-Heating Mode Only)”
HUM “Humidi er Contact Relay
(Dry Contact-Heating Mode Only)”
“Humidi er Contact Relay
(Dry Contact-Heating Mode Only)”
“Humidi er Contact Relay
(Dry Contact-Heating Mode Only)”
ALR This terminal is used only for Bosch / Florida Heat Pump Equipment. This connection is used for fault code communication from the
UPM board in the heat pump. The fault type being transmitted will be displayed on the thermostat. Do not use with any other equipment.
Caution
TSTBT4H2CP Thermostat Series Wiring
Notes: Bosch Water Source Heat Pumps
utilize “O” type reversing valve operation. If
your heat pump utilizes “B” type reversing
valve operation, substitute the wiring for the
“O” terminals for “B”.
TEMPERATURE SENSOR CONNECTIONS
ZONB-LAS---M--A Return Air
Temperature Sensor
Optionally, a temperature sensor can be installed in the
return air duct. This sensor is automatically detected by
the TRM and used to control the equipment should the
communication between the thermostat and TRM fail.
This insures the indoor temperature does not drop below
55°F or rise above 85°F.
Use AWG 18–22 thermostat wire to connect the sensors
to the TRM.
TS1 AND TS2
Temperature sensor 1 and Temperature sensor 2 inputs on
theTRMcanbeconguredinthethermostatsetupmenuas
an outdoor temperature sensor, a leaving air temperature
sensor, or as a remote room temperature sensor.
Either TS1 or TS2 can be designated as the outside air
temperature sensor, however once one of the input
sensors are designated as the outdoor temperature
sensor, the option will not be available for the other
sensor input in the menu setup. The same logic applies for
the leaving air temp. You cannot have two sensor inputs
designated as outdoor temperature or leaving air temp.
For the remote room temperature sensor function, either
TS1 or TS2 can be desingnated or both can. Two remote
room temp sensors are allowed.
TS1 Used as Outdoor Temperature Sensor
An outdoor temperature sensor is required for dual fuel
heal pumps and for automatic emergency heat activation
in cold weather. The sensor should be installed under the
eves and in the shade.
Temperature Sensor Connections

6 720 220 380 Subject to change without prior notice Revised 06-13
8TSTBT4H2CP SERIES
TS1 Used as Leaving Air Temperature
Sensor
A sensor can be installed in the supply duel to monitor the
Leaving air temperature for monitoring equipment
performance. The stainless steel tube should inserted in
the duct down stream from the plenum.
TS1 Used as a Remote Space
Temperature Sensor
A sensor can be installed in a remote location, such as the
secondoor,andthetemperatureattheremotesensor
will be averaged with the sensor in the thermostat when
controlling the heating and cooling.
TS2 Temperature Sensor #2
When both TS 1 and TS2 are used as remote space
temperature sensors, both sensor readings will be
averaged with the thermostat sensor reading.
See the available accessories at the end of this manual for
compatibility, part numbers and descriptions for
ordering.
REMOVE THE BATTERY TAB
The TSTBT4H2CP-M--A Thermostat Series has a coin cell
battery for maintaining the clock, schedules, and user
settings during power outages. After the wiring of the
installation, remove the battery tab. Do not remove the
tab until the Receiving Module, Thermostat and
equipment wiring is complete.
INSTALL THE THERMOSTAT ON THE
SUB-BASE
Align the four prongs on the sub-base with the square
holes in the thermostat back cover and push the
thermostat onto the sub-base until it locks in place.
Battery Tab

6 720 220 380
Revised 06-13 Subject to change without prior notice
TSTBT4H2CP SERIES 9
DISPLAYING AND RESETTING THE
SERVICE MESSAGES
The“Filter”,“HumPad”or“UV Bulb”will blink whenever
theirservicehourshaveexceededthetimeintervalin
100s of hours for cleaning or replacement. After servicing
thelter,humidierpadorUVbulb,pressandholdthe
key area in gray for 4 seconds to reset the hours.
Inside
Filter
We
Day
HEAT
Schedule
AUTO
FANMENU MODE NEXT ENTER
Heat
Set To
SYSTEM
AM
Press and hold in this area
for 4 seconds to reset filter
monitor hours.
“Filter” linking
Ifmultipleagsareblinking,youwillhavetorepeatthe
processforeachag.
FAULT CODES
The TSTBT4H2CP Thermostat Series communicates with
a Florida Heat Pump or Bosch heat pump through the
compressor protection module (UPM) board. The UPM
communicates fault codes utilizing a combination of
pulses. The translating module deciphers these pulses
and relays the associated fault to be displayed on the
thermostat.
ENABLING FAULT CODE MESSAGES
Run a low voltage wire from the ALR-OUT terminal
connection on the UPM board to the PDU terminal on the
TRM.
Caution
This feature is only available with a Florida
Heat Pump or Bosch Heat Pump.
Caution
See page 8 for wiring diagram.
DISPLAYING EQUIPMENT SERVICE
MESSAGES
The word“Message”will blink anytime an equipment
service message is present. To display the message, Press
in the key area shown in gray for 4 seconds.
Inside
Message
We
Day
HEAT
Schedule
AUTO
FANMENU MODE NEXT ENTER
Heat
Set To
SYSTEM
AM
HIGH PRESSURE ALERT
The equipment has detected a high head pressure
condition and prohibited heating and cooling calls.
Contact your local contractor for service. Press the
ENTER key to return to normal thermostat display.
Message
HEAT
AUTO
FANMENU MODE NEXT ENTER
SYSTEM
Message
HEAT
AUTO
FANMENU MODE NEXT ENTER
SYSTEM
LOW PRESSURE ALERT
The equipment has detected a low head pressure
condition and prohibited heating and cooling calls.
Contact yourlocal contractor for service. Press the ENTER
key to return to normal thermostat display.
Service Messages

6 720 220 380 Subject to change without prior notice Revised 06-13
10 TSTBT4H2CP SERIES
Message
Message
HEAT
HEAT
AUTO
AUTO
FAN
FAN
MENU
MENU
MODE
MODE
NEXT
NEXT
ENTER
ENTER
SYSTEM
SYSTEM
Caution
HP & LP faults will indicate whether the fault
has occurred on compressor 1 or compressor
2. HP1 is a high pressure fault on compressor
1, LP2 is a low pressure fault on compressor 2
FREEZE CONDITION ALERT
The equipment has detected a freeze condition and
prohibited heating and cooling calls.
The sensor that has triggered this fault is monitoring the
refrigerant temperature between the TXV and the air coil.
The UPM board is aware of the mode of operation, and
this sensor will be monitored in the cooling mode.
Contact your local contractor for service. Press ENTER
key to return to normal thermostat display.
Message
HEAT
AUTO
FANMENU MODE NEXT ENTER
SYSTEM
CONDENSATE LINE ALERT
The equipment has detected a condensate line blockage
condition and prohibited cooling calls. Contact yourlocal
contractor for service. Press the ENTER key to return to
normal thermostat display.
Message
HEAT
AUTO
FANMENU MODE NEXT ENTER
SYSTEM
BROWNOUT ALERT
The equipment has detected a power brownout condition
and prohibited heating and cooling calls. Contact
yourlocal contractor for service. Press the ENTER key to
return to normal thermostat display.
Message
HEAT
AUTO
FANMENU MODE NEXT ENTER
SYSTEM
EVAPORATOR FREEZE ALERT
The equipment has detected a freeze condition and
prohibited heating and cooling calls.
The sensor that has triggered this fault is monitoring the
refrigerant temperature between the TXV and the water
coil. The UPM board is aware of the mode of operation,
and this sensor will be monitored in the heating mode.
Contact your local contractor for service. Press ENTER
key to return to normal thermostat display.
Message
HEAT
AUTO
FANMENU MODE NEXT ENTER
SYSTEM
Freeze Condition Alert

6 720 220 380
Revised 06-13 Subject to change without prior notice
TSTBT4H2CP SERIES 11
LOST EQUIPMENT COMMUNICATION
The thermostat has detected a loss of communication
with the equipment,receiving module or zoning panel.
Check the wiring connections. See the troubleshooting
section at the end of this manual or contact your local
contractor for service. Press the ENTER key to return to
normal thermostat display.
.
Message
HEAT
AUTO
FANMENU MODE NEXT ENTER
SYSTEM
LOST GATEWAY COMMUNICATION
This fault will only be produced if Option 29 - Internet
Connection is being utilized. See the Tech Menu Setup
Explanationformoreinformation.Thethermostathas
detected a loss of communication with the Gateway and
internet access. If the condition persists, see the
troubleshooting section at the end of this manual or
contact your local contractor for service. Press the ENTER
key to return to normal thermostat display.
Message
HEA T
AUT O
FA NMENU MODE NEXT ENTER
SYSTEM
LOW HEATING OUTPUT
This fault will only be produced if Option 19 - Heating
Equipment Monitoring is being utilized. See the Tech
MenuSetupExplanationformoreinformation.The
thermostat has detected the heating equipment output is
below its limit. This can be caused by unusually severe
cold weather. If the condition persists, contact your local
contractor for service. Press the ENTER key to return to
normal thermostat display.
Message
HEA T
AUT O
FA NMENU MODE NEXT ENTER
SYSTEM
LOW COOLING OUTPUT
This fault will only be produced if Option 20 - Cooling
Equipment Monitoring is being utilized. See the Tech
MenuSetupExplanationformoreinformation.The
thermostat has detected the cooling equipment output is
below its limit. This can be caused by unusually severe hot
weather. If the condition persists, contact your local
contractor for service. Press the ENTER key to return to
normal thermostat display.
Message
COOL
AUT O
FA NMENU MODE NEXT ENTER
SYSTEM
LOST POWER
If the power to the equipment is lost, the Receiving
Module and Thermostat loss power and the thermostat
goes into a low power operating mode to maintain the
clock using the 3V coin cell. The keys and back lighting are
inhibited until power is restored. Only the time and “noP”
is shown on the LCD indicating there is no power available
to operate the equipment.
We Su
AM
Lost Equipment Communication

6 720 220 380 Subject to change without prior notice Revised 06-13
12 TSTBT4H2CP SERIES
INITIAL THERMOSTAT SETTINGS
The user options can be accessed using Menu key or by
pressing certain areas on the LCD.
SELECTING HEATING OR COOLING
By pressing SYSTEM button, you can rotate through the 4
operation mode choices: OFF, HEAT, EmHEAT, COOL,
AUTO. Select OFF to turn both heating and cooling off.
Select HEAT for heating only or COOL for cooling only.
Select AUTO for automatic changeover of heating and
cooling. When used for heat pump control, the emergency
heating can be operated by selecting EmHeat.
Inside
We
Day
HEAT
Schedul e
AUTO
FANMENU MODE NEXT ENTER
Heat
Set To
SYSTEM
AM System
Key
SELECTING AUTO OR CONT FAN
Select AUTO to allow the fan to be activated when needed
by a heating or cooling call. Select CONT to operate the
fan continuously for ventilation.
Inside
We
Day
HEAT
Schedul e
AUTO
FANMENU MODE NEXT ENTER
Heat
Set To
SYSTEM
AM
Fan Key
ADJUSTING THE TEMPERATURE
SETTING.
Press the arrow to raise the temperature setting or
press the arrow to lower the setting. To change the
non-calling system temperature setting, press the NEXT
key to switch from heat to cool setting or cool to heat
setting and use the and arrows to set the
temperature. The mode in which the set point is being
established will be displayed underneath the set point
temperature (ie. Heat will be displayed when establishing
the set point for heating).
Inside
We
Day
HEAT
Schedul e
AUTO
FANMENU MODE NEXT ENTER
Heat
Set To
SYSTEM
AM Up/Down
Keys
ADJUSTING RH SETPOINTS FOR
HUMIDITY CONTROL.
(Only available with TSTBT4H2CPHM--A &
TSTBT4H2CPHMW-A model thermostats)
If a thermostat has an RH sensor, use the NEXT key to
selectRHsettingfordehumidicationorhumidier
control. Use the and keys to raise or lower the RH
setting.
Inside
We
Day
HEAT
Schedul e
AUTO
FANMENU MODE NEXT ENTER
Set To
SYSTEM
AM
Indoor RH
RH%
RH%
RH setting
SELECTING OPERATING MODE
There are four operating modes: Schedule Operation,
Temporary Hold, Permanent Hold, and Vacant Mode.
Press and hold the MODE key to switch between
Schedule Operation, Temporary Hold, Permanent Hold, or
Vacant Mode.
In Schedule Operation, the temperature settings for
heating and cooling are automatically set according to the
Morning, Daytime, Evening, and Night times and
temperature settings for each day of the week. See the
schedule programming section above on instructions how
to establish temperature set points and time of day that
each program will apply.
The Temporary Hold mode is activated when the or
keys are pressed to adjust the temperature setting during
the schedule operation. “TempHold” will be displayed
instead of “Schedule” for the duration for the temporary
set point once the back light has dimmed. The
temperature settings are held for 3 hours and then will
resumewiththenormalschedulesettingsforthatspecic
time of day.
Initial Thermostat Settings

6 720 220 380 Subject to change without prior notice Revised 06-13
13 TSTBT4H2CP SERIES
Permanent Hold mode is a permanent temperature
override and ignores the schedule and maintains the
settings established by the and keys until the
status is manually changed by the user.
The Vacant mode maintains the space to temperatures
established by the user to minimize energy consumption
while maintaining necessary space conditions when they
areawayforanextendedamountoftime;onvacationfor
example.Thisisapermanentholdingfeatureuntilthe
status is manually changed by the user.
Press and hold the MODE button until “Vacant” is
displayed.
1. Use the and buttons to establish the heating
set point.
2. Push NEXT.
3. Use the and buttons to establish the cooling
set point.
4. Push NEXT.
5. Use the and buttons to establish the humidity
set point.
6. The back light will dim within 5 seconds and the
settings will take affect.
Inside
We
Day
HEAT
Schedul e
AUTO
FANMENU MODE NEXT ENTER
Heat
Set To
SYSTEM
AM
DisplaysTempHold, Hold or Schedule.
Mode Key
SETTING THE TIME AND DAY OF THE
WEEK
The time of day and day of the week can be set using the
MENU key or by pressing AM-PM key area shown in gray.
Inside
We
Day
HEAT
Schedul e
AUTO
FANMENU MODE NEXT ENTER
Heat
Set To
SYSTEM
AM
Press here to change
time of day.
Menu Key
1. Pressthe“AM”or“PM”textorMENU button once.
2. Use the or button to adjust the hour of day.
Caution
Pay attention to ensure the PM or AM is set
correctly
3. Push NEXT to proceed to set the minutes.
4. Use the or button to adjust the minutes.
5. Push NEXT to proceed to set the Day of the week.
6. Use the or button to adjust the Day of the
week.
7. Push ENTERtoexitthesetupmenuandbacktothe
home screen.
Caution
ENTER can be pressed at any time during the
time setup procedure to exit the setup menu
and back to the home screen
SCHEDULE PROGRAMMING
All communicating Bosch thermostats are shipped with
an energy saving pre-program. You can customize this
default program by following the programming
instructions below.
Inside
We
Day
HEAT
Schedul e
AUTO
FANMENU MODE NEXT ENTER
Heat
Set To
SYSTEM
AM
Press here to change
the Schedule.
Menu Key
The thermostat schedule can be set by pushing the MENU
button twice or by pressing “Schedule” from the
thermostat home screen. There are 4 different time
periods for each day (Morn, Day, Eve, Night). Each time
Setting the Time and Day of the Week

6 720 220 380 Subject to change without prior notice Revised 06-13
14 TSTBT4H2CP SERIES
period has two set points, one for Cooling Mode and one
for Heating Mode.
1. From the thermostat home screen, press MENU twice
or “Schedule” to enter the Programming Setup Menu.
2. MORNisthersttimeperioddisplayed.
3. Use the or button to adjust the start time for
the current time period. The time duration is in 15
minute intervals.
4. Push NEXT.
5. Set the set point for the Heating mode using the
or button. You will see “Heat” beneath the set
point temperature.
6. Push NEXT.
7. Set the set point for the Cooling mode using the or
button. You will see “Cool” beneath the set point
temperature.
8. Push NEXT.
9. Thenexttimeperiodisnowdisplayed.
10. Repeat steps 3-8 to establish the start time for that
time period and the heating and cooling set points for
that time period.
11. Push NEXT.
The current screen at this point is used to assign the
currentschedulebeingestablishedtospecicdays.
7 DAY PROGRAM SCHEDULE
(CONTINUED FROM SCHEDULE
PROGRAMMING)
The time schedule and set points have been determined,
buttheyhavenotbeenassignedtospecicdayatthis
point.
The default setting for the TSTBT4H2CP Thermostat
Series is a 7 Day Schedule. All 7 days are displayed. All 7
days will utilize the schedule just created if no changes
are made at this point.
12. Press ENTER to apply the schedule just created to all
7 days of the week.
CUSTOM PROGRAM SCHEDULE
(CONTINUED FROM SCHEDULE
PROGRAMMING)
Somedaysmayrequireadifferentscheduleprogram;
whetheritbeadifferenttimeperioddenitionordifferent
heating/coolingsetpoints.Tocreatespecicschedules
forspecicdays,continuefromtheSchedule
Programming Steps 1-11 from above and continue with the
following instructions. Each day can have its own unique
programmedscheduleandsetpoints;foratotalof7
possible unique schedules for the TSTBT4H2CP
Thermostat Series.
The decision to be made here is what days the scheduled
programwillbeassignedto;thisisaccomplishedby
removing the days that the program will not be associated
with. The remaining days being displayed are the days that
the current schedule will be assigned to.
Picking up after step 11 from above:
Currently all 7 days are being displayed and an “01” is
displayed in the u day. By pressing the or button,
you will see “Mon” appear or disappear. This is how you
add or remove Monday from the current schedule
program. The button adds “Mon” to the list of days
affected, the button removes “Mon” from the list of
days affected.
Creatinga5+2ScheduleExample(WeekdaySchedule+
Weekend Schedule):
13. Press the NEXT button until “06” is displayed in the
upper right hand corner (Day 6 which is Saturday).
14. Press the button to remove “Sat” from the days
being displayed.
15. Press the NEXT button to change the day number to
“07” (Day 7 is Sunday).
16. Press the button to remove “Sun” from the days
being displayed.
17. Currently you should only see Mon, Tue, Wed, Thu, Fri
being displayed. Press ENTER button.
You should now be back to the thermostat home screen
and the schedule that was just created has been applied
to Mon-Fri.
18. Repeat Steps 1-11 from above establishing times and
set points to apply for the weekend (Sat & Sun).
19. All days should be displayed and “01” should be in the
upper right hand corner. Press the button to
remove “Mon” from the days being displayed.
20. Press the NEXT button to change the day number to
“02” (Day 2 is Tuesday).
21. Press the button to remove “Tue” from the days
being displayed.
7 Day Program Schedule

6 720 220 380
Revised 06-13 Subject to change without prior notice
TSTBT4H2CP SERIES 15
22. Continue in this fashion to remove “Wed”, “Thu”, &
“Fri’ from the days being displayed.
23. At this point, only “Sat” & “Sun” should be displayed.
Press ENTER button.
You should now be back to the thermostat home screen
and the schedule that was just created has been applied
to Saturday and Sunday.
LOCKING THE THERMOSTAT
If the key locking option was enabled in the Tech Menu
Setup (Option #26), the keys can be locked or unlocked to
keep unauthorized changes to the thermostat. With the
thermostatlocked,nochangescanbemade;includingset
point temperatures, operation mode, and fan control.
If the thermostat is unlocked, “Lock” will be displayed, if
the thermostat is locked, “Locked” will be displayed.
Inside
Lock
We
Day
HEAT
Schedul e
AUTO
FANMENU MODE NEXT ENTER
Heat
Set To
SYSTEM
AM
Hidden Lock key
HIDDEN LOCK KEY
To Lock the Thermostat
1. Push LOCK and hold for 2 seconds (the screen shot
below will be displayed).
2. Push the button until the two digit code is
displayed in the upper right hand corner (see the
screen shot below).
3. Press ENTER
Caution
The Cancel key (blank key-second from the
left) can be pushed at any time to cancel out
of the sequence and will return to the home
screen without changes saved.
To Unlock the Thermostat
1. Push LOCKED and hold for 2 seconds (the screen
shot below will be displayed).
2. Push the button until the two digit code is
displayed in the upper right hand corner (see the
screen shot below).
3. Press ENTER.
Caution
The Cancel key (blank key-second from the
left) can be pushed at any time to cancel out
of the sequence and will return to the home
screen without changes saved.
DISPLAYING THE TIME AND
TEMPERATURE SCHEDULE
The complete lime and temperature schedule can be
displayed.
By pressing the MENU button 4 times from the thermostat
home screen, the display below appears
Repeatedly press the NEXT key to display the scheduled
times and temperature settings. The factory set schedule
is shown on the following page.
Locking the Thermostat

6 720 220 380 Subject to change without prior notice Revised 06-13
16 TSTBT4H2CP SERIES
7 Day Factory Default Program
Day of the
Week Time Period Time
Setpoint
Events Time
Temperature (Heat)
Setpoint
Temperature (Cool)
Weekday
Morn 6 a.m. 70° F (21° C) 78° F (26° C)
Day 8 a.m. 62° F (17° C) 85° F (29° C)
Eve 6 p.m. 70° F (21° C) 78° F (26° C)
Night 10 p.m. 62° F (17° C) 82° F (28° C)
Saturday
Morn 6 a.m. 70° F (21° C) 78° F (26° C)
Day 8 a.m. 62° F (17° C) 85° F (29° C)
Eve 6 p.m. 70° F (21° C) 78° F (26° C)
Night 10 p.m. 62° F (17° C) 82° F (28° C)
Sunday
Morn 6 a.m. 70° F (21° C) 78° F (26° C)
Day 8 a.m. 62° F (17° C) 85° F (29° C)
Eve 6 p.m. 70° F (21° C) 78° F (26° C)
Night 10 p.m. 62° F (17° C) 82° F (28° C)
USE THE TABLE BELOW TO PLAN YOUR CUSTOMIZED
PROGRAM SCHEDULE IF USING 5+1+1.
Custom User Schedule
Day of the
Week Time Period Time
Setpoint
Events Time
Temperature (Heat)
Setpoint
Temperature (Cool)
Weekday
Morn
Day
Eve
Night
Saturday
Morn
Day
Eve
Night
Sunday
Morn
Day
Eve
Night
7 Day Factory Default Program

6 720 220 380
Revised 06-13 Subject to change without prior notice
TSTBT4H2CP SERIES 17
TSTBT4H2CP THERMOSTAT SERIES INSTALLATION TROUBLESHOOTING
Problem Possible Explanation Possible Solution
1Display on thermostat
not illuminated
Power is not available to
the thermostat
1. Verify the unit circuit breaker is not tripped.
2. Detach the thermostat from wall plate and verify that
all wires are connected on the base make sure the
thermostat is properly seated on the wall.
2 No Cooling Thermostat Settings are
not correct
1. Verify that the thermostat mode is in “COOL”. If not,
push the SYSTEM button until “COOL” is displayed.
2. Verify the set point temperature is not higher than the
space temperature. If it is, use the (down) button to
adjust the set point to below the space temperature to
initiate a cooling call.
3 No Heating Thermostat Settings not
correct
1. Verify that the thermostat mode is in “HEAT”. If not,
push the SYSTEM button until “HEAT” is displayed.
2. Verify the set point temperature is not lower than
the space temperature. If not use the (up) button to
adjust the set point to above the space temperature to
initiate a heating call.
4 No Heating or Cooling
Thermostat has locked
out compressor due to
minimum off time setting
Once the space temperature matches the set point
temperature on the thermostat, the heating or cooling
call is removed and the equipment turns off. If the user
changes the set point temperature within the minimum
off time, the equipment will not come on. This is a
protection feature for the compressor and is normal.
Wait 10 min and verify if equipment has began operating
in heating or cooling mode. If unit remains off, call a
licensed technician.
5
Heating comes on
during a cooling call
with a heat pump
The thermostat is not set
up correctly for a heat
pump.
Call a technician as the thermostat must be set up
correctly. There are many settings to be made and
should only be attempted by a trained technician.
6"Filter" is displayed
on the thermostat
The time duration for a
lter change has been
surpassed.
Change the lter and reset the lter timer by pressing
the area of where "Filter" is displayed
7"UV Bulb" is displayed
on the thermostat
The time duration for a
UV bulb change has been
surpassed.
Call a technician for UV Bulb maintenance.
8
"HumPad" is
displayed on the
thermostat
The time duration for a
Humidier Pad change
has been surpassed.
Call a technician for Humidier pad maintenance.
9 Fan will not turn off Fan setting is set to ON
instead of AUTO Press the FAN button to change the status to AUTO
10 The set point will not
go any higher or lower
The set point limits have
been reached
There is a maximum temperature in heating that cannot
be surpassed and a minimum temperature in cooling
that cannot be surpassed. The technician who installed
the thermostat may have set these limits to protect
the equipment. The end user should not modify these
settings and should consult with a trained technician
who is familiar with the equipment being used.
Troubleshooting

6 720 220 380 Subject to change without prior notice Revised 06-13
18 TSTBT4H2CP SERIES
Problem Possible Explanation Possible Solution
11
A fault code is being
displayed on the
thermostat screen
Reference the Fault Code
section in this manual to
indentify the fault
Consult a licensed professional if any of the following
faults occur: HP1, HP2, LP1, LP2, FrA, CLA, bOA, EFA,
LEC, LHO, LCO
Consult the literature for the gateway for fault code LGC
in order to re-establish communication with the gateway
13
Equipment is not
responding to
thermostat changes
Loss of Equipment
Communication / No
Communication
Verify that the COM LED on the TRM at the equipment
is blinking green. If it is red, please call for technical
assistance.
There is not power to the
TRM
Check the circuit breaker that powers the air
conditioning unit if it is tripped please reset it.
If after resetting the breaker the TRM LEDs are not lit,
please contact the local a technician
14
Loss of Equipment
Communication COM
LED light is red on the
TRM
Loose Wiring on
thermostat
Remove the thermostat from the back mounting plate
and ensue that all 4 wires are securely seated in the
terminals. Also verify that there are not wire strands
present as this will cause a short.
Loose Wiring on TRM Remove the cover off of the TRM and verify that all wires
are securely seated in the terminals.
15
Compressor(s) comes
on in Heating when
using AC with electric
heat
Thermostat is set up to
operate a heat pump
Thermostat was not set correctly by the technician,
please contact local technician.
17
Heat Pump is in
cooling mode when
thermostat is in
heating mode or vise
a versa
"O" terminal is being
used when the "B"
terminal should be or
vise a versa
Thermostat was no installed correctly please contact
local technician
18
The thermostat
setpoint is not
satised, yet there is
no heating or cooling
call to the equipment
Remote room
temperature sensors are
connected and average
the space temperatures
with the thermostat
When remote room temperature sensors are connected
to the TRM, the space temperatures from the thermostat
and the room sensor(s) are averaged. It is possible to
have the thermostat not satisfying the set point and
still not have the equipment running. The average of the
sensor(s) and the thermostat has satised the setpoint.
19
Menus described in
the Tech Menu Setup
Table are not available
on the thermostat
Missing menu does not
apply to the equipment
being used
When the equipment type is chosen using Option #3,
certain features or options will not apply. When this is
the case, that menu setup is skipped when going through
the list of menu setup options.
AVAILABLE ACCESSORIES FOR THE TSTBT4H2CP THERMOSTAT SERIES
Descriptive Part Number Bosch Part Number Description Model Compatibility
ZONB-OTS---M--A 7738002978
Outdoor Temperature
Sensor / Remote Room
Temperature Sensor
TSTBT4H2CP-M--A
TSTBT4H2CPHM--A
ZONB-LAS---M--A 7738002979 Leaving Air Temperature
Sensor
TSTBT4H2CP-M--A
TSTBT4H2CPHM--A
TSTBT4H2CPHMW-A
TSTB--TRM--6--A 7738002948 Translator Communicating
Remote Module
TSTBT4H2CP-M--A
TSTBT4H2CPHM--A
Troubleshooting

6 720 220 380
Revised 06-13 Subject to change without prior notice
TSTBT4H2CP SERIES 19
Contact your local Bosch Dealer or Installing Contractor
for product support.
Field Technical Support:
Your local Bosch contractorwww.bosch-climate.us
PRODUCT LIMITED WARRANTY
Models Covered
This limited warranty is provided by FHP Manufacturing
Company (“FHP”) and covers the Bosch TST Thermostat
(hereinafter referred to as “Product”). This warranty is
provided to the original purchaser of the Product as long
as the Product remains installed at its original place of
installation.
WARRANTY COVERAGE
Limited Warranty
FHP warrants that all internal components incorporated
into the Product at the time of shipment by FHP shall
remain free from defects in workmanship and materials
fortheshorterofve(5)yearsfromproofofcerticateof
occupancydate,ve(5)yearsfromproofofcertiedstart
updateorsix(6)yearsfromdateofmanufacture
provided it is installed and properly maintained by a
qualiedandtrainedHVACcontractorandtheother
conditions of this warranty are met. If FHP determines
that the Product has a defect in workmanship or
materials, FHP, at its option, will repair or replace the
defective part.
ITEMS NOT COVERED
This limited warranty does not cover the following
circumstances:
1. Components or parts not provided by FHP.
2. Components or parts on which the tags or
nameplates have been removed, altered or defaced.
3. Scratchesinordiscolorationofnishes.
4. Serviceable items and normal maintenance as
required per the Installation and Maintenance
Manual.
5. The workmanship of any installer. FHP disclaims and
does not assume any liability of any nature for
unsatisfactory performance caused by improper
installation, repair or maintenance.
6. Any labor or material costs for removal, reinstallation,
repair and replacement of the defective component
or part.
7. Electricity or fuel costs, or any increases or unrealized
savings in same, for any reason whatsoever.
8. Damagecausedbyexcessivetemperaturesor
pressures,fuelorgasexplosion,electrochemical
reaction, water and air impurities, electrical failures,
useduringconstruction,oodingoractsofGod.
9. Any damage or failure resulting from the introduction
ofharmfulchemicals,causticuids,orliquids
detrimental to any unit component, including but not
limited to improperly applied or maintained heat
transferuidsorchlorinatedpoolorspawater
10. Any damage or failure resulting from improper unit
sizing.
11. Shippingcharges,deliveryexpensesor
administrative fees incurred by the purchaser in
repairing or replacing the Product.
CONDITIONS OF WARRANTY
The warranty herein is void under the following
circumstances:
1. Failure or malfunction resulting from improper or
negligent operation, accident, abuse, freezing,
electrical imbalance characteristics, misuse,
unauthorized alteration, incorrect electrical supply,
electrical surges, or improper installation, repair or
maintenance. See the Installation and Maintenance
Manual for installation and maintenance information.
2. Failure or malfunction resulting from any conditions
within the structure, including mold and/or mildew
and/oranychemicalortoxinsecretedtherefromor
damage resulting from mold, fungus or bacteria.
3. Failure or malfunction resulting from a contaminated
or corrosive air or liquid supply, the addition of
unapproved chemicals, operation at abnormal
temperatures,pressuresorowrates,openingofthe
refrigerantcircuitbyunqualiedpersonnelorany
attachment, accessory or component not authorized
and approved by FHP. See the Installation and
Maintenance Manual for installation and maintenance
information.
4. Failure or malfunction due to misapplication or faulty
building design or construction, including inadequate
refrigerant levels, condensate drain, duct work
design or installation.
Product Limited Warranty

6 720 220 380 Subject to change without prior notice Revised 06-13
20 TSTBT4H2CP SERIES Product Limited Warranty
5. Product on which payment to FHP is or has been in
default.
6. Work performed without prior authorization or
approval and without authorization/requisition
number and without proper documentation verifying
compliance with above terms.
LIMITED WARRANTY
OTHER THAN THE OBLIGATIONS OF FHP EXPRESSLY SET
FORTH HERIN, FHP DISCLAIMS ALL WARRANTIES,
EXPRESS OR IMPLIED, INCLUDING BUT NOT LIMITED
TO ANY IMPLIED WARRANTIES OF MERCHANTABILITY
OR FITNESS FOR A PARTICULAR PURPOSE. FHP’S
SOLE OBLIGATION WITH RESPECT TO THE PRODUCT
AND PURCHASER’S EXCLUSIVE REMEDIES ARE SET
FORTH IN THE FOREGOING LIMITED WARRANTY. FHP
SHALL NOT BE LIABLE FOR ANY INDIRECT, PUNITIVE,
INCIDENTAL, SPECIAL, CONSEQUENTIAL OR SIMILAR
DAMAGES INCLUDING, WITHOUT LIMITATION, INJURY
OR DAMAGE TO PERSONS OR PROPERTY OR DAMAGES
FOR LOSS OF USE, LOST PROFITS, INCONVENIENCE OR
LOSS OF TIME.
Caution
Note that any repaired or replaced product will be
warranted for only the unexpired tem of the
original warranty.
Caution
Some states do not allow the exclusion of
limitation of damages, or limitations on how long
an implied warranty lasts, so the above limitations
and exclusions may not apply to you.
WARRANTY CLAIMS PROCESS
If you have a warranty claim you should notify the
contractor who installed your Product and ask that the
contractor notify FHP Manufacturing Company, 601 N.W.
65th Court, Ft. Lauderdale, FL 33309. To process your
claim, you will need a copy of your original invoice or
other proof of purchase, the product serial number and
documentation showing the original installation date and
location. The alleged defective components or parts must
be returned to FHP in accordance with FHP procedure
then in force for handling goods returned for the purpose
of inspection to determine cause of failure (contact FHP if
you have questions regarding the return process). If FHP
determines that the returned components and/or parts
are defective and that this warranty applies, FHP will
furnish the repaired or replacement components and/or
parts to the contractor who installed your Product.
This Warranty applies to FHP products installed in the
Continental United States and Canada only.
This manual suits for next models
1
Table of contents
Other Bosch Thermostat manuals

Bosch
Bosch 8-733-944-325 Guide

Bosch
Bosch EasyControl User manual

Bosch
Bosch BCC100 User manual

Bosch
Bosch Radiator thermostat II Operator's manual

Bosch
Bosch TRZ 12-2 User manual

Bosch
Bosch TSTBM3H2CPH6W-A User manual

Bosch
Bosch EasyControl CT200 User manual

Bosch
Bosch CR 50 User manual

Bosch
Bosch 3H/2C Guide

Bosch
Bosch CRC R-1 User manual

Bosch
Bosch TR 200 User manual

Bosch
Bosch CT 100 User manual

Bosch
Bosch BCC100 User manual

Bosch
Bosch TRZ 12-2 User manual

Bosch
Bosch Climate 5000 Series User manual

Bosch
Bosch BCC50 User manual

Bosch
Bosch CR 11 User manual

Bosch
Bosch Smart Home Thermostat AA User manual

Bosch
Bosch CR 50 User manual

Bosch
Bosch RT10-RF User manual