Brading Fabrication SolaraSky Skylight User manual

INSTALLATION GUIDE
Skylight
Straight
SolaraShade™
Curved
SolaraShade™
Cathedral
SolaraShade™
Conservatory
SolaraShade™
Skylight
SolaraSky™
Rectangle & Triangle

INSTALLATION GUIDE
Skylight
Straight
SolaraShade™
Curved
SolaraShade™
Cathedral
SolaraShade™
Conservatory
SolaraShade™
Skylight
SolaraSky™
Rectangle & Triangle

INSTALLATION GUIDE
Skylight
Bottomrail
Cord Clamping Screw
And Washers
Slip Knot
Tension Spring
Tension Cord
Movable Rail
Handle
Headrail
Fabric
Side
Rail
Bottom Rail
Expanded Hardware Diagram
Cord Clamping Screw
And Washers
Slip Knot
Tension Spring
Tension Cord
Movable Rail
Handle
Fabric
Bottom Rail
Expanded Hardware Diagram
Cord Clamping Screw
And Washers
Slip Knot
Tension Spring
Tension Cord
Movable Rail
Handle
Headrail
Fabric
Side
Rail
Bottom Rail
Expanded Hardware Diagram
Expanded Hardware Diagram
Headrail
Siderail
Siderail
Headrail

INSTALLATION GUIDE
Skylight
1
CONTENTS
INTRODUCTION
Introduction
Product View
Mount The Side Tracks
Mount the Installation Brackets
Install Shade Into Side Tracks
Install The Head Rail
Install The Anchor Rail
Adjust the Shade
Final Assembly
Remove The Shade
Troubleshooting
Care and Cleaning
Thank You for purchasing SolaraSky by Brading Fabrication.
Your new shade has been custom built for you from the
highest quality materials. Once in your skylight, it will
provide you with years of trouble-free use.
Installation has been designed to be as simple as possible.
Please review the instructions to acquaint yourself with all of
the procedures.
For assistance, call our Service Department at
1-888-61-SHADE
Visit our website at www.solarashade.com
1
2
3
3-4
4
5
5
6
7
7
7
8

INSTALLATION GUIDE
Skylight
3
8
MOUNT THE SIDE TRACK
Inside Mount
Attach the side tracks to the inside of the window using the pre-drilled holes onN
alternate sides of the track centerline.
For sloped installations, align the wide flange with the front edge of theN
window opening.
For vertical installations, align the wide flange flush with the edge of the opening.N
Make sure the rails are centered within the side tracks.N
Make sure the side tracks are parallel by measuring the distance between them atN
the top and bottom of the window.
If the side tracks are more thanN1/4" off of parallel, use wooden shims under the
mounting screw locations, starting at the ends of the side tracks.
Top View:
Non-Vertical Shade
Top View:
Vertical Shade
Narrow Flange
At Front
Window
Casement
Wide Flange Of
Side Track At
Back Of Shade
Wide Flange
At Front
Narrow Flange Of
Side Track At
Back Of Shade
Window
Casement
Skylight
Frame
Make sure the wide flange is towards the room side of the skylight.
Attach the side tracks to the inside of the skylight using pre-drilled holes.
8
MOUNT THE SIDE TRACK
Inside Mount
Attach the side tracks to the inside of the window using the pre-drilled holes onN
alternate sides of the track centerline.
For sloped installations, align the wide flange with the front edge of theN
window opening.
For vertical installations, align the wide flange flush with the edge of the opening.N
Make sure the rails are centered within the side tracks.N
Make sure the side tracks are parallel by measuring the distance between them atN
the top and bottom of the window.
If the side tracks are more thanN1/4" off of parallel, use wooden shims under the
mounting screw locations, starting at the ends of the side tracks.
Top View:
Non-Vertical Shade
Top View:
Vertical Shade
Narrow Flange
At Front
Window
Casement
Wide Flange Of
Side Track At
Back Of Shade
Wide Flange
At Front
Narrow Flange Of
Side Track At
Back Of Shade
Window
Casement
6
MOUNT THE INSTALLATION BRACKETS
Bracket Placement
Position installation brackets so their centerlines are 4N1/2"from the ends of the
headrail.
If your shade has a support cord, position a third bracket 1N"to the left of the
center of the headrail.
Measure and mark all bracket centerlines.N
For outside mount applications, use the installation brackets to mount theN
anchor rail.
For inside mount applications, attach the anchor rails directly to the sillN
with screws.
Inside Mount Applications
The depth required for a fully recessed mount depends upon the application.
NOTE: Add the dimension of obstructions such as window cranks or handles
to the minimum depth.
Use one mounting screw to attach each installationN
bracket to the top sill of the window opening.
Place the screws on the marked centerlines and alignN
the brackets so their front edges are recessed.
If the anchor rail does not have mounting holes,N
space installation brackets on the bottom sill the same
distances as used for the top sill. Attach the anchor
rail to the brackets.
Use the rear hole of the bracket if the mounting depthN
is between 1/2" and 1".
41/2"41/2"1"
Center Of HeadrailInstallation Bracket
Centerline
4½"
(¾" Bracket Shown)
See Chart
For Depth
The depth required for a fully recessed mount depends upon the application.
Make sure the side tracks are parallel by measuring the distance between them
at the top and bottom of the skylight.

INSTALLATION GUIDE
Skylight
4
6
MOUNT THE INSTALLATION BRACKETS
Bracket Placement
Position installation brackets so their centerlines are 4N1/2"from the ends of the
headrail.
If your shade has a support cord, position a third bracket 1N"to the left of the
center of the headrail.
Measure and mark all bracket centerlines.N
For outside mount applications, use the installation brackets to mount theN
anchor rail.
For inside mount applications, attach the anchor rails directly to the sillN
with screws.
Inside Mount Applications
The depth required for a fully recessed mount depends upon the application.
NOTE: Add the dimension of obstructions such as window cranks or handles
to the minimum depth.
Use one mounting screw to attach each installationN
bracket to the top sill of the window opening.
Place the screws on the marked centerlines and alignN
the brackets so their front edges are recessed.
If the anchor rail does not have mounting holes,N
space installation brackets on the bottom sill the same
distances as used for the top sill. Attach the anchor
rail to the brackets.
Use the rear hole of the bracket if the mounting depthN
is between
1
/
2
" and 1".
41/2"41/2"1"
Center Of HeadrailInstallation Bracket
Centerline
4½"
(¾" Bracket Shown)
See Chart
For Depth
3/8”
3/4”
Use one mounting screw to attach each installation
bracket to the top jamb of the skylight opening.
Place the screws on the marked centerlines and
align the brackets so their front edges are equal.
INSTALL SHADE INTO SIDE TRACKS
Position shade on a slight diagonal inside the
skylight track opening.
Push one movable rail guide (grey plastic M shape) into the track. (Step 1)
Be careful not to tangle the tension cord.
Bring to a horizontal position and push the second movable rail guide into the
opposite track. (Step 2)
Shade should move freely
within the tracks
Step 1 Step 2
*click
*click

INSTALLATION GUIDE
Skylight
5
7
Outside Mount Applications
The back of the mounting bracket must be flush against a flat mounting surface. The
minimum mounting height is specific to the pleat size ordered. 5/8" for 3/8"pleat or
1" for 3/4" pleat.
From the marks on the wall measure up the minimum height (according to pleatN
ordered) and mark the bracket locations.
Center each bracket over the previously made mark on the mounting surface.N
Attach using one or two screws, as necessary.N
Use a level to check that the brackets are level and aligned.N
NOTE: Make sure the headrail brackets and anchor rail brackets are horizontal
and parallel. Make sure the brackets for each rail are aligned at the same height.
INSTALL THE HEADRAIL
NOTE: Do not remove the rubber bands that hold the headrail, fabric, and
moving rail until after the side tracks are mounted.
With the front (colored) side of the fabricN
facing you, slide the headrail into the
installation brackets.
Fit the front lips of the brackets into the frontN
groove on the top of the headrail.
Snap the headrail into place.N
Tighten the tab screw on each bracket until itN
is snug. Do not overtighten the tab screw.
CAUTION: Make sure the fabric is not trapped between the headrail and the
installation bracket tabs.
Standard Bracket For
3/8"Pleat Size
Standard Bracket For
3/4"Pleat Size, Double,
And Triple Honeycomb
1"
Minimum
5/8"
Minimum
Tab Screw
Headrail
Installation Bracket
9
Outside Mount
The narrow flange on the side tracks should be at the front of the shade. Holes are
drilled in the groove near the edge of the wide flange.
Attach the wide flange to the outside of the window casement using theN
appropriate fasteners.
Measure the distance between the side rails at the top and bottom of the windowN
to make sure the rails are parallel.
INSTALL THE ANCHOR RAIL
CAUTION: Be careful not to tangle the cords.
Cut the rubber bands that are holding the rails and fabric together.N
Lower the anchor rail to the bottom of the side tracks.N
Make sure the open side of the anchor rail faces up, with the spring andN
cords exposed.
If the open side is covered by a fabric strip, remove it to make anyN
shade adjustments.
Outside mounts:NSnap the anchor rail into the installation brackets.
Inside mounts:NAttach the anchor rail directly to the sill.
Center the rail within the side tracks before mounting.N
Top View:
Narrow Flange
At Front
Window
Casement
Attach Screw
Through Holes
In Drill Groove
Attach the anchor rail directly to the sill.
Center the rail within the side tracks before mounting.

INSTALLATION GUIDE
Skylight
6
10
ADJUST THE SHADE
Tension Cords
The moving rail should slide easily, yet hold its position when it is released. Adjust the
tension cords in the anchor rail if the moving rail does not slide properly.
Move the slip knot to the right to increase the cord tension. Do not stretch theN
spring to a length greater than 5½".
Move the slip knot to the left to decrease the cord tension.N
Moving Rail
The moving rail should be parallel to the anchor rail so that the two rails make even
contact when the shade is closed. Adjust the moving rail if it is not parallel.
Loosen the cord clamping screw.N
Slide the cord between the two washers.N
CAUTION: Do not adjust the cord tension while you make this adjustment.
Support Cord Tension (If Applicable)
If your shade has a support cord, it should be very taut. To adjust:
Loosen the support cord clamping screw.N
Pull the cord through the two washers to the desired tension.N
Tighten the screw.N
Make sure the cord is held taut between the two washers.N
Cord Clamping Screw
And Washers
Slip Knot
Tension Spring
Clamping
Screw
Support
Cord
Washers

INSTALLATION GUIDE
Skylight
7
11
FINAL ASSEMBLY
Fit the fabric strip into the anchor rail to cover the internal hardware.N
Attach the handle to the moving rail using the screws provided.N
REMOVE THE SHADE
Fully raise the shade.N
Unscrew the tab screw on each bracket to releaseN
the headrail.
If you used brackets to install the anchor rail, unscrew theN
tab screw on each bracket to release the anchor rail.
If you did not use brackets to install the anchor rail,N
remove the fabric strip, then remove the screws to release
the anchor rail.
14
TROUBLESHOOTING
Problem Solution
The shade does not raise
and lower evenly. Check the installation brackets. Make sure theN
shade fabric is not caught between the bracket
tab and the headrail.
Adjust the cord tension (seeNMoving Rail,
page 10).
Check that the lift cords are not pinchedN
or tangled.
The shade will
not snap into the
mounting brackets.
Make sure the mounting brackets are level.N
Loosen the tab screws slightly.

INSTALLATION GUIDE
Skylight
8
12
CARE AND CLEANING
Honeycomb shades are made of an anti-static, dust-resistant fabric which repels dirt
and dust. For most honeycomb fabrics, the following options are available if your
shade needs cleaning.
Dusting
Regular light dusting with a feather duster is all the cleaning that is needed in
most circumstances.
Vacuuming
Use a hand-held vacuum with low suction for more thorough dust removal.
CAUTION: Do not vacuum Architella™Elan™or Architella Elan Eclipse™.
Spot-Cleaning
Prepare a solution of warm water and a mild detergent.N
Dampen a clean cloth in the solution and wring it out.N
Dab the spot with the dampened cloth until it is gone.NDo not rub the fabric.
Allow the shade to dry in the completely lowered position.N
CAUTION: Do not spot-clean Batiste, Opalessence™, or Royale fabrics.
Deep Cleaning
Immerse the shade in a basin or bathtub filled with a mild detergent. NeverN
immerse the headrail into the solution.
Rinse with clean water.N
Fully raise the shade and tilt to eliminate excess water.N
Reinstall the damp shade, lower it, and let it dry completely.N
CAUTION: Do not immerse Architella Elan Eclipse, Architella Panache
Eclipse™, Commercial, Opalessence, Royale, or opaque fabrics.
13
Ultrasonic Cleaning
Some honeycomb fabrics can be ultrasonically cleaned by a professional.
Specify that a mild detergent solution be used.N
Never immerse the headrail into the solution.N
Dry the shade completely in the lowered position.N
CAUTION: Do not ultrasonically clean Architella™Elan Eclipse™,Architella
Panache Eclipse™, Commercial, Opalessence™, or opaque fabrics.
Injection/Extraction
Honeycomb shades can be professionally cleaned using the
injection/extraction method.
A dry method of injection/extraction is required for Architella ElanN™,Architella Elan
Eclipse, Architella Panache™,Architella Panache Eclipse,Commercial, Opalessence,
Panache, and opaque fabrics.
If using injection/extraction for Batiste fabrics, specify that no chemicals are usedN
(water only).
Never immerse the headrail in the solution.N
For more comprehensive cleaning instructions, call the Hunter Douglas Customer
Information Center toll free at:
1-888-501-8364
Table of contents
Popular Window Blind manuals by other brands
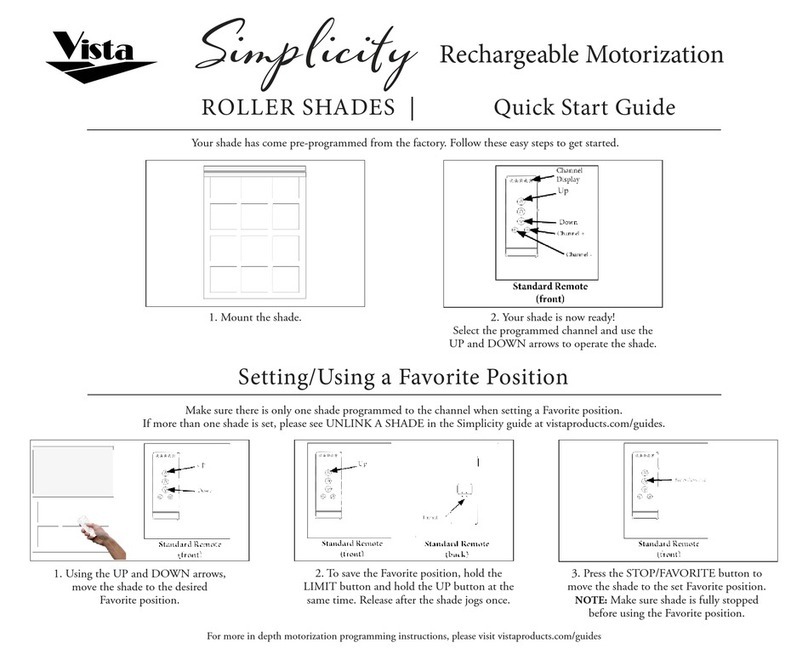
Vista
Vista Simplicity ROLLER SHADES quick start guide
Dometic
Dometic Rollerblind PrecisionRise Installation and operating manual
WAREMA
WAREMA FS Instructions for installation, use and maintenance
Levolor
Levolor Real Wood Blind Series Installation operation care
3 Day Blinds
3 Day Blinds METAL BLINDS Deluxe manual
MHZ
MHZ s-onro operating instructions

