ROOFLIGHT COMPANY neo Steel User manual

neo™ Steel
Multistop Roller Blind Installation Manual
Issue 01 | January 2014
NSBL-MR-001INST-A

Drilling template
Self tapping screws
Left hand blind channel
Right hand
blind channel Roller blind
Parts list - Supplied with blind
Tools list - Supplied by installer
A
E
C
B
D
Pozi-drive Screwdriver
Thank you for purchasing neo™ Steel Multistop Roller Blind, please follow this step-by-step guide to ensure
the blind is installed correctly. If the rooight’s integral linings have not been factory painted, we recommend
painting them before the blind is installed.
This blind system requires a reasonable level of practical skill to ensure correct installation. If you would like
on-site assistance, we have a team of trained professionals available through our blind tting service, please
call 01993 774 446 for details
Take precautions to remove dirt and grease from any tools used, as the blind fabric will mark easily.
Multistop Roller Blind Installation Manual
2 Issue 01 | January 2014
Please check that you have all the parts before proceeding to install the Roller Blind.
If you believe any items are missing please call us on 01993 833108.
Drilling template
Self tapping screws
Left hand blind channel
Right hand
blind channel Roller blind
Parts list - Supplied with blind
Tools list - Supplied by installer
A
E
C
B
D
Pozi-drive Screwdriver
See back cover for template

Multistop Roller Blind Installation Manual
Using the orientation shown on the drilling template (provided on inside of back page),
drill through Hole A on the template. Note: Do not drill deeper than 10mm through the
integral lining.
Step 1.0
Issue 01 | January 2014 3
Using the orientation shown on the drilling template, drill through Hole A on the template.
Note: Do not drill deeper than 10mm through the integral lining.
Step 1.1
Please note: these images do not show a complete roof window installation with painted linings and
internal nishes. Please refer to the image on page 8 which demonstrates a completed installation.
Please note: these images do not show a complete roof window installation with painted linings and
internal nishes. Please refer to the image on page 8 which demonstrates a completed installation.

Multistop Roller Blind Installation Manual
4 Issue 01 | January 2014
Using one of the screws (Part B), screw in the left blind channel (Part C) at the cill only.
Step 2.0
Using one of the screws (Part B), screw in the right blind channel loosely (Part D) at the cill only.
Step 2.1
Please note: these images do not show a complete roof window installation with painted linings and
internal nishes. Please refer to the image on page 8 which demonstrates a completed installation.
Please note: these images do not show a complete roof window installation with painted linings and
internal nishes. Please refer to the image on page 8 which demonstrates a completed installation.

Multistop Roller Blind Installation Manual
Issue 01 | January 2014 5
Let the two blind channels (Parts C and D) angle down into the room,
Locate the roller blind (Part E) into the ends of the channels (see arrows).
Step 3.0
Ensure the hem bar runs in the lower section of the channel on both sides (see arrow).
Step 3.1
Please note: these images do not show a complete roof window installation with painted linings and
internal nishes. Please refer to the image on page 8 which demonstrates a completed installation.
Please note: these images do not show a complete roof window installation with painted linings and
internal nishes. Please refer to the image on page 8 which demonstrates a completed installation.

Multistop Roller Blind Installation Manual
6 Issue 01 | January 2014
The black friction sliders on each end of the hem bar need to be located into the upper
section of the channel on both sides (see arrow).
Step 3.2
Push the assembled unit back up into the Rooight, making sure the roller blind is aligned
with the bottom of integral lining.
Step 3.3
Please note: these images do not show a complete roof window installation with painted linings and
internal nishes. Please refer to the image on page 8 which demonstrates a completed installation.
Please note: these images do not show a complete roof window installation with painted linings and
internal nishes. Please refer to the image on page 8 which demonstrates a completed installation.

Multistop Roller Blind Installation Manual
Issue 01 | January 2014 7
Drill the remaining holes in the roller blind channels. Repeat on the other side.
Note: Do not drill deeper than 10mm through the integral lining.
Step 4.0
Screw in the remaining screws (Part B) through the drilled holes on both sides.
Note: Do not drill deeper than 10mm through the integral lining.
Step 4.1
Please note: these images do not show a complete roof window installation with painted linings and
internal nishes. Please refer to the image on page 8 which demonstrates a completed installation.
Please note: these images do not show a complete roof window installation with painted linings and
internal nishes. Please refer to the image on page 8 which demonstrates a completed installation.

Multistop Roller Blind Installation Manual
8 Issue 01 | January 2014
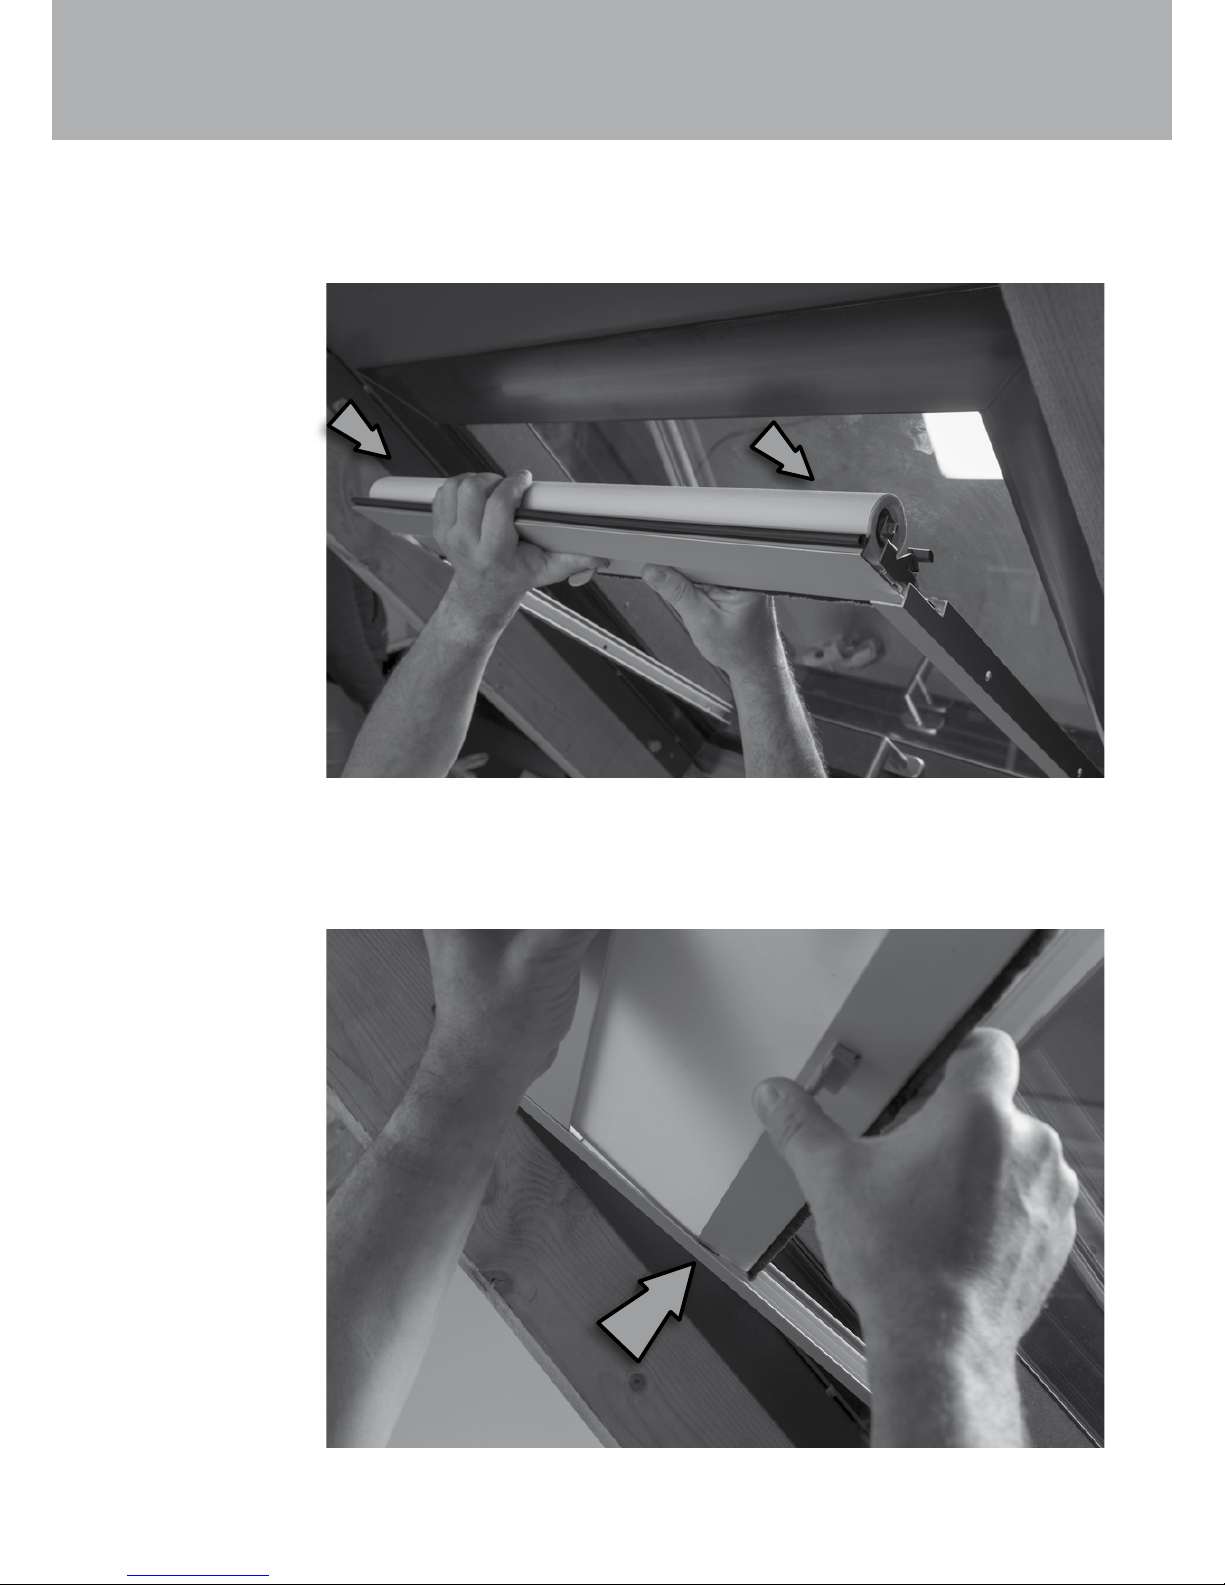
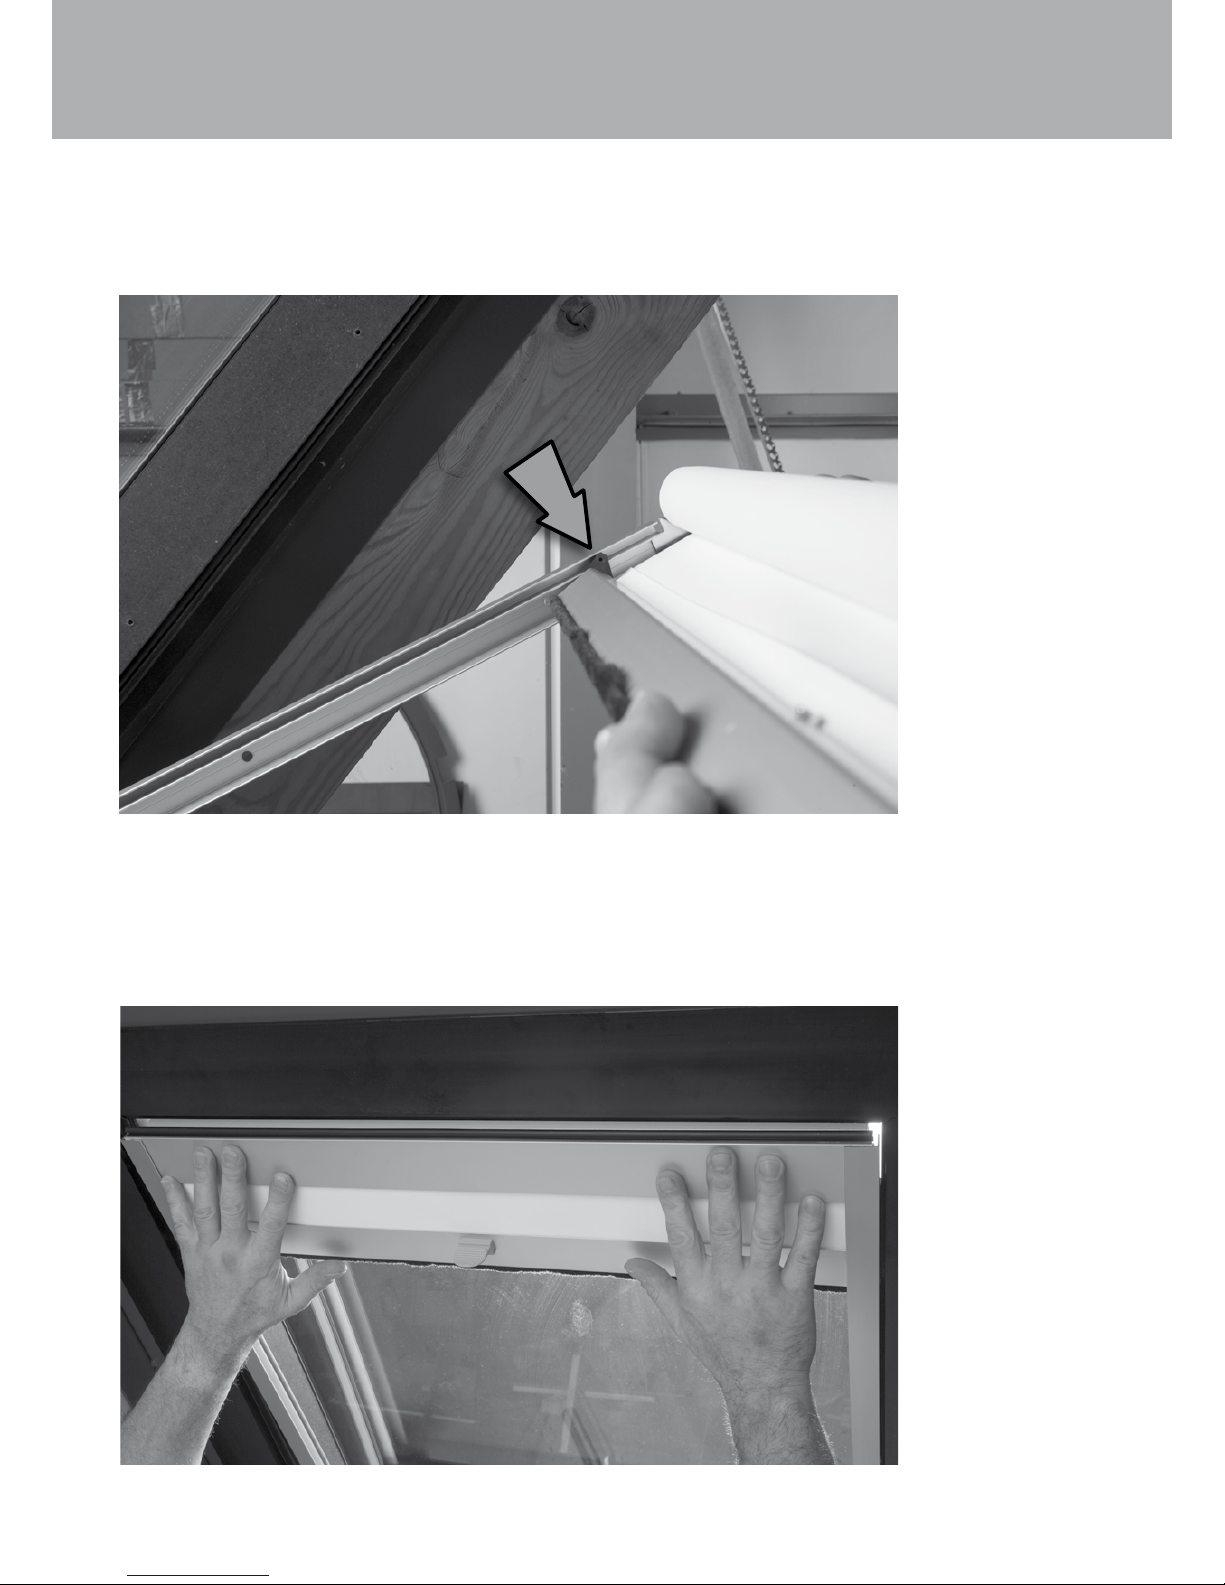
Check the operation of the blind
by tilting the handles towards the
ironmongery and sliding the blind up
and down the rooight. To lock the
blind, tilt the handles away from the
ironmongery.
Installation complete
Please follow our care and
maintenance instructions for
optimum lifetime of the blind.
These can be found at
www.therooightcompany.co.uk
or alternatively, call us on
01993 833108 for details.
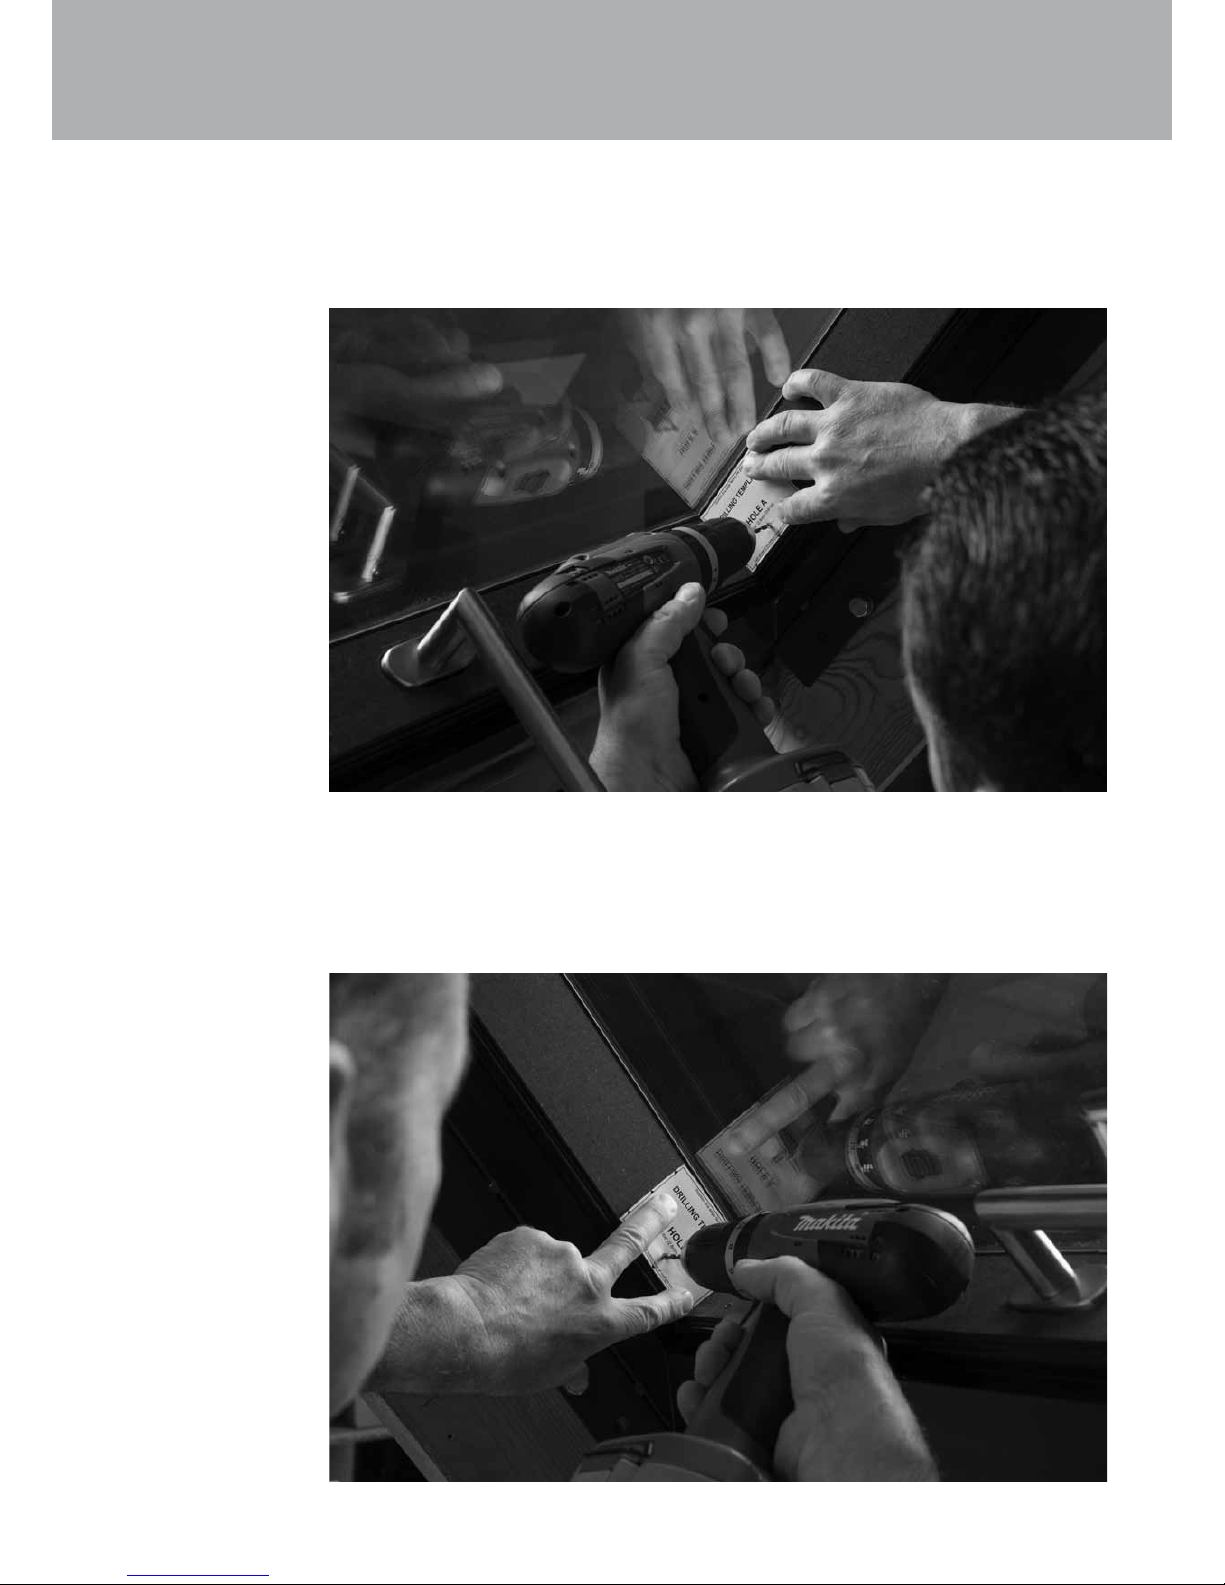
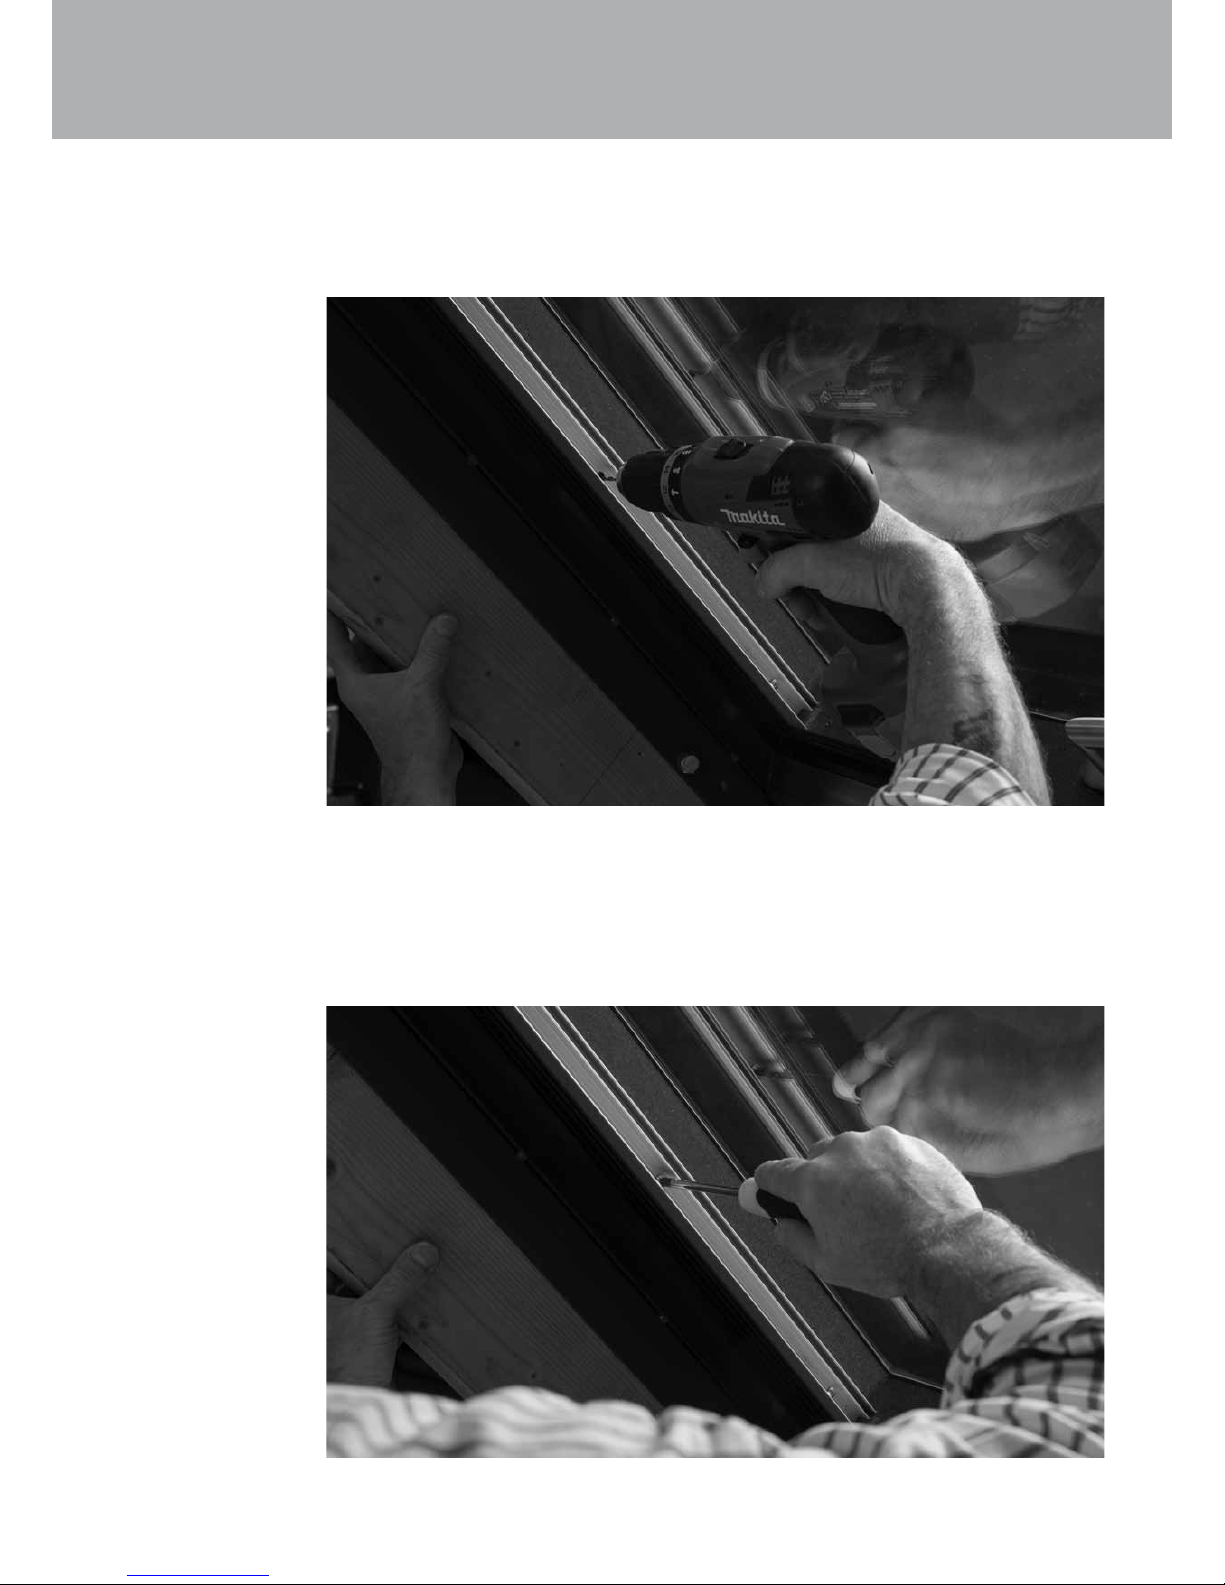
Step 5.0
Please note: these images do not show a complete roof window installation with
painted linings and internal nishes. Please refer to the image below which
demonstrates a completed installation.
Please note: this image represents a nished roof window installation with painted
linings. This image is for illustration purposes only and the position of the blind
system in the reveal may differ from your installation.

Multistop Roller Blind Installation Manual
Issue 01 | January 2014 9

Multistop Roller Blind Installation Manual
10 Issue 01 | January 2014

Part A: Drilling Template
Carefully push the drilling template below out of the
manual cover and use as instructed in the manual.
Multistop Roller Blind Installation Manual
Issue 01 | January 2014 11
Position this edge facing the glass
Align arrows to the bottom edge of rooflight intergral lining
DRILLING TEMPLATE 1
HOLE A
(7/64” /2.8mm Drill bit)
Pleated Blind
Multistop Roller Blind
Position this edge facing the glass
Align arrows to the bottom edge of rooflight intergral lining
HOLE A
(7/64” /2.8mm Drill bit)
DRILLING TEMPLATE 1
HOLE B
(7/64” /2.8mm Drill bit)
HOLE C
(7/64” /2.8mm Drill bit)
Align arrows to the bottom edge of rooflight intergral lining Align arrows to the bottom edge of rooflight intergral lining
Centre line
Fit around handle
Fit around handle
DRILLING TEMPLATE 2 DRILLING TEMPLATE 2

In the interest of continuous product development, it may be necessary to amend specication without alteration to technical literature.
All drawings and designs are the Copyright and Design right of The Metal Window Company Ltd.
Designed in the U.K
Assembled in the U.K.
Wychwood Business Centre
Milton Road
Shipton-under-Wychwood
OX7 6XU
Tel: 01993 833108
Fax: 01993 831066
Email: info@therooightcompany.co.uk
www.therooightcompany.co.uk
BS EN 1279-2
BS EN 1279-3
Table of contents
Popular Window Blind manuals by other brands

Lipper
Lipper Sirio 2.0 PVC owner's manual

The Shann Group
The Shann Group URBAN TRACK Care Instructions

Amazon
Amazon B0749TX4YP manual

rollease acmeda
rollease acmeda MULTI-LINK installation manual

Allen + Roth
Allen + Roth 2CFWBK710480 manual

Smith & Noble
Smith & Noble Metal Blinds Step by step installation instructions

LuxaFlex
LuxaFlex Venetian Series Mounting instructions

Tarasola
Tarasola Screener 110 ZIP Instructions for Use and Operation Manual

HINNO
HINNO CLIC CURVE 2.0 installation instructions

Velux
Velux INTEGRA Solar DSL instructions

TOSO
TOSO Shiori 25 Cord Single instruction manual

paramondo
paramondo 1000016155 Assembly instructions