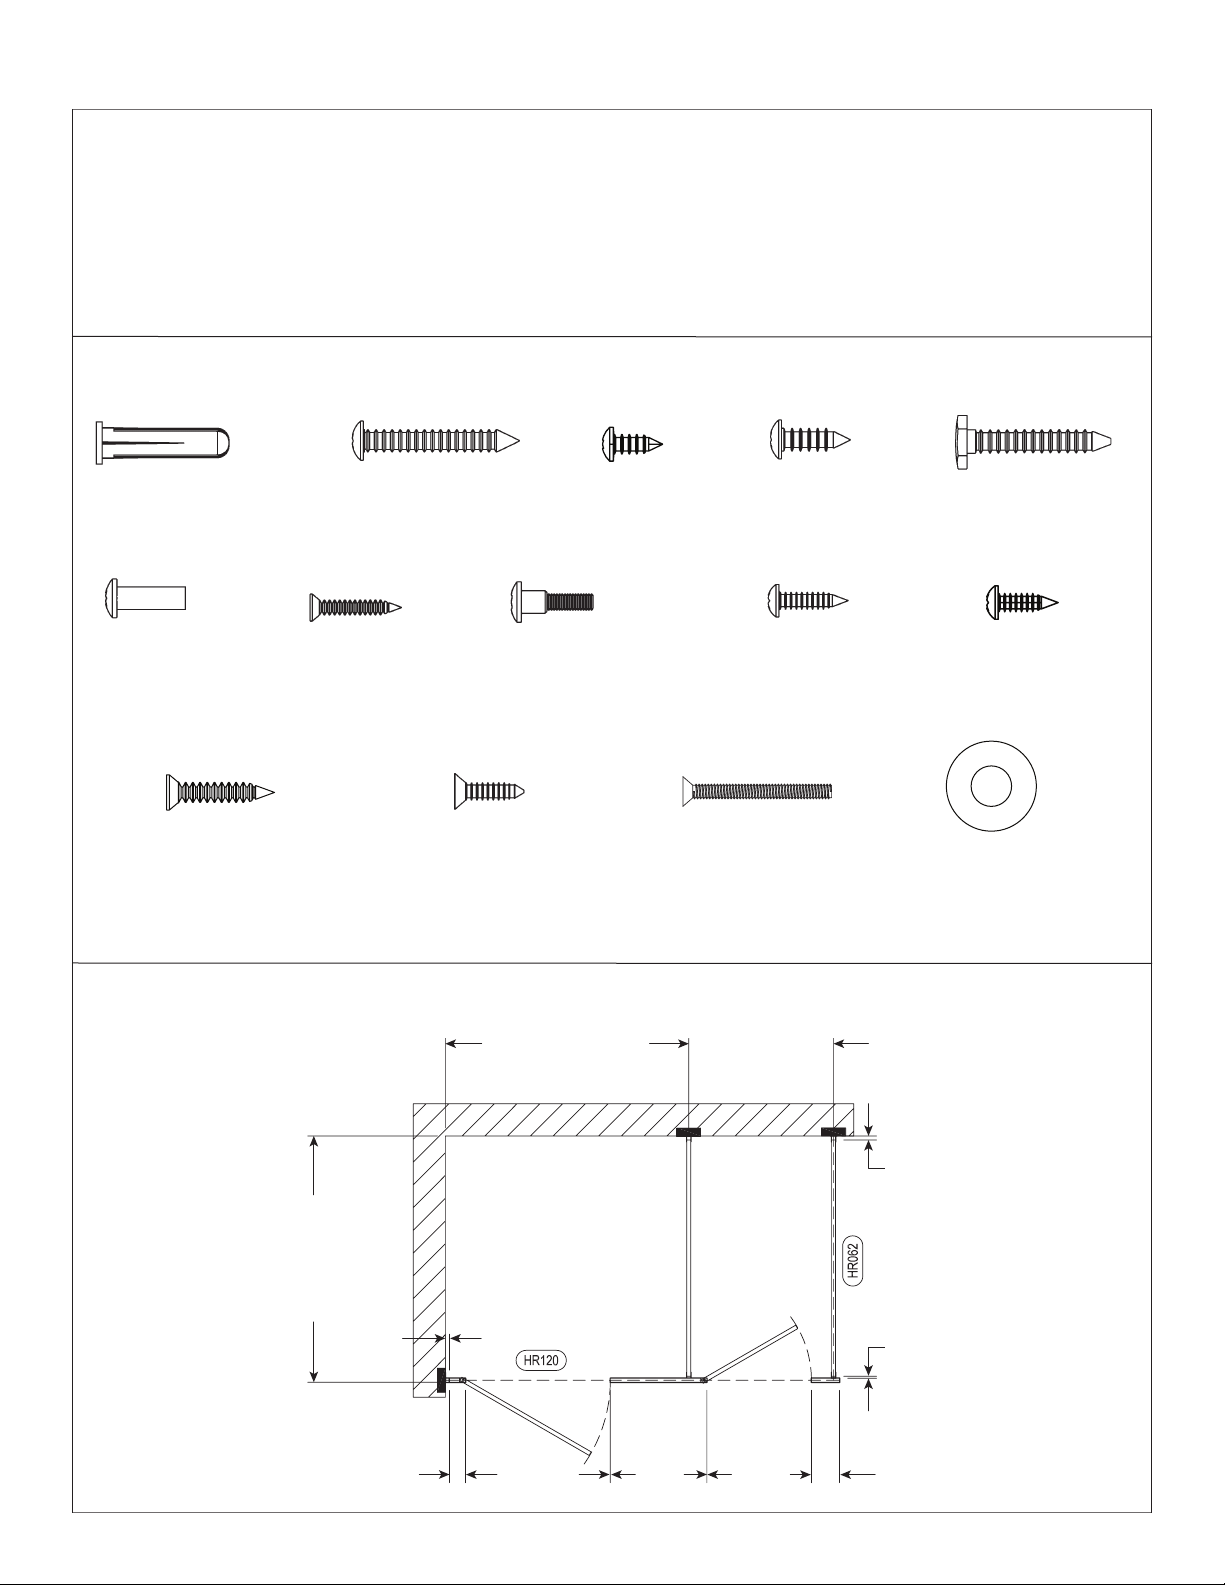
10
Bradmar™Restroom Partitions, Floor-Mounted with Overhead Brace — Series 400 Installation
10/1/2014 Bradley • HDWP-INSTR-013 Rev. K; ECN 12-14-012
Aluminum Heatsink on
bottomofdoor
8Integral Hinges (Standard)
Top and bottom pintles are pre-
lubricated for your convenience.
Do not remove lubricant.
Pilaster
Spring
3" Top
Pin
Door
Set
Screw
¾"
3"
3³⁄₈" Top
Pintle
3¼" Bottom
Pintle Assy.
¾"
(19mm)
Insert top pintle into the
bottomofthedoor.Besure
thepintlebottomsout(usethe
bottompintletopushthetop
pintleintothedoor).
A
Using a Ø ¹⁄₈"(3mm)drillbit,drillapilot
hole for the set screw into the center
ofthedooredge(approximately¾"
(19mm)downfromthetopofthedoor).
Besuretodrillatleast1½"(38mm)to
penetrate the top pin in the door.
Screw the set screw in flush with the
door'ssurface,thencheckforproper
door operation.
If the door is installed and pinned
correctly, the door will "raise" slightly
on the pintles as the door is opened.
F
Insertthebottompintleinto
thepilasterbottom.Position
thedoorontothebottom
pintleassemblyonthe
pilaster and swivel the door to
engage the pintles.
Insert the spring and the top
pin into the pilaster top.
Move the top of the door into
position while pushing the top
pin into the pilaster. Release
the top pin and force the pin
tobottomoutinthedoor.
C
D
Using a Ø ¹⁄₈"drillbit,drilla
pilot hole for the set screw into
the center of the door edge
(approximately¾"(19mm)up
fromthebottomofthedoor).
Be sure to drill at least 1½"
(38mm)topenetratethetop
pintle in the door. Screw the
set screw in flush with the
door'ssurface.
B
With the door "at rest"
position, drill a Ø ¹⁄₈" hole for
the set screw in the center
of the pilaster edge, down
3"(76mm)fromthecutout.
Be sure to drill at least 1½"
(38mm)topenetratethe
bottompintleassemblyinthe
pilaster.
Screw the set screw in flush
withthepilaster'ssurface.
Position the door at the desired
"at rest" position. Push down
on the door to make sure the
topandbottompintlesare
engaged properly.
E
Repeat steps A-F for all doors
G
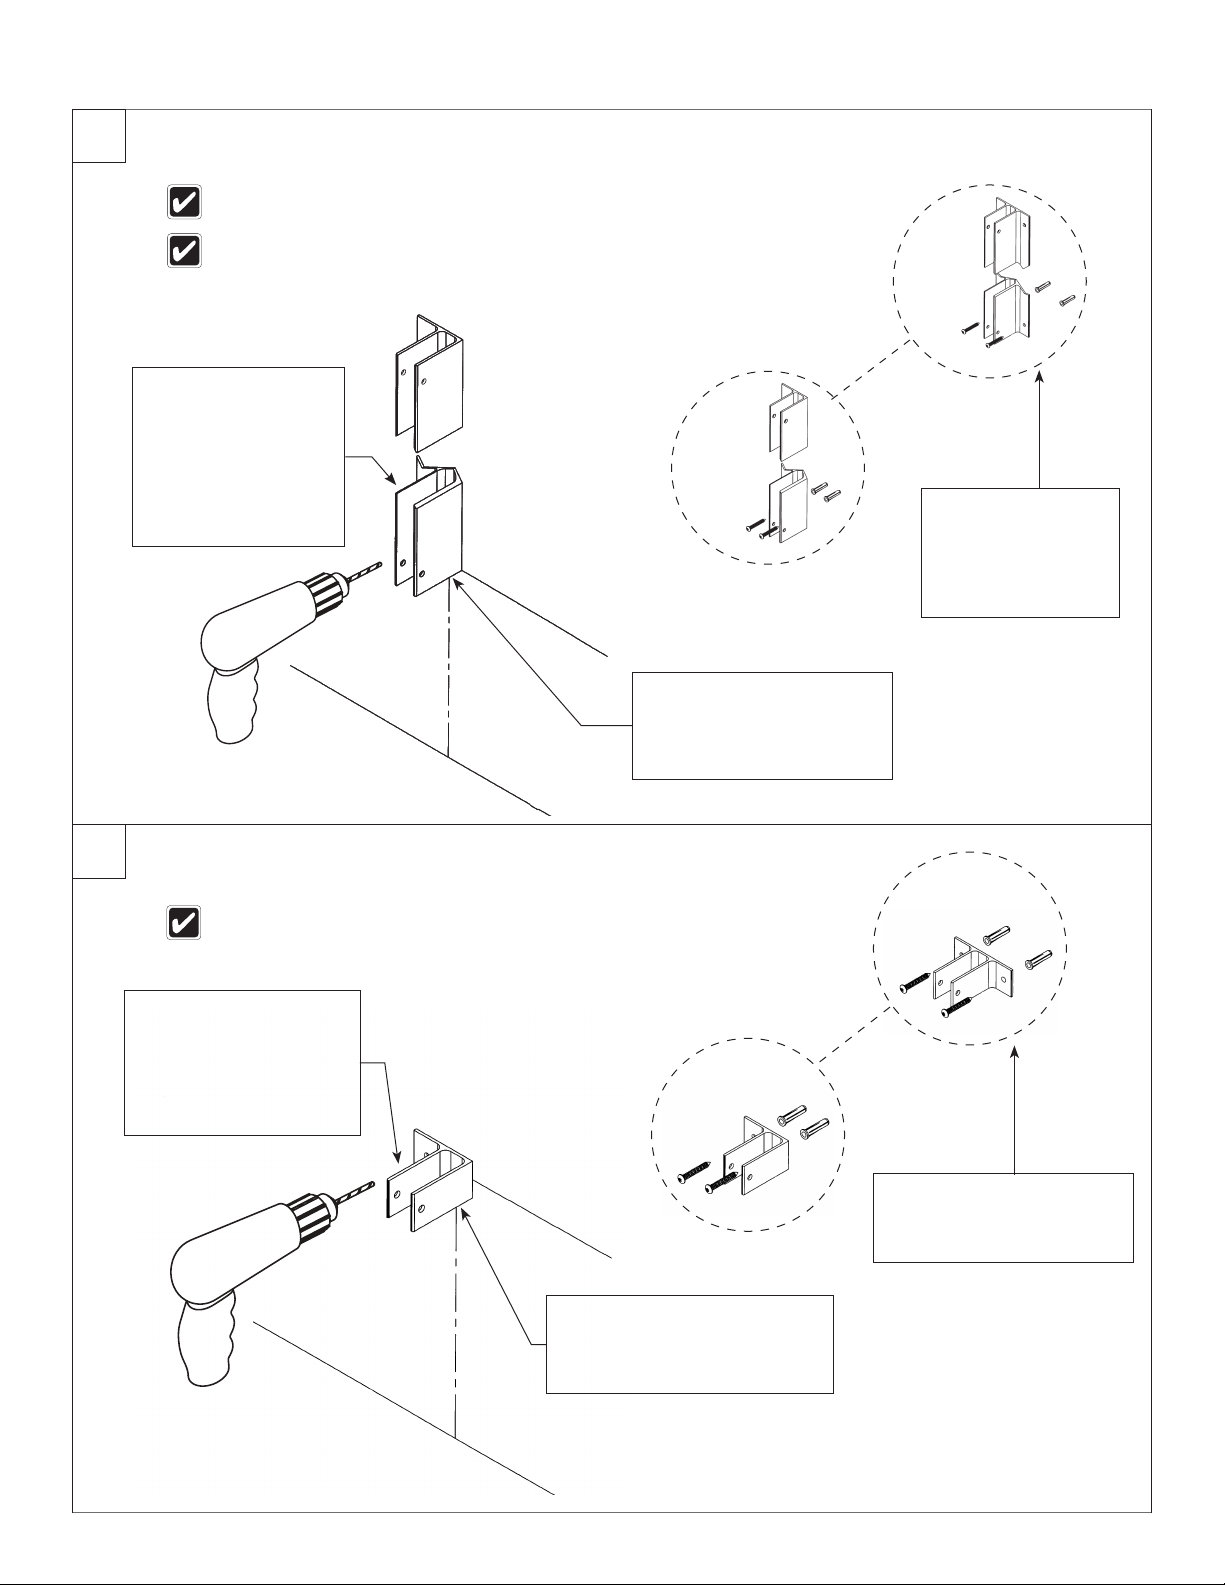
Before installing the hinges, make sure the door openings are the appropriate size, all pilasters are
plumb and secured to the shoe. Determine the door swing by facing the compartment from the outside.
Refer to your submittal drawings to determine each specific door swing for your application.
Right-hand
inswing
(RHI)
Left-hand
inswing
(LHI)
Right-hand
outswing
(RHO)
Left-hand
outswing
(LHO)