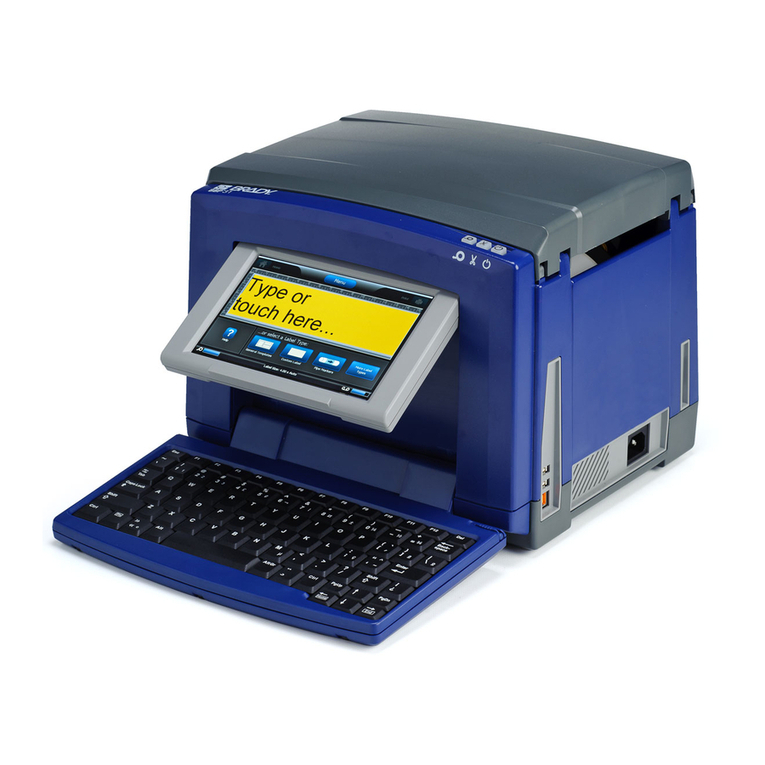
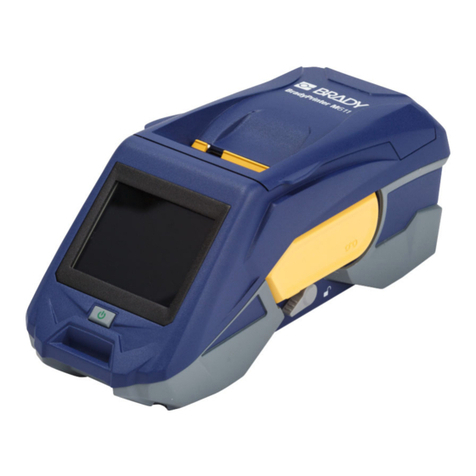
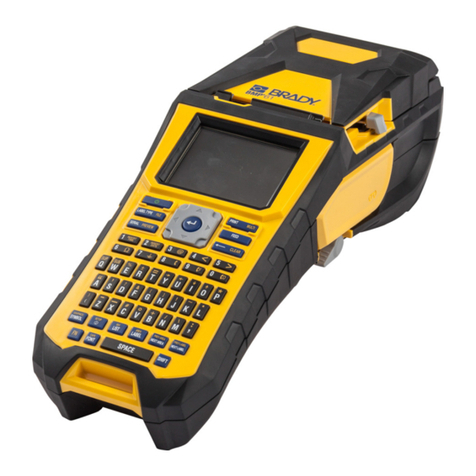
Brady M710 User manual

User Manual

M710 User Manual ii
Copyright and Trademarks
Disclaimer
This manual is proprietary to Brady Worldwide, Inc. (hereafter “Brady”), and may be revised from time
to time without notice. Brady disclaims any understanding to provide you with such revisions, if any.
This manual is copyrighted with all rights reserved. No portion of this manual may be copied or
reproduced by any means without the prior written consent of Brady.
While every precaution has been taken in the preparation of this document, Brady assumes no liability
to any party for any loss or damage caused by errors or omissions or by statements resulting from
negligence, accident, or any other cause. Brady further assumes no liability arising out of the
application or use of any product or system described, herein; nor any liability for incidental or
consequential damages arising from the use of this document. Brady disclaims all warranties of
merchantability of fitness for a particular purpose.
Brady reserves the right to make changes without further notice to any product or system described
herein to improve reliability, function, or design.
Trademarks
M710 is a trademark of Brady Worldwide, Inc.
Microsoft, Windows, Excel, Access and SQL Server are registered trademarks of Microsoft
Corporation.
All brand or product names referenced in this manual are trademarks (™) or registered trademarks (®)
of their respective companies or organizations.
© 2023 Brady Worldwide, Inc. All Rights Reserved.
Y5107809
Revision A-2
Brady Worldwide, Inc.
6555 West Good Hope Road
Milwaukee, WI 53223
bradyid.com

M710 User Manual iii
Brady Warranty
Our products are sold with the understanding that the buyer will test them in actual use and determine
for themself the adaptability to their intended uses. Brady warrants to the buyer that its products are
free from defects in material and workmanship, but limits its obligation under this warranty to
replacement of the product shown to Brady’s satisfaction to have been defective at the time Brady sold
it. This warranty does not extend to any persons obtaining the product from the buyer.
THIS WARRANTY IS IN LIEU OF ANY OTHER WARRANTY, EXPRESS OR IMPLIED, INCLUDING,
BUT NOT LIMITED TO, ANY IMPLIED WARRANTY OF MERCHANTABILITY OR FITNESS FOR A
PARTICULAR PURPOSE, AND OF ANY OTHER OBLIGATIONS OR LIABILITY ON BRADY’S PART.
UNDER NO CIRCUMSTANCES WILL BRADY BE LIABLE FOR ANY LOSS, DAMAGE, EXPENSE
OR CONSEQUENTIAL DAMAGES OF ANY KIND ARISING IN CONNECTION WITH THE USE, OR
INABILITY TO USE, BRADY’S PRODUCTS.
Safety and Environment
Please read and understand this manual before using the M710 printer for the first time. This manual
describes all of the main functions of the M710 printer.
Precautions
Before using the
M710 printer
, please note the following precautions:
• Read all instructions carefully before operating the printer and prior to performing any procedure.
• Do not place the unit on an unstable surface or stand.
• Do not place anything on top of the unit.
• Keep the top clear of obstructions.
• Always use the printer in a well ventilated area. Do not block the slots and opening on the unit, which
are provided for ventilation.
• Only use the power source indicated on the rating label.
• Use only the power cord that comes with the unit.
• Do not place anything on the power cord.
• This equipment is not intended for use by children.

M710 User Manual iv
Technical Support and Registration
Contact Information
For repair or technical assistance, locate your regional Brady Technical Support office by going to:
•
United States:
bradyid.com/techsupport
• Canada:
bradycanada.ca/contact-us
•
Mexico:
bradyid.com.mx/es-mx/contacto
• Latin America:
bradylatinamerica.com/es-mx/soporte-técnico
•
Europe
:
bradyeurope.com/services
•
Australia:
bradyid.com.au/technical-support
•
Asia Pacific
:
brady.co.uk/landing-pages/global-landing-page
Registration Information
To register your printer go to:
• bradycorp.com/register
Return
If for any reason you need to return the product, please contact Brady Technical Support for return
information.
Document Conventions
When using this document, it is important that you understand the conventions used throughout the
manual.
• All user actions are indicated by
Bold
text.
• References to menus, windows, buttons and screens are indicated by
Italicized
text.
•Theword
press
is used when referring to hardware keys; the word
tap
is used when referring to
controls on the touchscreen.

M710 User Manual v
Contents
1 • Introduction
System Specifications............................................................................................... 1
Physical and Environmental Characteristics .........................................................2
Proximity Range for Bluetooth ..............................................................................2
2 • Setup
Unpacking the Printer ............................................................................................... 3
What’s in the Box ..................................................................................................3
Save the Packaging ..............................................................................................3
Registration ...........................................................................................................4
Printer Components .................................................................................................. 4
Power .......................................................................................................................... 4
AC Power Adapter ................................................................................................5
Battery ..................................................................................................................5
Installing the Battery .......................................................................................7
Charging the Battery ......................................................................................7
Power On ..............................................................................................................7
Automatic Shut Down ...........................................................................................8
Printer Settings .......................................................................................................... 8
Language ..............................................................................................................8
Units of Measure ...................................................................................................8
Date and Time ......................................................................................................8
Pause/Cut .............................................................................................................9
Printer Configuration .............................................................................................9
Print History ........................................................................................................10
Label Type ..........................................................................................................11
Font .....................................................................................................................11
Software for Creating Labels.................................................................................. 12
Mobile (Wireless Model Only) .............................................................................12
Desktop ...............................................................................................................13
Installing the Windows Driver (Optional) .............................................................. 13
Connecting the Printer ............................................................................................ 13
Bluetooth .............................................................................................................13
USB .....................................................................................................................15
Wi-Fi ....................................................................................................................15
Search to Connect .......................................................................................15
Manually Enter Settings ...............................................................................16
Loading Supplies..................................................................................................... 16
Loading Labels ....................................................................................................16
Loading Ribbon ...................................................................................................19
Loading Bulk Labels ............................................................................................20
Loading Fanfold (Raised Panel) Labels ..............................................................21
Using the Label Roll Adapter.................................................................................. 22

M710 User Manual vi
Accessories.............................................................................................................. 24
Battery Specifications .........................................................................................24
3 • General Operation
Using the Touchscreen ........................................................................................... 25
Menus .................................................................................................................27
Settings Screens .................................................................................................28
Cancel Functions ................................................................................................29
Using the Keyboard................................................................................................. 29
Keys With Multiple Characters ............................................................................29
Navigation and Selection Keys ...........................................................................30
Editing Keys ........................................................................................................31
Print-Related Keys ..............................................................................................33
Creating a Simple Text Label.................................................................................. 34
Starting a New Label File ........................................................................................ 34
Printing ..................................................................................................................... 35
Print .....................................................................................................................35
Preview ...............................................................................................................35
Multiple Print .......................................................................................................36
History .................................................................................................................37
4 • Editing Labels on the Printer
Editing Text .............................................................................................................. 39
Positioning the Cursor .........................................................................................39
Inserting Text ......................................................................................................39
Deleting Text .......................................................................................................39
Formatting Text........................................................................................................ 40
Typeface .............................................................................................................40
Font Size .............................................................................................................40
Font Attributes .....................................................................................................41
New Text ......................................................................................................41
Existing Text .................................................................................................42
Superscript and Subscript ...................................................................................42
Labels and Areas ..................................................................................................... 43
Add Label or Area ...............................................................................................43
Label Length .......................................................................................................43
Go to Label or Area .............................................................................................44
Shortcut Keys ...............................................................................................44
Shortcuts on the Touchscreen .....................................................................44
Delete Label or Area ...........................................................................................45
Duplicate Label or Area ......................................................................................45
Formatting Labels and Areas ................................................................................. 45
Justification .........................................................................................................45
Rotation ...............................................................................................................46
Frame ..................................................................................................................47
Reverse ...............................................................................................................48
Vertical Text ........................................................................................................48
Multiple Vertical Lines of Text ......................................................................49
M710 User Manual vii
Errors with Vertical Text ...............................................................................49
Symbols.................................................................................................................... 49
Graphics ................................................................................................................... 50
Import Graphics ..................................................................................................50
Add a Graphic .....................................................................................................50
Date and Time .......................................................................................................... 51
International Characters ......................................................................................... 51
Letters with Diacritical Marks................................................................................. 51
Character on Keyboard .......................................................................................52
Key Combinations ...............................................................................................52
Barcode .................................................................................................................... 52
Barcode Settings .................................................................................................53
Add a Barcode ....................................................................................................53
Edit Barcode Data ...............................................................................................54
Serialization (Sequential Data) ............................................................................... 54
How Serialization Work .......................................................................................55
Examples of Serialization ....................................................................................55
Simple Example ...........................................................................................55
Simple Alphanumeric Example ....................................................................55
Advanced, Independent Example ................................................................55
Advanced, Dependent Example ...................................................................56
Add Serialization .................................................................................................56
Edit a Sequence ..................................................................................................57
List (Importing Data)................................................................................................ 57
Setting up the Data Source .................................................................................58
Working with Rows of Data ..........................................................................59
Merging Files ......................................................................................................60
Advanced Merge ..........................................................................................60
Edit Data Source .................................................................................................61
5 • Label Types
General ..................................................................................................................... 62
Wire Marker .............................................................................................................. 63
Flags ......................................................................................................................... 64
Terminal Block, Patch Panel, 66-Block.................................................................. 65
Face Plate ................................................................................................................. 67
110-Block, Bix Block ............................................................................................... 68
Vial ............................................................................................................................ 70
DesiStrip (Designation Strip).................................................................................. 71
Breaker Box.............................................................................................................. 72
Safety Templates (North America) ......................................................................... 73
General Templates (Europe)................................................................................... 73
Standard PipeMarker............................................................................................... 74
Arrow Tape ............................................................................................................... 75

M710 User Manual viii
Rollform PipeMarker................................................................................................ 76
6 • File Management
Saving Labels Created on the Printer.................................................................... 79
File Naming Standards .......................................................................................79
Folders ................................................................................................................79
Saving a File .......................................................................................................79
Storing Files Created with Brady Workstation Software ..................................... 81
Opening a File .......................................................................................................... 82
Deleting a File .......................................................................................................... 83
Using Files from a USB Drive................................................................................. 83
Importing a File ...................................................................................................83
Exporting a File ...................................................................................................84
7 • Maintenance
Installing Firmware Upgrades ................................................................................ 85
Upgrading via Brady Workstation Software ........................................................85
Upgrading via USB Drive ....................................................................................85
Upgrading via Computer Connection ..................................................................86
Updating the Printer Label Library......................................................................... 86
Cleaning the Printer................................................................................................. 87
Cleaning Internal Components ...........................................................................87
Cleaning the Sensors ..........................................................................................88
8 • Troubleshooting
Error Messages ....................................................................................................... 90
Other Issues ............................................................................................................. 93
Hardware ...........................................................................................................93
Power On and Off (Printer not Working) .............................................................93
Print Quality ........................................................................................................94
Labels .................................................................................................................95
Label Types & Label Supply................................................................................... 96
A • Symbols
B • Using IME for Asian Text
C • Regulatory Compliance
Agency Compliance and Approvals .................................................................... 110
United States ....................................................................................................110
FCC Notice .................................................................................................110
Canada .............................................................................................................110
Mexico ...............................................................................................................110
Europe ............................................................................................................111
RoHS Directive 2011/65/EU, 2015/863/EU ................................................111
Batteries Directive 2006/66/EC ..................................................................111
Turkey ...............................................................................................................111
China .................................................................................................................112

M710 User Manual ix
Taiwan ..............................................................................................................112
Wireless Regulatory Information ......................................................................... 112
United States ....................................................................................................113
Canada .............................................................................................................113
Mexico ...............................................................................................................114
European Union ................................................................................................114
International ......................................................................................................114
Japan ................................................................................................................114
South Africa ......................................................................................................114
D • Licensing
QR Code Generator Library .................................................................................. 115
RapidJSON ............................................................................................................. 115

M710 User Manual 1
1 Introduction
The M710 label printer includes the following features:
• Simple creation of a variety of label types right on the printer. Alternatively create label using Brady
Workstation desktop software or the Brady Express Labels mobile app.
• Supports a wide variety of label supplies: pre-sized, continuous, sleeves, durasleeves, tags, external
bulk labels, and more.
• Withstands a 4 ft (1.2 m) drop.
• Long battery life.
• Ability to use the printer while the battery is charging.
• 3.5" color display.
• Easy to use interface.
• Automatic label cutter.
• Wireless model includes Wi-Fi and Bluetooth connectivity.
• Easy loading label and ribbon supplies.
• Smart-cell technology that works intelligently with Brady authentic label and ribbon supplies.
• Replaceable lithium ion battery.
System Specifications
The M710 printer has the following specifications:
• Print speed: up to 3 in/sec (76 mm/sec).
• USB-C 2.0 for connecting to a computer.
• USB-A host connector for USB drive.
• Li-ion battery life: 4500 labels per battery charge given 1" x 2" (2.5 x 5 cm) labels with 25% coverage.
• Label widths from 0.25" (6.35 mm) through 2.0" (50.8 mm).
• Thermal transfer print mechanism, 300 dpi.
• Print width: 1.92" (48.8 mm) maximum.
• Print length for continuous labels: 40” (1016 mm) maximum.
• Liner width: 2.25" (22.2 mm) maximum.
• Removable lithium battery, 2700 mAh.
• Minimum label height for pre-sized labels: 0.250" (6.35 mm).
• Minimum label height for continuous labels: 0.375" (9.5 mm).

M710 User Manual 2
Introduction
System Specifications
Physical and Environmental Characteristics
The M710 printer has the following physical and environmental characteristics:
Note: The table below refers to the M710 printer only. Consumable performance may vary.
Proximity Range for Bluetooth
The M710 printer should be within 50 ft (15.2 m) of the device to pick up the Bluetooth signal.
Physical U.S. Units Metric Units
Dimensions 13.6” L x 9.5” W x 4.6” H 345 x 240 x 117 mm
Weight (with Li-ion battery pack) 5.8 lbs 2.6 kg
Environmental Operation Storage
Temperature (Printer)
Exposing the printer to direct
sunlight is not recommended.
40° to 120° F (4° to 49° C)
The AC adapter is rated at a
maximum temperature of
104° F (40° C).
14° to 140° F (-10° to 60° C)
Relative Humidity (Printer) 10% to 90% (non-
condensing)
10% to 90% (non-
condensing)
Temperature (AC adapter) 32° to 104° F (0° to 40° C) -40° to 158° F (-40° to 70° C)
Relative Humidity (AC adapter) 5% to 95% (non-
condensing)
0% to 95% (non-condensing)
CAUTION! Avoid using the printer near water, in direct sunlight, or near a
heating device.

M710 User Manual 3
2Setup
Unpacking the Printer
Carefully unpack and inspect the exterior and interior of the printer.
What’s in the Box
Before setting up the printer, verify that you have received the following items in the packaging:
• M710 printer
• Battery pack
• AC adapter
• USB connection cable
• M610 label roll adapter
• Cleaning card and swab
• Quick Start Guide
• USB drive containing User Manual, Quick Start
Guide, and Windows driver
• M7C-1000-595-WT labels
• M7-R6000 black ribbon
• Hardsided carrying case (depending on bundle
purchased)
Save the Packaging
Save the packaging surrounding your M710 printer in case you have to ship the printer and
accessories back to the supplier.
CAUTION! Never ship the M710 printer without first removing the rechargeable
battery pack from the printer.
If shipping both the printer and battery pack, remove the battery
pack from the printer and place the items in the original shipping
material before transporting. Consult with your transportation
carrier for state, federal, municipal, and international shipping
regulations regarding the lithium battery pack.

M710 User Manual 4
Setup
Printer Components
Registration
Register your printer on-line at www.bradycorp.com/register and receive free product support and
updates!
Printer Components
Power
Power is supplied to the printer through a lithium ion battery pack or through an AC power adapter
(included).
1 Navigation keys 7 Number pad
2 Label exit 8 Function keys
3 Cover latch 9 USB C port (to computer)
4 Cover 10 USB port (for USB drive)
5 Print-related buttons 11 Power port
6 Power button 12 Bulk label path
4
3
2
1
56
78
11 12
910

M710 User Manual 5
Setup
Power
AC Power Adapter
The printer can be powered through an AC power adapter (included). When the adapter is plugged in,
it is also charging the battery.
To plug in the printer:
1. Plug the power cable into the adapter.
2. Insert the round end of the adapter cable into the power port on the right side of the printer.
3. Plug the other end of the cord into an electrical outlet.
Battery
CAUTION! Use only the 18 V DC, 5A, Brady AC adapter for supplying power to
the printer.
WARNING! Risk of explosion if battery is replaced by incorrect type. Dispose
of used batteries according to instructions.

M710 User Manual 6
Setup
Power
WARNING!
• Do not operate the printer in temperatures above 120° F (49° C) or below
40° F (4° C).
• Do not store the printer in temperatures above 122° F (50° C) or below 14° F
(-10° C).
• Do not disassemble or mistreat the battery pack.
• Do not attempt to open, damage, or replace components in the battery pack.
• The battery pack should only be used and charged in a Brady compatible
printer.
• Do not allow metal or other conductive materials to touch the battery terminals
WARNING! The battery pack is not intended to be transportable. When not in
use, the battery pack should be stored in the M710 hard case,
M710 soft case, or equivalent casing to prevent possible damage
to the battery pack.
Keep the battery pack away from sparks, flames, or other heat
sources.
Keep the battery pack away from water.
Never lay objects on top of the battery pack.
Store your battery pack only in a cool, dry place.
Keep the battery pack out of the reach of children.
At the end of battery life, replace your old battery only with the
Brady M710 battery pack.
The battery pack must be recycled or disposed of properly
according to federal, state, and municipal regulations.

M710 User Manual 7
Setup
Power
Installing the Battery
To install the battery:
Charging the Battery
To charge the battery:
1. With the battery installed in the printer, plug the printer in to an electrical outlet.
2. The first time that you charge the battery, allow it to charge for 3.5 hours.
Power On
To turn the printer on or off:
1. Press the power button on the front of the printer.
2. The first time you turn on the printer, choose a language in which to display screen items. See
“Printer Settings” on page 8.
Note: Whenever the printer is powered on, the system performs an initialization process. Part of
this process is recognizing the ribbon and label part installed. If the ribbon or label is not
installed, an error message displays. You can dismiss this error during initial setup or if you
wish to continue without the label and ribbon.
The detected ribbon and label information is used when designing labels. While you can
design labels without installing ribbon or label supply, if you choose not to install any, the
label design may not match the ribbon and label supply used to print.
1. Stand the printer up so you
can access the bottom.
Push to the right on the
battery cover release latch,
swing the cover open, and
lift it out.
2. With the battery label facing
outward, insert battery pegs into
the peg slots at the left of the
compartment, then push the
right end of the battery into
place.
3. Re-insert the tabs on the
battery cover into the right
side of the compartment
and snap the cover into
place.

M710 User Manual 8
Setup
Printer Settings
Automatic Shut Down
To conserve energy, the printer automatically turns off after a period of inactivity. To set the inactive
time, or to turn off this feature when the printer is plugged in, see “Printer Configuration” on page 9.
Printer Settings
Use the keyboard and touchscreen to configure standard settings, such as the language. For an
introduction to the touchscreen and keyboard, see “Using the Touchscreen” on page 25 and “Using
the Keyboard” on page 29.
Language
When turning the printer on for the first time, choose the language in which you want all printer menus,
functions, and data displayed.
To set the language for text on the touchscreen:
1. Press FN + SETUP.
2. Use the navigation keys to move through the menu until Language is highlighted.
3. Use the up and down navigation keys to select the desired language.
4. Press to accept the choice.
Units of Measure
Set the unit of measure to inches or millimeters.
To set the unit of measure:
1. Press FN + SETUP.
2. Use the navigation keys to move through the menu until Units is highlighted.
3. Use the up and down navigation keys to select the desired unit.
4. Press to accept the choice.
Date and Time
Set the printer’s clock to the current date and time. Also set the format to use when adding the current
date or time to a label.
To set the date and time:
1. Press FN + SETUP.
2. Use the navigation keys to move through the menu until Time/Date is highlighted.

M710 User Manual 9
Setup
Printer Settings
3. Press to accept the choice and display the time and date settings.
4. For information on how to use the screen, see “Settings Screens” on page 28. Most of the
settings on this screen are self-explanatory, but the following information may be useful.
•
Display 24 Hour:
If this is selected, hours are numbered 1-24. Clear this field to number the
hours 1-12 and use AM and PM.
•
PM:
Not available if
Display 24 Hour
is selected. Clear this check box for AM; set it for PM.
5. Tap OK.
6. Press to dismiss the menu. Alternatively, use the navigation keys to navigate to the
next setting that you want to configure.
Pause/Cut
The Pause/Cut function allows you to remove a label from the printer before another label starts
printing.
To set pausing and cutting:
1. Press FN + SETUP.
2. Use the navigation keys to move through the menu until Pause/Cut is highlighted.
3. Use the up and down navigation keys to select the desired function.
•
End of Label:
The printer cuts after each label and then prints the next label.
•
End of Job:
The printer prints all labels in a file and then cuts. The next job (file) prints.
•
Never:
Always prints the next label or file in the queue without pausing. This is useful for
terminal block, patch panel, and 66-block labels.
4. Press to accept the choice.
Printer Configuration
Use the Config menu to set the brightness, automatic shutdown, backfeed, and to clean the printer.
To configure the printer:
1. Press FN + SETUP.
2. Use the navigation keys to move through the menu until Config is highlighted.
3. Press to accept the choice and display the printer configuration settings.
4. For information on how to use the screen, see “Settings Screens” on page 28.
•
Printer Name:
(Optional.) Tap in the
Printer Name
box and use the keyboard to type a name
for the printer. When using the Brady Express Labels app, this name is shown when selecting a
printer.

M710 User Manual 10
Setup
Printer Settings
Important! If you change the printer name after using the printer with the Brady Express
Labels mobile app (see “Software for Creating Labels” on page 12), additional steps are
needed to update the printer name in the software.
• Reboot the printer. (Turn the printer off and then on again.)
• In the Brady Express Labels app, go to settings and add the printer again.
•
Shut Off Delay:
Set the amount of time, in minutes, that the printer should remain idle before
shutting down automatically.
•
No Shut Off (AC):
Select this check box to turn off the automatic shutdown, which is not
needed when the printer is plugged in.
•
Brightness:
Change the brightness of the touchscreen.
•
Clean Printer:
For more information see
“Cleaning the Printer” on page 87
.
•
No Backfeed:
Applies only to continuous label supplies. After a label has been printed and cut
on a continuous label supply, about 1.5" (38.1 mm) of label material remains ahead of the
printhead, in a position where it would not be printed on. In order not to waste this label material,
the printer normally backfeeds (retracts) the label supply before printing. If the label supply has
been in the printer for awhile, the roller can leave an indentation on the label supply. When
retracted into the printer for printing, the print quality can be bad on the indentation. To resolve
this issue, select the
No Backfeed
check box. Printing starts at the current position leaving
about 1.5" (38.1 mm) of blank label at the leading edge.
Tip: If printing many labels you may want to avoid the excess blank area at the beginning
of each label. Clear the No Backfeed check box. If the first label is unsatisfactory,
reprint just the first label. To print a range of labels (from 1 to 1), see “Multiple Print”
on page 36.
•
About:
Displays version numbers for firmware, Bluetooth, Wi-Fi, and the Printer Label Library.
See
“Installing Firmware Upgrades” on page 85
and
“Updating the Printer Label Library” on
page 86
.
5. Tap OK.
6. Press to dismiss the menu. Alternatively, use the navigation keys to navigate to the
next setting that you want to configure.
Print History
Choose whether you want the printer to retain a history of recently used files.
To configure print history:
1. Press FN + SETUP.
2. Use the navigation keys to move through the menu until Print History is highlighted.
3. Use the up and down navigation keys to select the desired function.
•
On:
The printer retains a history of the last ten label files used.
•
Off:
Print history is no longer retained, but any existing history remains.
•
Clear:
Delete the history. This does not affect the on or off setting.
4. Press to accept the choice.

M710 User Manual 11
Setup
Printer Settings
Label Type
Set defaults for new labels and for pipe marker label types.
To set pipe marker defaults:
1. Press FN + SETUP.
2. Use the navigation keys to move through the menu until Label Type is highlighted.
3. Press to accept the choice and display the application settings.
4. Configure the following settings. For information on how to use the screen, see “Settings
Screens” on page 28.
•
On New Label Creation:
When you start a new label, you usually have to specify some
settings. Some label types show a setting screen with several selections, others just have a
menu to select one option. These settings are detailed in
Chapter 5: Label Types
.
Your choice for On New Label Creation determines the default values for these label type
settings.
•
Clear previous field values:
Uses the factory default settings regardless of your previous
choices.
•
Default to previous field values:
Uses your previous settings as the default.
•
Color Standards:
Select the standard used in your country. When creating a pipe marker from
the EU Safety menu, this setting determines the colors needed. Once you select the pipe
contents, the pipe marker settings screen will show you the label and ribbon colors that you will
need to print the pipe marker.
•Default PipeMarker Symbol Category: When adding graphics to a pipe marker you have
to choose a category of symbols to select from. Setting this is a convenient way to have the
symbols most often used when creating pipe markers readily available. You can still select
a different category while creating a pipe marker. This option is only available when Clear
previous field values is set under On New Label Creation (see above).
•
Adjust PipeMarker Length to Characters:
The length of pipemarker labels is set to conform
to standards. This check box controls whether the length of the label will shorten if there is not
much text on the label.
Select the check box if you want the label to shorten when there is little text. This saves
label material. Clear the check box if you want the full size pipemarker regardless of the
amount of text.
In both cases the software gives you the option of increasing the label length to
accommodate text that is too long to fit on the standard label length.
Font
Choose the font to use when creating labels on the printer. Only one font type can be selected per
label file. These settings do not affect any currently open label file. They take effect for the next new
label file created.
To set the font:
1. Press FN + SETUP.
Table of contents
Other Brady Label Maker manuals

Brady
Brady BP-PR300+CS User manual

Brady
Brady GlobalMark 2 User manual

Brady
Brady BMP 41 User manual

Brady
Brady BBP31 User manual

Brady
Brady M511 User manual

Brady
Brady BMP71 User manual

Brady
Brady BBP31 User manual

Brady
Brady BradyPrinter S3700 Instruction Manual

Brady
Brady BMP 61 User manual

Brady
Brady BradyPrinter S3100 User manual

Brady
Brady BMP71 User manual

Brady
Brady BBP 85 User manual

Brady
Brady BBP 30 User manual

Brady
Brady BradyPrinter S3700 User manual

Brady
Brady BMP 91 User manual

Brady
Brady TLS PC Link Manual

Brady
Brady BradyJet J2000 User manual

Brady
Brady BradyPrinter M611 User manual

Brady
Brady MINIMARK User manual

Brady
Brady BradyPrinter i5100 User manual