Braun BC21 Product information sheet

CR2032
A B
6 7
1
2C
D
53
4
9
10
8
BC21
Alarm clock with wireless fast-
charging pad
Wecker mit Pad zum schnellen
kabellosen Laden
Réveil avec tapis de recharge
sans fil
Sveglia con base per ricarica
rapida wireless
Wekker met draadloze
snellaadpad
Vækkeur med trådløs
hurtigopladningspad
Reloj despertador con base de
carga inalámbrica rápida
English
User instructions
Guarantee
Deutsch
Gebrauchsanweisung
Garantie
Français
Mode d’emploi
Garantie
Italiano
Manuale di istruzioni
Garanzia
Nederlands
Gebruiksaanwijzingen
Garantie
Dansk
Brugervejledninger
Garanti
Español
Instrucciones para el usuario
Garantía

Battery precautions
1. Do not use rechargeable batteries.
2. Use only 3V, CR2032 battery of the same or equivalent type.
3. Insert batteries with the correct polarity.
4. Keep batteries away from children.
5. Dispose of exhausted batteries according to local legal require-
ments. Do not dispose them by throwing away with normal
household rubbish.
6. Avoid short circuiting the contacts in the battery compartment
and battery terminals.
7. Remove batteries from the unit if it will not be used for long
period of time.
8. Exhausted batteries should be removed from the battery com-
partment to prevent over-discharge, which can cause leakage
and may cause damage to the clock.
Getting started
1. Remove the battery door.
2. Take out button cell battery and remove the plastic strip.
3. Replace the button cell battery for time backup.
4. Close the battery door.
5. An AC/DC adapter is being used to power the clock, plug the
adapter into the USB-C jack at the back of the clock.
Function keys
Alarm/time/12/24 hour/brightness switch
- Slide to the alarm position to set the alarm time
- Slide to the time position to set the clock time
- Slide to the 12/24 hour position to set 12/24 hour format
- Slide to the brightness position to set the clock display bright-
ness.
+ key
- In the alarm/time setting mode, press to increase the setting
value. Press and hold to speed up the setting.
- In the 12/24 hour setting mode, press to switch between 12/24
hour format.
- In the brightness mode, press to increase the clock display
brightness.
- key
- In the alarm/time setting mode, press to decrease the setting
value. Press and hold to speed up the setting.
- In the brightness mode, press to decrease the clock display
brightness
ALARM ON/OFF button
- Press to turn the alarm on/off.
Snooze zone
- Touch to stop the alarm and activate the snooze function.
Reset button
- Press by using a pin to reset all values to default. In case of a
malfunction, the unit has to be reset.
Product description
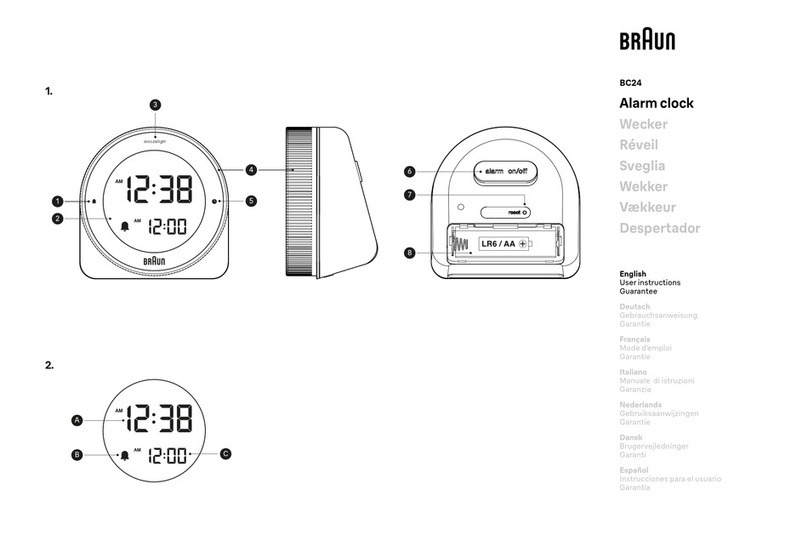
1. LCD display
2. Alarm/time/12/24 hour/brightness switch
3. USB-C
4. Backup Battery compartment
5. Reset button
6. Alarm ON/OFF button
7. Snooze zone
8. – key
9. + key
10. Wireless charging pad
Display symbols
A. Time
B. Alarm icon
C. Alarm time
D. Charging indicator
Setting the time
1. Slide the “ALARM / TIME / 12/24 HOUR / BRIGHTNESS” switch
to the TIME position.
2. Press the “+” or “-” key to set the desired value. Press and hold
to speed up the setting.
3. Slide the “ALARM / TIME / 12/24 HOUR / BRIGHTNESS” switch
to the “BRIGHTNESS” position to return to normal display and
save the setting.
Setting the alarm
1. Slide the “ALARM / TIME / 12/24 HOUR / BRIGHTNESS” switch
to the ALARM position.
2. Press the “+” or “-” key to set the desired value. Press and hold
to speed up the setting.
3. Slide the “ALARM / TIME / 12/24 HOUR / BRIGHTNESS” switch
to the BRIGHTNESS position to return to normal display and
save the setting.
Setting the 12/24 hour format
1. Slide the “ALARM / TIME / 12/24 HOUR / BRIGHTNESS” switch
to the 12/24 HOUR position.
2. Press the “+” key to set the 12 or 24 hour format.
3. Slide the “ALARM / TIME / 12/24 HOUR / BRIGHTNESS” switch
to the BRIGHTNESS position to return to normal display and
save the setting.
Setting the clock display brightness
The clock will automatically adjust the display brightness depend-
ing on the surrounding level of light.
1. In a well-lit environment, slide the “ALARM / TIME / 12/24 HOUR
/ BRIGHTNESS” switch to the BRIGHTNESS position.
2. Press the “+” or “-” key to set the desired brightness.
3. In a dark environment (or by covering the sensor), slide the
“ALARM / TIME / 12/24 HOUR / BRIGHTNESS” switch to the
BRIGHTNESS position.
4. Press the “+” or “-” key to set the desired brightness.
Using the alarm and snooze function
1. Activate the alarm by pressing the “ALARM ON/OFF” button.
The bell icon “ ” will appear on the LCD display.
2. Press the SNOOZE zone to stop the alarm and activate the
snooze function. When the alarm sounds, the alarm icon will
flash.
3. To de-activate the alarm and snooze function, press the ALARM
ON/OFF button. The bell icon will disappear.
Note:
When the snooze function is activated, the alarm will automat-
ically start again after 5 minutes. The snooze function will not
stop unless you press the ALARM ON/OFF button to turn off the
snooze.
Using the wireless charging function
Place your Qi compatible device on the centre of the wireless
charging pad. The charging icon will appear on the LCD display
when the device is charging.
Note: The wireless charging function may not work with all phone
cases. For maximum charging efficiency, the device must be
aligned with the centre of the charging area, which is marked with
‘charge’ text. No metal case or foreign objects should be placed
between the device and the charging pad.
Battery replacement
1. If the AC/DC adapter is removed from the clock and plugged
back in and the current time is not memorised, then the button
cell battery must be replaced immediately.
2. It is recommended to replace the button cell battery once a
year.
Note: Exposure to an electrostatic environment may cause the
clock to reset. In this event please follow the instructions as de-
scribed in this manual to set the clock again.
English

Guarantee
2 year guarantee against material and workmanship defects
(except battery).
The guarantee is valid in those countries where the alarm clock
is officially being sold. Broken or cracked lens screen are not
covered under the Guarantee.
Precaution of using adaptor:
1. The AC/DC adaptor and apparatus should not be exposed to
dripping or splashing and no objects filled with liquids, should
be placed on the AC/DC adaptor and apparatus.
2. When the AC/DC adaptor is used to disconnect device. The
AC/DC adaptor should not be obstructed and should be easily
accessed during intended use. To completely disconnect the
power input, the AC/DC adaptor should be disconnected from
the mains.
3. Rated power consumption of the LCD clock dc 9.0V 1.5A or
5.0V 2.0A so use the provided 9.0V dc 1.5A adaptor for the
LCD clock.
4. Battery should not be exposed to excessive heat such as sun-
shine, fire or the like.
CAUTION: Danger of explosion if battery is incorrectly replaced.
Replace only with the same (CR2032) or equivalent type.
Braun helpline
Should you have a problem with your product, please check your
local service centre at:
www.braun-clocks.com
www.braun-watches.com
or contact +44 808 175 3235 (calls free within the UK) or +44 208
208 1833.
WARNING! This product is covered by the Waste Electrical and
Electronic Equipment (WEEE) directive and the battery used
in this item is covered by the Battery directive. It should not be
discarded with normal household waste but taken to your local
collection centre for recycling.
Use this unit and mobile phone only in environments with ambi-
ent temperatures between 0°C and 40°C.
FCC Information
This equipment complies with FCC RF radiation exposure limits
set forth for an uncontrolled environment.
This equipment should be installed and operated with minimum
distance 20cm between the radiator & your body.
This device complies with Part 15 of the FCC rules. Operation is
subject to the following two conditions: (1) This device may not
cause harmful interference, and (2) This device must accept any
interference received, including interference that may cause
undesired operation.
WARNING! Changes or modifications to this unit not expressly
approved by the party responsible for compliance could void the
user’s authority to operate the equipment.
This equipment has been tested and found to comply with the
limits for a Class B digital device, pursuant to Part 15 of the FCC
Rules. These limits are designed to provide reasonable protection
against harmful interference in a residential installation. This
equipment generates, uses and can radiate radio frequency
energy and, if not installed and used in accordance with
the instructions, may cause harmful interference to radio
communications.
However, there is no guarantee that interference will not occur
in a particular installation. If this equipment does cause harmful
interference to radio or television reception, which can be
determined by turning the equipment off and on, the user is
encouraged to try to correct the interference by one or more of
the following measures:
• Reorient or relocate the receiving antenna.
• Increase the separation between the equipment and the
receiver.
• Connect the equipment into an outlet on a circuit different from
that to which the receiver is connected.
• Consult the dealer or an experienced radio/TV technician for
help.
We ZEON LIMITED UK, manufacturer of Braun Watches & Clocks
under licence from the Procter & Gamble Company hereby
declare that model BC21 conforms with Directive 2014/53/EU.
The full text of the EU Declaration of Conformity can be viewed on
our website atwww.braun-clocks.com
Zeon Ltd
Unit 1 Phoenix Park
Apsley Way, London
England, NW2 7LN
© 2023 Zeon Ltd
Certain trademarks used under license from The Procter &
Gamble Company

CR2032
A B
6 7
1
2C
D
53
4
9
10
8
BC21
Alarm clock with wireless fast-
charging pad
Wecker mit Pad zum schnellen
kabellosen Laden
Réveil avec tapis de recharge
sans fil
Sveglia con base per ricarica
rapida wireless
Wekker met draadloze
snellaadpad
Vækkeur med trådløs
hurtigopladningspad
Reloj despertador con base de
carga inalámbrica rápida
English
User instructions
Guarantee
Deutsch
Gebrauchsanweisung
Garantie
Français
Mode d’emploi
Garantie
Italiano
Manuale di istruzioni
Garanzia
Nederlands
Gebruiksaanwijzingen
Garantie
Dansk
Brugervejledninger
Garanti
Español
Instrucciones para el usuario
Garantía

Vorsichtsmaßnamen für Batterien
1. Nutzen Sie keine Akkus.
2. Nutzen Sie nur CR2032-Batterien mit 3V des gleichen oder
eines gleichwertigen Typs.
3. Achten Sie beim Einlegen der Batterien auf die richtige Polar-
ität.
4. Halten Sie die Batterien von Kindern fern.
5. Entsorgen Sie verbrauchte Batterien nach den örtlich gel-
tenden Vorgaben. Entsorgen Sie die Batterien nicht mit dem
normalen Hausmüll.
6. Vermeiden Sie Kurzschlüsse an den Kontaktstellen des Batter-
iefachs und der Batterieklemmen.
7. Entfernen Sie die Batterien aus dem Gerät, wenn dieses für eine
längere Zeit nicht genutzt wird.
8. Verbrauchte Batterien sollten aus dem Batteriefach entfernt
werden, um so übermäßiges Entladen zu verhindern, das zum
Auslaufen des Batterieinhalts führen und Schäden an der Uhr
verursachen kann.
Die ersten Schritte
1. Entfernen Sie die Batterieabdeckung.
2. Entnehmen Sie die Knopfzelle und entfernen Sie den Plastik-
streifen.
3. Setzen Sie die Knopfzelle für die Speicherung der Uhrzeit
wieder ein.
4. Schließen Sie das Batteriefach.
5. Für den Betrieb der Uhr wird ein AC/DC-Adapter genutzt,
stecken Sie den Adapter dazu in die USB-C-Buchse auf der
Rückseite der Uhr.
Funktionstasten
Schalter für Alarm/Zeit/12-/24-Stunden-Format/Helligkeit
- Schieben Sie den Schalter in die Alarm-Position, um die Zeit für
den Alarm einzustellen
- Schieben Sie den Schalter auf die Time-Position, um die Uhrzeit
einzustellen
- Schieben Sie den Schalter auf die 12/24Hour-Position, um das
12-/24-Stunden-Format einzustellen
- Schieben Sie den Schalter auf die Brightness-Position, um die
den Helligkeit des Bildschirms einzustellen
+ Taste
- Drücken Sie Sie diese Taste im Alarm-/Zeit-Modus, um die
Einstellung zu erhöhen. Halten Sie die Taste gedrückt, um die
Einstellung schneller zu verändern.
- Drücken Sie die Taste im 12/24Hour-Modus, um zwischen dem
12-Stunden- und dem 24-Stunden-Format zu wechseln.
- Drücken Sie die Taste im Brightness-Modus, um die Helligkeit
des Displays zu erhöhen.
-- Taste
- Drücken Sie Sie diese Taste im Alarm/Time-Modus, um die
Einstellung zu erhöhen. Halten Sie die Taste gedrückt, um die
Einstellung schneller zu verändern.
- Drücken Sie die Taste im Brightness-Modus, um die Helligkeit
des Displays zu senken.
ALARM ON/OFF-Taste
- Drücken Sie diese Taste, um den Alarm an-/auszuschalten.
Schlummerfunktion
- Drücken Sie die Taste, um den Alarm zu unterbrechen und die
Schlummerfunktion zu aktivieren.
Reset-Knopf
- Benutzen Sie einen Stift, um diesen zu betätigen und alles auf
die Standardeinstellung zurückzusetzen. Bei einer Fehlfunktion
müssen Sie das Gerät zurücksetzen.
Produktbeschreibung
1. LCD-Display
2. Schalter für Alarm/Zeit/12-/24-Stunden-Format/Helligkeit
3. USB-C
4. Ersatzbatteriefach
5. Reset-Knopf
6. Alarm ON/OFF-Taste
7. Schlummerfunktion
8. - Taste
9. + Taste
10.Pad zum schnellen kabellosen Laden
Symbole auf dem Display
A.Zeit
B. Alarmsymbol
C.Alarmzeit
D.Ladeanzeige
Einstellen der Zeit
1. Schieben Sie den Schalter für „ALARM / TIME / 12/24 HOUR /
BRIGHTNESS“ auf die TIME-Position.
2. Drücken Sie die Taste „+“ oder „-“, um die gewünschte Zeit
einzustellen. Halten Sie die Taste gedrückt, um die Einstellung
schneller zu ändern.
3. Schieben Sie den „ALARM / TIME / 12/24 HOUR / BRIGHT-
NESS“-Schalter in die BRIGHTNESS-Position, um zur normalen
Anzeige zurückzukehren und die Einstellungen zu speichern.
Einstellen des Alarms
1. Schieben Sie den Schalter für „ALARM/ZEIT/12-/24-STUNDEN/
HELLIGKEIT“ auf die ALARM-Position.
2. Drücken Sie die Taste „+“ oder „-“, um die gewünschte Zeit
einzustellen. Halten Sie die Taste gedrückt, um die Einstellung
schneller zu ändern.
3. Schieben Sie den „ALARM / TIME / 12/24 HOUR / BRIGHT-
NESS“-Schalter in die BRIGHTNESS-Position, um zur normalen
Anzeige zurückzukehren und die Einstellungen zu speichern.
Einstellen des 12-/24-Stunden-Formats
1. Schieben Sie den „ALARM / TIME / 12/24 HOUR / BRIGHT-
NESS“-Schalter in die 12/24 HOUR-Position.
2. Drücken Sie auf „+“, um das 12- oder das 24-Stunden-Format
einzustellen.
3. Schieben Sie den „ALARM / TIME / 12/24 HOUR / BRIGHT-
NESS“-Schalter in die BRIGHTNESS-Position, um zur normalen
Anzeige zurückzukehren und die Einstellungen zu speichern.
Einstellung der Displayhelligkeit
Der Wecker passt die Displayhelligkeit automatisch an die Hellig-
keit der Umgebung an.
1. Schieben Sie in einer hellen Umgebung den Schalter „ALARM
/ TIME / 12/24 HOUR / BRIGHTNESS“ („ALARM / ZEIT / 12/24
STUNDEN / HELLIGKEIT“) auf die Position BRIGHTNESS
(HELLIGKEIT).
2. Drücken Sie die Taste „+“ oder „-“, um die gewünschte Helligkeit
einzustellen.
3. Schieben Sie in einer dunklen Umgebung (oder indem Sie den
Sensor abdecken) den Schalter „ALARM / TIME / 12/24 HOUR /
BRIGHTNESS“ („ALARM / ZEIT / 12/24 STUNDEN / HELLIGKEIT“)
auf die Position BRIGHTNESS (HELLIGKEIT).
4. Drücken Sie die Taste „+“ oder „-“, um die gewünschte Helligkeit
einzustellen.
Nutzung der Alarm- und Schlummerfunktion
1. Aktivieren Sie den Alarm, indem Sie auf die „ALARM ON/
OFF“-Taste drücken. Das Alarmsymbol „ “ erscheint auf dem
LCD-Display.
2. Drücken Sie auf die SNOOZE-Taste, um den Alarm zu unterbre-
chen und die Schlummerfunktion zu aktivieren. Wenn der Alarm
ertönt, blinkt das Alarmsymbol.
3. Um den Alarm und die Schlummerfunktion zu deaktivieren,
drücken Sie die ALARM ON/OFF-Taste. Das Symbol wird aus-
geblendet.
Hinweis:
Wenn die Schlummerfunktion aktiviert ist, ertönt der Alarm
automatisch nach 5 Minuten erneut. Die Schlummerfunktion
wird erst dadurch unterbrochen, dass die ALARM ON/OFF-Taste
gedrückt wird.
Deutsch
Other manuals for BC21
1
Table of contents
Languages:
Other Braun Alarm Clock manuals

Braun
Braun BC01 Product information sheet

Braun
Braun BC09 User manual

Braun
Braun DB 15 Quick guide

Braun
Braun BC16 User manual

Braun
Braun BNC009-RC User manual

Braun
Braun BC05 User manual

Braun
Braun BNC016 User manual

Braun
Braun AB 325 Quick guide

Braun
Braun AB 55 fsl Quick guide

Braun
Braun BC02X Product information sheet

Braun
Braun BC07-DCF User manual

Braun
Braun BNC User manual

Braun
Braun BNC020 User manual

Braun
Braun BNC007-DCF User manual

Braun
Braun BNC011 User manual

Braun
Braun BC20 User manual

Braun
Braun BC08-DCF Product information sheet

Braun
Braun BC12 Product information sheet

Braun
Braun BC16 User manual

Braun
Braun AB 60 rsl Quick guide