brel-motors DD7002B User manual

MOT O R S
www.brel-home.com
Visit our website for more manuals and information
INSTALLATION
MANUAL
BREL HOME HUB
Scan the QR code here for the manual to
download & view instructional videos
Read the manual before you begin the
installation. If these instructions are not
followed, this may lead to defects and
injury in which warranty can’t be claimed.
DD7002B
DD7002B
EN
NL DE FR
Apple
QR code
Android

Page 2
Warning
The motor must be
protected from direct
moisture influences.
De motor moet beschermd
worden tegen water en
andere vochtige invloeden.
Der Motor muss vor direkter
Feuchtigkeit geschützt
werden.
Le moteur doit être protégé
contre l'influence directe
de l'humidité
The motor must be
installed correctly.
De motor moet correct
worden geïnstalleerd.
Der Motor muss korrekt
installiert sein.
Le moteur doit être installé
correctement
BREL-Motors declares that this
motor has been manufactured
according to the guidelines of the
CE standard 1999/5/EC
Brel Motors verklaard dat de motor is
gefabriceerd volgens de CE standaard
1999/5/EC norm
BREL-Motors erklärt hiermit, dass
dieser Motor nach den Richtlinien der
CE-Norm 1999/5/EG hergestellt wurde
BREL-Motors déclare que ce moteur
a été fabriqué selon les directives
de la norme CE 1999/5/CE
Do not operate the motor
in humid surroundings.
Plaats de motor niet in
een vochtige omgeving.
Verwenden Sie den
Motor nicht in feuchter
Umgebung.
Ne pas travailler avec le
moteur dans des
environnements humides.
Keep the antenna in a good
condition and do not shorten. The
antenna should not come into
contact with other metal parts
otherwise it will reduce the function.
De antenne moet in goede conditie
verkeren. Kort deze niet in. Zorg
ervoor dat de antenne niet in contact
komt met andere metalen. Gebeurt dit
toch dan beïnvloed dit de functie.
Halten Sie die Antenne in gutem
Zustand und verkürzen Sie diese nicht!
Die Antenne darf nicht mit anderen
Antennen oder Metallteilen in Berührung
kommen, da ansonsten der Betrieb
eingeschränkt wird.
Maintenez l'antenne en bon état et ne
la raccourcissez pas. L'antenne ne
doit pas entrer en contact avec d'autres
pièces métalliques, sinon la performance
en sera réduite.
Do not allow children to play with the
roller blind control unit. Keep remote
controls out of reach of children.
Children cannot recognize the dangers
of electrical equipment and are
therefore not allowed to work with it
Keep these instructions for future reference
Bewaar deze handleiding zodat u in de toekomst deze kunt raadplegen
Conservez ces instructions pour référence ultérieure
Die Anleitung für zukünftiges Nachschlagen aufbewahren

Page 3
Wiring
Technical data of the hub
TYPE DD-7002B
Power | Vermogen | Leistung | Puissance Micro USB DC 5V / 1A*
WiFi 2.4 Ghz
Frequency | Frequentie | Frequenz | Fréquenc 433.92 MHz
Capacity | Capaciteit | Kapazität | Capacité Max. 30 motors
Scenarios | Scenario’s | Szenarien | Scénarios Max. 20
Timer Max. 15
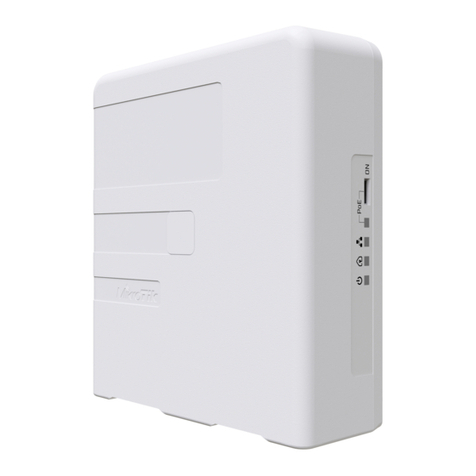
The hub is suitable for both Mono - and Bi-directional motors. The hub allows the user to connect his
motors to connect with a Wi-Fi network, which then can be controlled via a smart APP.
De hub is geschikt voor zowel mono - als bi-directionele motoren. Met de hub kan de gebruiker zijn
motoren verbinden met een wifi-netwerk, die vervolgens bediend kunnen worden via een slimme APP.
Der Hub ist für Mono- und Bidirektionalmotoren geeignet. Mit dem Hub kann der Benutzer sein
Motoren an ein WLAN-Netzwerk Anschließen, das dann über eine intelligente App gesteuert werden kann.
Le hub convient aux moteurs mono et bidirectionnels. Avec le hub, l'utilisateur peut être
connectez les moteurs à un réseau wifi, qui peut ensuite être contrôlé via une application intelligente.
Hub Functions
Program button Reset
Make sure that the USB port has sufficient power, this may affect the operation of the hub.
Zorg ervoor dat de USB-poort voldoende stroom heeft, dit kan de hub nadelig beïnvloeden.
Stellen Sie sicher, dass der USB-Anschluss ausreichend mit Strom versorgt wird. Dies kann
den Betrieb des Hubs beeinträchtigen.
Assurez-vous que le port USB est suffisamment alimenté, cela peut affecter le
fonctionnement du hub.
RS485
Interface Power:
Micro USB ( 5V/1A)
Indicator

Page 4
Resetting the hub
Press and hold the programming button for about 10 seconds, then release it until the LED flashes red.
Houd de programmeertoets ongeveer 10s ingedrukt en laat hem vervolgens los wanneer de LED rood knippert.
Halten Sie die Programmiertaste etwa 10s gedrückt und lassen Sie sie dann los, wenn die LED rot blinkt.
Appuyez sur le bouton de programmation 10s, puis relâchez-le lorsque la LED clignote en rouge.
Hub status indicator
Constant Blue | Constant blauw Working ne |Werkt prima
Konstantes Blau | Bleu constant Funktioniert gut | Fonctionne bien
Slow Flashing Red | Langzaam knipperend rood Wi is disconnected | Wi is verbroken
Langsam rot blinkend | Rouge clignotant lentement Wi ist nicht verbunden | Le wi est déconnecté
Slow Flashing Yellow | Langzaam knipperend geel Wi is connecting | Wi is verbonden
Langsam geel blinkend | Jaune clignotant lentement Wi ist verbunden | Le wi est connecté
Quick Flashing Red | Snel knipperend rood Reset Hub | Hub resetten | Hub zurücksetzen
Schnell rot blinkend | Rouge clignotant vite Hub réinitialiser
Slow Flashing Purple | Langzaam knipperend paars Pairing in progress | Bezig met koppelen
Langsam violett blinkend | Violet clignotant lentement Pairing läuft | Appairage en cours
Slow Flashing Green | Langzaam knipperend groen Update in progress | Bezig met updaten
Langsam grün blinkend | Vert clignotant lentement Update läuft | Mise à jour en cours
COLOR MEANING
Extra information
Pay attention to the case-sensitivity of your password when connecting the Wifi.
Let op de hoofdlettergevoeligheid van uw wachtwoord bij het koppelen van de Wifi.
Achten Sie beim Anschließen des WLANs auf die Groß- und Kleinschreibung Ihres Passworts.
Faites attention à la casse de votre mot de passe lors de la connexion au Wifi.
With your Apple product, turn off the automatic connection to your home WiFi when installing the hub.
Zet bij uw Apple product het automatisch verbinden uit met uw thuis Wifi tijdens het installeren van de hub.
Deaktivieren Sie bei Ihrem Apple-Produkt die automatische Verbindung zu Ihrem Heim-WLAN.
Avec votre produit Apple, désactivez la connexion automatique à votre réseau Wi-Fi domestique.
Does the hub have a bad connection? Then move the hub closer to the motor.
Heeft de hub een slechte verbinding? Plaats de hub dan dichterbij de motor.
Hat der Hub eine schlechte Verbindung? Bewegen Sie dann die Nabe näher an den Motor.
Le hub a-t-il une mauvaise connexion? Rapprochez ensuite le moyeu du moteur.

Installation of the BREL HOME App
The installation of the BREL HOME App is done in 7 steps. It is important that you read the
steps before you start the installation.
GOLDEN TIP: Install the BREL HOME app on your own phone and complete the entire installation.
Your own phone works the easiest, you only have to download the app once and it serves as an
extra check of the WiFi password. You can then download the app on the customer’s devices and
then all you have to do is log in.
Step 1: Log in to the customer’s home network
Connect to the customer’s WiFi network. Make sure you write the password correctly. You will need
the password when adding the HUB. After connecting to the home network, you need to disable the
Step 2: Download the BREL HOME app
Download the app from the Apple store or the Playstore.
Step 3: Create a new account
Create a new account with the customer’s email address and password of their choice.
Log in now with this information.
Step 4: Create a room
You are now on the home screen of the app. There’s Add Room. Click on this and give the room a
name, for example‘Living room’.
Step 5: Add the HUB
Click on the room. Add New Device, click on the appropriate HUB and follow the installation steps.
- Go back to the WiFi connections of your phone, select the BREL WiFi network and go back to the
app.
- The timer will now count down until the connection is complete. Now give the HUB a name and
click DONE. The light on the HUB is solid BLUE.
Step 6: Add the Motors
Click on Add New Device, select the remote control motor and click on the correct product.
You now have the choice to pair the motors by remote or by motor.
Pair by Remote: Go to the correct channel. Press P2 - motor jogs up and down -
press P2 motor jogs up and down again - press PAIR.
Pair by Motor: Press 3 sec. on the P1 key on the motor head motor jogs up and down - press PAIR.
The motor has been added when it jogs up and down 2x and beeps 3x.
Name the motor and click DONE.

Tips & Tricks
Tips
can be placed with the products.
- The password is case sensitive and space sensitive. So pay attention that it
password is entered correctly. Otherwise, the connection will always fail.
- The WiFi network must be 2.4 Ghz
Tricks
Pairing the motor with a remote control via the app
Go to the product in the app that you want to link to the remote.
Click EDIT at the top left of the app.
Click on Add Remote.
Go to the correct channel on the remote. Press P2 - motor goes up and down -
press P2 motor goes up and down again - press NEXT. The motor is now connecting to the
remote. The motor jogs up and down 2x and beeps 3x.
The motor is now linked to the remote control.
Setting up scenarios
Click on the Scenario icon in the bottom icon bar.
Select the motors for which you want to create a scenario.
And put them in the desired position.
Give the scenario a name and click DONE.
Now the scenario has been created for the selected engines. Clicking on the scenario will
move the motors to the set position.
Setting a timer
Click on the Timer icon in the bottom icon bar.
Select whether you want to set a timer for a product or for a created scenario.
Give the Timer a name.
Select the product or scenario for which you want to set your timer.
Set the time and select the days.

Installatie van de BREL HOME app
-
De installatie van de BREL HOME App gebeurt in 7 stappen. Belangrijk is dat de stappen
eerst doorgelezen worden voordat je met de installatie begint.
GOUDEN TIP: Doe de installatie van de BREL HOME app op jouw eigen telefoon en voltooi de hele
installatie. Jouw eigen telefoon werkt het makkelijkst, je hoeft de app maar 1x te downloaden en
het dient als een extra controle van het WiFi wachtwoord. Je kunt daarna de app downloaden op de
toestellen van de klant en dan hoef je alleen maar in te loggen.
Stap 1: Log in op het thuisnetwerk van de klant
Maak verbinding met het WiFi netwerk van de klant. Zorg ervoor dat je het wachtwoord correct
overschrijft. Het wachtwoord heb je straks nodig bij het toevoegen van de HUB. Na het verbinden
met het thuisnetwerk moet je het automatisch verbinden uitschakelen. Dit kan je vinden bij de WiFi
instellingen van het netwerk op je telefoon.
Stap 2: Download de BREL HOME app
Download de app in de Apple store of in de Playstore.
Stap 3: Maak een nieuw account aan
Maak een nieuw account aan met het emailadres van de klant en het wachtwoord naar hun keuze.
Log nu in met deze gegevens.
Stap 4: Maak een kamer aan
Je komt nu in het beginscherm van de app. Daar staat Add Room. Klik hier op en geef de kamer een
naam, bijvoorbeeld ‘Woonkamer’.
Stap 5: Voeg de HUB toe
- Vul het WiFi wachtwoord in van het thuisnetwerk dat ingevuld staat.
- Stop de stekker van de HUB in het stopcontact (LED knippert ROOD) en druk voor 2 sec. op de
settingsknop (LED knippert PAARS)
- De timer loopt nu af totdat de verbinden voltooid is. Geef de HUB nu een naam en klik op DONE. Het
lampje op de HUB brandt constant BLAUW.
Stap 6: Voeg de motoren toe
Klik op Add New Device, selecteer de radiomotor en klik op het juiste product. Je hebt nu de keuze
om de motoren te koppen aan de hand van de afstandsbediening of via de motor.
Pair by Remote: Ga naar het juiste kanaal. Druk op P2 - motor gaat op en neer - druk op P2- motor
gaat weer op en neer - druk op PAIR. Pair by Motor: Druk 3 sec. op de P1 toets op de motorkop-
motor gaat heen en weer - druk op PAIR. De motor is toegevoegd als het 2x heen en weer gaat en 3x
piept. Geef de motor een naam en klik op DONE.
De BREL HOME App is geïnstalleerd en klaar voor gebruik!

Tips & Tricks
Tips
- Schakel altijd het automatisch verbinden van het thuisnetwerk uit.
de producten geplaatst worden.
- Het wachtwoord is hoofdlettergevoelig en spatiegevoelig. Let dus goed op dat het
wachtwoord goed ingevuld wordt. Anders mislukt de verbinding altijd.
- Het WiFi netwerk moet 2.4 Ghz zijn
Tricks
De motor koppelen aan een afstandsbediening via de app
Ga naar het product in de app dat je wilt koppelen aan de afstandsbediening.
Klik op EDIT links boven in de app.
Klik op Add Remote.
Ga naar het juiste kanaal op de afstandsbediening. Druk op P2 - motor gaat op en neer - druk op
P2- motor gaat weer op en neer - druk op NEXT. De motor is nu verbinding aan het maken met de
afstandsbediening. De motor gaat 2x op en neer en piept 3x. De motor is nu gekoppeld aan de
afstandsbediening.
Het instellen van scenario’s
Klik op het icoontje van Scenario in de onderste balk met icoontjes.
Selecteer de motoren waarvoor je een scenario wilt maken. En zet ze in de gewenste stand.
Geef de scenario een naam en klik op DONE.
Nu is de scenario aangemaakt voor de geselecteerde motoren. Door op het scenario te
klikken gaan de motoren naar de ingestelde positie.
Het instellen van een timer
Klik op het icoontje van Timer in de onderste balk met icoontjes.
Selecteer of je een timer wilt instellen voor een product of voor een aangemaakt scenario.
Geef de Timer een naam.
Selecteer het product of scenario waarvoor de je timer wilt instellen.
Stel de tijd in en selecteer de dagen.
Alles ingevuld naar wens? Klik dan op DONE en de timer is ingesteld.
Table of contents
