8
Fitting the tray
Position the tray over the arms and pull outward on the side levers (a) found on
the underside of the tray, whilst sliding the tray to the position required.
The tray has three positions only, line the tray with the desired position as
indicated on the armrest, release the levers to position and or remove the tray.
WARNING: Never leave the tray tted in a position in which the warning signes are
visible.
The top tray can be removed by holding and pull at the ridge (b) at the same time
as lifting the ridge (c) and lift o. To replace again, position the top tray over the
bottom tray and push down to secure.
The tray maybe stored on the back legs of the highchair. Align the holes in the rear
of the tray with the small pegs on the back legs.
Harness
A ve-point safety harness is provided to restrain your child and should always be
worn.
Sliding adjusters are tted and should be carefully adjusted so the harness ts
your child comfortably.
To fasten the harness push the prongs into the buckle.
To release, push the prongs (A) and remove from the buckle.
Pass the ends of the shoulder, waist and crotch straps through the vertical slots in
the lower backrest, rotate the ends, and pull back to secure.
The seat cover should come already positioned on the highchair, however it may
be necessary to remove these components for cleaning purposes.
To remove the seat insert undo the harness and thread the shoulder and crotch
straps through the seat insert slots and simply remove.
IMPORTANT: SAFETY NOTE
The seat cover may be sponge cleaned only. If you feel the need to remove the
seat cover, for ease of cleaning, please ensure that you carefully follow the
instructions outlined in part 7 on how to correctly re-thread the safety harness.
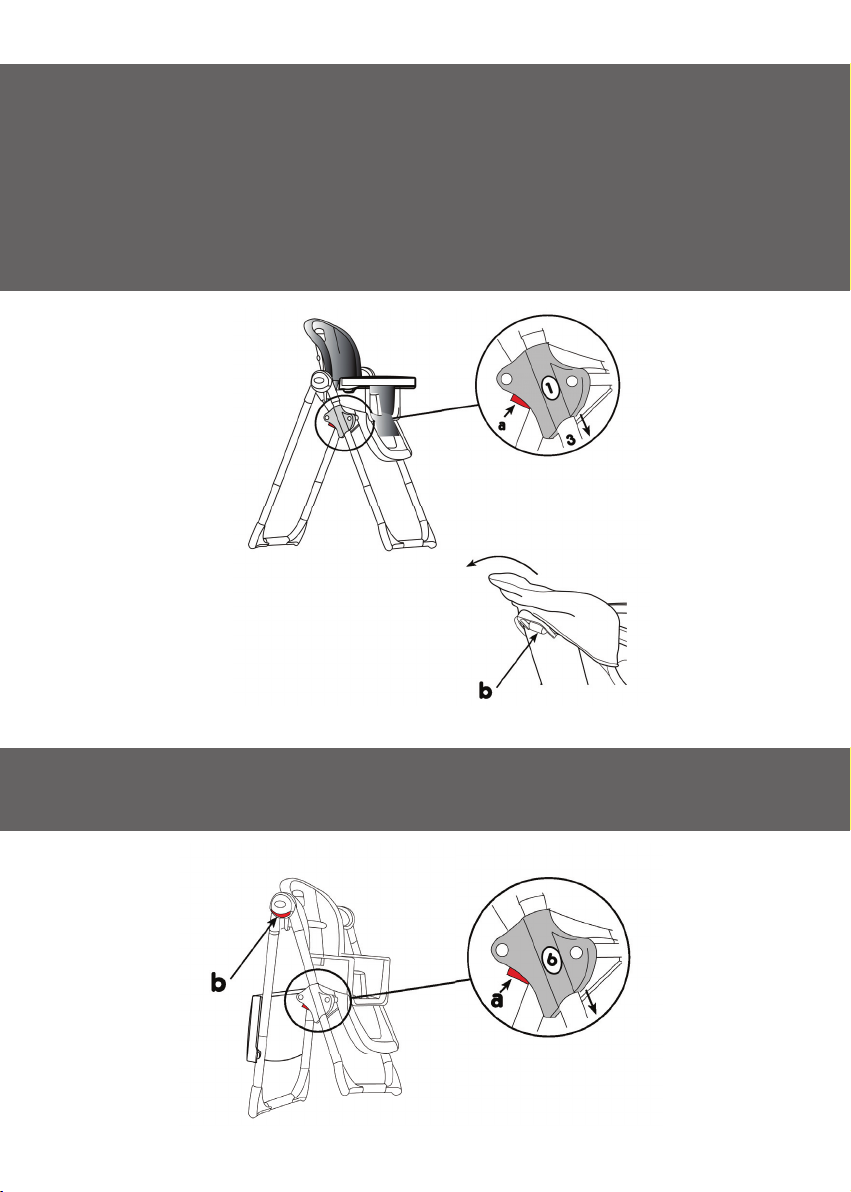
Adjusting the seat height and recline
Note: Do not adjust the height of the seat whilst the child is seated in the chair.
To adjust the height of the seat push in both of the height adjusting locks (A) and
simultaneously raise or lower the seat, releasing both of the locks at the required
height.
To adjust the angle of the seat, lift the plastic lever (b) (found on the back of the
seat unit) and position as required, releasing the mechanism to secure into place.
DO NOT recline the seat unit when the highchair is in its highest position.