manuals.online logo
Brands
  1. Home
  2. •
  3. Brands
  4. •
  5. Brother
  6. •
  7. Printer
  8. •
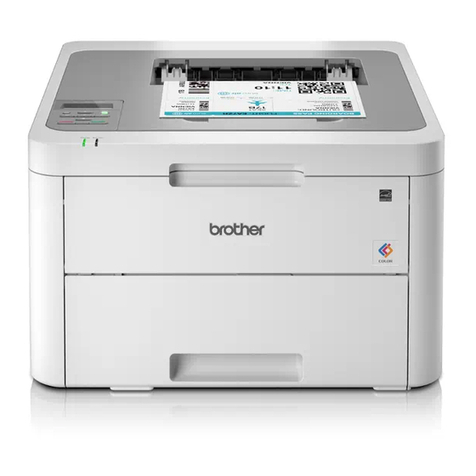
  9. Brother HL-L3210CW User manual

Brother HL-L3210CW User manual

How to replace or install the drum unit HLL3210CW HLL3230CDW
After replace the drum unit you need to reset the printer, please check page 3 for more detail
To replace or install the drum unit, follow the steps listed below:
1. Make sure the machine is turned on.
2. Open the top cover until it locks in the open position.
If you've just used the machine, its internal parts will be extremely hot. Wait for the machine to cool down before touching any
internal parts.
3. Remove the drum unit and toner cartridge assembly for the color you're replacing (the color that needs to be replaced will be
shown on the machine's display).
We recommend placing the drum and toner assembly on a clean, flat surface with disposable paper underneath it in case you
accidentally spill or scatter toner.
4. Push down the green lock lever and remove the toner cartridge from the drum unit.
5. Unpack the new drum unit and remove the protective cover.
6. Reinsert the toner cartridge firmly into the new drum unit until you hear it lock into place.
Make sure you put the toner cartridge in correctly or it may separate from the drum unit.
7. Clean the corona wire inside the drum unit by gently sliding the green tab from left to right and right to left several times. Repeat
this for all the corona wires.
Be sure to return the green tab to the Home position (▲). The arrow on the tab must be aligned with the arrow on the drum
unit. If it's not, printed pages may have a vertical stripe.
8. Slide the drum unit and toner cartridge assemblies into the machine. Make sure that you match the toner cartridge color to the
same color label on the machine.
9. Close the machine's top cover.
10. Reset the drum counter:
a. Make sure the machine's cover is closed.
b. Press OKand▲atthesametime.
c. Press OK to select Drum.
d. Select the toner color for the drum you just replaced, then press OK.
e.Select▲forReset.
1. Make sure the machine is turned on.
2. Open the top cover until it locks in the open position.
If you've just used the machine, its internal parts will be extremely hot. Wait for the machine to cool down before touching any
internal parts.
3. Remove the drum unit and toner cartridge assembly for the color you're replacing (the color that needs to be replaced will be
shown on the machine's display).
We recommend placing the drum and toner assembly on a clean, flat surface with disposable paper underneath it in case you
accidentally spill or scatter toner.
How to replace or install the drum unit HL-L3270CDW
After replace the drum unit you need to reset the drum counter, please check page 3 for more detail
4. Push down the green lock lever and remove the toner cartridge from the drum unit.
5. Unpack the new drum unit and remove the protective cover.
6. Reinsert the toner cartridge firmly into the new drum unit until you hear it lock into place.
Make sure you put the toner cartridge in correctly or it may separate from the drum unit.
7. Clean the corona wire inside the drum unit by gently sliding the green tab from left to right and right to left several times. Repeat
this for all the corona wires.
Be sure to return the green tab to the Home position (▲). The arrow on the tab must be aligned with the arrow on the drum
unit. If it's not, printed pages may have a vertical stripe.
8. Slide the drum unit and toner cartridge assemblies into the machine. Make sure that you match the toner cartridge color to the
same color label on the machine.
9. Close the machine's top cover.
10. Reset the drum counter:
a. Make sure the machine's cover is closed.
b. Press and hold (Toner) on the Touchscreen for approximately five seconds.
c. Press Drum.
d. Select the toner color for the drum you just replaced.
e. Press Yes.
1. Make sure the machine is turned on.
2. Open the top cover until it locks in the open position.
If you've just used the machine, its internal parts will be extremely hot. Wait for the machine to cool down before touching any
internal parts.
3. Remove the drum unit and toner cartridge assembly for the color you're replacing (the color that needs to be replaced will be
shown on the machine's display).
We recommend placing the drum and toner assembly on a clean, flat surface with disposable paper underneath it in case you
accidentally spill or scatter toner.
4. Push down the green lock lever and remove the toner cartridge from the drum unit.
How to replace or install the drum unit MFCL3710CW MFCL3750CDW MFCL3770CDW
After replace the drum unit you need to reset the printer, please check page 3 for more detail
5. Unpack the new drum unit and remove the protective cover.
6. Reinsert the toner cartridge firmly into the new drum unit until you hear it lock into place.
Make sure you put the toner cartridge in correctly or it may separate from the drum unit.
7. Clean the corona wire inside the drum unit by gently sliding the green tab from left to right and right to left several times. Repeat
this for all the corona wires.
Be sure to return the green tab to the Home position (▲). The arrow on the tab must be aligned with the arrow on the drum
unit. If it's not, printed pages may have a vertical stripe.
8. Slide the drum unit and toner cartridge assemblies into the machine. Make sure that you match the toner cartridge color to the
same color label on the machine.
9. Close the machine's top cover.
10. Reset the drum counter:
a. Make sure the machine's cover is closed.
b. Press and hold (Toner) on the Touchscreen for approximately five seconds.
c. Press Drum.
d. Select the toner color for the drum you just replaced.
e. Press Yes.

Other manuals for HL-L3210CW

4

This manual suits for next models

1

Other Brother Printer manuals

Brother RJ-2035B User manual

Brother

Brother RJ-2035B User manual

Brother MFC-J985DW Specification sheet

Brother

Brother MFC-J985DW Specification sheet

Brother HS-5000 - Color Solid Ink Printer User manual

Brother

Brother HS-5000 - Color Solid Ink Printer User manual

Brother HL-L5050DN User manual

Brother

Brother HL-L5050DN User manual

Brother HL-1070 - B/W Laser Printer User manual

Brother

Brother HL-1070 - B/W Laser Printer User manual

Brother MPRINT MW-145MFi Operating manual

Brother

Brother MPRINT MW-145MFi Operating manual

Brother PA-CR-005 User manual

Brother

Brother PA-CR-005 User manual

Brother HL-1060 Series User manual

Brother

Brother HL-1060 Series User manual

Brother QL-820NWB User manual

Brother

Brother QL-820NWB User manual

Brother MFC-1813 Operating manual

Brother

Brother MFC-1813 Operating manual

Brother MFC-J2510 User manual

Brother

Brother MFC-J2510 User manual

Brother HL-2070N User manual

Brother

Brother HL-2070N User manual

Brother HL-L2460DW Operating manual

Brother

Brother HL-L2460DW Operating manual

Brother HL-L8260CDN Technical manual

Brother

Brother HL-L8260CDN Technical manual

Brother MFC-J6910DW Assembly instructions

Brother

Brother MFC-J6910DW Assembly instructions

Brother HL-5470DW User manual

Brother

Brother HL-5470DW User manual

Brother TN 430 User manual

Brother

Brother TN 430 User manual

Brother HL-L2380DW User manual

Brother

Brother HL-L2380DW User manual

Brother PT 1000 - P-Touch 1000 B/W Thermal Transfer... Parts list manual

Brother

Brother PT 1000 - P-Touch 1000 B/W Thermal Transfer... Parts list manual

Brother HL-4050CDN User manual

Brother

Brother HL-4050CDN User manual

Brother DCP-J100 User manual

Brother

Brother DCP-J100 User manual

Brother GT-541 User manual

Brother

Brother GT-541 User manual

Brother SP-1 Technical manual

Brother

Brother SP-1 Technical manual

Brother HL 2030 User manual

Brother

Brother HL 2030 User manual

Popular Printer manuals by other brands

Lexmark C510 Setup guide

Lexmark

Lexmark C510 Setup guide

Oki T400 user guide

Oki

Oki T400 user guide

Evolis Elypso user guide

Evolis

Evolis Elypso user guide

Epson DFX-5000+ Service manual

Epson

Epson DFX-5000+ Service manual

Canon S820D user guide

Canon

Canon S820D user guide

Epson T-750 user manual

Epson

Epson T-750 user manual

DEK 265 horizon Engineering specification

DEK

DEK 265 horizon Engineering specification

Epson B-500DN Start here

Epson

Epson B-500DN Start here

MUNBYN IMP013 user manual

MUNBYN

MUNBYN IMP013 user manual

Reiner jetStamp 1025 operating manual

Reiner

Reiner jetStamp 1025 operating manual

Canon iP4700 - PIXMA Color Inkjet Printer Getting started

Canon

Canon iP4700 - PIXMA Color Inkjet Printer Getting started

Macherey-Nagel NANOCOLOR UV/VIS II user manual

Macherey-Nagel

Macherey-Nagel NANOCOLOR UV/VIS II user manual

Digital Graphic Printer UP-D898MD Before using

Digital Graphic Printer

Digital Graphic Printer UP-D898MD Before using

Fujitsu DL3300 user manual

Fujitsu

Fujitsu DL3300 user manual

FARGO electronics PERSONA C30 user manual

FARGO electronics

FARGO electronics PERSONA C30 user manual

MUTOH VJ-628 ValueJet Activation guide

MUTOH

MUTOH VJ-628 ValueJet Activation guide

Epson SpectroProofer Mounter 17" user guide

Epson

Epson SpectroProofer Mounter 17" user guide

Intermec PB40 quick start guide

Intermec

Intermec PB40 quick start guide

manuals.online logo
manuals.online logoBrands
  • About & Mission
  • Contact us
  • Privacy Policy
  • Terms and Conditions

Copyright 2025 Manuals.Online. All Rights Reserved.