Instruction Manual
7602
Safety & Installation Instructions
1. If you are in any doubt consult a qualified electrician as to the installation of the fitting. Install in accordance with current
IEE wiring regulations. It is recommended that this fitting is installed by a qualified electrician.
2. Ensure that the electrical supply is OFF. Disconnect the electrical supply at the fuse-board.
3. If removing an existing fitting first, note all wiring connections: record which of the house wires is connected to the live,
neutral and earth terminals.
4. Carefully identify where the supply cable is (and check there are no other cables in the area) to avoid damage to concealed
wiring during installation.
5. Position the light where desired ensuring that there is suitable support adjacent to where you will connect to the main
supply.
6. A suitable recess is required to install the light. Use appropriate tools to make one. Seek professional advice if necessary.
7. GU10 version MUST BE EARTHED. GX5.3 version must be connected to a surface mounted or ground burial low voltage 12V
transformer (min. 35va) No transformer or connector blocks are supplied. This product must be installed by a suitably
qualified person. Follow instructions/diagrams supplied with your transformer for installing GX5.3 version. Connections
must be made in an IP rated enslosure (IP68 minimum).
8. Check that no wires are trapped behind or within the fitting and complete the installation, referring to the Installation
diagram inside. Water ingress into the recess that the light fitting sits in should be prevented, using a suitable sealing
method between the bezel and and the mounting surface.
9. Fit the correct type and wattage of lamp (or less). Be careful not to overtighten the lamp.
10. Switch on at the fuse-board. Your light fitting is now ready for use.
Other Important Information
Switch off at mains before changing lamp(s). Never fit a lamp of greater wattage than recommended. Ensure children do not
play with the light fitting. Dispose of old lamps carefully. Never leave a fitting without a lamp in position (or someone can
accidently touch the contacts). Adjust fitting only when power to the fitting is off and has been left to cool. If the electrical flex
or electrical components become damaged at any point, power to the fitting should be disconnected immediately and not
operated until the damaged parts are fixed/replaced.
These instructions are provided for your safety in order to prevent the risk of Fire, Electric shock or Injury. It is vitally
important that they are read in their entirety before installing your fitting. Please retain for future reference.
MADE IN BRITAIN
ORIGINALBTC.COM
+44 (0)1993 882 251
UNIT 21 / 22 AVENUE ONE, STATION LANE, WITNEY, OX28 4XZ, ENGLAND
Established in 1990, Original BTC manufactures relaxed, familiar lighting for traditional and contemporary homes.
All products are hand-assembled in Oxford from high quality components, produced in the UK.
Cleaning and Maintenance
Metal finishes should only be cleaned with a soft, dry cloth. Do not use polishes or abrasives. Switch off power to the fitting
before cleaning.
Uplight For Submerged
or Surface Use
Fitting
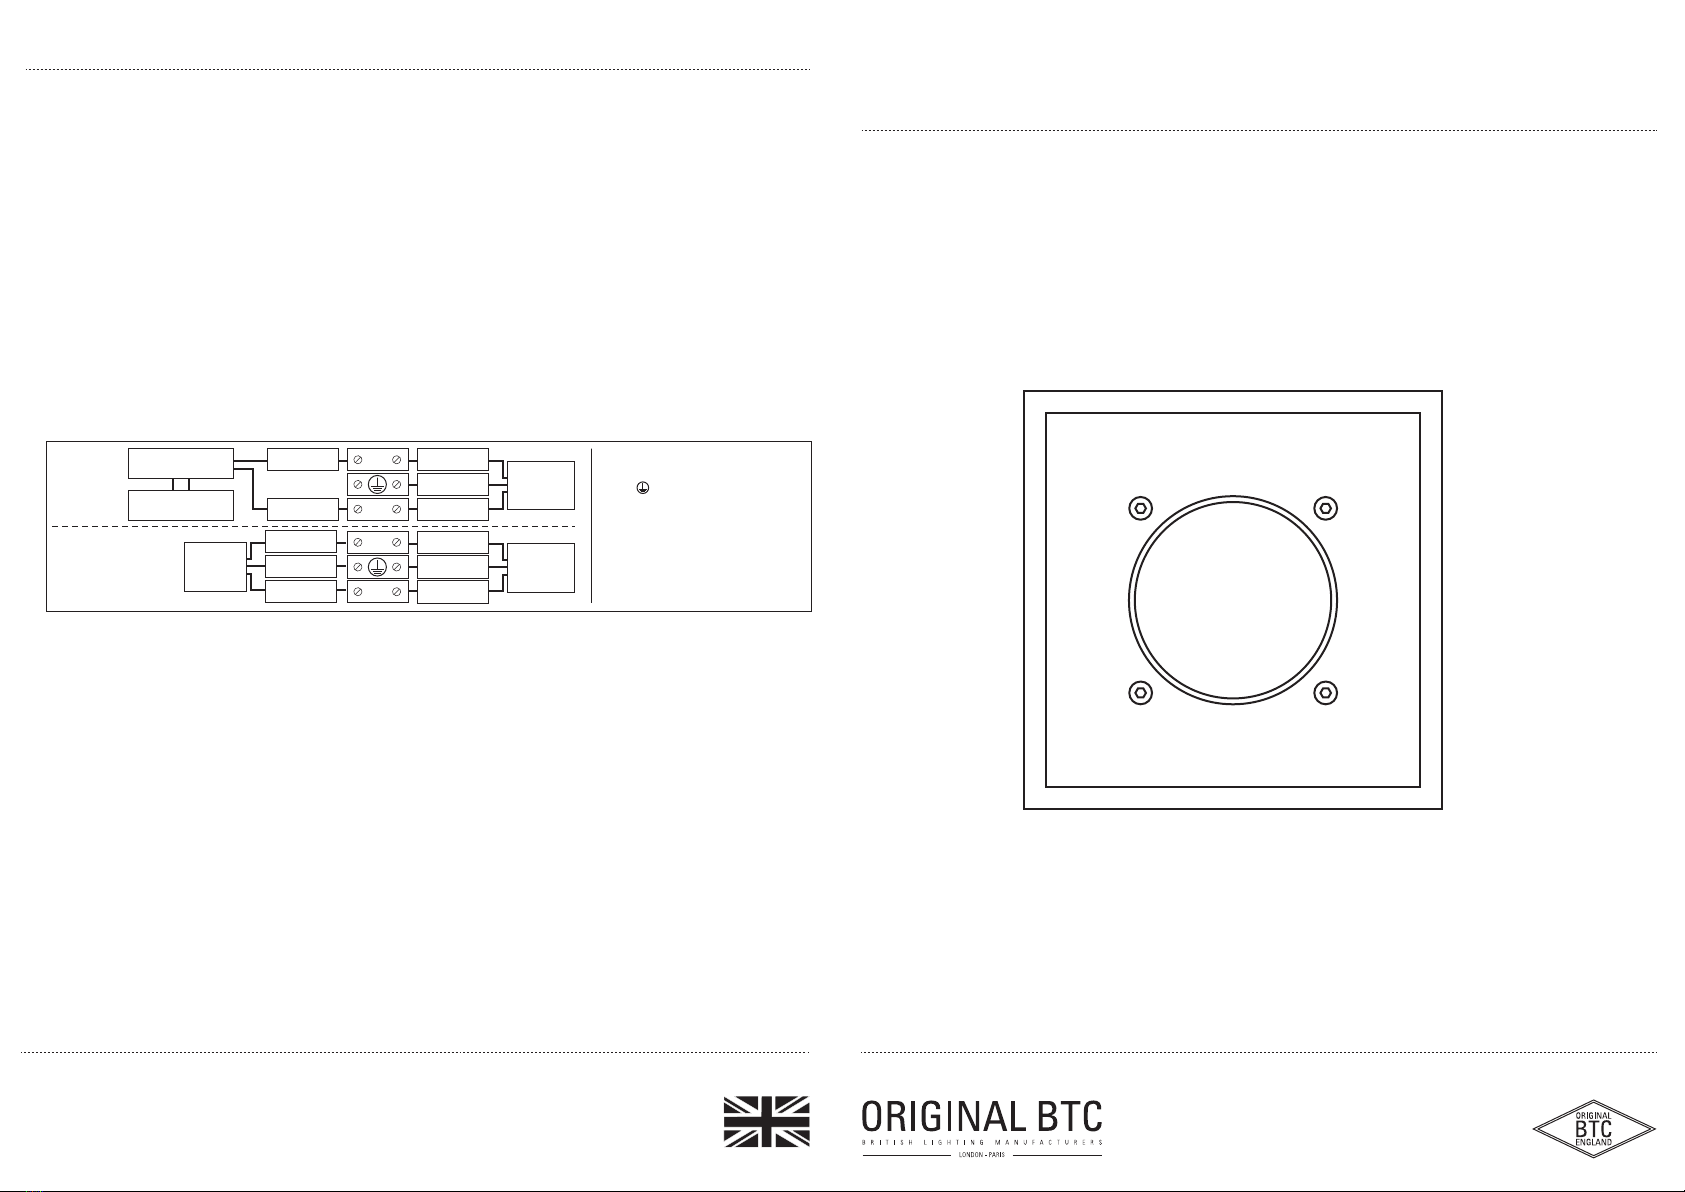
BROWN
GRN/YEL
BLUE
L
N
Live
KEY Neutral
Earth
L =
N =
=
**Mains
Supply
Transformer
Light fitting
**After 2004, wiring installation colours
changed:
LIVE Brown replaces Red
EARTH Green/Yellow sleeving
NEUTRAL Blue replaces Black
*Check colours on your transformer/driver
BROWNBROWN*
GX5.3
GU10
GRN/YEL
BLUEBLUE*
L
N
**Mains
Supply
BROWN
GRN/YEL
BLUE


