manuals.online logo
Brands
  1. Home
  2. •
  3. Brands
  4. •
  5. Buffalo
  6. •
  7. Storage
  8. •
  9. Buffalo LinkStation LS-XL/E User manual

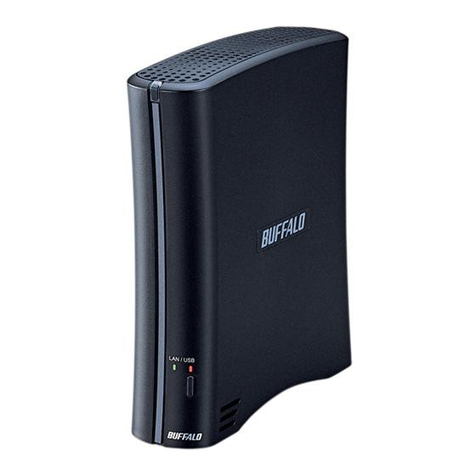
Buffalo LinkStation LS-XL/E User manual

感谢您购买 Buffalo LinkStation LS-XL/E。此产品不包含硬盘。
要了解产品技术规格,请参考 www.buffalotech.com。
注意:功耗和重量的大小取决于硬盘的规格。
- 硬盘信息
・支持使用 3.5 英寸的串行 ATA 硬盘。请参考 www.buffalotech.com 取得
兼容性信息。
・所添加驱动器上存储的原始数据将被删除。
・请勿添加之前已在 LinkStation 或TeraStation 中使用过的硬盘。
・如果主装置中没有驱动器,则 LinkStation 的固件无法更新。
・已安装的硬盘会自动格式化。硬盘上的所有数据将会丢失,所以一定要
备份所有重要数据。
执行以下 1 至10 操作步骤,来安装硬盘。安装硬盘时,需要使用十字头螺丝刀。
等待蓝色电源 LED 停止闪烁,稳定发光。
・此过程大约需要 10 分钟。直到安装完成,才能断开电源适配器。
・如果电源 LED 持续闪烁 20 分钟或更长时间,应该断开电源适配器,更换另一个硬盘,并重新执行 1 至10 操作步骤。
请参考 LinkStation 的Quick Setup Guide,获取安装步骤的更多信息。
- 安全信息
・LinkStation 比较脆弱,应谨慎进行操作。
・为了避免突出物带来损伤,安装硬盘时,应谨慎操作。
・为避免失去保修,更换硬盘时,请勿拆卸或改装任何组件。
・开始操作装置前,必须先接触金属物体以释放体内静电,以免静电损坏
硬盘。
安装硬盘
感謝您購買 Buffalo LinkStation LS-XL/E。此產品出廠時未安裝硬碟。
關於產品規格,請參閱 www.buffalotech.com。
注意:耗電量及重量的數值因硬碟規格而異。
- 硬碟資訊
・支援 3.5 英吋串行 ATA 硬碟。如需相容性資訊,請參閱
www.buffalotech.com。
・將刪除新增的磁碟機中儲存的原始資料。
・請勿新增原先在 LinkStation 或TeraStation 內使用的硬碟。
・主要裝置沒有任何磁碟機,將無法更新 LinkStation 的韌體。
・安裝的硬碟將自動格式化。硬碟中所有的資料將遺失,因此務必備份所
有重要的資料。
請執行以下步驟 1 至10 安裝硬碟。安裝硬碟需要十字螺絲起子。
請等待,直至藍色電源 LED 指示燈停止閃爍並常亮。
・此程序約需 10 分鐘。安裝完成前,請勿拔除交流電變壓器。
・如果電源 LED 指示燈持續閃爍 20 分鐘以上,請拔除交流電變壓器,並且將硬碟更換為不同的硬碟,然後再次進行步驟 1 至10。
如需安裝程序的詳細資訊,請參閱 LinkStation 的Quick Setup Guide。
- 安全資訊
・LinkStation 為易碎品,應謹慎處理。
・安裝硬碟時請小心,以免因突出物而造成傷害。
・替換硬碟時,請勿拆卸或修改任何元件,以免導致保固無效。
・接觸裝置前,務必先觸碰金屬物體,將身體的靜電釋放,否則靜電可能
造成硬碟損壞。
安裝硬碟
Buffalo LinkStation LS-XL/E를 구매해 주셔서 감사합니다. 본 제품은 하드 드라이브가 설치되지 않은 상태로 출고됩니다.
제품 사양을 보려면 www.buffalotech.com을참조하십시오.
참고: 소비 전력 값과 무게는 하드 드라이브 사양에 따라 달라질 수있습니다.
- 하드 드라이브 정보
・3.5인치 Serial ATA 하드 드라이브가 지원됩니다. 호환성 정보를 보려면
www.buffalotech.com을참조하십시오.
・추가된 드라이브에 원래 저장되어 있던 데이터는 삭제됩니다.
・LinkStation 또는 TeraStation에서 사용된 적이 있는 하드 드라이브는
추가하지 마십시오.
・주장치에 드라이브가 있는 경우에만 LinkStation의펌웨어를
업데이트할 수있습니다.
・설치된 하드 드라이브는 자동으로 포맷됩니다. 하드 드라이브에 있는
모든 데이터가 삭제되므로 중요한 데이터를 모두 백업하십시오.
아래 1-10단계를 수행하여 하드 드라이브를 설치하십시오. 하드 드라이브를 설치하려면 십자 스크루드라이버가 필요합니다.
파란색 전원 LED의깜박임이 멈추고 빛을 낼때까지 기다리십시오.
・이절차에는 약10분이 소요됩니다. 설치가 완료될 때까지 AC 어댑터를 분리하지 마십시오.
・전원 LED가20분이상 지속적으로 깜박이면 AC 어댑터를 분리하고 하드 드라이브를 다른 드라이브로 교체한 다음 1-10단계를 다시 수행하십시오.
설치 프로세스에 대한 자세한 내용은 LinkStation의Quick Setup Guide를참조하십시오.
- 안전 정보
・LinkStation은손상되기 쉬우므로 주의하여 다루어야 합니다.
・하드 드라이브를 설치할 때돌출부에 의해 다치지 않도록 조심합니다.
・하드 드라이브를 교체할 때어떤 구성 요소도 분해하거나 변경하지
마십시오. 그러한 경우 보증을 받을 수없습니다.
・장치를 다루기 전에 금속 물체를 만져 몸에 있는 정전기를 방전시켜야
합니다. 정전기로 인해 하드 드라이브가 손상될 수있습니다.
하드 드라이브 설치
1
2
3
4
5
6
7
8
9
10
c
c
b
b
a
a
Thank you for purchasing a Buffalo LinkStation LS-XL/E. This product ships with no hard drive installed.
For product specifications, please refer to www.buffalotech.com.
Note: The values for power consumption and weight will vary depending on the hard drive's specifications.
- Hard Drive Information
・3.5inch Serial ATA hard drives are supported. Please refer to www.buffalotech.com for compatibility information.
・Original data saved on the added drive will be deleted.
・Do not add a hard drive that has previously been used in a LinkStation or TeraStation.
・The LinkStation's firmware cannot be updated without a drive being present in the main unit.
・The installed hard drive is automatically formatted. All data on the hard drive will be lost, so be sure to back up any important data.
- Safety Information
・The LinkStation is fragile and should be handled with care.
・Use caution when installing a hard drive to avoid injury due to projection.
・Do not disassemble or modify any components when replacing a hard drive as this will void your warranty.
・It is important to discharge static from your body by touching a metal object prior to working on the unit, as static may cause damage to the hard drives.
Installing a Hard Drive
Wait until the blue Power LED stops ashing and
glows steadily.
・This procedure takes about 10 minutes. Do not
disconnect the AC adapter until installation is
complete.
・If the Power LED blinks continuously for 20 minutes or
longer, disconnect the AC adapter, replace the hard
drive with a different drive, and perform steps 1 to 10
again.
Refer to the LinkStation’s Quick Setup Guide for
more information on the setup process.
Install the hard drive by performing steps 1 to 10 below. Phillips-head screwdriver is required for installing the hard drive.
LS-XL/E Setup Guide
English
简体中文
繁體中文
한국어
35012315-01
ขอบคุณที่ซื้อ Buffalo LinkStation LS-XL/E ผลิตภัณฑ์นี้จำหน่ายโดยไม่มีฮาร์ดไดรฟ์ติดตั้งอยู่
หากต้องการดูรายละเอียดทางเทคนิคของผลิตภัณฑ์ โปรดไปที่ www.buffalotech.com
หมายเหตุ: ระดับการใช้พลังงานและน้ำหนักจะแตกต่างกันไปขึ้นอยู่กับรายละเอียดทางเทคนิคของฮาร์ดไดรฟ์
- ข้อมูลฮาร์ดไดรฟ์
・รองรับฮาร์ดไดร์ฟแบบ Serial ATA ขนาด 3.5 นิ้วโปรดดูข้อมูลความเข้ากันได้ที่
www.buffalotech.com
・ข้อมูลเดิมที่บันทึกไว้ในไดรฟ์ที่เพิ่มเข้าไปจะถูกลบ
・อย่าเพิ่มฮาร์ดไดรฟ์ที่ใช้งานแล้วลงใน LinkStation หรือ TeraStation
・ไม่สามารถอัพเดตเฟิร์มแวร์ของ LinkStation โดยไม่มีการติดตั้งไดรฟ์ไว้
ในเครื่องได้
・ฮาร์ดไดรฟ์ที่ติดตั้งจะถูกฟอร์แมตโดยอัตโนมัติข้อมูลทั้งหมดที่อยู่บนฮาร์ดไดร
ฟ์จะสูญหาย ดังนั้นจึงควรตรวจสอบให้แน่ใจว่าได้สำรองข้อมูลที่สำคัญไว้แล้ว
ทำการติดตั้งฮาร์ดไดรฟ์โดยทำตามขั้นตอน 1 - 10 ด้านล่าง คุณต้องใช้ไขควงสี่แฉกในการติดตั้งฮาร์ดไดรฟ์
รอจนกระทั่งไฟ LED แสดงการทำงานสีน้ำเงินหยุดกะพริบและติดค้าง
・ขั้นตอนนี้จะใช้เวลาประมาณ 10 นาทีอย่าถอดอะแดปเตอร์ AC จนกว่าการติดตั้งจะเสร็จสมบูรณ์
・หากไฟ LED แสดงการทำงานกะพริบต่อเนื่องเป็นเวลา 20 นาทีหรือมากกว่า ให้ถอดอะแดปเตอร์ AC เปลี่ยนฮาร์ดไดรฟ์ตัวอื่น แล้วทำตามขั้นตอนที่ 1 - 10 อีกครั้ง
โปรดดูข้อมูลเพิ่มเติมเกี่ยวกับขั้นตอนการติดตั้งได้ใน Quick Setup Guide ของ LinkStation
- ข้อมูลเพื่อความปลอดภัย
・LinkStation เกิดความเสียหายได้ง่าย คุณจึงควรดูแลรักษาด้วยความระมัดระวัง
・ใช้ความระมัดระวังในขณะติดตั้งฮาร์ดไดรฟ์เพื่อหลีกเลี่ยงการบาดเจ็บที่ไม่คาดคิด
・ห้ามถอดหรือดัดแปลงชิ้นส่วนเมื่อเปลี่ยนฮาร์ดไดรฟ์เนื่องจากจะทำให้คุณเสียสิ
ทธิ์ในการรับประกัน
・ให้สัมผัสวัตถุที่เป็นโลหะก่อนที่จะถอดหรือใส่อุปกรณ์เพื่อไล่ไฟฟ้าสถิตย์ออกจ
ากตัวคุณเนื่องจากไฟฟ้าสถิตย์อาจทำให้ฮาร์ดไดรฟ์เสียหายได้
การติดตั้งฮาร์ดไดรฟ์
Gracias por adquirir el producto Buffalo LinkStation LS-XL/E. Este producto se envía sin el disco duro instalado.
Para conocer las especificaciones del producto, consulte www.buffalotech.com.
Nota: Los valores correspondientes al consumo de energía y al peso variarán de acuerdo con las especificaciones del disco duro.
- Información sobre el disco duro
・Compatible con los discos duros Serial ATA de 3,5 pulg. Consulte la
información sobre compatibilidad en www.buffalotech.com.
・
Los datos originales guardados en el disco que se agrega serán eliminados.
・No agregue un disco duro que haya sido usado anteriormente en una
unidad LinkStation o TeraStation.
・El firmware de LinkStation no puede actualizarse sin que haya un disco en
la unidad principal.
・El disco duro instalado se formatea automáticamente. Todos los datos que
tenga el disco duro se perderán, por lo que debe procurar hacer una copia
de respaldo de los datos importantes.
Para instalar el disco duro, siga los pasos 1 a 10 a continuación. Es necesario usar un destornillador de cruz Phillips para instalar el disco duro.
Espere a que la luz LED azul de encendido deje de parpadear y emita una luz constante.
・Este procedimiento dura alrededor de 10 minutos. No desconecte el adaptador de CA hasta que haya finalizado la instalación.
・Si la luz LED de encendido parpadea continuamente durante 20 minutos o más, desconecte el adaptador de CA, reemplace el disco duro con uno diferente y siga
nuevamente los pasos 1 a 10.
Consulte la guía Quick Setup Guide de LinkStation para obtener más información sobre el proceso de configuración.
- Información sobre seguridad
・LinkStation es frágil por lo que debe manipularse con cuidado.
・Sea precavido al instalar un disco duro para evitar lesiones a causa de la
proyección.
・No desarme ni modifique ningún componente cuando reemplaza un disco
duro, ya que, de hacerlo, anulará la garantía.
・Es importante que, antes de manipular la unidad, toque un objeto de
metal para descargar la estática de su cuerpo, ya que esta puede ocasionar
daños a los discos duros.
Instalación del disco duro
Obrigado por adquirir um Buffalo LinkStation LS-XL/E. Esse produto é fornecido sem um disco rígido instalado.
Para obter as especificações do produto, consulte www.buffalotech.com.
Nota: Os valores de consumo de energia e peso variam dependendo das especificações da unidade de disco rígido.
- Informações do disco rígido
・Discos rígidos ATA Serial de 3,5 pol são suportados. Consulte
www.buffalotech.com para obter informações de compatibilidade.
・Dados originais salvos na unidade adicionada serão excluídos.
・Não adicione um disco rígido que tenha sido usado anteriormente em
uma LinkStation ou uma TeraStation.
・O firmware da LinkStation não pode ser atualizado sem uma unidade estar
presente na unidade principal.
・O disco rígido instalado é formatado automaticamente. Todos os dados da
unidade de disco rígido serão perdidos, certifique-se de fazer backup de
todos os dados importantes.
Instale a unidade de disco rígido executando as etapas de 1 a 10 abaixo. Uma chave Phillips é necessária para a instalação do disco rígido.
Aguarde até que o LED azul de alimentação pare de piscar e que aceso de modo constante.
・Este procedimento leva cerca de 10 minutos. Não desconecte o adaptador de CA até que a instalação esteja concluída.
・Se o LED de alimentação piscar continuamente por 20 minutos ou mais, desconecte o adaptador de CA, substitua o disco rígido por uma unidade diferente e
execute as etapas de 1 a 10 novamente.
Consulte o Quick Setup Guide da LinkStation para obter mais informações sobre o processo de instalação.
- Informações de segurança
・A LinkStation é frágil e deve ser manipulada com cuidado.
・Tenha cuidado ao instalar um disco rígido para evitar ferimentos devido à
projeção.
・Não desmonte ou modifique quaisquer componentes ao substituir um
disco rígido, uma vez que isso invalidaria sua garantia.
・É importante descarregar a estática de seu corpo tocando um objeto de
metal antes de trabalhar na unidade, pois a estática pode causar danos aos
discos rígidos.
Instalando um disco rígido
ภาษาไทย
Español
Português
Other Buffalo Storage manuals

Buffalo TS6400DN0802 User manual

Buffalo

Buffalo TS6400DN0802 User manual

Buffalo LinkStation LS220D Series User manual

Buffalo

Buffalo LinkStation LS220D Series User manual

Buffalo DriveStation HD-HBU2 Series User manual

Buffalo

Buffalo DriveStation HD-HBU2 Series User manual

Buffalo HD-PZU3 User manual

Buffalo

Buffalo HD-PZU3 User manual

Buffalo HD-PV320U2 User manual

Buffalo

Buffalo HD-PV320U2 User manual

Buffalo terastation 3000 User manual

Buffalo

Buffalo terastation 3000 User manual

Buffalo WS-QV4TL/R5 Operating and safety instructions

Buffalo

Buffalo WS-QV4TL/R5 Operating and safety instructions

Buffalo SSD-PUSU3 User manual

Buffalo

Buffalo SSD-PUSU3 User manual

Buffalo MiniStation DataVault HDS-PH160U2 User manual

Buffalo

Buffalo MiniStation DataVault HDS-PH160U2 User manual

Buffalo HD-LBU2 User manual

Buffalo

Buffalo HD-LBU2 User manual

Buffalo TeraStation 3020 User manual

Buffalo

Buffalo TeraStation 3020 User manual

Buffalo DriveStation Combo User manual

Buffalo

Buffalo DriveStation Combo User manual

Buffalo LinkStation 500 User manual

Buffalo

Buffalo LinkStation 500 User manual

Buffalo DriveStation HD-CE320U2 User manual

Buffalo

Buffalo DriveStation HD-CE320U2 User manual

Buffalo Cloudstor CS-X series User manual

Buffalo

Buffalo Cloudstor CS-X series User manual

Buffalo JustStore Portable HD-PVU2 User manual

Buffalo

Buffalo JustStore Portable HD-PVU2 User manual

Buffalo HD-CELU2 DRIVESTATION User manual

Buffalo

Buffalo HD-CELU2 DRIVESTATION User manual

Buffalo hd-patu3 User manual

Buffalo

Buffalo hd-patu3 User manual

Buffalo LinkStation Pro User manual

Buffalo

Buffalo LinkStation Pro User manual

Buffalo HD-LEMU2 User manual

Buffalo

Buffalo HD-LEMU2 User manual

Buffalo MiniStation Cobalt 500GB User manual

Buffalo

Buffalo MiniStation Cobalt 500GB User manual

Buffalo DriveStation HD-CX1.5TU2 User manual

Buffalo

Buffalo DriveStation HD-CX1.5TU2 User manual

Buffalo CloudStor CS-WV/1D User manual

Buffalo

Buffalo CloudStor CS-WV/1D User manual

Buffalo DriveStation HD-HSU2-UC Series User manual

Buffalo

Buffalo DriveStation HD-HSU2-UC Series User manual

Popular Storage manuals by other brands

Pinnacle Heavy Duty Series manual

Pinnacle

Pinnacle Heavy Duty Series manual

LaCie Portable Drive user manual

LaCie

LaCie Portable Drive user manual

Adaptec 5325301642 datasheet

Adaptec

Adaptec 5325301642 datasheet

IBM ATA-100 user guide

IBM

IBM ATA-100 user guide

LaCie 1big Dock SSD Pro user manual

LaCie

LaCie 1big Dock SSD Pro user manual

Rocstor ROCPORT 9CX 320GB Quick installation guide

Rocstor

Rocstor ROCPORT 9CX 320GB Quick installation guide

Stardom SOHORAID SR2-SB3+ user manual

Stardom

Stardom SOHORAID SR2-SB3+ user manual

SWEEX ST030V2 - QUICK_START_GUIDE introduction

SWEEX

SWEEX ST030V2 - QUICK_START_GUIDE introduction

Trinity TLS-0401 owner's manual

Trinity

Trinity TLS-0401 owner's manual

Maxtor 2B020H1 product manual

Maxtor

Maxtor 2B020H1 product manual

FOCO Office-Container Assembly instructions

FOCO

FOCO Office-Container Assembly instructions

HP Alletra 4120 Product End-of-Life Disassembly Instructions

HP

HP Alletra 4120 Product End-of-Life Disassembly Instructions

Keysight ECal Kit instructions

Keysight

Keysight ECal Kit instructions

ACP-EP Memory ACP-EP Product sheet

ACP-EP Memory

ACP-EP Memory ACP-EP Product sheet

Edge DiskGO 222710-PE user guide

Edge

Edge DiskGO 222710-PE user guide

Panasonic KX-NCPS01 manual

Panasonic

Panasonic KX-NCPS01 manual

Kilowatt Labs 3550-192-B-2C-TM-SD-A-G user manual

Kilowatt Labs

Kilowatt Labs 3550-192-B-2C-TM-SD-A-G user manual

Seagate Medalist 6540 product manual

Seagate

Seagate Medalist 6540 product manual

manuals.online logo
manuals.online logoBrands
  • About & Mission
  • Contact us
  • Privacy Policy
  • Terms and Conditions

Copyright 2025 Manuals.Online. All Rights Reserved.