Bulldog Security DC Series User manual

DC Series Electric Winches
Instruction Manual
DC Series Treuils électriques
Manuel d’instructions
Serie DC Cabrestantes eléctrico
Manual de instrucciones
DC6000, DC9000, DC12000L, DC12000, DC15000, DC18000
To prevent SERIOUS INJURY, DEATH and PROPERTY DAMAGE, you
should read, understand and follow the warnings and instructions in this
manual. Keep for future reference.
Afin de prévenir les BLESSURES GRAVES OU FATALES ET LES DOMMAGES
À LA PROPRIÉTÉ, vous devez lire, comprendre et observer les avertisse-
ments et les instructions de ce manuel. Conserver pour référence ultérieure.
Para evitar LESIONES GRAVES, LA MUERTE Y DAÑOS MATERIALES,
usted debe leer, entender y seguir las advertencias e instrucciones de
este manual. Consérvelo para referencia futura.

CEQUENT™ PERFORMANCE PRODUCTS, INC. • F3838-00 REV A (3576) 10/14
2
Read, Understand, Follow and Save These Instructions
• Read,understandandfollowalloftheseinstructionsandwarningsbeforeinstallingandusingthis
product.
• Installandusethisproductonlyasspeciedintheseinstructions.
• Improperinstallationoruseofthisproductmayresultinpropertydamage,seriousinjury,and/or
death.
• Neverallowinstallationoruseofthisproductbyanyonewithoutprovidingthemwiththeseinstruc-
tions.
• Youmustread,understandandfollowallinstructionsandwarningsforanyproduct(s)towhichthis
productisusedinconjunctionwithorinstalled.
• Savetheseinstructionswiththeproductforuseasareferenceforanyfutureinstallationanduseof
theproduct.
Table Of Contents
Safety Page
ImportantSafetyMessages......................................................4
KnowYourWinch..............................................................5
FeaturesandRatings...........................................................6
Instructions
InstallationInstructions ..........................................................7
OperationInstructions.......................................................... 15
Maintenance .................................................................. 19
HowToOrder................................................................. 20
LimitedWarranty............................................................... 23
Thesafetyalertsymbolalertsyoutopotentialphysicalinjuryhazards.
Obeyallsafetymessagesthatfollowthissymboltoavoidpossibleinjuryordeath.
WARNING CAUTION NOTICE
WARNINGindicatesahazardous
situationthat,ifnotavoided,
couldresultindeathorserious
injury.
NOTICEindicatesahazardous
situationthat,ifnotavoided,
couldresultinpropertydamage
CAUTIONindicatesahazardous
situationthat,ifnotavoided
couldresultinminoror
moderateinjury.
Throughout this manual WARNING, CAUTION, NOTICE and the SAFETY ALERT SYMBOL will be used.

CEQUENT™ PERFORMANCE PRODUCTS, INC. • F3838-00 REV A (3576) 10/14 3
Before First Operation
• Purchaser/ownermustensurethat
productisinstalledaccordingto
theseinstructions.Purchaser/own-
ermustnotalterormodifyproduct.
• Understandyourwinchand
itsinstructions.
• Neverexceedmaximumrated
capacity.Refertostamped
markingsordecalsonproductto
obtainratedcapacity.Ifuncertain,
contactCequentPerformance
Productsat1-800-521-0510or
www.cequentgroup.com
• Thewinchisratedattherstlayer
ofwire/syntheticropeonthedrum
forintermittent-periodicduty.
• Alwaysoperateyourwinchin
accordancewiththemounting
congurationontable5.
Are you ready to pull?
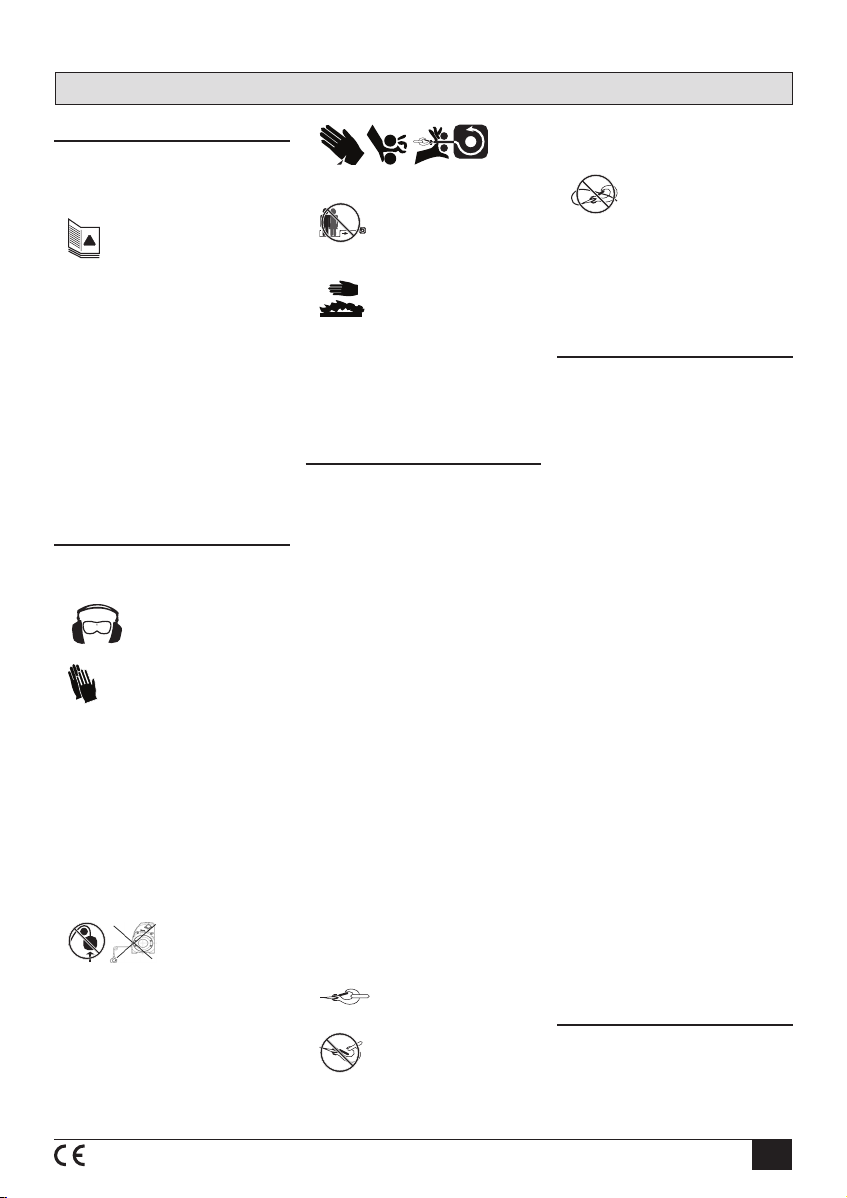
• NEVERoperatethiswinchwhen
undertheinuenceofdrugs,alco-
holormedication.
• ALWAYSremovejewelry
andweareyeprotection.
• Useleatherglovesorahand
savercablestrapwhenhandling
thewirerope.
• NEVERletwinchropeslipthrough
yourhands.
• Nevertouchawinchropeorhook
whensomeoneelseisatthe
controls.
• NEVERtouchwinchropeorhook
whileundertensionorunderload.
• ALWAYSstandclearofwinchrope
andloadandkeepothersaway
whilewinching.
• Donotusethe
winchasaliftingdeviceorahoist
forverticallift.
• Operatorandbystandersshould
neverpositionanypartofbody
underanyportionofthisproductor
theloadbeingsupported.
• Donotallowchildrentoplayon
oraroundthisproductortheload
beingsupported.
• Keep
clearofwinch,rope,hook,and
fairleadwhileoperating.
• Thewinchisnottobe
usedtolift,supportorotherwise
transportpersonnel.
• ALWAYSbeawareof
possiblehotsurfacesatwinch
motor,drumorropeduringorafter
winchuse.
• ALWAYSensuretheoperatorand
bystandersareawareofthestabili-
tyofthevehicleand/orload.
Is your winch ready to pull?
• ALWAYSinspectwinchrope,hook,
andslingsbeforeoperatingwinch.
Frayed,kinkedordamagedwinch
ropemustbereplacedimmediate-
ly.Damagedcomponentsmustbe
replacedbeforeoperation.
• Periodicallycheckmountinghard-
wareforpropertorqueandtighten
ifnecessary.
• ALWAYSremoveanyelementor
obstaclethatmayinterferewith
safeoperationofthewinch.
• ALWAYSbecertaintheanchoryou
selectwillwithstandtheloadand
thestraporchainwillnotslip.
• Wire/syntheticropecanbreak
withoutwarning.Alwayskeepa
safedistancefromthewinchand
ropewhileunderaload.
• ALWAYSkeepwiredpendant
controlleadandpowercordclear
ofthedrum,rope,andrigging.
Inspectforcracks,pinches,
frayedwiresorlooseconnections.
Damagedcomponentsmustbe
replacedbeforeoperation.
• NEVERwrapwinchropebackonto
itself.Useachokerchainorstrap.
• ALWAYSensurehooklatch
isclosedandnotsupportingload.
• NEVERapplyloadtohook
tiporlatch.Applyloadonlytothe
centerofhook.
• NEVERuseahookwhosethroat
openinghasincreased,orwhose
tipisbentortwisted.
• ALWAYSuseahookwithalatch.
• NEVERhookbackonrope.
• Neverusewinchropefortowing.
• NEVERuseexcessiveefforttofree
spoolwinchrope.
• ALWAYStaketimetouseappropri-
ateriggingtechniquesforawinch
pull.
During the pull
• NEVERexceedwinchorwinch
roperatedcapacity.Doubleline
usingasnatchblocktoreduce
winchload.
• Donotshockloadthewinch.
• Neveruseawinchtosecureaload.
• ALWAYSunspoolasmuchwinch
ropeaspossiblewhenrigging.
Doublelineorpickdistantanchor
point.
• Neverengageordisengagethe
clutchwhenthewinchisunder
loadorthedrumismoving.
• Trytopullfromanangleofless
than5degreeslaterallyand15
degreeshorizontly.Shortpulls
ofupto45degreeslaterallyare
acceptable;howeverwithout
maintainingthepropereetangle
of+/-5degrees;(Seepage17)the
ropewillpileontoonesideofthe
ropedrumandpossiblydodamage
totheropeorwinch.Re-spoolyour
winchasrequired.
• Whenwinchingaheavyload,lay
arecoverydamperoraheavy
blanketoverthewireropenearthe
hookend.
• ALWAYSavoidsidepullswhich
canpileupwinchropeatoneend
ofthedrum.Thiscandamage
winchropeorwinch.
• ALWAYSensuretheclutchisfully
engagedordisengaged.
• NEVERsubmergewinchinwater.
After Use
• Disconnectthehandheldpendant
fromthewinchwhennotinuse.
• ALWAYSstorethependantcontrol
inaprotected,clean,dryarea.
Important Safety Messages

CEQUENT™ PERFORMANCE PRODUCTS, INC. • F3838-00 REV A (3576) 10/14
4
Figure 1 - Winch Components
Know Your Winch
Winch Drum
Contactor
Control Box
Planetary
Gear Box
Clutch
T-Handle
Motor
Pendant Remote
Control Socket
Pendant Remote ControlRoller Fairlead
(with Mounting Hardware)
2 Gauge
Battery Lead Hose Clamps
Mounting Footprint
Template Hand Saver
Cable Strap Winch and Fairlead
Mounting Hardware

CEQUENT™ PERFORMANCE PRODUCTS, INC. • F3838-00 REV A (3576) 10/14 5
Features and Ratings
Load Rating
Loadandspeedvariesaccordingtohowmuchwire/syntheticropeisonthedrum.Therstlayerofrope
onthedrumdeliverstheslowestspeedandthemaximumload.Afulldrumdeliversthemaximumspeed
andtheminimumload.Forthisreason,allutilitydutywinchesareratedattheirrstlayercapacities.
Table 1 - Winch Capacity
DC6000 DC9000 DC12000L
Rope
Layer
Capacity Length of
Rope on
Drum
Rope
Layer
Capacity Length of
Rope on
Drum
Rope
Layer
Capacity Length of
Rope on
Drum
1st 6,000lbs./
2,722kgs.
60ft./
18.3m.
1st 9,000lbs./
4,083kgs.
20ft./
6.1m.
1st
12,000lbs./
5,443kgs.
17.7ft./
5.4m.
2nd 4,995lbs./
2,266kgs.
150ft./
45.7m.
2nd 7,310lbs./
3,316kgs.
44.7ft./
13.6m.
2nd 9,522lbs./
4,319kgs.
40ft./
12.2m.
3rd 4,279lbs./
1,941kgs.
240ft./
73.2m.
3rd 6,154lbs./
2,792kgs.
74ft./
22.6m.
3rd 7,893lbs./
3,580kgs.
67.3ft./
20.5m.
4th 3,742lbs./
1,698kgs.
300ft./
91.4m.
4th 5,314lbs./
2,410kgs.
100ft./
30.5m.
4th 6,737lbs./
3,056kgs.
82ft./
25m.
5th 3,325lbs./
1,509kgs.
N/A 5th N/A N/A 5th N/A N/A
DC12000 DC15000 DC18000
Rope
Layer
Capacity Length of
Rope on
Drum
Rope
Layer
Capacity Length of
Rope on
Drum
Rope
Layer
Capacity Length of
Rope on
Drum
1st 12,000lbs./
5,443kgs.
21.5ft./
6.6m.
1st 15,000lbs./
6,809kgs.
18.6ft./
5.7m.
1st 18,000
lbs./
8,181kgs.
15.4ft./
4.7m.
2nd 10,060lbs./
4,563kgs.
47.2ft./
14.4m.
2nd 12,277lbs./
5,589kgs.
41.4ft./
12.6m.
2nd 14.431
lbs./
6,546kgs.
34.4ft./
10.5m.
3rd 8,659lbs./
3,928kgs.
77ft./
23.5m.
3rd 10,391lbs./
4,713kgs.
68.3ft./
20.8m.
3rd 12,028
lbs./
5,450kgs.
57.4ft./
17.5m.
4th 7,601lbs./
3,448kgs.
110.9ft./
33.8m.
4th 9,007lbs./
4,086kgs.
89ft./
27m.
4th 10,311
lbs./
4,877kgs.
82ft./
25m.
5th 6,774lbs./
3,072kgs.
125ft./
58m.
5th N/A N/A 5th N/A N/A

CEQUENT™ PERFORMANCE PRODUCTS, INC. • F3838-00 REV A (3576) 10/14
6
Features and Ratings
Table 3 - Line Speed And Amp Draw
DC6000 DC9000 DC12000L
1st Layer
Line Pull
(lbs./kgs.)
Line Speed
(FPM/
MPM)
Amp
Draw
1st Layer
Line Pull
(lbs./kgs.)
Line Speed
(FPM/
MPM)
Amp
Draw
1st Layer
Line Pull
(lbs./kgs.)
Line Speed
(FPM/
MPM)
Amp
Draw
NoLoad 26.2/8 60 NoLoad 44/13.4 55 NoLoad 26.2/8 50
2,000/
907.2
17/5.2 150 2,000/
907.2
15/4.6 110 4,000/
1,814.4
9.8/3 120
4,000/
1,814.4
10.2/3.1 240 4,000/
1,814.4
11/3.4 200 8,000/
3,628.8
5/1.5 230
6,000/
2,721.6
6.5/2 300 6,000/
2,721.6
9/2.7 230 10,000/
4,536
4/1.2 290
N/A N/A N/A 9,000/
4,082.3
6.4/2 350 12,000/
5,443.1
3.3/1 350
DC12000 DC15000 DC18000
1st Layer
Line Pull
(lbs./kgs.)
Line Speed
(FPM/
MPM)
Amp
Draw
1st Layer
Line Pull
(lbs./kgs.)
Line Speed
(FPM/
MPM)
Amp
Draw
1st Layer
Line Pull
(lbs./kgs.)
Line Speed
(FPM/
MPM)
Amp
Draw
NoLoad 27/8.3 50 NoLoad 22/6.9 60 NoLoad 28.2/8.6 40
4,000/
1,814.4
8.6/2.6 200 4,000/
1,814.4
5.4/1.6 180 8,000/
3,628.8
12/3.6 140
8,000/
3,628.8
5.8/1.7 310 8,000/
3,628.8
3.8/1.2 280 12,000/
5,443.1
9.3/2.8 210
10,000/
4,536
4.4/1.4 370 12,000/
5,443.1
2.9/0.9 385 15,000/
6,803.9
7.5/2.3 260
12,000/
5,443.1
4/1.2 440 15,000/
6,803.9
2.5/0.8 460 18,000/
8,164.7
3.3/1 320
Table 2 - Winch Specifications
Powered
Winches DC6000 DC9000 DC12000L DC12000 DC15000 DC18000
Wire rope 9/32”x80’
A7x19
Aircraft
Cable
21/64”x82’
A7x19
Aircraft
Cable
3/8”x82’
A7x19
Aircraft
Cable
3/8”x125’
A7x19
Aircraft
Cable
7/16”x90’
6x29-IWRC
1/2”x82’
6x29-IWRC
Brake Patentedconebrakeholdsfullload
Clutch (free-
spooling) LiftandTurn“T”handle
Control Handheldpendantswitch
FPM = Feet Per Minute MPM = Meters Per Minute

CEQUENT™ PERFORMANCE PRODUCTS, INC. • F3838-00 REV A (3576) 10/14 7
Mounting Hardware Requirements
Four(4)orEight(8)WinchMountingBoltsandtwo(2)FairleadMountingBolts,Nuts,andWashersare
required.RefertoTable2belowforboltquantity,sizes,andrequiredtorque.Mountingsystemwill
dictateboltlength.
WARNING
ALWAYS torque mounting bolts to the values specified for your winch in Table 4 to prevent vibration
during operation.
ALWAYS use class 8.8 metric (grade 5) or better hardware.
NEVER weld mounting bolts.
ALWAYS choose the proper bolt length for your application.
ALWAYS confirm required bolt length to ensure proper thread engagement.
Table 4 - Mounting Torque Requirements
Powered
Winches DC6000 DC9000 DC12000L DC12000 DC15000 DC18000
Winch
Mounting
Bolt Size
M10x
1.5pitch
8.8grade
4 Required
M10x
1.5pitch
8.8grade
4 Required
M10x
1.5pitch
8.8grade
4 Required
M12x
1.75pitch
8.8grade
8 Required
M12x
1.75pitch
8.8grade
8 Required
M12x
1.75pitch
8.8grade
8 Required
Fairlead
Mounting
Bolt Size
M8x
1.5pitch
8.8grade
2 Required
M8x
1.5pitch
8.8grade
2 Required
M8x
1.5pitch
8.8grade
2 Required
M12x
1.75pitch
8.8grade
2 Required
M12x
1.75pitch
8.8grade
2 Required
M12x
1.75pitch
8.8grade
2 Required
Winch &
Fairlead
Mounting
Bolt Torque
40ft./lbs. 40ft./lbs. 40ft./lbs. 65ft./lbs. 65ft./lbs. 65ft./lbs.
BEFORE INSTALLING AND USING YOUR POWERED WINCH, READ AND
FOLLOW ALL MOUNTING INSTRUCTIONS AND SAFETY MESSAGES.
Mounting
To prevent accidental activation of the winch and serious injury, complete the winch installation
and attach the hook before installing the wiring.
1. Before Installation
WARNING
Installation Instructions
1.1 Inspect Parts
Hand Saver Cable Strap
Clutch T-Handle
Instruction/Owners Manual
Winch Assembly
Contactor Control Box
Pendant Remote Control
Pendant Remote Control Socket
Roller Fairlead
2 Gauge Battery Lead
Mounting Footprint Template
Mounting Hardware
Hose Clamps

CEQUENT™ PERFORMANCE PRODUCTS, INC. • F3838-00 REV A (3576) 10/14
8
1.2.1 Mounting Configurations
Thepay-outdirectionforwirerope/syntheticropeandthecorrectmethodsformountingthewinch
varyaccordingtothedifferentwinchmodels(seepage9).Whenmountingthewinchfootforward,
windtheropefromthetoporbottomofthedrumtowardsthedirectionofthemountingbaseplate.
SeeFigure1page9.Whenmountingthewinchfootdown,windtheropefromthebottomofthe
drum.SeeFigure2,page9.
1.2.2 Winch and fairlead mounting considerations
1.2 Select Mount Location
ALWAYS choose a mounting location that is sufficiently strong to withstand the maximum pull-
ing capacity of your winch.
WARNING
1.Yourmountingsurfacemustbeequaltoorgreaterthanthefootprintofthewinchframe.
2.Makesurethemotor,drumandgearboxhousingarealignedcorrectly.
3.Thefairleaddoesnotmountdirectlytothewinch.
4.Thewire/syntheticropeshallbewoundinaccordancewithTable5,page9.
ALWAYS position fairlead with warning readily visible on top.
WARNING
MOUNTING HOLE TEMPLATES AND MINIMUM SURFACE AREAS
Templates are not to scale.
Remember that all winches do not mount in the same orientation.
Dashed rectangle represents the cable access hole for foot forward mounting.
DC6000
Minimum
Mounting Surface
DC9000 & DC12000L
Minimum Mounting Surface
DC12000, DC15000 &
DC18000 Minimum
Mounting Surface
Installation Instructions

CEQUENT™ PERFORMANCE PRODUCTS, INC. • F3838-00 REV A (3576) 10/14 9
Table 5 - Mounting Position Specifications
Electric Winch
Model
Mounting Position Repositioning
Foot Down Foot Forward Foot Down Foot Forward
DC6000 x x 90˚
DC9000 x x 40˚ 90˚
DC12000L x 40˚ 90˚
DC12000 & DC15000 x x 36˚ 90˚
DC18000 x 36˚ 90˚
UNDER WOUND
Under-windonlyonwinches
mountedinafootdown
orientation.
Figure 1 - Foot Forward Mounting Position
Windtheropefromthetoporbottomofthedrum
towardsthedirectionofthemountingbaseplate
forfootforwardmountingwinches.
OVER WOUND
Over-windorunderwoundon
winchesmountedinafoot
forwardorientation.
Figure 2 - Foot Down Mounting Position
Windtheropearoundthebottomofthedrumfor
footdownmountingcongurations.
Roller
Fairlead
Hawse
Fairlead
Under-Wound
CORRECT
1.3 Determine Mount Position
Failure to adequately align, support, or attach the winch to a suitable mounting base could
result in a loss of efficiency of performance or damage to the winch, wire/synthetic rope and
mounting surface.
The mounting surface must be equal to or greater than the footprint of the winch frame.
WARNING
OnlythemountingorientationsinTable5arepermissableforsafewinchingoperation.Allothersare
improperandinappropriateandwillvoidyourwarranty.
Installation Instructions

CEQUENT™ PERFORMANCE PRODUCTS, INC. • F3838-00 REV A (3576) 10/14
10
1.Setangednutsintopocketsofwinchfeet.
2.Makesurethemotor,drumandgearboxhousingarealignedcorrectly
3.Setwinchinmountinglocation.Conrmrequiredboltlength.
4.InstallboltsandtightentotorquespeciedinTable4,Page7.
The fairlead does not mount directly to the winch.
1.4 Install the Winch
1.4.1 Install the Winch Fairlead
Installation Instructions

CEQUENT™ PERFORMANCE PRODUCTS, INC. • F3838-00 REV A (3576) 10/14 11
Installation Instructions
1.5 Motor Repositioning
Tochangethemotormountingorientation
usean11mmwrenchandremovethe2
screws.Holdthemotorandpullbackabout
a1/4”androtatethemotorby90degree
incrementstotherequiredposition.Reinstall
thetwoscrewsandtorqueto10ft.-lbs.See
Figure5.
Figure 5 - Motor Position Rotated By 90°
1.5.1 Clutch Repositioning
ChangethepositionoftheFree-SpoolT-handle
accordingtothefollowingsteps.Loosenand
releasetheboltsonthebrakerearcover.Rotate
thegearboxbyproperangleincrements.See
Figure6.Re-assemblythegearboxandrear
brakecover.Torquescrewsto5ft.-lbs.
Remove these
screws to
rotate motor
Figure 6 - T-Handle Cluth Postion & Rotation
DC9000 & DC12000L Models
Rotate by 40˚ Increments DC12000, DC15000, DC18000 Models
Rotate by 36˚ Increments
Remove these
screws to
rotate clutch
Remove these
screws to
rotate clutch
Clutch
Handle
Clutch
Handle
Itmaybenecessarytorotatethemotororclutch.Thiswilldependonthemountingpositionor
variablesthatrestrictaccesstothemotorconnectionsortheclutchhandle.

CEQUENT™ PERFORMANCE PRODUCTS, INC. • F3838-00 REV A (3576) 10/14
12
ALWAYS complete the winch installation and hook attachment before installing the wiring.
ALWAYS pre-stretch rope and re-spool under load before use. Tightly wound rope reduces
chances of “binding”, which can damage the rope.
A minimum of five (5) wraps of steel wire rope and a minimum of ten (10) wraps of synthetic
rope around the drum is necessary to support the rated load.
ALWAYS spool the winch rope onto the drum in the direction specified by the drum rotation
labels on the winch and/or in the documentation. This is required for the automatic brake to
function properly.
1.6 Install the Rope
WARNING
Installation Instructions
Roller Fairlead
Usearollerfairlead(showninFigure1)when
usingwire ropeineitherafootforwardorfoot
downapplication.
Hawse Fairlead
UseaHawsefairlead(showninFigure2)when
usingsynthetic rope ineitherafootforwardor
footdownapplication.
Roller
Fairlead
Hawse
Fairlead
Roller Fairlead
Theuseofa4wayrollerfairleadcanreducethecontactingfrictionwiththewirerope.Thefairlead
doesnotensurethewireropewillwindontothedruminanorderlymanner.Thepropereetangle
within15°mustbemaintainedforthewireropetowindontothedruminanorderlymanner.Ifthe
propereetangleisnotmaintained,itcanresultindamagetothewinchandwire/syntheticrope.
Figure14.
Hawse Fairlead
TheuseofaHawseFairleadcanreducethecontactingfrictionwiththesyntheticrope.Analuminum
hawsefairleadisrecommendedbecauseithasnosharpedgesandresistsweardamagemoreeffec-
tivelythanarollerfairlead.Thefairleaddoesnotensurethesyntheticropewillwindontothedrumin
anorderlymanner.Ifthepropereetangleisnotmaintained,itcanresultindamagetothewinchand
syntheticrope.Figure14.

CEQUENT™ PERFORMANCE PRODUCTS, INC. • F3838-00 REV A (3576) 10/14 13
Afullychargedbatteryandgoodconnectionsareessentialfortheproperoperationofyourwinch.The
minimumrequirementforthebatteryis650coldcrankingamps.Thebatteryleadshallbe2gauge
with72”inlengthatmost,otherwiseaconsiderablevoltagedropwilloccur.
Figure 7 - Torque Specification
WARNING
14 N-m
124 in-lbs.
Installation Instructions
1.7 Install the Wiring
1.Plantheroutingpath.
2.Looselysecurepowercablesalongpath.
3.Conrmpowercablesareprotectedfromsharpedges,heatandmovingparts.Considerchassis
exandvibrationwhichmightdamagecable.
4.Carefullyinspectelectricalcablerouting.Ziptieandsecureelectricalcables.Ziptiesshouldbe
snug,butnotcuttingintowireinsulation.Useelectricaltape,piecesofrubberhoseorelectrical
conduittoprotectelectricalcablesandwireharnesswhereneededtoavoidelectricalcableinsula-
tionwearorabrasion.
5.FIRSTattachred(positive)batterycable,thenblack(negative)batterycable.Installbootsasappro-
priatetoprotectconnections.Torquebatteryterminalfastenersto124in/lbs(14N-M).SeeFigure7.
ALWAYS route battery cables along a path that allows the cables to be secured with zip ties.
Loose or unsecured power cables can cause serious injury or death.
Routebatteryconnectioncablesinareasthatwillnotcausethemtochafeorcutthroughtheinsu-
lationcausingapotentialshortcircuit.Thewinchpowerwiremustberoutedtothebattery.Adirect
batteryconnectionofthepower(red)andground(black)cablesisrequired.
BEFORE installing the winch, make sure all electrical parts are corrosion free.
ALWAYS place the supplied terminal boots on wires and terminals as directed by the installation
instructions.
NEVER lean over battery while making connections.
NEVER route electrical cables over battery terminals.
ALWAYS consult Electrical Connections section for proper wiring details.
Run the charging system during winching operations to keep battery charged.
NEVER route electrical cables across sharp edges.
NEVER route electrical cables near parts that get hot.
NEVER route electrical cables through or near moving parts.
AVOID pinch and wear/abrasion points when installing all electrical cables.
ALWAYS insulate and protect all exposed wiring and electrical terminals.
1.7.1 Battery Recommendations & Lead Size
1.7.2 Battery Cable Routing
WARNING

CEQUENT™ PERFORMANCE PRODUCTS, INC. • F3838-00 REV A (3576) 10/14
14
Figure 9 - DC6000 Wiring Diagram
Figure 8 - DC9000, DC12000L, DC12000, DC15000, & DC18000 Wiring Diagram
Uponcompletionofinstallation,checkwinchforproperoperation.Thevoltagedropforthewinch
motormustnotexceed10%ofthenominalvoltageof12/24DC.
1.7.3 System Check
Installation Instructions

CEQUENT™ PERFORMANCE PRODUCTS, INC. • F3838-00 REV A (3576) 10/14 15
Operation Instructions
ALWAYS use supplied hand saver cable strap whenever spooling winch rope in or out, during
installation or operation to avoid injury to hands and fingers.
2.1 Spooling in Under Load
WARNING
NEVER exceed winch’s rated line pull. Power-in the winch rope evenly and tightly on the drum.
This prevents the outer winch wraps from sinking into the inner wraps, binding and damaging
the winch rope.
NEVER touch winch rope or hook while someone else is at the control switch or during winch-
ing operation.
WARNING
Donotshockloadthewinchwhenspooling.Avoidshockloadswhenspoolingbypulsingthecontrol
switchtotakeupwinchropeslack.Shockloadscanmomentarilyfarexceedthewinchandroperatings.
DO NOT power the hook into the fairlead. This could cause damage to the fairlead.
NOTICE
2.4 Safe Working Conditions
2.3 Stretching the Wire Rope
ALWAYS pre-stretch rope and re-spool under load before use. Tightly wound rope reduces
chances of “binding”, which can damage the rope.
NEVER operate winch with less than five (5) wraps of wire rope and ten (10) wraps of synthetic
rope around the drum. Rope could come loose from the drum, as the rope attachment to the
drum is not designed to hold a load.
Thegoalofstretchingyourwireropeistowrapittightlyonthewinchdrumsothatitcansupportad-
ditionallayersofwire.Itcantakeupto1,000lbs.toproperlystretchlargediametercable.Thiscanbe
accomplisehdwithavehiclesuppliedasdeadweighttostretchtherope.Thisisanexercisethatwill
makeyourwireropelastlonger,avoidtanglesandensureatightlywrappedwinch.Usecaretoevenly
wrapeachlayertopreventdamagetotherope.
2.2 Overloading / Overheating
Thiswinchisratedforintermittentduty.Whenthemotorapproachesstallspeed,veryrapidheat
buildupoccurswhichmaycausemotordamage.Double-lineriggingwillreducetheamperagedraw,
andreduceheatbuildupinthemotor.Thisallowslongercontinualuse.
WARNING
NEVER work around the winch rope while under load.
NEVER step over a winch rope while under load.
ALWAYS use caution when working with electricity and remember to verify that no exposed
electrical connections exist before energizing your winch circuit.
WARNING
WARNING
TheoperatorshouldALWAYSoperatethewinchfromasafepositionwhenpullingaload.Thesafe
areasare:Perpendiculartothewinchrope.
Thesafepositionwillhelppreventthewireropefromstrikingtheoperatorifthewireropefailswhen
underload.
Fullyextendthependantcontrolcordtooperatewinchwheneverpossible.Theoperatormusttryto
maintainatleast8ft.(2.44m)fromthewinchwhileoperating.

CEQUENT™ PERFORMANCE PRODUCTS, INC. • F3838-00 REV A (3576) 10/14
16
2.5.1 Handheld Pendant Control
Industrialgradeandwaterproofremote.
DC12000,DC15000andDC18000winches
includesLEDoverheatingindicator.
2.5.2 Connect the remote control
Alwayskeeptheremotecontrolwireclearof
thewinch,wire/syntheticropeandroller/hawse
fairlead.Figure10.
DO NOT leave the pendant control plugged
into the winch when not in use. This may result
in a dangerous condition and/or battery drain.
1.PressandholdtheCableInButtonforrope
windinginoperation.
2.PressandholdtheCableOutButtonforrope
windingoutoperation.
3.Tostopwinching,releasetheCableInorCable
OutButtons.Figure11.
Cable-Out
Figure 11 - Cable Button
Figure 10 - Connect Remote
2.5 For First Time operation
2.6 Clutch Operation
NEVER engage or disengage clutch if winch is under load, winch rope is in tension or drum is
moving.
To prevent damage, ALWAYS fully engage or fully disengage the clutch lever.
WARNING
Theclutchlever,locatedonthewinchhousingoppositethemotor,controlstheclutchposition.When
theclutchisengaged,thegeartrainiscoupledtothewinchdrumandpowercanbetransferredfrom
thewinchmotor.
NEVER engage the clutch while the drum is rotating.
2.6.1 Disengage Clutch For
Free-Spooling
LifttheclutchT-handleupandturnitat90°
counter-clockwiserotationtothe“Disengaged”
position,ropecannowfree-spooloffthedrum.
Figure12.
2.6.2 Engage Clutch For Winching
Toengage,lifttheclutchT-handleupandturnit
90°clockwisetothe“Engaged”position.Never
engagetheclutchwhilethedrumisrotating.
Figure13.
Figure 12 - Disengage Clutch
Figure 13 - Engage Clutch
Disengaged
To engage,
lift and turn
Cable-In
Operation Instructions

CEQUENT™ PERFORMANCE PRODUCTS, INC. • F3838-00 REV A (3576) 10/14 17
2.7.1 Calculating Fleet Angle
Toobtainthebestwire/syntheticropeservice,thedirectionof
pullwillbeonahorizontalwithin±15degreesandperpendicular
tothecenterlineofthewinchdrumwithin±5degrees.Shortpulls
ofupto45degreeslaterallyareacceptable;howeverwithout
maintainingthepropereetangle;theropewillpileontooneside
oftheropedrumandpossiblydodamagetotheropeorwinch.
Re-spoolyourwinchasrequired.
2.7 Winching Principles
2.7.2 Recovery Damper
Arecoverydamperisasafetydevicedesignedtohelpreduce
thepossibilityofinjuryorpropertydamageintheeventofa
wireropefailure.Placeinthemiddlethirdofaliverope.
Figure15.
2.7.3 Snatch Block
Animportantaidtosuccessfulwinchingisthe
useofsnatchblock,whichcanbeusedto
increasethepullingpowerofawinchorchange
thedirectionofapull.
Awinchdoublelinedwithasnatchblockcreates
amechanicalleveragecuttingtheeffortrequired
bynearlyhalf.
Theuseofonesnatchblockshowsanindirect
pullwherethevehicleislimitedduetounsuitable
groundorobstruction.Thepullontheloadis
theactuallinepullofthewinch.Ifmorethanone
snatchblockisused,theymustbelocatedat
least100cm(40˚)apart.Figure16.
Figure 14 - Fleet Angle
Roller
Fairlead
Figure 15 - Recovery Damper
Figure 16 - Snatch Block
Snatch
Block
Operation Instructions

CEQUENT™ PERFORMANCE PRODUCTS, INC. • F3838-00 REV A (3576) 10/14
18
2.8 Tips For Prolonging The Life Of Synthetic Rope
• Checktheropefordamageorwearbeforeeachuse.
• Abrasioncandamageorweakenyoursyntheticrope,protectyourropefromrubbingagainstsharpobjects.
• Analuminumhawsefairleadisrecommendedbecauseithasnosharpedgesandresistsdamage
moreeasilythanarollerfairlead.
• Keepyoursyntheticropecleananddry.Tocleanit,spoolouttherope,rinseitwithahose,andletit
drycompletelybeforere-spooling.
The“powerout”functiondrivesthewinchmotoragainstthebrakewhichissimilartodrivingyour
vehiclewiththeparkingbrakeengaged.DonotusethePower-Outfunctionforloweringaload--
winchesarenotdesignedtobeusedashoists.Usethefree-spoolfunctiontopayoutwire/synthetic
rope.Ifyoupoweroutover25feet,letthewinchcoolfor15minutes.
Do not use the winch as a lifting device or a hoist for vertical lifting.
WARNING
The “Power-Out” function should be used for relieving tension on the rope,
not for extended distances.
CAUTION
Operation Instructions

CEQUENT™ PERFORMANCE PRODUCTS, INC. • F3838-00 REV A (3576) 10/14 19
Tape
Maintenance
3.1 Wire Rope Replacement
1.DisengagetheclutchT-handle.
2.Un-spooltheentirerope,andremoveitfromthedrum.
3.Placethereplacementropethroughtherollerfairleadopening,passaroundthedrumperTable4and
insertitintotheholeonthedrumcore.Tightentheset-screwdownwardstosecurethewirerope.
4.Aminimumofve(5)wrapsofwireropeandten(10)wrapsofsyntheticropearoundthedrumis
necessarytosupporttheratedload.
3.2 Synthetic Rope Replacement
1.DisengagetheclutchT-handle,removeexistingropeandreplacehawsefairleadifnecessary.
2.Un-spooltheropefromthedrum.Removetheset-screwfromthedrum.
3.Cuttheendoftheropeat45°andapply2-3wrapsofelectricaltapetoholdthecutstrandsinplace.
Thiswilleaseassembly.
4.ThreadropethroughahawsefairleadandaroundthedrumperTable4,inserttheropethroughthe
holeonthedrumwith6”–8”tospare.
5.Placeropeacrossthedrumandtapetheenddowntoholditinplace.SeeFigure18Lightlytighten
theset-screwtosqueezetherope,donotovertighten.
6.Aminimumoften(10)wrapsofropearoundthedrumisnecessarytosupporttheratedload.
Figure 17 - Wire Rope Replacement
Figure 18 - Synthetic Rope Replacement
Engaged Lift and
turn to
disengage
• Check the wire/synthetic rope. Beforewinching,make
suretheropeiswoundonthedrumevenly.Ifthereismixed
winding,itisessentialtorewinditevenly.
• Becarefultokeeptheropeundertension.Neverguidea
wire/syntheticropeontothedrumwithyourhand,usea
handsavercablestrap.

CEQUENT™ PERFORMANCE PRODUCTS, INC. • F3838-00 REV A (3576) 10/14
20
Maintenance
3.3 Brake Adjustment
Undernormaluse,thebrakemechanismwillnotrequireanyadjustment.Ifthebrakefailstoholda
load,thebrakediscmaybewornandrequirereplacement.Whenthebrakewearstothepointthatthe
loadbeginstoslip,thebrakecanbeadjustedasfollows:
1.Loosentheboltonthebrakecoverandtakeouttheretainingrings
2.Insertspacers/washerstomaintainthebrakespacerbetweentobe2.2±0.25mm
3.Makesuretokeeptheclutchbaseplateisrotatedcounter-clockwiseby150–180degree
3.4 Lubrication
Allmovingpartsinthewincharepermanentlylubricatedatthetimeofassembly.Undernormalcon-
ditionsfactorylubricationwillsufce.Ifre-lubricationofgearboxisnecessaryafterrepairordisas-
semblyuseShellEP2orequivalentgrease.RegularlylubricateClutchT-handlewithlightoil.Never
lubricatethebrakesystem.
Figure 19 - Brake Adjustment
3.5 How To Order Replacement Parts
UseonlyCequentPerformanceProducts’partsorpartsofequalqualityforrepair.Replacement
partsareavailablethroughCequentPerformanceProducts’TechServiceDepartment,
1-800-521-0510.Pleasespecifyproductmodelnumber.
Other manuals for DC Series
2
This manual suits for next models
6
Table of contents
Languages:
Other Bulldog Security Winch manuals
Popular Winch manuals by other brands

Warrior Winches
Warrior Winches 95SPS12 Assembly & operating instructions

Prowinch
Prowinch PWPT1000 user manual

Paccar
Paccar Braden PD12C Installation maintenance and service manual

HERKULES
HERKULES 500-2 Original operating instructions

Wedge Clamp Systems Inc.
Wedge Clamp Systems Inc. EZE ROLLER Assembly instructions

Superwinch
Superwinch S Series Technical installation manual