Bullmax BMPD-H35 User manual

Post Driver – BMPD-H35
This User Manual covers the Bullmax Post Driver Component.
Refer to the Honda User Manual for safe operation of the Honda GX35 engine.

2
User Manual
Contents
Thank you for purchasing the Bullmax Post Driver. This machine is powered by the (Honda
GX35) 4 stroke engine that is easy to use and very reliable. Please read these user instructions
carefully as when followed will ensure ecient and a long working service life of the machine.
It is important to follow the user manual instructions before using this machine for your safety
and to avoid physical injury and damage.
1. Parts Diagram 3
2. Safe Operating Instructions 4
3. Main Purpose and Function 4
4. Preparation before use 5
5. Starting 5
6. Operation 5
7. Turning o the Machine 6
8. Technical Maintenance 6
9. Failure Analysis and Troubleshooting 6
10. Key Data of Product 6
11. Bullmax Post Driver Parts – Maintenance Cycle 7
12. Honda GX35 Engine – Maintenance Cycle 7
13. Parts List and Exploded View of BMPD-H35 Post Driver 8–10
14. Bullmax Post Driver Packing List 11
15. Bullmax Post Driver Warranty 12

3
1. List of Main Parts
No. Name of Part No. Name of Part No. Name of Part
1 Handle Frame 2 Positioning Sleeve 3 Damping Spring
4 Handle Sleeve 5 Grease Cap 6 Hammer Case
7 Support Plate 8 Carburettor with fuel
priming bubble and choke
9 Throttle Knob
10 Ignition ON/OFF switch 11 Throttle Trigger 12 Fast Idle Control
13 Throttle Cable 14 Piling Socket 15 Piling Socket Retainer
15
7
6
5
4
3
2
14
13
12
11
8
10
9
Fig. 1
1

4
2. Safe Operating Instructions
1. The operator must wear slip-resistant safety shoes, suitable clothing, safety glasses,
helmet, and earplugs.
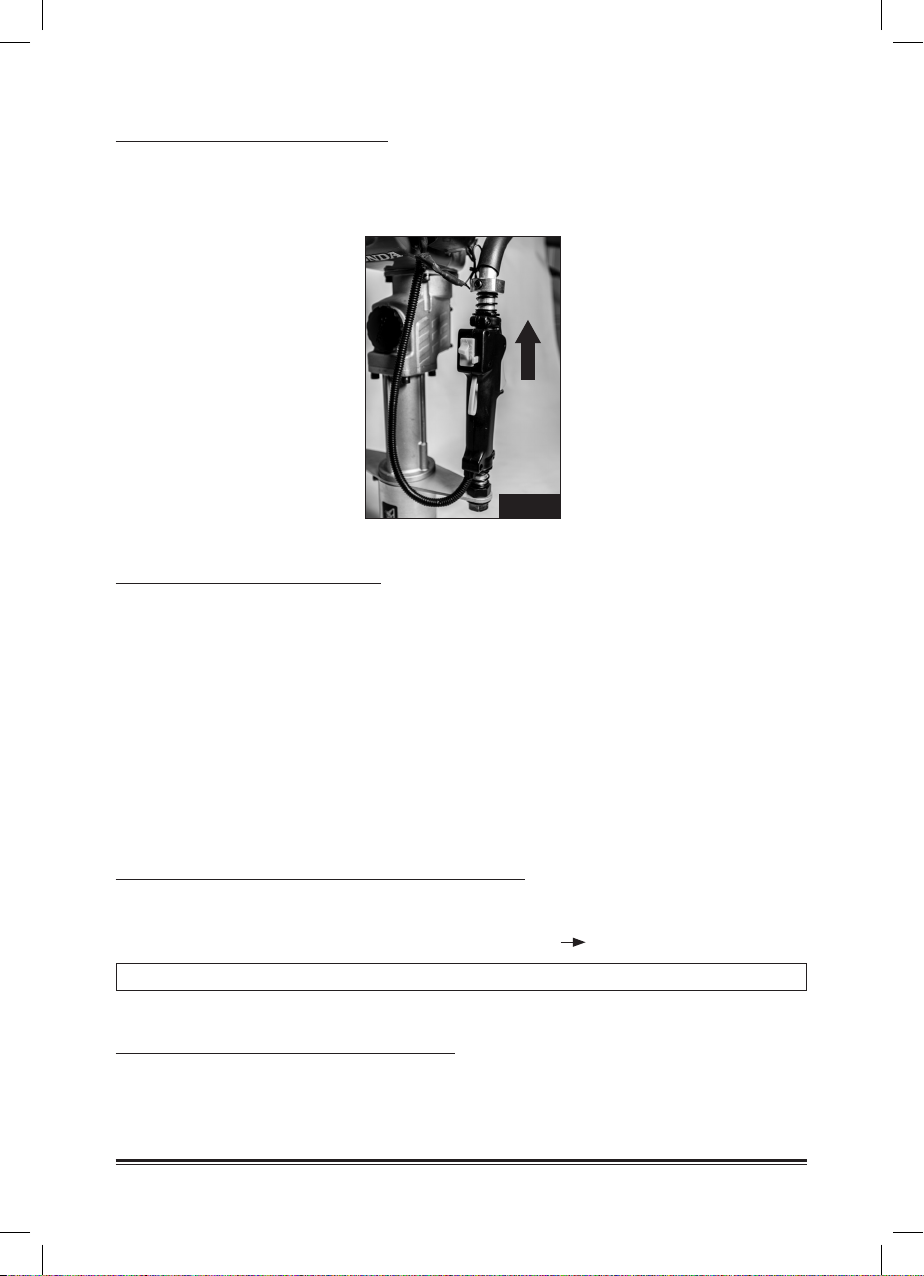
2. While operating the machine, please keep well balanced; the user shall stand in front of
Air Filter to operate the machine. While operating the machine, do not partake in any other
activity.
3. While operating the machine always use both hands.
4. When lifting the machine always have engine at idle.
5. Keep any observer away from the operation area to avoid injury.
6. Select the medium speed to operate post driver.
7. Keep the handle dry and clean free of oil or fuel.
8. If operation is stopped midway; be sure to turn o the engine.
9. Pre-check before use that all bolts and screws are tight and that they have not vibrated
loose from the previous day’s work or transportation.
10. Gasoline is highly ammable. Therefore, replenish fuel in a well-ventilated environment.
During fuel lling, engine must be turned o.
11. Do not add too much fuel and do not exceed the neck of the fuel tank. If fuel spills, wait
until the fuel vaporizes completely and then start the engine.
12. After refueling, tighten the fuel tank lid. If fuel spills while operating the machine, check
that the fuel tank lid is tight and check for damage to the fuel tank. If there is a fuel leak
shut the machine down immediately.
13. Keep reserve fuel in a safe storage area away from re or open ame.
14. Where the post driver is used in closed areas such as tunnels, trenches and conned
spaces, ensure there is ample air circulation to avoid waste gas poisoning and suocation.
15. When transporting ensure machine is tied down securely so as to not damage the
machine.
16. Before transport, empty fuel inside fuel tank to avoid leakage.
17. Do not allow non-qualied personnel to dismantle the post driver. This will avoid internal
damage of the machine, shortened service life of the post driver or accidents. To do so will
void the warranty.
3. Main Purpose and Function
3.1 Purpose: It can be used for driving in star pickets, pipe, form work pins for use on fences,
barriers and construction.
3.2 Function
3.2.1 It is a handheld gasoline post driver that is light weight and produces low emissions.
3.2.2 The product is an excellent design and engineered to be easy to use with minimal eort
and powerful operating eciency. The operator can achieve 360° all-round operation.
3.2.3 It can regulate impact energy and impact frequency and be applied to a variety of posts
with diameter larger than 20mm (inclusive) and smaller less than 80mm (inclusive).
3.2.4 Advantage: Saves the trouble of using heavy machines such as generator, air compressor,
hoses, leads and vehicle.
3.2.5 The operating handle of the machine is rubber and plastic sponge which can greatly
reduce the recoil force of the machine. It features a two-way Dampening Spring which
makes it more comfortable to use.

5
4. Preparation before Use
4.1 Piling Socket
4.1.1 Install or replace Piling Socket Retainer selecting the correct size for the picket to be
driven. Select from the 4 sizes that are supplied with your machine – 20~45mm, > 55mm,
>73mm, >80mm.
See Fig. 2.
4.2 Fuel – Refer to Honda GX35 User Manual.
4.3 Checking of Air Filter – Refer to Honda GX35 User Manual.
5. Starting
5.1 Turn ignition switch to the on position, prime fuel by depressing the fuel bubble on the
carburettor, turn choke to the on position, pull start.
5.2 Turn choke to the o position.
5.3 Please do not pull up the starter handle during operation since fast rotation of the part
may lead to damage of the starter.
6. Operation
6.1 After the engine is started, allow 5 minutes for the machine to warm up.
6.2 When the engine has warmed up, press throttle button to the appropriate position
according to the required impact energy.
Note: Operate the new post driver at low or medium-speed in the rst 20 hours of
operation and the maximum throttle shall not be used in order to extend the service life.
6.3 Operating speed of post driver is most eective at medium speed.
Fig. 2

6
7. Turning o the Machine
7.1 Release throttle button and allow the machine to idle for 3-5 minutes.
7.2 Push ignition switch to the o position. See Fig. 3.
8. Technical Maintenance
8.1 Engine – Refer to Honda GX35 User Manual.
8.2 Spark Plug – Refer to Honda GX35 User Manual.
8.3 Muer – Refer to Honda GX35 User Manual.
8.4 Check grease every 50 hours of operation.
8.5 Do not overll.
8.6 Impact Cylinder Lubrication
8.6.1 After initial one hours work – replenish grease around big end journal using no more
than one tablespoon of Bullmax Rock Hammer Grease.
8.6.2 100ml tube of grease is supplied in your tool kit.
8.6.3 Use only genuine Bullmax Rock Hammer Grease – Call 02 9521 6300 or your local dealer.
9. Failure Analysis and Troubleshooting
Refer to Honda GX35 User Manual.
Example: The machine is working normally but the work eciency is very low.
The rubber ring of impact piston is aged and worn Replace.
Please contact Bullmax 02 9521 6300 for maintenance advice and parts.
10. Honda Engine Specications
Refer to Honda GX35 User Manual.
Fig. 3
OFF

7
11. Bullmax Post Driver Parts – Maintenance Cycle
The following Data is for operating under normal
conditions. If operating in the conditions such as
thick dust or long work hours, or hot conditions;
the maintenance cycle should be shortened
correspondingly.
If necessary
Every 50 hours of operation
Every Month
Every Week
After relling fuel
After work or every day
Before work each day
The whole machine
Control Handle Frame/
Stop button
Reduction gear box/
Impact cylinder
Silencer
Cylinder Cooling Fin
Spanner check (tighten
all bolts and screws)
Clean
Function check
Clean
Add grease
Check
Remove carbon deposit
Check
Clean
12. Honda GX35 Engine – Maintenance Cycle
Refer to Honda GX35 User Manual.

8
13. Parts List and Exploded View of BMPD – Honda GX35
Parts
No. Name Qty
1 Driven Disk 1
2 Inner Hexagon Cylindrical
-head ScrewM5x12
3
3 Elastic Washer 5 3
4 Bearing Pressing Plate 1
5 Deep Groove Ball Bearings
6202-2RS
3
6 Small Bevel Gear 7-2 1
7 Reduction Gearbox 1
8 Grease Cap 1
9Grease Cap O-RINGɸ1.5x50 1
10 Inner Hexagon Cylindrical
-head ScrewM6x16
1
11 Elastic Washer 6 9
12 Retainer 1
13 Needle Roller Bearing-
Hk152316
1
14 Impact Crankshaft 1
15 A Type Common Flat Key
5x5x10
1
16 Deep Groove Ball Bearings
6003-2RS
1
17 6003Bearing Pressing Plate 1
18 Cross Pan Head Screw-
M5x14
4
19 Large Bevel Gear 28-2 1
20 Shaft Retainer16 1
21 Rear Placket 1
22 Round Pin4x10 2
23 Reduction Gearbox Cover 1
Parts
No. Name Qty
24 Inner Hexagon Cylindrical
-head ScrewM5x20
4
25 Inner Hexagon Cylindrical
-head ScrewM6x20
8
26 Cylinder Gaskets 1
27 Impact Connecting Rod 1
28 Impact Piston 1
29 Impact Piston Pin 1
30 O-ring Impact Piston 1
31 Impact Cylinder 1
32 Middle Placket 1
33 Hammer Case 1
34 Elastic Washer 8 8
35 Inner Hexagon Cylindrical
-head ScrewM8x20
4
36 Front Placket 1
37 Hammer O-circle 1
38 Hammer 1
39 Crush Pad 2
40 Waved Gasket ɸ39x46x0.5 6
41 Shock O-Circle 2
42 Shock 1
43 Support Plate 1
44 Hexagon Flange Nut M18x1.5 2
45 Impact Socket 1
46 Piling Socket 1
47 Inner Hexagon Cylindrical
-head ScrewM8x40
4
48 Inner Pile Head 77 1
49 Piling Socket Retainer 80 1

9
Parts
No. Name Qty
50 Piling Socket Retainer 45 1
51 Connecting Thread Head 2
52 Step Nut 2
53 Handle Spring 38x27xɸ2.5 4
54 Handle Sleeve 1
55 Handle Soft Sleeve 1
56 Handle Nut 1
57 Positioning Sleeve 2
58 Handle Frame (four-stroke) 1
59 Handle Frame Soft Sleeve 1
60 Inner Hexagon Cylindrical
head ScrewM6x40
2
61 Combination Switch 1
62 Switch Handle Guide Sleeve 2

10
Exploded View of Bullmax Post Driver BMPD-H35 with Honda GX35 Engine
1
2
3
4
5
6
7
8910 11 12 13 14 15
25
26
27
28
39
30
37
38
39
40
41
42
43
49
48
47
51
62
61
50
52
53
54
55
56
57
58
60
24
23
22
21
20
19
18
17
16
59
46
45
44
31
32
33
34
35
36
Honda GX35 Engine
Refer to Honda
User Manual

11
14. Bullmax Post Driver Packing List
1. Bullmax Post Driver with Honda GX35 engine 1
2a. Piling Socket Retainer 20-45mm 1
2b. Piling Socket Retainer 46-55mm 1
2c. Piling Socket Retainer 56-73mm 1
2d. Piling Socket Retainer 74-80mm 1
3. Bullmax Rock Hammer Grease - 50ml 1
4. Bullmax User Manual 1
5. Bullmax Warranty Card 1
6. Tool Kit (Spark plug spanner, Allen key spanners, 4mm, 5mm, 6mm, T-piece Allen key
spanner, straight edge screwdriver, open ended spanners, 8mm & 10mm.) 1

12
15. Bullmax Post Driver Warranty
The Bullmax post driver is assembled in Australia and is inspected and tested before leaving our
factory.
The Bullmax post driver has a 3-year Honda engine warranty and a Bullmax 1-year post driver
parts warranty. Bullmax undertakes as its option to repair and replace free of charge each
product or part thereof on the following conditions.
The warranty is valid from the date of purchase and when the machine is used in accordance
with the information supplied in the instruction manual. (Please keep proof of purchase)
The Bullmax warranty does not cover the following
• Normal wear and tear
• Commercial use
• Damaged caused due to failing to follow the safety and operating instructions, which includes
due to lack of maintenance, cleaning and care of the post driver.
• Parts that may need to be replaced due to normal wear and tear and lack of maintenance.
• Incorrect usage and negligence which causes damages to the machine.
• Altering or modifying the post driver.
• Use of unsuitable parts used for repairs that were not conducted by an authorised Bullmax
repairer.
• Using the post driver in an unsuitable environment and not for the purpose it was intended
for.
• Unsuitable transportation of the post driver, involved in an accident or not securely packaged
to avoid damage in transit or storage.
How to make a claim
If a fault has occurred within the warranty period the consumer can make a claim, by adhering to
the following.
• Stop using the post driver immediately to avoid further damage to the machine.
• Contact Bullmax at [email protected] or alternatively by returning the post driver to the
place of purchase and contact can be made.
Our goods come with guarantees that cannot be excluded under Australian Consumer Law. You
are entitled to have the goods repaired, replaced or a refund for a major failure.
Table of contents
Popular Power Tools manuals by other brands

CPS
CPS BLACKMAX BTLDTW manual

Stomer Professional
Stomer Professional SJS-750-QLK owner's manual

Milwaukee
Milwaukee M12 FHIR14LR Original instructions

Worx
Worx Sonicrafter WX693 Original instructions

Scheppach
Scheppach DP16SL Translation of original instruction manual

infaco
infaco A3MV2-48V Original user guide