5
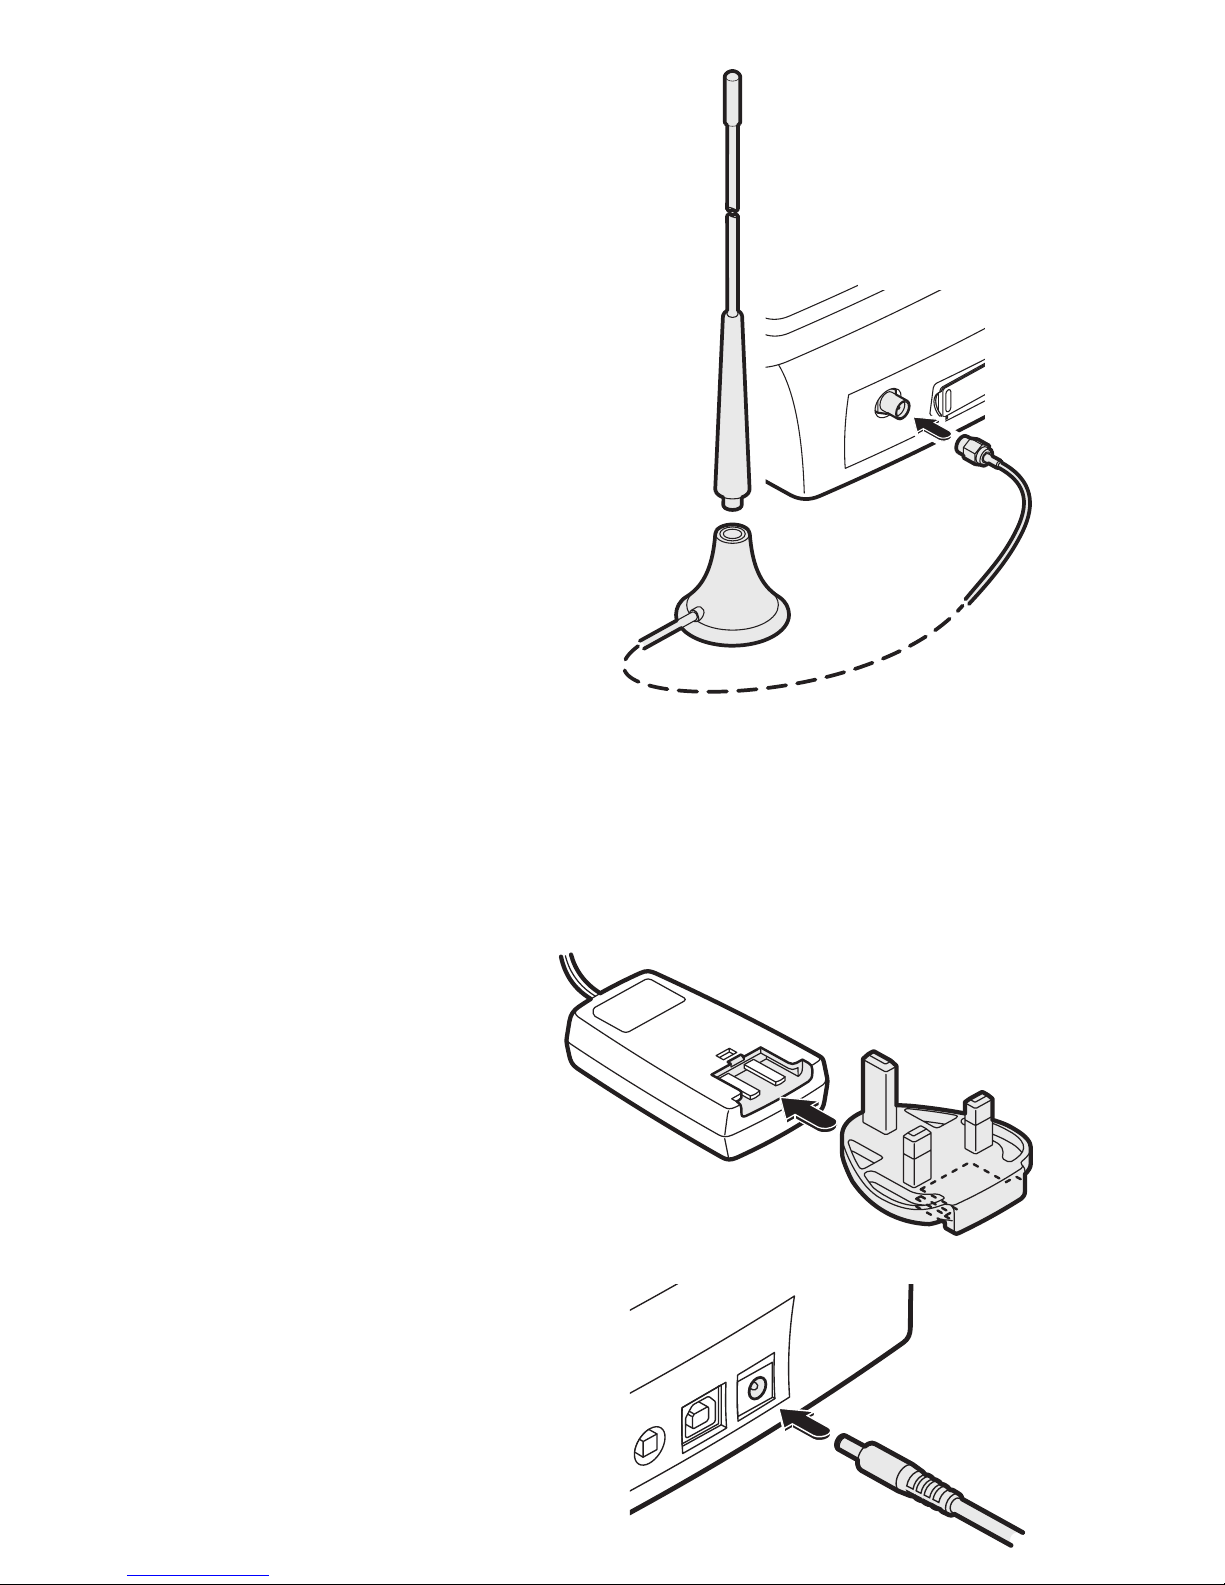
Attach the power adapter
1 Attach the connector from the power
adapter to the socket on the far right
of the rear panel.
2 Plug the power adapter main body
into a nearby mains outlet and en-
sure that the outlet is switched on.
Prepare the power adapter
The supplied power adapter will either be fully specific to your location or
will be an adaptable unit with at least one snap-on plug to suit the mains
power sockets used in your area. If appropriate, you may need to attach the
snap-on plug, if it has not already been fitted.
1 Locate the power adapter main body and the appropriate snap-on plug
(if it has not already been fitted to the main body).
2 Orientate the snap-on plug so
that its underside connection
slots are aligned with the two
metal blades of the adapter
main body, as shown here:
3 Slide the plug into the adapter
main body and press it firmly
into place until you hear a click
(as it snaps into position).
Attach the antenna
The supplied antenna has a magnetic mount
and a two metre cable for remote positioning.
1 Assemble the antenna by screwing the upper
section into the base until it is finger tight.
2 Position the antenna where required, if pos-
sible on a secure metal surface (preferably
iron or steel).
Note: Keep the antenna base away from
monitor screens, televisions, diskettes, credit
cards, etc. because the magnetic base can
affect these items.
3 Feed the antenna cable to the rear of the phone,
attach the connector to the antenna socket
and twist the collar until it is finger tight.
Note: Ensure that the antenna cable
does not cause a trip hazard.
Note: You can use
the status screen to
assist with antenna
positioning - see
page 33.