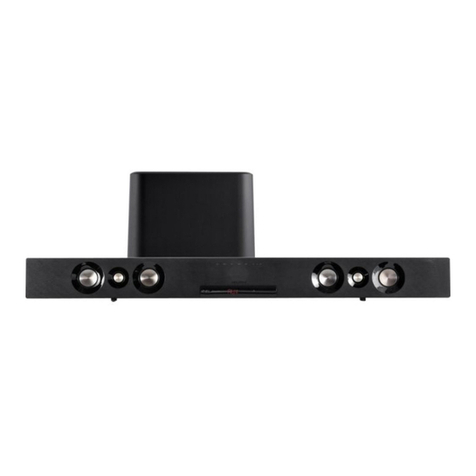
Bush B-3363A User manual

24W RMS 2.0 Soundbar
B-3363A
Instruction manual
SKU:136848861

2
If you require any technical guidance or find that your product is not operating as intended, a simple solution can often be found in theTroubleshooting section of these instructions,
You’ll soon be enjoying your new Bush 24W
It all begins here, with your instructions. Don’t worry,
there’s nothing too technical coming up. Just simple,
step-by-step guidance to get you up and running
quickly. Sound good? Then let’s get started.
Help and Guidance
We’re here to help you get the most from your Bush 24W RMS 2.0 soundbar. Should you require any
guidance; a solution can often be found online at: http://www.bush-support.com
If you still require further assistance, call one of our experts on 0345 604 0105
RMS 2.0 soundbar.

3
Or by calling one of our experts on
Contents
Other information
Product support
4
5
Safety information
Power source
Getting to know your soundbar
Using your soundbar
1
2
3
0345 6040105
Ventilation, heat and moisture
Battery safety
Care and maintenance
Accessories
Soundbar
Indicators
Remote control
Using the soundbar via a wired connection
Using the soundbar with a Bluetooth device
Wall mounting
Technical specification
Troubleshooting
Help and assistance
Recycling electrical products
Declaration
Connecting the soundbar
Guarantee

1
Safety information

5
The exclamation mark within an
equilateral triangle is intended to
alert the user to presence of
important operating and
maintenance (servicing)
instructions in the literature
accompanying the appliance.
Safety information
Important - Please read these instructions fully before
installing or operating
Power source
For household and indoor use only
Keep the appliance and its cord out of reach of children less than 8 years.
Do not allow children to use the appliance without supervision.
This appliance can be used by children aged from 8 years and above and persons with reduced physical,
sensory or mental capabilities or lack of experience and knowledge if they have been given supervision or
instruction concerning use of the appliance in a safe way and understand the hazards involved. Children
shall not play with the appliance. Cleaning and user maintenance shall not be made by children unless
they are aged from 8 years and above and supervised.
Fully unwind the cable before plugging in and ensure the cable is postitioned away from areas where it is
likely to get damaged or cause a trip hazard.
The output cord of the mains adaptor cannot be replaced. In the event of damage to the cable, jack plug
or adaptor, the entire adaptor unit should be replaced.
Connections must only be made via the mains adaptor supplied, never connect the appliance directly to
the 240v mains supply.
Never use the adaptor supplied with any other appliance.
Remove mains adaptor from supply if appliance is unused for a long period of time, and during
thunderstorms.
Do not pull on the cable to disconnect from mains supply.
appliance must only be carried out by a qualified electrician.This product does not contain any user
serviceable parts. Unauthorised handling of the product may damage it and will void your warranty.
Always ensure the mains adaptor plug is readily unpluggable - do not use with ‘lockable’ sockets or
permanently wire to mains.
Keep appliance, cable, mains adaptor plug dry and away from areas where it is likely to get splashed.
Do not use this appliance near water or moisture. Avoid using in hot, humid environments.
Place the appliance on a flat, stable surface with adequate ventilation and away from other sources of
heat. Do not install thisappliancein a confined space. Minimum distances around the appliance for
adequate ventilation is 10cm. Do not cover or
restrict ventilation openings. Keep appliance away
from direct sunlight.
Do not place items with naked flames or containers with liquids on near this appliance.
The mains adaptor will become warm in use; do not cover or place on or near surfaces that could be
Ventilation, heat and moisture
If you require any technical guidance or find that your product is not operating as intended, a simple solution can often be found in theTroubleshooting section of these instructions
The lightning flash with arrow -head
symbol, within an equilateral triangle, is
intended to alert the user to the
presence of un-insulated “dangerous
voltage” within the product’s enclosure
constitute a risk of electric shock.
Only use the power supply that came with the appliance. Using an unauthorised power supply will invalidate
your guarantee and may irrecoverably damage the appliance.

6
Safety information
Important - Please read these instructions fully before
installing or operating
Battery Safety
DO NOT INGEST BATTERY. CHEMICAL BURN HAZARD.
The remote control supplied with this product contains a coin / button cell battery. Button cells are
WARNING
dangerous - if swallowed they can cause severe internal burns in just 2 hours and can lead to death. If
you think batteries might have been swallowed or placed inside any part of the body, seek immediate
medical attention.
Batteries should be installed by an adult. Keep new and used batteries away from children.
If the battery compartment does not close securely, stop using the remote and keep it away from
children.
CAUTION - Danger of explosion if battery is incorrectly fitted/replaced.
Only use CR2025 lithium batteries in this remote control.
Be sure to insert correctly taking care to observe the correct polarity (+ and -).
Use only batteries of the same or equivalent type as recommended.
Do not recharge non-rechargeable batteries.
Nevertry to dismantle batteries.
Do not short circuit the supply terminals.
Always remove exhausted or dead batteries from the product.
Remove batteries from the product before extended storage.
Dispose of used batteries responsibly at local authority household waste recycling facility.
DO NOT dispose of batteries in a fire as the batteries may explode.
Care and maintenance
Wipe with a soft lint free cloth. If the cabinet is very dirty, unplug from the mains and dampen the cloth
with a weak solution of washing up liquid and water and wipe clean. Allow it to dry thoroughlybefore
using. Never clean the appliance with liquids or solvents.
Or by calling one of our experts on 0345 6040105

Getting to know your soundbar 2

8
Getting to know your soundbar
You’ll be up and running in no time
Ready? Let’s begin...
Please read these instructions carefully. They contain important information which will help you get the best from
your soundbar and ensure safe and correct installation and operation.
If you require any further assistance, our technical experts are happy to help. For full details, refer to the product
support section at the end of these instructions.
Accessories
If you require any technical guidance or find that your product is not operating as intended, a simple solution can often be found in theTroubleshooting section of these instructions
Adaptor Remote control CR2025 battery
3.5mm jack to twin phono cable 3.5mm jack to 3.5mm jack cable
6mm rawl plugs Wall screws
Audio optical cable

POWER/
SOURCE
VOL +
VOL -
PLAY/
PAUSE
9
Getting to know your soundbar
You’ll be up and running in no time
Soundbar
Indicators
1. Indicator light
2. Line in jack
3. Optical in socket
4. DC in jack
5. POWER/SOURCE
6. VOL +
7. VOL -
8. PLAY/PAUSE
9. Keyhole mounts
Rear view
1
5
6
7
8
Status Indicator light
Standby
Line in source
Optical source
Bluetooth (unpaired)
Bluetooth (paired)
Red
Green
Yellow
Flashing blue
Blue (static)
Or by calling one of our experts on 0345 6040105
9
234

10
11
16
15
17
12
13 14
10
Getting to know your soundbar
You’ll be up and running in no time
10. Power ( ) button
Remote control
11. Line in mode button
12. BT mode Previous ( ) button
Play / Pause ( ) button
Next ( ) button
13. EQ mode Standard button
Talk button
Movie button
Music button
14. Volume up (+) / down (-) buttons
15. Bluetooth mode ( ) button
16. Optical mode button
17. Mute button
Before using remote for the first time -
To replace the battery in the remote
pull out the clear isolation strip from the battery compartment.
Push theslider at theend of the remotecontrol in the direction shown
by arrow 1 and then slideout the battery holder (fig. 1) Remove the
spent battery.
Insert 1 x CR2025 lithium battery in accordance with the diagram on the
rear of the remote. Takecare to observe the correct polarity (+/-). Refit
the battery holder.
Do notexpose the batteriesor the installed batteries to excessive heat
(e.g. fire, sunshine or position closeto radiators etc.).
Fig. 1
1
2
Push
1.
2.
3.
If you require any technical guidance or find that your product is not operating as intended, a simple solution can often be found in theTroubleshooting section of these instructions

If you are connecting to a DVD player, games console, satellite box or TV which has RCA phono AUDIO OUT
sockets, then use Line in to twin phono lead (supplied) to connect to the AUDIO OUT sockets of the source
and the other end to the 3.5mm Line In sockets of the soundbar. Ensure red plugs are inserted into the red
sockets (fig.3).
2.
Place the soundbar in the desired location within easy reach of a mains plug socket. If wall mounting the
soundbar,see wall mounting Page 1 7 .
11
3.
1.
Getting to know your soundbar
You’ll be up and running in no time
Connecting the soundbar
TV and audio equipment (e.g. DVD, MP3 players etc.) can be connected and amplified via the soundbar.
Fig. 3
Fig. 4
The soundbar can be connected via an OPTICAL connection to a TV, DVD or Blu-ray player using an optical
cable ( supplied ). Ensure any protective stoppers have been removed from the ends of the optical cable
and the rear of the optical socket of the soundbar. Connect one end of the cable to the source optical
out socket and the other end to the optical socket at the rear of the soundbar. (fig.4)
Or by calling one of our experts on 0345 6040105
Follow the connecton guide below. DO NOT switch on the mains power until all other connections are
made.

4.
12
Getting to know your soundbar
You’ll be up and running in no time
The soundbar can be connected to an MP3 player using the 3.5mm jack-to-jack lead supplied (fig. 5). Connect
one end of the lead to the headphone 3.5mm audio output socket and the other end to the
socket of the soundbar at the rear of the soundbar.
Fig. 5
If you require any technical guidance or find that your product is not operating as intended, a simple solution can often be found in theTroubleshooting section of these instructions
3.5mm Line In

Using your soundbar 3

14
Select the operating mode using one of the remote control mode buttons (LINE IN, OPTICAL) until the
indicator corresponding to the sockets being used is illuminated. Repeated pressing of the
button on the soundbar can also be used. The unit also gives an audio announcement of the
POWER /
Using your soundbar
Let’s get started
Using the soundbar via wired connection
Connect the equipment to the soundbar as described above and insert the adaptor cable into the DC jack at
the rear of the soundbar. Pl ug into the mains supply and the red standby indicator light will illuminate to
Press the remote control POWER ( ) button to switch on the unit or press and hold POWER / SOURCE
Adjust the volume to the desired level by pressing the VOLUME (+ or -) buttons until the desired listening
Press play on the connected equipment.
volume is achieved. The sound can be silenced by pressing the MUTE button, the sound will be silenced and
the indicator will flash on unit to indicate that the sound has been muted. Press the MUTE button
a second
time to restore the sound.
If desired, use one of the sound equalizing buttons (MUSIC, MOVIE TALK, STANDARD) to optimize the tone of the
sound being listened to. See guide below. The indicator will flash once when the button is pressed to
show that the function has been selected.
MOVIE – Bass and Treble boosted, for more dramatic sounds.
TALK – Midrange boosted, bass and treble cut to make speech programmes clearer.
MUSIC – Level frequency response.
STANDARD - Sound in standard mode.
Use the controls as usual on the connected equipment.
To place the soundbar into standby mode press the POWER ( ) button on remote control or press and hold
and the red standby indicator will illuminate.
9.
8.
7.
6.
5.
4.
3.
2.
1.
If you require any technical guidance or find that your product is not operating as intended, a simple solution can often be found in theTroubleshooting section of these instructions
show that the soundbar is in standby mode.
button on soundbar.
source
POWER / SOURCE button on unit
Note : This product is designed to go into STANDBY mode automatically after 20 minutes
(approximately) if it does not receive an audio signal. To switch soundbar back on press POWER ( )
button on remote control or press and hold POWER / SOURCE button on unit.
Note: There are 32 volume levels. The indicator will flash at each press of VOLUME (+ or -) until
mimimum or maximum volume level has been reached and indicator remains illuminated.
Note : In Optical mode mark sure the audio settings are set to PCM or Optical Audio on your connected
device and are turned On.
selected mode.
SOURCE
,

Pairing a Bluetooth device
Before you can use the soundbar with your phone or
other Bluetooth capable device you will need to pair
the device to the soundbar.
Pairing a Bluetooth Device for the First Time
1. Press and hold 2 seconds the POWER/SOURCE
button on the unit or the POWER button on the
remote control to switch on the unit.
4.
5. When successfully paired and connected, an audio
announcement will issue from the unit and the
indicator will display a solid blue light. After initial
pairing, the unit will stay paired unless unpaired
manually by the user or until it is erased due to a
reset of the device. If your device should become
unpaired or you find it is unable to connect, repeat
the above steps.
Controlling a paired device
Once connected you can either use the controls on
the audio device to begin playback, skip tracks etc.
Or you can use the control buttons on the remote.
1. The button on the remote control when
2. To skip to the next track press the button
on the remote.
3. To skip to the previous track press the
button on the remote.
4. Any further operations must be done from the
audio device.
The v ected by the volume level
on the audio source EG: Phone or laptop, so make
sure that is set to about 70-80% ( not too loud to
avoid distortion).
Bluetooth notes
•The operation range of Bluetooth is approximately
10 metres (30 Feet). Any obstacles in the path
between devices may reduce this range.
•Only one Bluetooth device can be paired at a time.
•Not all Bluetooth devices are compatible.
15
2. Select and press the Bluetooth ( ) SOURCE
button on
the remote control to
Bluetooth mode or press the POWER/
button on the unit repeatedly to enter
indicated by the blue indicator
that will flash whilst the unit searches for
3. On the device that you would like to connect to
your soundbar via Bluetooth (e.g. TV/phone/
tablet/computer), turn on Bluetooth
connectivity and ensure that it is 'discoverable'.
When connecting a device via Bluetooth,
remain within 3 feet of the soundbar.
Note: If necessary, refer to the instructions for
your device to add or set up Bluetooth.
enter
SOURCE
Bluetooth mode
light
Bluetooth devices.
When found on your device your soundbar will
be displayed as 'Bush B-3363A'. Select this name
on your device to begin pairing.
Or by calling one of our experts on 0345 6040105
Using the soundbar with a Bluetooth device
pressed will begin playback of the selected
track on the audio device. Press again to
pause playback.

Other information 4

17
Other information
Wall mounting
Safety
Tools
required
Before drilling into wall surface, check for hidden cables or pipes.
Wear safety goggles and dust mask when drilling.
The use of a residual current device (RCD) is recommended when working with power tools.
Drill fitted with masonry drill bit
Screwdriver
Pencil
Ruler
Spirit level
Choose a suitable location for the soundbar away from areas where it will get wet or knocked. Check that the
audio cables will reach the connected device / TV, the supply cable will reach the electrical socket and that it
will not become a trip hazard.
Make a light pencil mark on the wall at the top edge of both fixing brackets. The mark should be positioned
Place the soundbar away from the work area and then mark two fixing points 5mm below the light pencil .
marks for the screws. These marks should be 450mm apart and level. Before drilling, use a spirit level to
check that the fixing points marked are level
If fixing to a solid masonry wall, use a masonry drill bit, drill holes to a depth of approximately 39mm and insert
the rawl plugs. Insert the screws into the rawl plugs and drive home the screws until the heads stand proud of
the wall by about 1mm.
If fixing to timber, follow the directions above, but only drill a small pilot hole for each screw and do not use
the rawl plugs provided.
If fixing to hollow plaster board walls, use a drill bit suitable for wood and replace the rawl plugs with wall
anchors appropriate for the application. Locate the fixing points into wall studs and cross braces where
possible.
Locate the soundbar onto the screw heads and check that the screws are fully engaged into the keyhole
mount before releasing your hold.
1.
2.
3.
4.
5.
6.
7.
8.
If you require any technical guidance or find that your product is not operating as intended, a simple solution can often be found in theTroubleshooting section of these instructions
450mm
Place the soundbar in the desired position and using a spirit level check that the soundbar is le vel.
centres of the mounting brackets are 85mm from each end. Pitch
between them 450mm . You can use the soundbar as a template to get the right mounting position.

Other information
Technical Specification
18
Or by calling one of our experts on 0345 6040105
Model
Rated voltage (adaptor)
Adaptor output
Class rating(adaptor)
Power consumption (rated max)
Power consumption (standby)
Audio output (max @10% THD)
Remote battery
Bluetooth supporting profiles
Operating conditions
Operating position
B-3363A
110-240V~50/60Hz
DC 15V 1.5A
II (double insulated)
17W
<0.5W
2x 12W RMS
CR2025
Advanced Audio Distribution Profile (A2DP)
Audio Video Remote Control Profile (AVRCP)
Temperature: 5℃ to 35℃
Humidity 5% to 90%
Horizontal
Net Weight
Dimemsions 620(W) x 67(D) x 65(H) mm
1 KG
Bluetooth Pairing Name Bush B-3363A

Product support 5

Is the volume on the connected device set at minimum or muted?
Has the correct operating mode been selected using the source / mode buttons?
The indicator should be blue for Bluetooth, yellow for optical and green
for Line in source.
Check that any Bluetooth device is correctly paired.
20
Product
support
Help is always at hand
Troubleshooting
Observation
The unit does not
work (indicator not
illuminated)
The remote control
does not work
No sound (source
indicator lit)
Bluetooth device
not detected / will
not pair
Poor sound tone /
crackling when
using Bluetooth
Sound is not
synchronised with
picture when using
Bluetooth
Line in source does
not play
Optical source does
not play
Potential cause / solution
Has the power cable been correctly plugged into the mains?
Has the POWER Button been pressed?
Does the socket that is being used have power?
Is the battery exhausted?
Has the battery been correctly fitted?
Are there obstacles in the between the remote and the sensor on the main unit?
Is the remote too far away from the sensor?
Have you selected correct SEARCH mode on your Bluetooth device?
Has Bluetooth mode been correctly selected on soundbar using the BT button?
Have you delayed searching? Try to pair within 2 minutes of switching on soundbar.
Is another device already paired with the soundbar?
Have you found ‘Bush B-3363A’ on your Bluetooth device and then selected
“pair with this device”?
Does your Bluetooth device support A2DP connection?
Is the Bluetooth device positioned over 8 – 10m from the speaker?
Are there solid objects between the Bluetooth device and the speaker?
This is normal and because of the way Bluetooth transmits the sound. For
applications where picture and sound need to be played together, use one of the
wired connection options.
Is the line in source equipment correctly connected to the soundbar?
Has the line in source been selected using the OPTICAL button? The source
indicator will be yellow when optical mode selected.
Has the play button been pressed on the optical source?
Has the play button been pressed on the line in source?
Has the line in source been selected using the LINE IN button? The source
Is the optical source equipment correctly connected to the soundbar?
indicator will be green when line in mode selected.
If you require any technical guidance or find that your product is not operating as intended, a simple solution can often be found in theTroubleshooting section of these instructions
This manual suits for next models
1
Table of contents
Other Bush Speakers System manuals

Bush
Bush BAS950BT User manual

Bush
Bush CAB-91667 User manual

Bush
Bush SR190DG User manual

Bush
Bush CBAR1000BF User manual

Bush
Bush B-3515A User manual

Bush
Bush CBAR7W Assembly Instructions

Bush
Bush BAS520BT User manual

Bush
Bush CBAR4 Assembly Instructions

Bush
Bush DC826B User manual

Bush
Bush SR215Y User manual