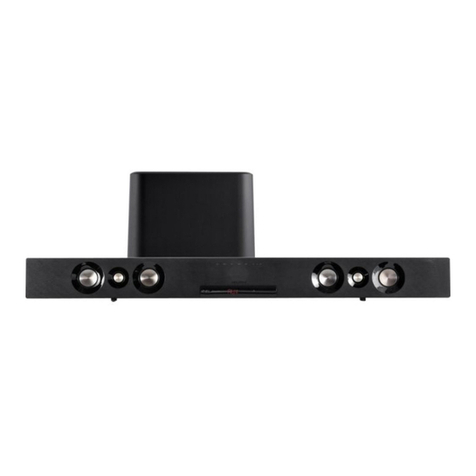
Bush BAS520BT User manual

TV SOUND BASE WITH DAB+ RADIO
AND BLUETOOTH STREAMING
BAS520BT
USER MANUAL

BAS520BT
2
ImportantSafetyInstructions
1.Readtheseinstructions.
2.KeeptheseInstructions.
3.HeedallWarnings.
4.Followallinstructions.
5.Donotusethespeakernearwater.
6.Cleanonlywithdrycloth.
WARNING:TOREDUCETHERISKOF FIREORELECTRICSHOCK,DONOTEXPOSE
THISSPEAKERTORAINORMOISTURE.
Toreducethe riskofelectricalshock,fire,etc.:
1. Donotplacenearanyheatsourcesuchasradiators, heatregisters,stoves, orother
apparatus(includingamplifiers)that produceheat.
2. Donotblockanyventilationopeningsofthisproduct.
3. The deviceshall notbeexposedtodrippingorsplashingandnoobjectsfilled withliquids,
suchasvases,shall beplacedonthedevice.
4. Protectthe powercordfrombeingwalked onorpinchedparticularlyat theplugs,
conveniencereceptacles,and at anypointwheretheyexitfromthe device.
5. PleasereadRatingLabelsonthe backofunitforpowerinputandothersafety
information.
6. Neverunplugyourunitbypullingonthe powercord. Alwaysgrasptheplugfirmlyand
pull straight outfromthe outlet.
7. Repairorreplaceallelectricservicecordsthathavebecomefrayedorotherwise
damagedimmediately.Donotuseacordthatshowscracksorabrasiondamagealong
itslength,theplug, orthe connectorend.
8. Topreventfireorshock hazard,donot usethisplugwithanextensioncordorother
outlet unless the bladescanbefullyinserted topreventbladeexposure.
9. Topreventfireorshock hazard,donot exposethisdevicetorain ormoisture.
10.Donotplaceanyheavy loadsontotheunit,anddonotsteponit, the loadmayfall and
causeseriousinjurytothe unit.
11.Donotattempt tocarryout anyserviceworkyourself. Byopening orremoving the
cabinet,youmaybeexposedtodangerousvoltageorotherhazards.Anyservicework
shouldbecarried outbyqualifiedtechnicians.
12.Duringlightningorrainingdays,unplugtheunitforadditional protectionduring
thunderstormsorwhentheunit isnotused forprolonged periods.Thiswill prevent
damagetothe unitfromlightningandpowersurges.
13.Intheinterestsofsafetyandtoavoid unnecessaryenergyconsumption, neverleavethe
unitswitchedonwhileunattendedforlongperiodsof time,e.g. overnight,whileon
holidayorwhileoutofthehouse. Switchitoffanddisconnectthemainsplugfromthe
mainssocket.
14.The batteryofremotecontrolshallnot beexposed toexcessiveheat suchassunshine,
fireorthelike.
15.Dangerofexplosion ifbatteryisincorrectlyreplaced. Replaceonlywiththesameor
equivalenttype.

BAS520BT
3
FCC Information
Thisequipment hasbeentested and found tocomplywiththelimitsforaClass Bdigital
device, pursuanttoPart15 oftheFCCRules.Theselimitsaredesignedtoprovide
reasonable protectionagainst harmfulinterferencein aresidentialinstallation.Thisequipment
generatesusesandcanradiateradiofrequency energyand, if not installedandusedin
accordancewiththeinstructions,maycauseharmfulinterferencetoradio communications.
However,thereisnoguaranteethat interferencewill not occurin aparticularinstallation.
Ifthisequipment doescauseharmfulinterferencetoradioortelevisionreception,whichcan
bedeterminedbyturningtheequipment off andon, theuserisencouragedtotrytocorrect
the interferencebyone ormoreofthefollowingmeasures:
lReorientorrelocatethe receivingantenna.
lIncreasetheseparation betweentheequipment andreceiver.
lConnecttheequipmentintoan outletonacircuit different fromthattowhichthereceiver
isconnected.
lConsultthedealeroranexperiencedradio/TVtechnician forhelp.
Thenormal functionof theproductmaybedisturbedbystrongElectro-MagneticInterference.
Ifso,simplyresettheproduct toresumenormaloperationbyfollowingtheinstructionmanual.
Incasethefunctioncould not resume, pleaseusetheproduct inotherlocation.
Changesormodificationstothisunit notexpresslyapprovedbythe partyresponsible for
compliancecouldvoidtheuser sauthoritytooperatetheequipment.
Caution:Tomaintaincompliancewiththe FCCsRF exposureguidelines,placethe unit at
least20cm fromnearbypersons.

BAS520BT
4
Contents
Important SafetyInstructions.................................................................................................2
FCCInformation....................................................................................................................3
Contents................................................................................................................................4
GettingStarted......................................................................................................................5
Front View.........................................................................................................................6
BackView.........................................................................................................................6
RemoteControl.................................................................................................................7
DAB+Mode...........................................................................................................................8
StationList........................................................................................................................8
Full Scan...........................................................................................................................8
StoringPreset Stations......................................................................................................8
Recalling Preset Stations...................................................................................................9
FMMode.............................................................................................................................10
Selecting FMMode.........................................................................................................10
ScanSetting....................................................................................................................10
Audio Setting...................................................................................................................10
BluetoothMode...................................................................................................................11
NFC(NearField Communication)........................................................................................11
AuxInInput.........................................................................................................................12
OpticalInput........................................................................................................................12
CoaxialInput.......................................................................................................................12
General Operations.............................................................................................................13
SettingSleep...................................................................................................................13
SettingAlarm...................................................................................................................13
SettingEqualiser.............................................................................................................14
SettingTime....................................................................................................................14
SettingBacklight..............................................................................................................14
SettingLanguage............................................................................................................14
FactoryReset..................................................................................................................15
SoftwareUpgrade...........................................................................................................15
SWVersion.....................................................................................................................15
Specification........................................................................................................................16

BAS520BT
5
GettingStarted
CarefullyremoveyourSound Base fromthebox. Youmaywant tostorethepackagingfor
futureuse.
Whatyoucan findinsidethepackage
nMainunitx1
nACpowercordx1
nDAB+/FMantennax1
nRemotecontrolx1+AAAalkalinebatteryx2
nInstructionmanual x1
SettingUpyourSoundBase
nThisunit isdesignedtobe positioned underyourTV.TheunitsupportsaTVuptoa
maximumdimensionof48 cm(W)x30cm(D)foritsbaseand withinamaximumloadof
30kg.
Avoid thefollowinglocations:
nWheretheunit will beexposedtodirect sunlight.
nWheretheunit will beclosetoheat radiating sources.
nWherethehumidityishighandventilationispoor.
nWhereit isdusty.
nWhereit isdamporthereisapossibilityofwaterdrippingorsplashingontounit.
AdjustingtheAntenna
ScrewtheDAB+/FMantenna to DAB/FMANT. socket. Extendthe soft antennatoensureyou
receivethebestreceptionpossibleforbothDAB+andFMradio modes.Itmaybe necessary
toadjustthepositionoftheunit and /orantennatoachievethebestsignal reception.
TurningtheUnitOn/Off
Connectthe powercordtothe ACIN socket on thebackofthe unit. Theninsert theplugon
the otherendofpowercordintothe mainssocket.Press STANDBY/ON button toswitchthe
unit onorstandby. Toswitchtheunitoff completely,unplugthepowercordfromthemains
socket.
AutomaticPowerOff Function
Theunit automaticallyturnstostandbymodeafter10 minutesifthe TVorthe external unit is
disconnected,switchedofforthe volumeistooclosetomutein Bluetooth, AUXIN1Input,
AUXIN2Input, Optical 1Input, Optical 2Input and CoaxialInput mode.
VolumeControl
Adjust theunit volumebypressing or button.

BAS520BT
6
FrontView
1. Leftspeakergrill
2. NFCforBluetoothconnection
3. SOURCE button
Presstoswitchamong DAB+,FM,
Bluetooth,AUXIN1Input,AUXIN2
Input, Optical1 Input,Optical2Input,
Coaxial Inputmodes.
4. MENU button
Presstodisplaymenuscreen.
5. PRESET button
Pressandhold tostorepresetstation.
Presstorecallstoredpresetstation.
6. LCDdisplay
7. button
Presstoupwardsbrowseoptionsin
menuscreen.
Presstodecreasevolumelevel whena
program/trackisplaying.
8. button
Presstoupwardsbrowseoptionsin
menuscreen.
Presstodecreasevolumelevelwhena
program/trackisplaying.
9. SELECT button
Presstoconfirmselectionwhenin menu
setting.
TUNE button
Presstoshiftvolumeadjusting function
totuningfunctionof and
buttons.
10.Remotecontrolsensor
11.Rightspeakergrill
12. STANDBY/ON button
Presstoswitchuniton orstandby.
BackView
1. ACIN socket
2. DAB/FMANT. socket
3. AUXIN1 socket
4. AUXIN2 socket
5. COAXIAL socket
6. OPTICAL1 socket
7. OPTICAL2 socket
8. UPDATEPORT (Pleaseleavethisfor
serviceprofessional!)

BAS520BT
7
RemoteControl
Thewayofreplacebatteries:
1.Open thebatterycompartmentcoverby
usingyourthumbdownwardpushthe
bulge ofthe back of yourremotecontrol.
2.Install2pcs newAAA sizebatteries,
referringtothemarkingsdirectioninside
thebatterycompartment.
3. Coverthebatterycompartment door.
Note:
Donotreverseanybatteryand donot mix
batterytypes, alsodonot mixoldandnew
batteries.Whendiscardyourold battery,
pleaseconsideringeco-friendly.
1. button
Presstoswitchunitonorstandby.
2. SELECT button
Presstoconfirmyourselection.
3. buttons
Presstobrowseoptions.
4. VOL+/- buttons
Presstoadjustvolume.
5. INFO button
Presstoviewstationinformation.
6. MENU button
Presstodisplaymenuoptions.
7. SLEEP button
Presstosetsleeptime.
8. MUTE button
Presstomuteunit, pressagainto
resumesound.
9. SCAN button
PresstoscanDAB+orFMstations.
10. button
Presstoskiptoprevioustrackin
Bluetoothmode.
11. button
PresstoskiptonexttrackinBluetooth
mode.
12. button
Presstopauseorplaycurrenttrackin
Bluetoothmode.
13. 1-10 buttons
Pressandhold tosavepreset
stations.
Presstorecallasaved preset station
14. SOURCE button
Presstoswitchamong DAB+,FM,
Bluetooth, AUXIN1Input, AUXIN2
Input, Optical1 Input,Optical2Input,
Coaxial Inputmodes.
15. EQ button
Presstoselectpreset equaliser.

BAS520BT
8
DAB+Mode
Whenthefirsttimeyouturnontheunit itwill automaticallysearchand storealltheavailable
stations.You should conduct an additionalFullScantoensureallstationsarepickedup and
stored.It isalsorecommendedeveryfewmonthstorunanewscantopickup anynewDAB+
that mayhavebegunbroadcasting afterpurchasingyourunit.
1. Forinitialuse, yourunit willconductafull scanandstorestationslist inmemory.
2. Oncethe scanningiscompleted,theDAB+ stationswillbedisplayedinalphanumeric
order.Thefirststationin the listwill beselected.
Note
:
1. TheDAB+ stationswillbedisplayed andstoredinalphanumericorder.
2. IfnoDAB+signal isfound,itmaybenecessaryforyou torelocateyourunit.
Station List
Thisfeatureenablesyoutoselectastationfromavailablestationlist.
1. Press MENU button andthenpress or buttontoselect StationList, press
SELECT buttontoconfirm.
2. Or, while aprogramisplaying, press TUNE buttonfirst thenpress or button
toshowstationlist.
3. Press or buttontobrowsestationslist,andthenpress SELECT buttonto
confirm.Theselectedstationwill bebroadcast.
Full Scan
Thisfeatureenablesyourunit toscanforallavailable stations.
Press MENU buttonandthen press or buttontoselect FullScan, press SELECT
buttontoconfirm.
StoringPreset Stations
Note
:
ThisisthesameforDAB+ and FMstations.
Yourunit canstoreup to10of yourfavouriteDAB+and FMstationsaspreset stations. This
willenableyou toaccessyourfavouritestationsquicklyandeasily.
1. Pressandhold PRESET button untilLCDdisplayshows ‘PresetStore<1:(Empty)> .

BAS520BT
9
2. Press or buttontoselectamongpresetnumbers1-10.
3. Press SELECT buttontoconfirm, the LCDdisplayshows ‘Preset#stored .
RecallingPreset Stations
Note:
ThisisthesameforDAB+ and FMstations.
1. Press SOURCE buttontoselectthe mode(DAB+ orFM)youwanttoplay.
2. Press or buttontoselect throughstored preset stations, andthenpress
SELECT buttontoconfirmthestationwhichyouwanttoplay.

BAS520BT
10
FMMode
SelectingFM Mode
1.Press SOURCE buttonrepeatedlytoselect FMmode.
2.Forinitialuse,it willstartat thebeginningoftheFMfrequencyrange(87.50MHz).Orit
willplaythe last FMstation youwerelisteningto.
3. TomanuallychangetheFMfrequency, while FMfrequency showsup, press TUNE
button first andthenpress or button tochangethefrequency by0.05MHzper
step.
4. Toautomaticallyscan,whileFMfrequencyshowsup, press TUNE buttonfirstandthen
pressand hold or button,yourunitwill skip backwardsorforwardsuntilit
reached thenext availablestation.
ScanSetting
Bydefault,FMscansstopatanyavailablestation.Thismayresultinapoorsignal-to-noise
ratio (hiss)fromweakstations.
1. Tochangethescansettingstostoponlyat stationswithgood signal strength, press
MENU button andthenpress or buttontoselect Scansetting, press
SELECT buttontoconfirm.
2. Press or button tobrowse ‘Strongstationsonly, andthenpress SELECT
buttontoconfirm.
AudioSetting
Bydefault,all stereostationsarereproducedin stereo. Forweakstations,thismayresultin a
poorsignal-to-noiseratio(hiss).
1. Toplayweakstationsin mono,press MENU buttonandthenpress or
buttontoselect Audio setting,press SELECT buttontoconfirm.
2. Press or button tobrowse ‘Forcedmono ,and thenpress SELECT buttonto
confirm.

BAS520BT
11
BluetoothMode
Theunit hasaBluetoothfunctionthatcan receiveasignalapprox. within 10meters.
PairtheunitwithaBluetoothdevicetolistentomusic:
1. Press SOURCE buttonrepeatedlytoselect Bluetooth mode.
2. The LCDdisplaywill show ‘BTReady .
3. ActivateyourBluetoothdeviceandselectthesearchmode.
4. ‘Digital Radio Station will appearonyourBluetoothdevice.
5. Select ‘DigitalRadio Station and enter “0000”forthe passwordifnecessary.
6. ‘DeviceConnected willshowonthe LCDdisplaywhenconnectionissuccessful.
7. Todisconnect currentBluetoothconnection,press MENU button,andthenpress
or button toselect Disconnect. Press SELECT button toconfirmdisconnecting.
NFC(NearFieldCommunication)
NFCenable youpairandconnectwithBluetoothdevicesin aeasy way.
1. Press SOURCE buttonrepeatedlytoselect Bluetooth mode.
2. MakesurethatyourNFCisturned “On”onyourmobiledevice.
3. Hold yourmobiledeviceabout2cmclosetoNFClogoonfrontpanelforreceiving an
auto-connectionbetweenyourmobiledeviceandunit.
4. Yourdevicethen will turn-onBluetoothautomaticallyandwill pairyourdevicewithunit.
Noadditional settingsarenecessary.

BAS520BT
12
AuxInInput
Thisfeatureenablestheunitplayingsoundfromyouraudiodevice.
1. Beforeconnecting tothe mainssocket,connect the Red(L)and Black(R)plugsatthe
end of the RCAcable (not supplied)tothe AUXIN1 socketwhichislocated ontheback
ofthisunit.TheninserttheotherendofyourRCAcabletoyouraudio device.
2. Connectpowercordtomainssocket,press STANDBY/ON buttontoswitchuniton.
3. Press SOURCE buttonrepeatedlytoselect AUXIN1Input mode.
Note
:
Theoperationsarethe sameforAUXIN1InputandAUXIN2Input modes.
OpticalInput
Thisfeatureenablestheunitplayingsoundfromyouraudiodevice.
1. Beforeconnecting tothe mainssocket,connect afiber-opticaldigitalcable (notsupplied)
to OPTICAL1 socketonthebackoftheunit.
2. Connectpowercordtomainssocket,press STANDBY/ON buttontoswitchuniton.
3. Press SOURCE buttonrepeatedlytoselect OPTICAL1Input mode.
Note
:
1.TheoperationsarethesameforOPTICAL1Input andOPTICAL2Inputmodes.
2.IfthereisnosoundoutputandtheOPTICALindicatorflashes,ensuretheaudio
settingoftheinputsource(e.g. TV,gameconsole,DVDplayer, etc.)isset to
PCMmode withopticalinput.
CoaxialInput
Thisfeatureenablestheunitplayingsoundfromyouraudiodevice.
1. Beforeconnecting tothe mainssocket,connect acoaxialdigitalcable (notsupplied)to
COAXIAL socketontheback of theunit.
2. Connectpowercordtomainssocket,press STANDBY/ON buttontoswitchuniton.
3. Press SOURCE buttonrepeatedlytoselect Coaxial Input mode.

BAS520BT
13
GeneralOperations
Setting Sleep
Thisfunctionenablestheunit toswitchtostandbymode byitselfafteraset sleeptime.
1.Press MENU buttonand thenpress or buttontoselect Sleep, press SELECT
button toconfirm.
2.Press or buttontoviewoptions Sleep off, 15,30,45,60 and 90 minutes,
andthenpress SELECT buttontoconfirm.Thesleepicon willshowonthe display.
3.Toviewthe setsleeptime, redoabovestep1.
4.Toturnthesleepfunctionoffwhilethesleep timerisstillcountingdown, select 'Sleep'
option, press or buttontoselect 'Sleepoff'.
Setting Alarm
Yourunitincludesdual alarms. SettingAlarm, makesurethatsettimeat first.
1. Press MENU button andthenpress or buttontoselect Alarm,press SELECT
button toconfirm.
2. Press or buttontobrowse'Alarm1Setup'and'Alarm2Setup',press
SELECT buttontoconfirm. or will flashonthe display.
3. Followyourunitsinstructionstoconfigurethe following parameters:
Alarmstates: OnorOff
Alarmtime: OnTime:00:00 (manuallysetupthe time)
Alarmdurationtime: 15/30/45/60/90minutes
Alarmsource: DAB,FMorBuzz
Lastlistened:
Lastlistened
or
saved presetstation
(not availablefor
Buzzmode).
Alarmactiveday: Daily,Once,WeekendsorWeekdays
Alarmvolume: press or button tosetthe alarmvolume
4. Whendisplayshows'AlarmSaved',thealarmsettingissuccessful.
5. Totemporarilyswitchoffalarm,press SELECT buttontoactivateSnoozefunctionwhen
thealarmsounds. Press SELECT button repeatedlycansetSnoozetimeof 5,10,15 or
30minutesinturn.
6. Toturnoff alarm,press STANDBY/ON buttonwhenthealarmsounds.
7. TocancelAlarm,refertosteps1-3tosetAlarmstatesto ‘Off'.
Note
:
SelectingSnoozeperiod timedependson whichalarmduration timeyou selected.

BAS520BT
14
Setting Equaliser
Thisfeatureenablesyou tochooseasound equalizationprofile.Eachof theequalization
setting willchange thetoneof thesoundfromyourunitwhenselected.
1. Press MENU button andthenpress or buttontoselect Equaliser,press
SELECT buttontoconfirm.
2. Press or buttontocyclethroughLive, Movie,Jazz,Rock,Pop, Flat andMy
EQsound equalization profiles, press SELECT buttontoconfirm.
3. Toset “MyEQ…” profile,press or buttontoselect TrebleorBass,and then
press SELECT buttontoconfirm. Press or button toset the levelof Trebleor
Bass.Thelevelcanbesetbetween-10to+10,and then press SELECT buttonto
confirm.
Setting Time
1.Press MENU button and thenpress or buttontoselect Time, press SELECT
button toviewoptionsasbelow:
SetTime/Date: Manuallyset-up bothTimeandDate
Auto Update:
‘Updatefrom
Any
,
‘UpdatefromDAB
,
‘Update
fromFM or ‘Noupdate
Set12/24HourFormat:
‘Set24hour or ‘Set12hour
SetDateFormat: ‘DD-MM-YYYY or ‘MM-DD-YYYY'
2.Thensettingtimeaccordingtoyourpersonal preference.
Setting Backlight
1. Press MENU button andthenpress or buttontoselect Backlight,press
SELECT buttontoconfirm.
2. Press or buttontoset backlightlevelbetween Level 0toLevel 10,then press
SELECT buttontoconfirm.
Setting Language
Thisfeatureenablesyou unit changetootherlanguages.
1. Press MENU button andthenpress or buttontoselect Language,press
SELECT buttontoconfirm.
2. Press or buttontobrowse,andthenpress SELECT buttontoselectyou
desired language.

BAS520BT
15
FactoryReset
Doingafactoryreset resetsallusersettingstodefault values, sotime/date,alarmsettings
andpresetsarelost.
1. Press MENU button andthenpress or buttontoselect FactoryReset, press
SELECT buttontoconfirm.
2. Press or buttontoselect 'Yes',andthenpress SELECT buttontoconfirm.
SoftwareUpgrade
Pleaseleavethisforserviceprofessional!
Ifyouselected SoftwareUpgrade accidentally,pleaseselect 'No'toexitthisoption.
SWVersion
Press MENU buttonandthen press or buttontoselect SWversion,press
SELECT button toconfirm.Thesoftwareversionwill showontheLCD display.

BAS520BT
16
Specification
ITEMS SPECIFICATIONS
Description: SOUND BASEWITHDAB+RADIOANDBUILT-IN
SUBWOOFER
Frequency Ranges: DAB+: 174.928 –239.200MHz
FM:87.5-108MHz
PowerSupply: ACInput:100-240Vac, 50-60Hz
AudioOutputPower: 20W rms x4+40Wrmssubwoofer
PowerConsumption: 130W(Max)
Dimension(WxDxH):
520mm x330mm x90mm
Thesymbolontheproduct oritspackagingindicatesthatthisproductmust
not be disposedofwithyourotherhousehold waste.Instead,itisyour
responsibilitytodisposeof yourwasteequipmentbyhandingitovertoa
designatedcollectionpointfortherecyclingofwasteelectricalandelectronic
equipment. Theseparatecollection andrecyclingofyourwasteequipmentat
thetimeof disposal willhelpconservenatural resourcesandensurethatitis
recycledin amannerthat protectshuman healthandtheenvironment.
Formoreinformationaboutwhereyou candropoffyourwasteforrecycling, pleasecontact
yourlocal authority,orwhereyoupurchasedyourproduct.

For more information and support visit:
www.bushaustralia.com.au
Our goods come with guarantees that cannot be excluded under the Australian
Consumer Law. You are entitled to a replacement or refund for a major failure and
for compensation for any other reasonably foreseeable loss or damage. You are also
entitled to have the goods repaired or replaced if the goods fail to be of acceptable
quality and the failure does not amount to a major failure.
YOUR WARRANTY
For any Warranty Enquires, please call:
1300 055 518
Table of contents
Other Bush Speakers System manuals

Bush
Bush DC826B User manual

Bush
Bush CBAR7W Assembly Instructions

Bush
Bush B-3515A User manual

Bush
Bush CAB-91667 User manual

Bush
Bush CBAR4 Assembly Instructions

Bush
Bush SR190DG User manual

Bush
Bush CBAR1000BF User manual

Bush
Bush SR215Y User manual

Bush
Bush BAS950BT User manual

Bush
Bush B-3363A User manual