Bush BMK40 Manual

40” Full HD Digital LED TV
Installation & Operating Instructions - Please keep for future reference 183/5700
BMK40
Important - Please read these instructions fully before installing or operating
These instructions contain important information which will help you get the best from your
television and ensure safe and correct installation and operation.
For any help concerning set up and use of your TV please call the
Customer Helpline: 0845 604 0105
Lines open: 9am - 8pm Monday to Saturday and 10am - 4pm Sunday


3
For any help concerning the set up and use of your TV please call the Customer Helpline: 0845 604 0105
Contents
Safety Information 4
Safety Instructions 5
Help & Support 6
Features 7
TV Features 7
Accessories Supplied 7
Remote Control 8
Getting Started 9
Using the remote control 9
Battery tting 9
TV control buttons 10
Inputs & Outputs 10
Connection types 11
Switching on for the rst time 12
First Time Setup 12
Basic Features 14
Menu operations 14
Picture Menu 14
Sound Menu 14
Channel Menu 15
Lock System Menu 17
Setup Menu 18
Advanced Features 20
Electronic Programme Guide (EPG) 20
Digital Teletext 20
Digital Radio 21
Common Interface (CI) 21
Channel List 21
Favorite List 21
On-Screen Displays 22
Connecting to a PC 22
Changing input source 22
Product Support 23
Fitting the base stand 23
Wall Mounting 23
Troubleshooting 24
Specications 25
Guarantee 26
Help & Support 27

For any help concerning the set up and use of your TV please call the Customer Helpline: 0845 604 0105
4
Safety Information
IMPORTANT - Please read these instructions fully before installing or operating
Thelightningashwitharrowhead
symbol, within an equilateral triangle, is
intended to alert the user to the presence
of uninsulated dangerous voltage within
the product’s enclosure that may be of
sufcientmagnitudetoconstituteariskof
electric shock to the persons.
The exclamation point within an equilateral
triangle is intend to alert the user to the
presence of important operating and
maintenance (servicing) instructions in the
literature accompanying the appliance.
Correct disposal of this Product
Waste Electrical & Electronic Equipment (WEEE)
The crossed out wheelie bin is intended to show that this appliance must not be placed with ordinary household waste
at the end of its useful life. To prevent possible harm to the environment or human health from uncontrolled waste
disposal, please keep separate from other household waste and recycle it responsibly to promote the sustainable reuse
of material resources.
Householdusersshouldcontacteithertheretailerwhereyoupurchasedtheproduct,ortheirlocalgovernmentofcefor
details of where and how you can take this item for environmentally safe recycling.
Business users should contact their supplier and check the terms and conditions of the purchase contract. This product
must not be mixed with other commercial wastes for disposal
This appliance complies with European Safety & Electrical Directives
Do not place used batteries in domestic waste.
You may return batteries to any Argos store for safe disposal.
CAUTION: Danger of explosion if battery is incorrectly replaced. Replace only with the same or equivalent type. Do not
mix old and new or different types of battery. If the product is not to be used for a prolonged time remove the batteries as
electrolyte leakage will damage the product and will invalidate the warranty
This is a double-insulated Class II appliance and must not be earthed.
Fitting a replacement plug
Should it become necessary to replace the mains plug please follow this diagram.
The BROWN wire must be connected to the LIVE (L) terminal.
The BLUE wire must be connected to the NEUTRAL (N) terminal.
Always replace the fuse with a 5 AMP BS fuse

5
For any help concerning the set up and use of your TV please call the Customer Helpline: 0845 604 0105
Safety Instructions
IMPORTANT - Please read these instructions fully before installing or operating
Unpacking and handling
Open the carton carefully and remove the polystyrene packing. Carefully lift the TV out and place onto a
rmstablesurface.Liftoffthepolybagandretainallpackagingforfutureuse.Keepallpackagingaway
fromsmallchildrenandanimals.RemoveEnergyEfciencylabelfromthescreen,thisshouldpeel
easily, do not use any tool to remove this label.
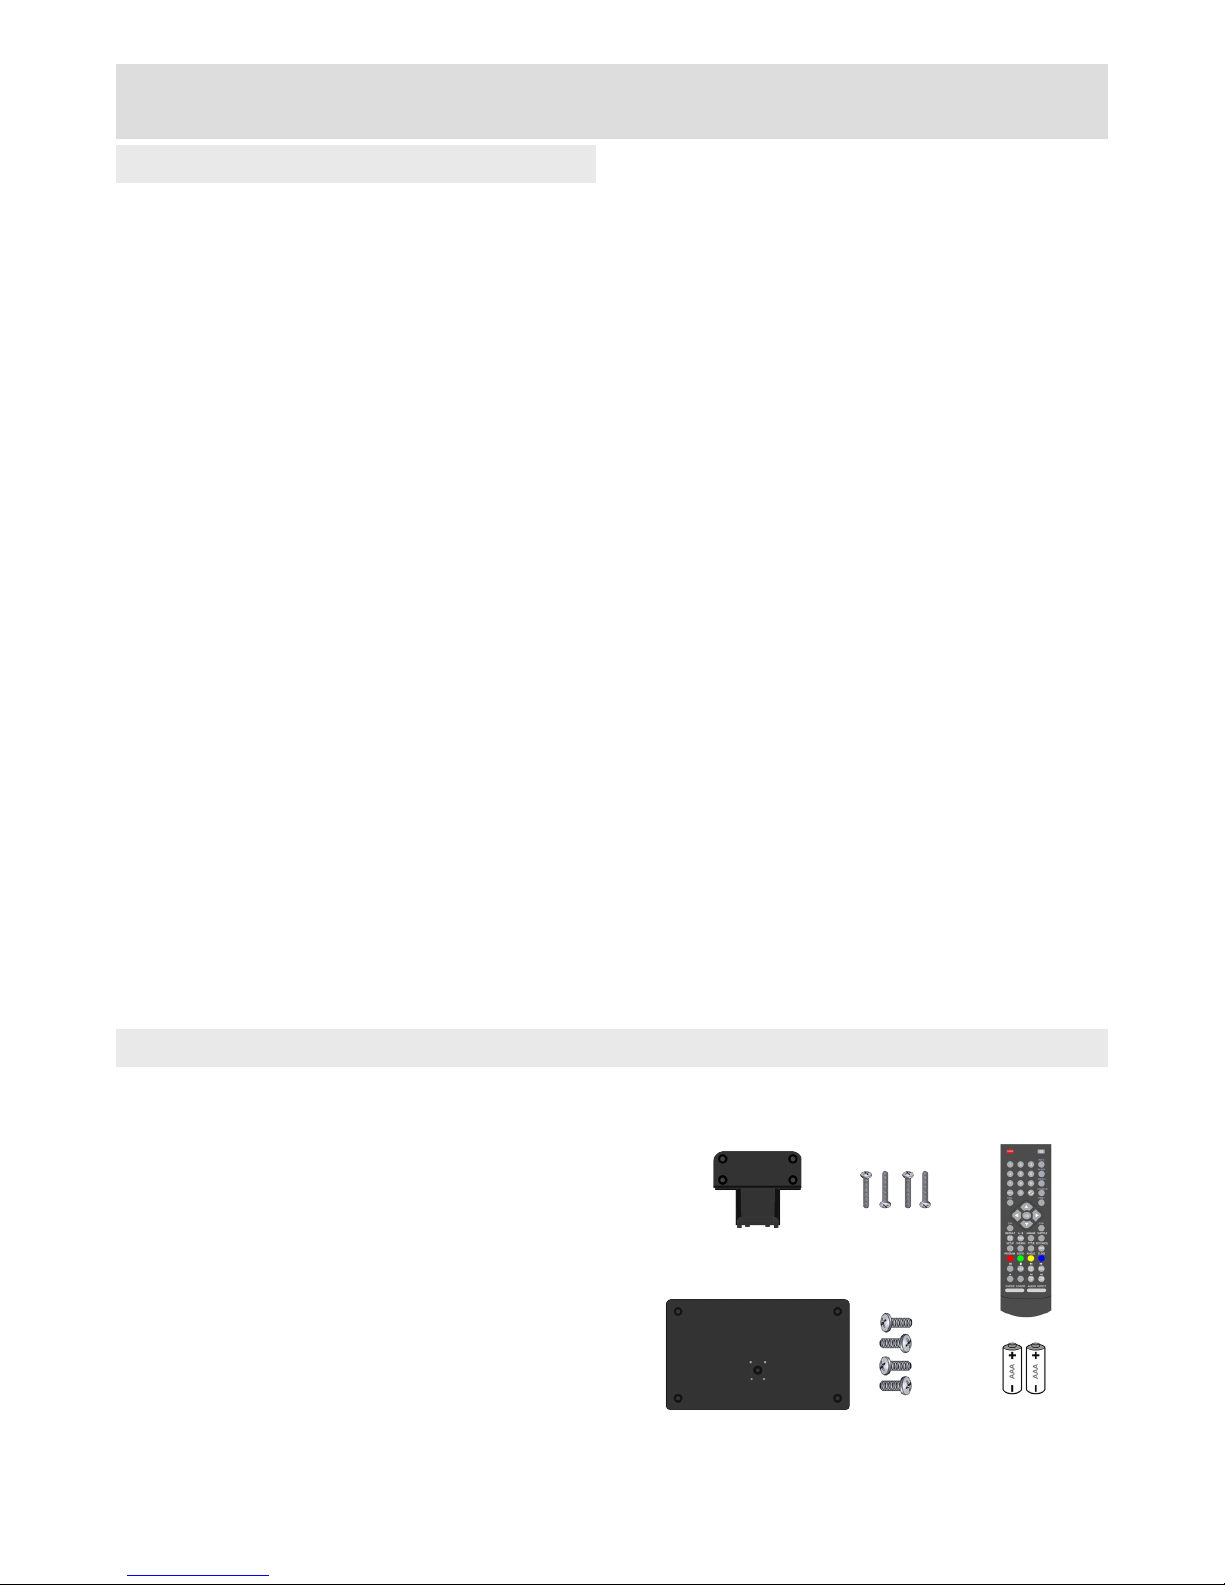
Base tting
ThisTVissuppliedwithaseparatebasetoreducepackaging.SeePage23forttinginstructionsand
wall mounting.
Positioning your TV
TheTVshouldbeplacedonarmtableorshelf.Ifplacinginacabinetensurethereissufcient
spacingforairow:10cmaboveand20cmateachside.
Ventilation slots
Do not allow objects to be dropped inside the ventilation slots, this could cause a short circuit and a
possiblere.DonotallowchainstobedangledintotheTV,aseriouselectricalshockmayoccur.
Ventilation and heat sources
Do not place material over the ventilation slots, this will cause the TV to overheat and fail. Do not place
theTVindirectsunlightornearheatsourcessuchasradiatorsorres.
Connections
When connecting the TV to external sources and the mains supply do not place wires that can be
tripped over. Do not trap or place heavy objects on the mains cable.
Candles and open ames
Do not place lighted candles (such as tealights) on the top or at the sides of the TV, or any other naked
ameneartheTVcabinet.
Disconnection device
Where the mains plug or appliance connector is used as the disconnection device, the disconnection
device shall remain operable and must be accessible at all times. To be completely disconnected from
the mains supply, the mains plug must be removed from the socket completely.
Moisture
Do not place the TV in wet or damp conditions, such as steamy kitchens, basements or other damp
places.DonotallowwaterorotheruidstoentertheTV.Donottouchthemainsplugwithwethands.
Should moisture enter the TV, disconnect from the supply and call the customer helpline.
Cleaning
Use a soft dry cloth, for stubborn stains use a soft moist cloth with a dilute mild detergent. Do not use
alcohol-baseduidsorabrasivecleanersormaterials.
LCD Screen
Do not hit or cause impact to the LCD screen. The screen consists of many individual pixels and is
easily damaged. Bright or dark dots may occur and are not covered by warranty.
Lightning
During a thunderstorm or when leaving the appliance for long periods such as holidays, disconnect the
aerial input (if external aerial) and remove the mains plug; this is to prevent power surges damaging the
product.
Headphone use
When using headphones do not use for long periods. Loud music can permanently damage your
hearing.

For any help concerning the set up and use of your TV please call the Customer Helpline: 0845 604 0105
6
The Argos Technical Helpline is here to help
Technical experts are available 7 days a week
• Simplehelpandadviceonsettingupyourdigital
equipment.
• Guidanceonconnectingotherdevicestoyour
televisionsuchasDVDplayer,Sky,homecinema
systemoragamesconsole.
• Orderspareparts,includingthatlostremote
control.
• Anyothertechnicalissuesyoumayneed
assistancewith.
Callustoday:08456040105
Local call rate applies*
Linesopen9am-8pmMondaytoSaturdayand10am-4pmSunday.
*Calls to Argos enquiry lines may attract a charge and set up fee from residential
lines depending on your call plan/tariff. Mobile and other providers costs may vary,
see www.bt.com/pricing for details.
For security and training purposes, telephone calls to and from customer service
centres may be recorded and monitored. Calls from Republic of Ireland will attract
international call charges.
Help & Support

7
For any help concerning the set up and use of your TV please call the Customer Helpline: 0845 604 0105
Features
TV Features
Accessories Supplied
Features
• Full HD Digital LED Television
• Fully integrated Digital Freeview (DVB-T)
• 7-Day Electronic Programme Guide (EPG)
• Now & Next Guide
• 3 x HDMI sockets (with HDCP)
• Stereo 10W Speakers
• SRS TruSurround HD
• Multi-Language On-Screen Display:
English, German, French, Italian, Spanish,
Dutch, Portuguese
• SCART socket
• Composite Video (CVBS) socket
• Component Video socket
• Digital Teletext
• Digital Subtitles
• Headphone socket (3.5mm)
• Digital and analogue tuners
• Automatic setup & tuning
• Manual tuning
• Sleep timer
• Parental controls
Installation & Operating Instructions
Quick Start Guide
Remote Control
Stand Stem
Stem Screws (long) x 4
Stand Base
Base Screws (short) x 4
Batteries: AAA x 2
SRS TruSurround HD™ creates an immersive,
feature-rich surround sound experience from two
speakers, complete with rich bass, high frequency
detail and clear dialog.

For any help concerning the set up and use of your TV please call the Customer Helpline: 0845 604 0105
8
Remote Control
1. POWER: Switch TV in and out of standby
2. 0-9 Numeric keys: Number or channel entry
3. EPG: Display Electronic Programme Guide
4. VOL-: Decrease volume
5. OK:Conrmselection,showchannellist
6. Left arrow: Navigation
7. Down arrow: Navigation
8. CH-: Channel down
9. Freeze: Freeze picture on screen
10. TXT: Display/remove teletext
11. GREEN: Option button
12. RED: Option button
13. List: Display channel list
14. P Mode / S Mode: Cycle picture and sound
modes
15. MUTE: Toggle volume muting
16. INFO: Display channel/programme
information
17. SLEEP: Cycle sleep timer length
18. MENU: Display main settings menu
19. Swap: Swap to last channel (DTV)
20. SOURCE: Select input source
21. Vol+: Increase volume
22. Up arrow: Navigation
23. Right arrow: Navigation
24. CH+: Channel up
25. LANGUAGE: Cycle language options (DTV)
26. SUBTITLE: Display subtitles (DTV)
27. EXIT/CANCEL: Exit menu or cancel selection
28. YELLOW: Option button
29. BLUE: Option button
30. DTV/Radio: Toggle TV or radio mode (DTV)
31. FAV.: Display favourite list (DTV)
32. Page Up: Navigation
33. Page Down: Navigation
34. Audio / Aspect: Cycle audio mode and
picture size settings (audio V.I mode for
visually impaired)

9
For any help concerning the set up and use of your TV please call the Customer Helpline: 0845 604 0105
Batterytting
• Open the battery cover
• Fit 2 x AAA batteries. Ensure the battery po-
larities are correct (+ to +, - to -)
• Replace the battery cover
Battery Safety & Disposal
Topreventinjury,donotbreakopenorthrowexhaustedbatteriesinare.
Do not mix batteries, old and new, carbon or alkaline.
Do not use rechargeable batteries.
Remove batteries if not using the remote control for long periods to prevent leakage.
If the batteries do leak, clean the compartment with soapy water and scrape any residue from the contacts.
Do not touch or ingest battery residue.
Should you swallow chemicals leaked from a battery, please urgently consult a medical adviser.
Using the remote control
• Point the remote control at the REMOTE
SENSOR on the TV
• The recommended operating distance is up to
3 metres (10 feet)
• Bright sunlight shining onto the remote sensor
may cause the TV not to respond correctly
Do not place used batteries in domestic waste
You may return used batteries to any Argos store for safe disposal
Getting StartedGetting Started

For any help concerning the set up and use of your TV please call the Customer Helpline: 0845 604 0105
10
Getting Started
• CH+: Increases channel selection by 1 with
each press.
• CH- : Decreases channel selection by 1 with
each press.
• VOL+: Increases volume level. In menu mode
increases values.
• VOL- : Decreases volume level. In menu
mode decreases values.
• MENU: Select the menu function. If in a sub
menu, will revert to previous menu level.
• SOURCE: Select input source
• POWER: Turn TV on from standby. Also
return TV to standby
TV control buttons
Inputs & Outputs

11
For any help concerning the set up and use of your TV please call the Customer Helpline: 0845 604 0105
Getting Started
Connector Name Type Description Purpose
TV Tuner Input Aerial (RF) input
Required for receiving Digital
Freeview, also used for aerial
distribution systems, such as
Sky or cable
HDMI Input HighDenition(HD)digital
video and audio input
Connecting: Blu-ray, games
consoles, Sky HD, HD
camcorders
SCART Input StandardDenition(SD)
video and audio input
Connecting: VCR, DVD
players, games consoles,
satellite receivers
YPbPr Input Component HD analogue
video input
Connecting (video): games
consoles, HD camcorders,
Blu-ray
Additional cable required
VIDEO
(yellow) Input Composite SD video input
Connecting (video): games
consoles, DVD players,
camcorders
L R
(white / red) Input Audio input for VIDEO and
YPbPr
Connecting (audio): games
consoles, DVD players,
camcorders
VGA Input PC video input Connecting (video): personal
computers, laptops
PC AUDIO Input PC audio input Connecting (audio): personal
computers, laptops
- CI Input Common Interface
Conditional Access Module
(CAM) required for viewing
Top Up TV
Headphones Output 3.5mm headphones Connecting: headphones
SPDIF Output PCM Digital Audio Connecting:digitalampliers,
surround sound systems
- USB - - Service use only
Connection types

For any help concerning the set up and use of your TV please call the Customer Helpline: 0845 604 0105
12
Getting Started
Switchingonforthersttime
Once you have mains power and an aerial
connected, you are ready to switch your TV on
and complete the setup and tuning:
• Press POWER button on remote control or TV
• LED on front of TV should turn from RED to
GREEN
• Welcome message will be displayed, press
OK to continue
OSD Language
Choose on-screen display language
Press◄►toadjust
Press▼tocontinue
Mode Setting
Choose Home Mode for normal viewing,
choose Store Mode for bright environments
Press◄►toadjust
Press▼tocontinue
Country
Press◄►toadjust
Press▼tocontinue
Auto Scan
Choose DTV for digital Freeview, choose ATV
for other systems, such as Sky
Press◄►toadjust
Press▼tocontinue
Start
Press►orOK to begin the automatic tuning
First Time Setup

13
For any help concerning the set up and use of your TV please call the Customer Helpline: 0845 604 0105
Getting Started
Tuning progress will be shown
As the progress bar moves along any channels
found will be indicated.
If you are in a mixed-signal area the region
selector screen will be shown.
This allows you to select which local transmitter
you would like to tune to.
Country Code
Choose from countries found.
Press◄►toadjust
Press▼tocontinue
Primary Region
Choose from tuning regions found
Press◄►toadjust
Press▼tocontinue
Secondary Region
Choose from main local transmitters found
Press◄►toadjust
Press▼tocontinue
Tertiary Region
Choose from local transmitters found
Press◄►toadjust
Press▼tocontinue
Conrm
Press►orOK to complete
Once tuning has completed the TV will revert to
therstchannelfound.
That’s it, you’re done!
No signal?
Missing channels?
Picture breaking up?
Sounds like an aerial issue...
Digital Freeview requires a fairly strong, high quality aerial signal to work fully: a professionally installed outdoor aerial system is
recommended.
An indicator of an inadequate aerial signal is the picture and/or sound breaking up, channels missing, or no channels found at all.
If tuning to a satellite system, such as Sky, remember to choose ATV as the Auto Scan type.

For any help concerning the set up and use of your TV please call the Customer Helpline: 0845 604 0105
14
Basic Features
Menu operations
Picture Menu
All settings and options are accessed using the
MENU button
Navigateusingthe▲▼◄►andOK buttons
Exit sub-menus using MENU
Exit completely using Cancel/Exit
Picture Mode: Standard, Mild, Personal,
Dynamic
Brightness: Adjust picture brightness
Contrast: Adjust picture contrast
Sharpness: Adjustedgedenition
Saturation: Adjust picture colour depth
Hue (NTSC only): Adjust picture hue
Color Temp: Standard, Cool, Warm
Aspect Ratio: Full, Zoom1, Zoom2, 4:3
Advanced Settings:
NR: Set noise reduction: Off, Weak, Medium,
Strong
MPEG NR: Set MPEG noise reduction: Off,
Weak, Medium, Strong
Dynamic Contrast: Automatically adjust picture
detail and brightness: Off, Weak, Medium,
Strong
Sound Menu
Sound Mode: Standard, Music, Personal, Movie
Treble: Adjust higher frequency audio
Bass: Adjust lower frequency audio
Balance: Adjust level between left and right
speakers
SRS TruSurround HD: Surround sound effect:
On or Off (switch Off to adjust EQ settings)
EQ Setting: 7-band graphic equaliser with
presets: Off, Rock, Pop, Jazz, User
AVL: Automatic volume limiting: On or Off
SPDIF: Digital audio output: Off, Auto, PCM
Audio Description:
Mode: On or Off
Volume: Adjust AD volume separately
Sound Type: For use in dual language
broadcasts: Stereo, Dual I, Dual II, Mixed
PLEASE NOTE
SRS TruSurround HD must be switched off to
change Sound Mode and EQ settings.
Adjusting any picture or sound settings will
automatically change the mode to Personal.
If you wish to reset all picture and sound
adjustments: MENU > Setup > Reset

15
For any help concerning the set up and use of your TV please call the Customer Helpline: 0845 604 0105
Basic Features
Channel Menu
Auto Scan
Country:Choosecountryofinstallation:UK,
Denmark, Finland, France, Germany, Hungary,
Italy, Netherlands, Norway, Poland, Portugal,
Russia, Serbia, Spain, Sweden
Mode: DTV, ATV, DTV+ATV
Start:Press►orOK to start tuning scan
Manual Scan
Digital Manual Scan
Digital Scan:CH--:Press◄►toadjust
channel
Start:Press►orOK to start tuning scan
Frequency: Channel frequency in MHz
(information only)
Signal: Signal strength for selected channel
(information only)
Analog Manual Scan
Analog Scan:--MHz:Press◄►toadjust
frequency
Channel to Save:Press◄►toadjustchannel
number to save to
Color System:Press◄►toadjust:Auto,PAL,
SECAM
Sound System:Press◄►toadjust:Auto,DK,
BG, I or L
AFC: Auto-FrequencyControl:Press◄►to
adjust: On or Off
Start:Press►orOK to start tuning scan

For any help concerning the set up and use of your TV please call the Customer Helpline: 0845 604 0105
16
Basic Features
Channel Edit
Move and delete installed channels.
Highlight channel to edit, then press:
RED: Delete selected channel
GREEN: Skip selected channel (channel
will be skipped when using CH+/CH-)
BLUE: Move selected channel (press
BLUE once to “pick up” then press BLUE
again when moved to required position)
To re-install a deleted channel, or to reset all
channel positions: MENU > Setup > First Time
Setup
Common Interface
Only available when CAM module inserted.
Display details of CAM module and card inserted.
CAM module and card available from subscription
service provider
Signal Information
Displays signal details for DTV channels, for
information only.

17
For any help concerning the set up and use of your TV please call the Customer Helpline: 0845 604 0105
Basic Features
Lock System Menu
Allows password control of channel access and
tuning functions.
Enter password to access (default 0000)
Channel Locks:Lockspecicchannels:Inmenu,
select channel and press OK to lock.
Parental Rating: Lock adult channels (if channel
supports)
Lock Keypad: Lock TV control buttons (remote
functions not affected)
New Password: Change password
Clear Lock: Remove any set locks
PLEASE NOTE: Enabling the lock system locks all tuning
options (Auto Scan, Manual Scan, First Time Setup)
When changing the password please remember to note the
new password. If password lost see troubleshooting.

For any help concerning the set up and use of your TV please call the Customer Helpline: 0845 604 0105
18
Basic Features
Setup Menu
OSD Language:Press◄►toadjust:Choose
on-screen display language: English, German,
French, Italian, Spanish, Dutch, Portuguese
Audio Languages:Press◄►toadjust:
Choose primary and secondary audio language
(programme dependent)
Subtitle
Mode:Press◄►toadjust:OnorOff
Subtitle Primary Language (programme
dependent):Press◄►toadjust
Subtitle Secondary Language (programme
dependent):Press◄►toadjust
Hearing Impaired:Press◄►toadjust:Onor
Off
Teletext
Digital Teletext Language (programme
dependent):Press◄►toadjust
Decoding Page Language (programme
dependent):Press◄►toadjust
Mode Setting
Adjusts backlight brightness to suit different
environments.Press◄►toadjust.
Home Mode: Standard brightness,
recommended for general home use.
Store Mode: Full brightness, recommended for
shop display use or very bright environments,
this mode greatly increases power
consumption.

19
For any help concerning the set up and use of your TV please call the Customer Helpline: 0845 604 0105
Basic Features
Time Settings
OSD Time:Press◄►toadjust:Off,10,20,
30, 60 seconds
Sleep Timer:Press◄►toadjust:Off,5,15,
30, 60, 90, 120, 240 minutes
Auto Sleep:Press◄►toadjust:Off,3,4,5
hours
Time Zone:Press►toenter,▲▼toadjust
Time: Press►toenter,▲▼◄►toadjust
Auto Sync: Set time via DTV signal: On or
Off
Date: Current date
Time: Current time
Time zone, date and time settings will be set
automatically when tuned in to a digital TV signal.
First Time Setup
Reset and delete all stored channels and menu
options.
Press►orOK to enter, follow the guide on Page
12 to complete.
This reset method is recommended when
retuning messages are received from
broadcasters.
PLEASE NOTE: All stored preferences are deleted
during First Time Setup, including any favourite lists or
password locks.
Reset
To reset all menu options, such as picture and
sound settings. Tuning data is retained.
Press►orOK to enter
Press◄toselectYes, press OKtoconrm

For any help concerning the set up and use of your TV please call the Customer Helpline: 0845 604 0105
20
Advanced Features
Electronic Programme Guide (EPG)
To access your 7-day electronic programme guide
press the EPG button.
The EPG shows TV and radio programme times
and details up to 7 days ahead and also allows
programme reminders to be set.
Navigateusingthe▲▼◄►andOK buttons
◄►willmovebetweenchannelandprogramme
▲▼willmoveupanddownchannelsand
programmes
RED: Move back in time (to present)
GREEN: Move forward in time (up to 7 days)
YELLOW: Display reminder schedule
BLUE: Set programme reminder
Reminder
Frequency:Press◄►toadjust:Off,Once,Daily,
Weekly
Channel:Press◄►toadjust
StartTime:Press►toenter
Save: Press OK to save reminder
Digital Teletext
Digital teletext is available on certain channels or
broadcasts.
To access press TXT, navigate using the
▲▼◄►andOK buttons
To access BBC Red Button services, such as
interactive broadcasts, press the RED button
To exit press the TXT button
Not all channels provide digital teletext, services
are broadcast dependent.
Table of contents
Other Bush TV manuals

Bush
Bush DLED65UHDHDRS User manual

Bush
Bush LE-32GKA User manual

Bush
Bush DLED50UHDHDRSA User manual

Bush
Bush 39/401UHD User manual

Bush
Bush 24/207FDVD User manual

Bush
Bush HA24H4212LEKB User manual

Bush
Bush DLED65UHDHDRSA User manual

Bush
Bush ELED24HDSDVDWB User manual

Bush
Bush VL24HDLED User manual

Bush
Bush HA42U5232MEKB User manual

Bush
Bush ELED22134FHDDVDCNTD Installation instructions

Bush
Bush DLED50UHDHDRS User manual

Bush
Bush 40/402UHD User manual

Bush
Bush LE-22GY14R+DVD Manual

Bush
Bush LE-40GCL-A-T Manual

Bush
Bush DLED32FHDS User manual

Bush
Bush LED19T3 User manual

Bush
Bush DLED50UHDHDRSB User manual

Bush
Bush SuperSLim LT19M4 User manual

Bush
Bush DLED32165HDS Manual