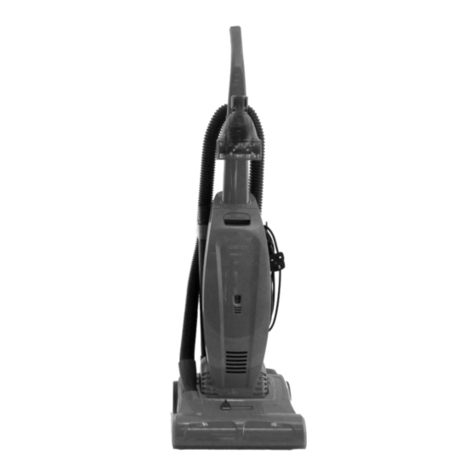
Bush VUS34AE2O User manual

Bush Upright Vacuum Cleaner
Model: VUS34AE2O
Instruction manual

If you require any technical guidance or find that your product is not operating as intended, a simple solution can often be found in the
Troubleshooting section of these instructions
2
You’ll soon be enjoying your new Bush Upright
Vacuum Cleaner
It all begins here, with your instructions. Don’t
worry, there’s nothing too technical coming up.
Just simple, step-by-step guidance to get you up
and running quickly. Sound good? Then let’s get
started.
We’re here to help you get the most from your Bush Upright Vacuum
Cleaner.

3
Or by calling one of our experts on 0345 604 0105
Power source
Ventilation heat and moisture
Warning
Plug / Wiring advice
6
7
8
9
Getting to know your vacuum cleaner
Accessories 12
Part identification 13
18
Using your vacuum
Operating the appliance
How to use accessories 19
Nozzle use 19
Assembly 16
Assembling your vacuum cleaner
22
22
Maintenance
Emptying the dust container
23Cleaning the filters
24How to clear a blockage
25How to maintain brush roll bar
26How to replace brush roll bar or belt
28Other information
28Recycling electrical products
Care and maintenance
6
Product support
30
31
32

If you require any technical guidance or find that your product is not operating as intended, a simple solution can often be found in the
Troubleshooting section of these instructions
4

1

FOR HOUSEHOLD USE ONLY.
When using the vacuum cleaner,basic safety precautions
should always be observed, including the following:
Only use the vacuum cleaner indoors on dry surfaces. Do not
handle the plug or vacuum cleaner with wet hands. Do not
use outdoors or on wet surfaces.
Turn o the vacuum cleaner controls before disconnecting or
connecting from the mains supply.
Always unplug the vacuum cleaner before connecting or
disconnecting the vacuum hose and accessories.
Children should be supervised to ensure that they do not play
with the appliance.
This appliance can be used by children aged from 8 years and
above and persons with reduced physical, sensory or mental
capabilities or lack of experience and knowledge if they have
been given supervision or instruction concerning use of the
appliance in a safe way and understand the
hazards involved.
Only use as described in this manual. Only use recommended
attachments.
Do not use the vacuum cleaner if it has been dropped, dam-
aged, left outdoors or dropped into water.
Do not use the vacuum cleaner with a damaged cord or plug.
If the supply cord is damaged, please consult qualified
technician.
Do not pull or carry by cord. Do not use the cord as a handle,
close a door on the cord or pull cord around sharp edges or
corners. Do not run the vacuum cleaner over the cord. Keep
Safety information
Important - Please read these instructions fully
before assembling or operating
If you require any technical guidance or find that your product is not operating as intended, a simple solution can often be found in the
Troubleshooting section of these instructions
6

the cord away from heated surfaces.
Do not put any objects into openings. Do not use with any
openings blocked and do not restrict air-flow. Keep all open-
ings free of dust, lint, hair or anything that might reduce
airflow.
Keep hair, loose clothing, fingers and all parts of the body
away from openings and moving parts.
Do not pick up hot coals, cigarette butts, matches or any
hot, smoking or burning objects.
Do not pick up flammable or combustible materials (lighter
fluid, petrol, kerosene etc.) or use in the presence of explosive
liquids or vapours.
Do not vacuum up harmful or toxic material (chlorine, bleach,
ammonia, drain cleaner etc.).
Do not vacuum up hard or sharp objects such as glass, nails,
screws, coins, etc.
Do not use without all of the filters in place.
Take extra care when vacuuming on stairs.
Keep vacuuming area well lit.
Store the vacuum cleaner in a cool, dry area.
Turn o the on/o switch before unplugging the vacuum
cleaner.
Only use CE-approved 13 amp extension cords.
Non-approved cords may overheat. Care should be taken to
arrange the cord so that the cord cannot be tripped over.
Safety information
Important - Please read these instructions fully
before assembling or operating
7
Or by calling one of our experts on 0345 604 0105

WARNING: Always switch o and unplug the vacuum clean-
er from the electrical outlet before assembling, opening or
emptying the dirt container, connecting/ disconnecting the
attachments, or carrying out maintenance or troubleshooting
checks.
CAUTION: The vacuum cleaner is a very powerful unit.
Before plugging the cord into the electrical outlet, make sure
the switch is in the ‘o’ position. Hold the vacuum cleaner
firmly when starting and in use.
IMPORTANT: If the inlet, hose or extension tube is blocked,
switch o the vacuum cleaner and remove the blockage(s)
before re-starting the vacuum cleaner.
IMPORTANT: We recommend that filters should be checked
and cleaned periodically. For washable filters, ensure they are
completely dry before inserting back into the vacuum cleaner.
Do not wash with detergents. Only use warm water, max
40°C.
PLEASE KEEP INSTRUCTIONS
FOR FURTHER USE
Safety information
Important - Please read these instructions fully
before assembling or operating
If you require any technical guidance or find that your product is not operating as intended, a simple solution can often be found in the
Troubleshooting section of these instructions
8

Safety information
Important - Please read these instructions fully
before assembling or operating
Plug / Wiring advice
The wires in this mains lead are coloured in accordance with the
Non-rewireable plug
refitted
. If the fuse cover is lost or damaged, the appliance must not
be used.
Rewireable plug
The colours of the wires in the mains lead of this appliance may not
correspond with the coloured markings identifying the terminals in a
rewireable plug. Rewireable plugs should only be replaced by a
suitably competent person. If in doubt, consult a qualified
e
Should the fuse need to be replaced, a 13 amp fuse approved to
BS1363/A must be used
lectrician.
the terminal marked with the letter N
to the terminal marked with the letter L
This appliance may be fitted with a “non-rewireable” plug. If you need
to change the fuse in a “non-rewireable” plug, fuse cover must be
9
Or by calling one of our experts on 0345 604 0105

If you require any technical guidance or find that your product is not operating as intended, a simple solution can often be found in the
Troubleshooting section of these instructions
10

vacuum cleaner
2

Vacuum cleaner
Accessories
Accessories: long Crevice tool, Brush tool, upholstery tool.
If you require any technical guidance or find that your product is not operating as intended, a simple solution can often be found in the
Troubleshooting section of these instructions
12
Getting to know your vacuum
You’ll be up and running in no time
Vacuum cleaner
Handle
Crevice tool
Dusting brush
Upholstery tool

Part identification
13
Or by calling one of our experts on 0345 604 0105
Getting to know your vacuum
You’ll be up and running in no time
1. Handle
2. Dust Container Clamp
3. Dust Container Assembly
4. Height adjustment Button
5. Brush Assembly
6. Wheel
7. Cleaner Release Button
8. Power on/o button
9. Crevice Tool
10. Power Cord Holder
11. Brush Tool
12. Handle Clamp
13. Upholstery tool
14. Handle Hose
15. Power Cord

If you require any technical guidance or find that your product is not operating as intended, a simple solution can often be found in the
Troubleshooting section of these instructions
14

Assembling your vacuum cleaner
3

Assembling your vacuum
Bringing it all together
Assembly
If you require any technical guidance or find that your product is not operating as intended, a simple solution can often be found in the
Troubleshooting section of these instructions
16
Vacuum cleaner
with dust cup.
Push loose end of
hose securely
onto hose inlet.
Store accessories
on back of
vacuum cleaner.
Wrap cord onto
upper and lower
cord hooks.
Align upper and
lower cord hooks
and press to snap
in place. Upper
cord hook should
rotate freely.
Slide handle into
top of vacuum
cleaner. Push
down until it
clicks.
Loop hose over
hose retainer.
Insert bent end of
hose into opening
at back of dust cup.
Twist hose
clockwise to lock.
Click!

Using your vacuum
4

Operating the appliance
Using your vacuum
Let’s get started
If you require any technical guidance or find that your product is not operating as intended, a simple solution can often be found in the
Troubleshooting section of these instructions
18
Turn height adjustment knob to
adjust from Low to high pile carpet or
hard floor setting as appropriate.
Step on power on/o button to
turn vacuum cleaner on.
Step on again to turn o
Step on cleaner release
button to lower handle
into position for
vacuuming floors.
Empty dust container after every use
Press release button
and lift o dust
container.
To empty debris, press
lever to release bottom
lid.
Put plug into power socket

How to use accessories
1. Place vacuum in upright position.
2. Turn height adjustment knob to highest position.
3. Pull up on hose connection to release hose end from hose inlet (Fig.1).
4. Push end of hose into top of handle and twist clockwise until it clicks
(Fig.2).
5. Press handle release latch and pull out handle with wand (Fig.3).
6. To attach accessories, push desired tool onto end of wand (Fig.4).
7. To use accessories without handle and wand, push desired tool directly
onto end of hose (Fig.5).
Caution: When using tools, always place handle in upright position.
Using your vacuum
Let’s get started
Nozzle use
Nozzle
Cleaning area
Floor &
carpets
Furniture
Between
cushions
Curtains
Stairs
Walls
Skirting
edges
Radiators
Floor head
Brush tool
Crevice tool
Upholstery tool
19
Or by calling one of our experts on 0345 604 0105
1 3
Click!
2
4
5
Make sure vacuum cleaner is turned o while attaching tools.

If you require any technical guidance or find that your product is not operating as intended, a simple solution can often be found in the
Troubleshooting section of these instructions
20
Table of contents
Other Bush Vacuum Cleaner manuals

Bush
Bush BVC1401 User manual

Bush
Bush BU-203 User manual

Bush
Bush VCS35B15K0D-70 User manual

Bush
Bush V8211_03 User manual

Bush
Bush VCM40A16L0B-70 User manual

Bush
Bush VHW01B17W User manual

Bush
Bush BU-202 User manual

Bush
Bush VCM40A16L0B-70 User manual

Bush
Bush BU-204 User manual

Bush
Bush BC-402 User manual