BVV CK30TV3 User manual

Rev01 10/31/2019
1251 Frontenac Rd. Suite 150
Naperville, IL 60563
(311) 281 - 0154
www.shopbvv.com

Rev01 10/31/2019
Introduction
The 30 Ton Rosin Press is a pneumatic-operated, dual heating Rosin Press. Featuring automatic press
and timing operation, this unit is designed with the professionals in mind. Please read this user
manual carefully and keep it for future reference. If you need any assistance, please contact us at
support@shopbvv.com
Safety Information
Carefully read all warnings and instructions, and inspect unit for damage prior to use. Do not use if
the unit appears damaged, bent, warped, cracked, or otherwise unsafe for operation.
Warning! Shock hazard. Do not open or modify electrical equipment. No user serviceable parts.
Warning! Crush/pinch hazard. Keep hands clear of pressing plates.
Caution: Plates may be hot!
Figure 1: 30,000lb ROSIN PRESS
1: Pneumatic Foot Pedal
2: Upper Heat Plate
3: Lower Heat Plate
4: Timer Start Button
5: PID Controller
Getting Started
Unbox and place the unit and pedal on a sturdy surface. After inspecting the unit and removing the
foam shipping pad between the plates, connect the supplied power cable. When the unit is switched
on, the screens will take a few seconds to boot, then it will enter Display Mode and begin to heat.

Rev01 10/31/2019
Set Temperature:
Set Timer:
Press the power
switch to turn on the
machine, then press
the “SET” button for
2 seconds
Then the digital
controller will show
“St”
Press arrows button
“▲”or “▼” to set
desired time (in
Seconds)then press
the “SET” button for
2 seconds
Figure 2: Display Mode
PV: This displays the current temperature value
SV:This displays the timer value
When the unit is heating, a Heating Element Indicator will illuminate to the left of the temperature
display. As the plates heat to your set-point, this indicator will occasionally blink on and off to
maintain a stable temperature.
Operation
1. Make sure the power plug is properly connected to the wall socket.
2. Attach the air hose to both the pneumatic pedal, and the back of the unit.
3. Rotate the Reservoir pressure relief on the pedal in a counterclockwise motion to get
the pressure required.
4. Adjust the pressure regulator on your compressor (shown below).
5. Press the power switch on.
Press the power
switch to turn on the
machine, then press
the “SET” button
Then the digital
controller will show
the word “SH”
Press arrow buttons
“▲”or “▼” to set
desired temperature
(°F)

Rev01 10/31/2019
6. Set temperature and the time values as desired. The buzzer will sound when the
temperature reaches the set value.
7. Place rosin material on plate, then step on pedal to bring plates together.
8. Press the start button (meantime the sound will stop) and the timer starts to count
down.
9. The buzzer will sound again when the set time is up. Step on the top pedal to retract the
plates. The buzzer will stop, and the press work is finished.
10. Retrieve material and repeat the process as desired.
Adjusting Pressure
To adjust the maximum amount of pressure applied, you can limit the pressure regulator on the air
compressor, or adjust the duration of pressing the foot pedal. The maximum supply air pressure is
120psi. The gauge readout on the foot pedal does not directly display the amount of pressure on your
heat plates, it will give the hydraulic pressure within the hose. To calculate the exact pressure on the
press plates, please see the equation below and solve for F:
π r2x Ph= F
F/ (plate size) = Pp
r= radius of the hydraulic cylinder (1in)
Ph= pressure in hydraulic system shown on foot pedal gauge (psi)
Pp= pressure on press plates
F= total force applied to press plates (lbs)
Plate Size = 6in x 8in = 48in2
Ex: 5000psi gauge readout
π (1in)2x 5000psi = 15707lbs
15707lbs /48in2= 327psi
Maintenance
•Different materials will require different temperature and time settings.
•This machine is not suitable for children to use, or for food processing.
•Turn off the machine and unplug the power cord when the machine is not in use.
•For prolonged life of heat press, the recommended max temperature is 250°F.
•Always use heavy duty parchment paper when pressing to protect the heat plates.
Specifications
Brand
BVV
Model
CK30TV3
Heat Plate Size
6”X8”
Temperature Range
0-482 °F
Timer Range
0-999 Seconds
Pressure Range
0-30,000lbs
Voltage
110V
Power
1200W
Product Size
15”L x 12”D x 20”H
Product Weight
82KG/180lbs

Rev01 10/31/2019
Troubleshooting
To improve performance results, try a small sample first. This press has been designed to maximize yields on
partially dried botanical samples between 20-25grams. Ideal settings can vary widely depending on the quality
and fineness of the source material.
Nothing happens when the machine is turned on.
1. Inspect the plug for proper connection or damage.
2. Inspect the fuse for potential burn out.
3. Inspect the power switch or digital controller for damage.
Indicating light is on but the display screen is black.
Inspect the #5 cable inside the railway transformer. If the connection is loose, it may need to be
adjusted. The transformer may be faulty if the cable is properly connected and may need
replacement.
The display screen is working but the temperature is not heating.
1. Check if the indicating light of the solid-state relay is on, if not, the relay or PID controller needs
replacement.
2. The heat plates are not heating with a working solid-state relay; heat plates may need
replacement.
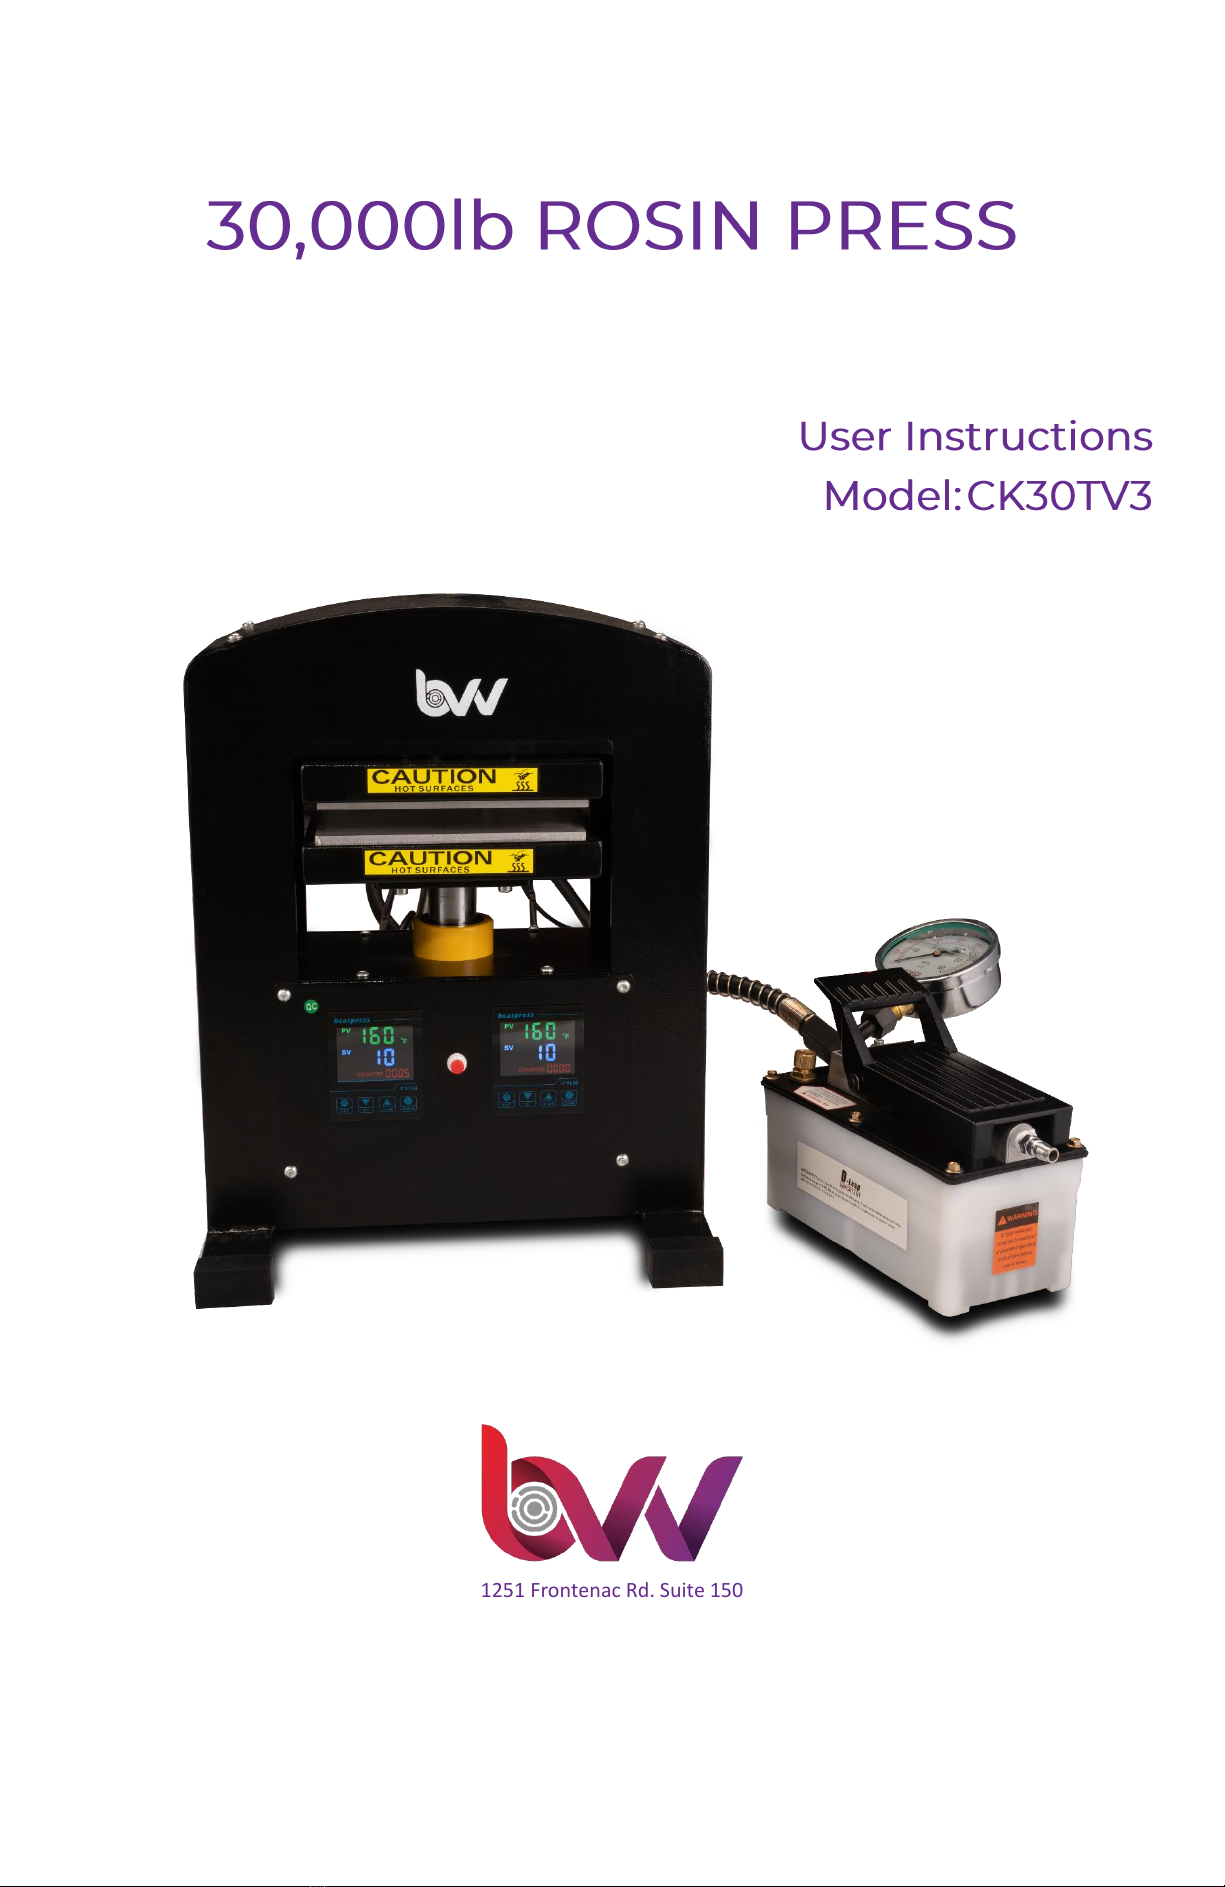
The temperature is overshooting by less than (15°F)
The plates can be autotuned to the users desired operating temperature to best control the heating.
To enter the autotuning function, first set the plates to the desired operating temperature and move
the plates away from each other. Press and hold the button labeled AT. Until the machine beeps and
displays a flashing “AT”on the right side of the screen. Leave the machine on until it goes through the
procedure of autotuning.
NOTE: The machine will overshoot by over 50°F during calibration.
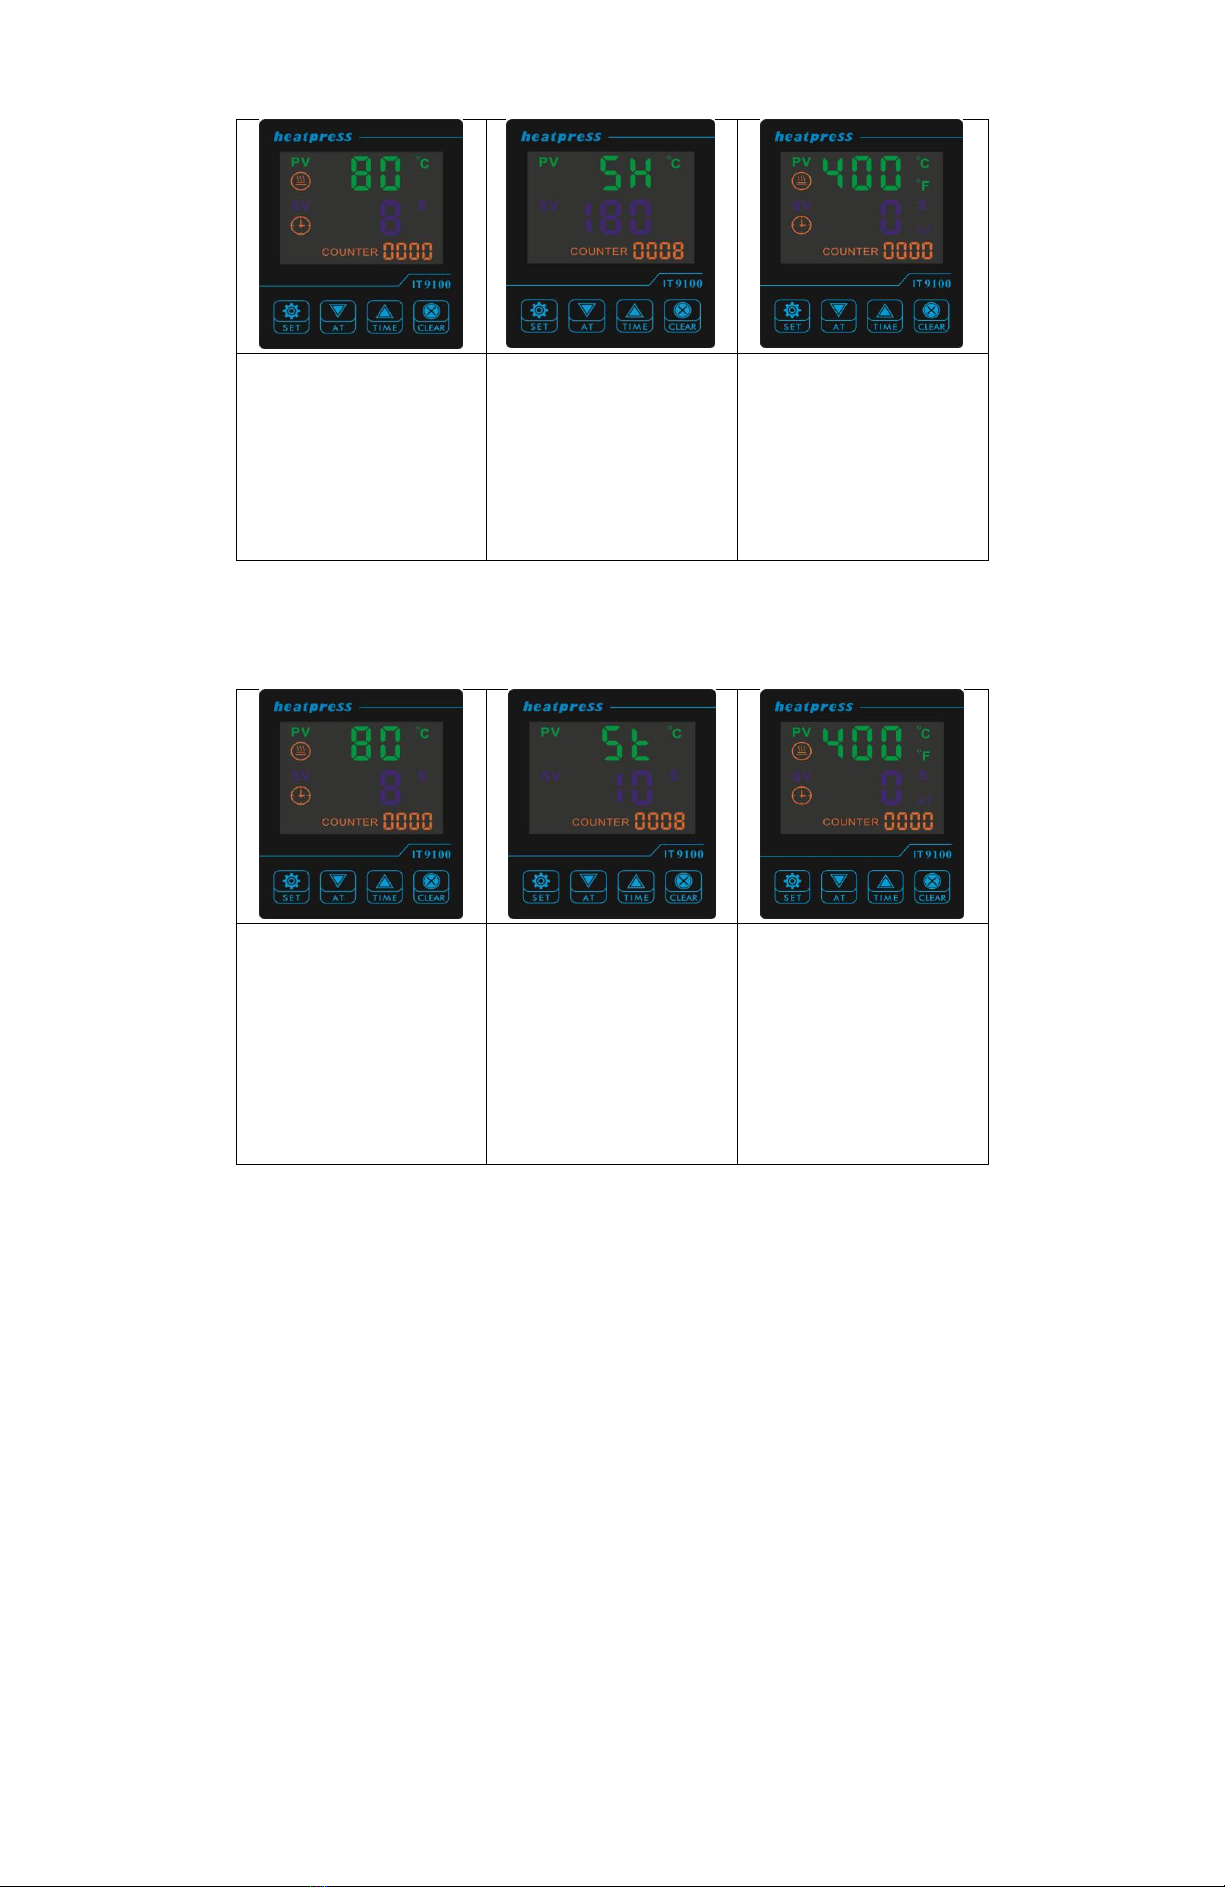
The temperature is overshooting, Ex: Set temperature is 180°C (356°F), but the actual temperature is
above 200°C (392°F)
1. The solid-state relay may be stuck on; needs replacement.
2. PID controller may be faulty and continuously sends signal to relay; PID needs replacement.
I inspected the plate temperature with my own probe and the reading is different
Because the plates are polished, an infrared laser probe will provide an inaccurate reading of the
plate temperature. This may be fixed by adjusting your probe’s emissivity setting. If you are using a
conventional probe and the reading is off, you may adjust the temperature calibration of the plates.