manuals.online logo
Brands
  1. Home
  2. •
  3. Brands
  4. •
  5. Cadco
  6. •
  7. Cooktop
  8. •
  9. Cadco Space Saver CDR-1TFB User manual

Cadco Space Saver CDR-1TFB User manual

Cadco, Ltd.
200 International Way, Winsted, CT 06098
(860) 738-2500 l Fax (860) 738-9772
We site: www.cadco-ltd.com
E-mail: [email protected]
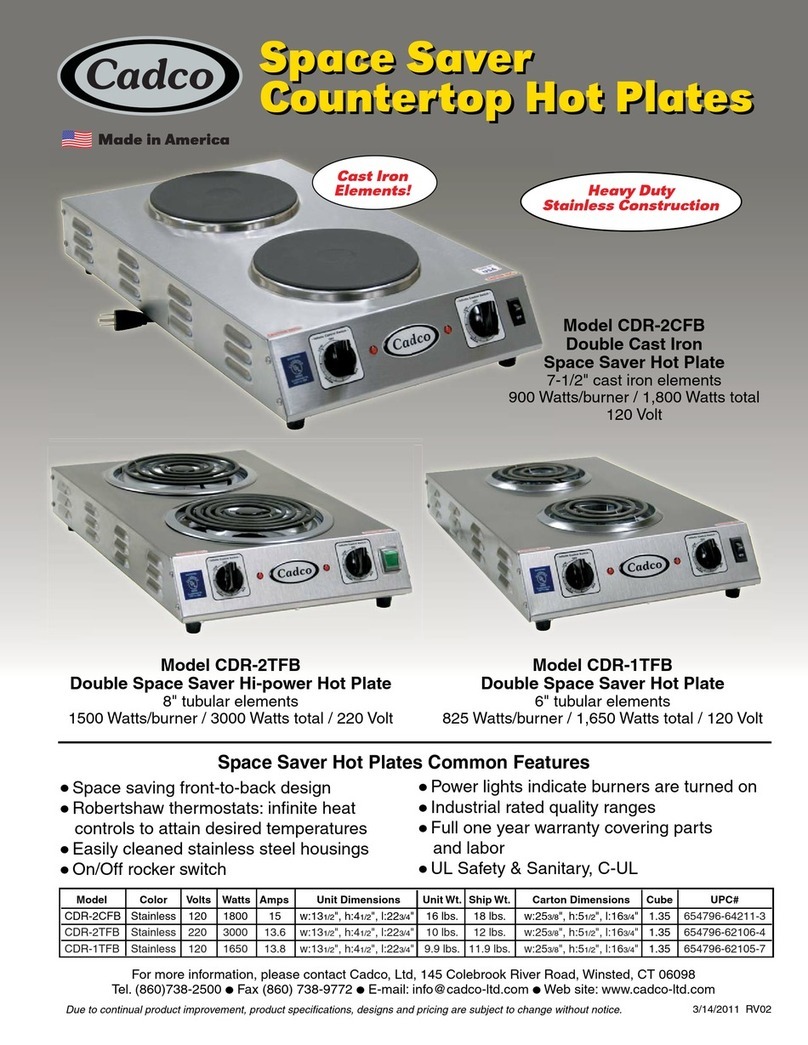
CDR-2CFB
120 Volts / 1800 Watts
(900 Watts per burner) /
15 Amps / Single Phase
4
3/28/2011 RV01
WARRANTY
adco warrants that this Hot Plate be free from defects in material and
workmanship for a period of one year from date of purchase. (Warranty provides
repair of unit.) A copy of your original purchase receipt is required for proof of
purchase date. This warranty does not cover consequential dama e of any
kind or damages resulting from accident, misuse, abuse, or external service or
repair attempts by unauthorized personnel. Inquiries concerning this warranty
and the use and maintenance of this unit should be directed to adco, Ltd.
Please note: This appliance is a carry-in service item; customer is
responsible for packa in the unit securely and returnin it to Cadco* for
service, along with a copy of your original purchase receipt, a description of the
problem, and your name, shipping address and phone number. Ship to: adco,
Ltd., Attn: REPAIR, 200 International Way, Winsted, T 06098. If shipping the
unit for service, we recommend that you insure it for its original purchase price.
adco is not responsible for damage or loss of unit in transit to us.
Call Cadco at 860-738-2500 for Return Authorization Number BEFORE
returnin any item for repair. Return Authorization Number MUST be written
on outside of carton to track the unit and avoid service delays. Warranty
covers repairin the unit and returnin it to customer.
Warranty is applicable only in USA and anada*. (* anadian customers
contact Tarrison Products, Ltd. in Ontario, Tel. (905) 825-9665.)
IMPORTANT NOTES:
Date of Purchase: __________________________
Place of Purchase: ____________________________________________
To expedite all warranty claims please keep your dated sales receipt from
place of purchase.
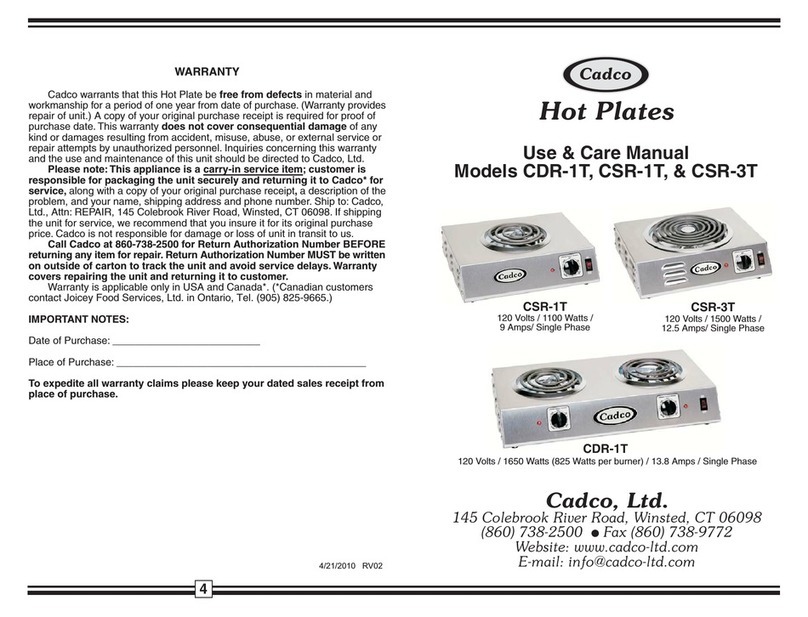
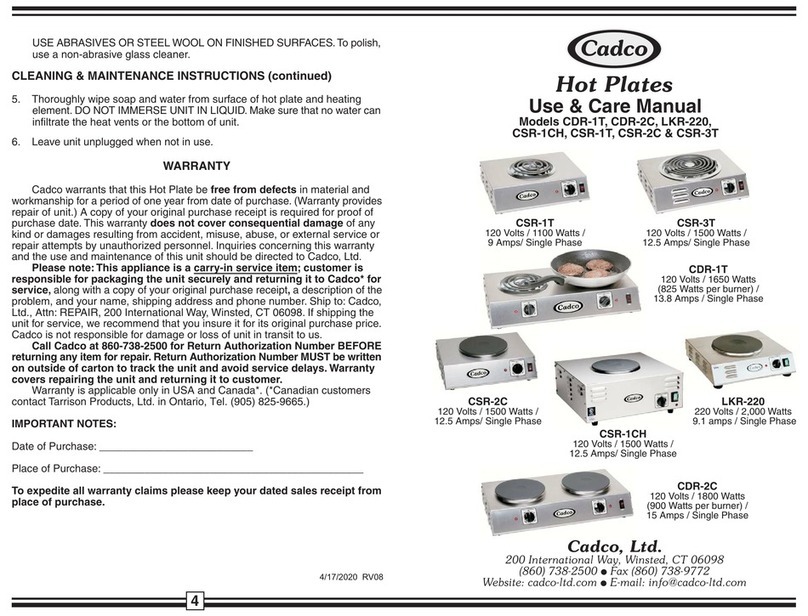
Use & Care Manual
Models CDR-1TFB, CDR-2TFB & CDR-2CFB
Space Saver Hot Plates
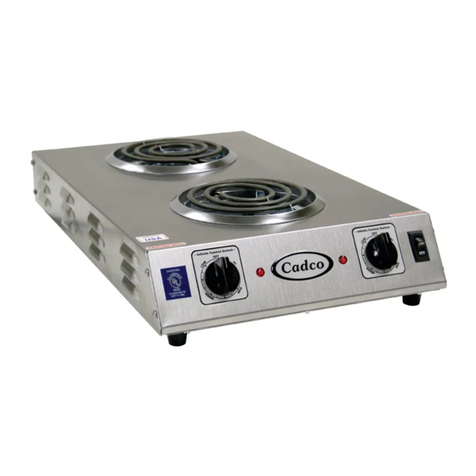
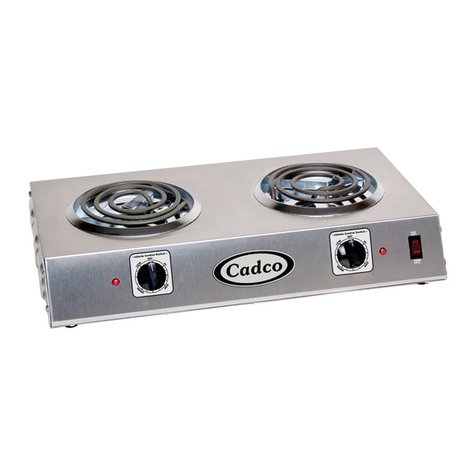
CDR-1TFB
120 Volts / 1650 Watts
(825 Watts per burner) /
13.8 Amps / Single Phase
CDR-2TFB
220 Volts / 3000 Watts
(1500 Watts per burner) /
13.6 Amps / Single Phase
OPERATING INSTRUCTIONS
1. Avoid lettin water or food drop or boil over onto heatin element.
If liquids or other forei n material are allowed to drip down throu h
the element pan and into the housin , the warranty is voided.
2. Rocker switch light will come on when hot plate is plugged into electric outlet
and the rocker switch is put in ON position.
Round signal light(s) will come on when heat control knob is turned fromOFF
to a heat setting. They will cycle on & off as the element maintains temperature.
3. As with all countertop hot plates as well as stovetops, the most efficient
cooking/heating will be done when using pans that are closest in diameter
to the heating element. For best results, the pot or pan used should not
exceed the heating element diameter.
DR-1TFB: 6 diameter coil elements
DR-2TFB: 8 diameter coil elements
DR-2 FB: 7-1/2diameter solid elements
4. Be sure your Hot Plate is resting level on countertop. Avoid using pans that
are unstable and easily tipped.
5. To avoid excessive heat on wall(s) while cookin , always keep a space
of at least 4 between your hot plate and your rear and side walls.
6. Always place the appliance on a heat-resistant surface.
CLEANING & MAINTENANCE INSTRUCTIONS
1. Always unplug hot plate from electric outlet and allow to cool before
cleaning. Caution: Heatin element may be hot without lowin red. Be
sure element is cool before touchin .
2. oil models: clean the elements by gripping an element at the point opposite
where it goes into the holes in the drip pan and tilting it up. (Do not force
it up higher than it will go easily.) lean the element and drip area. If
liquids or other forei n material are allowed to drip down throu h the
element pan and into the housin , the warranty is voided.
3. Use damp cloth with mild detergent to clean stainless surtaces - NEVER
USE ABRASIVES OR STEEL WOOL ON FINISHED SURFA ES. To polish,
use a non-abrasive glass cleaner.
4. Thoroughly wipe soap and water from surface of hot plate and heating
element. DO NOT IMMERSE UNIT IN LIQUID. Make sure that no water can
infiltrate the heat vents or the bottom of unit.
5. Leave unit unplugged when not in use.
23
ongratulations on your purchase of a adco Hot Plate. Please read all
instructions carefully before use.
IMPORTANT SAFEGUARDS
1. Read all instructions before use.
2. Do not touch hot surfaces! Always use hot pad or pot holder until unit cools.
3. To protect against electrical hazards, do not immerse cord, plug, or range
in water or any other liquid.
4. lose supervision is necessary when any appliance is used by or near
children.
5. Unplug from outlet before cleaning. Allow to cool completely before
putting on or taking off parts.
6. Do not operate any appliance with a damaged cord or plug or, or if the
appliance malfunctions or has been damaged in any manner. all Factory
Service at 860-738-2500. In anada call (905) 825-9665.
7. Do not use outdoors.
8. Do not let cord hang over edge of table or counter or touch hot surfaces.
9. Do not use appliance for other than intended use.
10. Do not clean with metal scouring pads. Pieces can break off the pad and
touch electrical parts, creating a shock hazard.
11. A fire may occur if this appliance is covered or touching flammable
material, including curtains, walls, etc., when in operation. To avoid
excessive heat on wall(s) while cookin , always keep a space of at
least 4 between your ran e and your rear and side walls.
12. Do not use plastic dishes or plastic wraps on heatin elements.
SAVE THESE INSTRUCTIONS
IMPORTANT NOTES
1. Your unit is equipped with a grounded, current-carrying plug. This plug
will fit into any 3 pronged outlet. This is a safety feature.
2. Electrical connection must be a proper outlet for the 3 pron ed cord.
Before connectin power, make sure the volta e and frequency
correspond to the data plate on the unit.
3. A short power cord is provided to reduce the hazards resulting from
accidents such as tripping, entanglement, etc.
-If a long cord set or extension cord is used:
(A) The marketed electrical rating of the cord set or extension cord should
be at least as great as the electrical rating of the appliance.
(B) The longer cord should be arranoed so that it will not drape over the
countertop or tabletop, where it can be pulled on by children or tripped over
accidentally.
4. When performing any cleaning or maintenance to this unit, be sure to
unplug from power outlet first, and allow to cool.
5. all adco ustomer Service at 860-738-2500 with any questions or
service needs.
INITIAL USE
Heat the appliance without a pot for approximately 10 minutes at maximum
setting in order for the special element coating to seal. Temporary smoking is
normal during initial use.
This manual suits for next models

2

Other Cadco Cooktop manuals

Cadco CSR-1T User manual

Cadco

Cadco CSR-1T User manual

Cadco CDR-1T User manual

Cadco

Cadco CDR-1T User manual

Cadco CDR-1T User manual

Cadco

Cadco CDR-1T User manual

Cadco BRC-D1 Installation instructions

Cadco

Cadco BRC-D1 Installation instructions

Cadco CDR-1TFB User manual

Cadco

Cadco CDR-1TFB User manual

Cadco CDR-1TFB User manual

Cadco

Cadco CDR-1TFB User manual

Cadco HOT PLATES CDR-1T Installation instructions

Cadco

Cadco HOT PLATES CDR-1T Installation instructions

Cadco CDR-1T User manual

Cadco

Cadco CDR-1T User manual

Cadco CDR-1TFB User manual

Cadco

Cadco CDR-1TFB User manual

Cadco CSR-1T User manual

Cadco

Cadco CSR-1T User manual

Cadco CDR-1T User manual

Cadco

Cadco CDR-1T User manual

Cadco CDR-1T User manual

Cadco

Cadco CDR-1T User manual

Cadco CSR-RH User manual

Cadco

Cadco CSR-RH User manual

Cadco CDR-1T User manual

Cadco

Cadco CDR-1T User manual

Popular Cooktop manuals by other brands

Omega OI63Z Installation, operation and maintenance instructions

Omega

Omega OI63Z Installation, operation and maintenance instructions

Bosch FAP-OC 500Series user manual

Bosch

Bosch FAP-OC 500Series user manual

Waldorf RN8400E Installation and operation manual

Waldorf

Waldorf RN8400E Installation and operation manual

Svan SGW3600X user manual

Svan

Svan SGW3600X user manual

Whirlpool RF377PXV Use & care guide

Whirlpool

Whirlpool RF377PXV Use & care guide

Glen Dimplex ICC6GE3 Instruction and installation manual

Glen Dimplex

Glen Dimplex ICC6GE3 Instruction and installation manual

Maytag MGC6536BDW - 36 Inch Gas Cooktop user guide

Maytag

Maytag MGC6536BDW - 36 Inch Gas Cooktop user guide

Frigidaire FEF336BCA Wiring diagram

Frigidaire

Frigidaire FEF336BCA Wiring diagram

Capital MCR304 Use and care & installation guide

Capital

Capital MCR304 Use and care & installation guide

Trinity TRC600-EK user manual

Trinity

Trinity TRC600-EK user manual

KitchenAid KECD806RBL04 parts list

KitchenAid

KitchenAid KECD806RBL04 parts list

Belling BDC604S instruction manual

Belling

Belling BDC604S instruction manual

Teka GKS 30Gas Instructions for the installation and advice for the maintenance

Teka

Teka GKS 30Gas Instructions for the installation and advice for the maintenance

Jenn-Air JGC8430 installation manual

Jenn-Air

Jenn-Air JGC8430 installation manual

Whirlpool SC8436ER Use & care guide

Whirlpool

Whirlpool SC8436ER Use & care guide

Clatronic EKP 3788 E instruction manual

Clatronic

Clatronic EKP 3788 E instruction manual

GE JGP989 Owner's Manual & Installation Instructions

GE

GE JGP989 Owner's Manual & Installation Instructions

Kleenmaid cooking GCT6012 Instructions for use and warranty details

Kleenmaid

Kleenmaid cooking GCT6012 Instructions for use and warranty details

manuals.online logo
manuals.online logoBrands
  • About & Mission
  • Contact us
  • Privacy Policy
  • Terms and Conditions

Copyright 2025 Manuals.Online. All Rights Reserved.