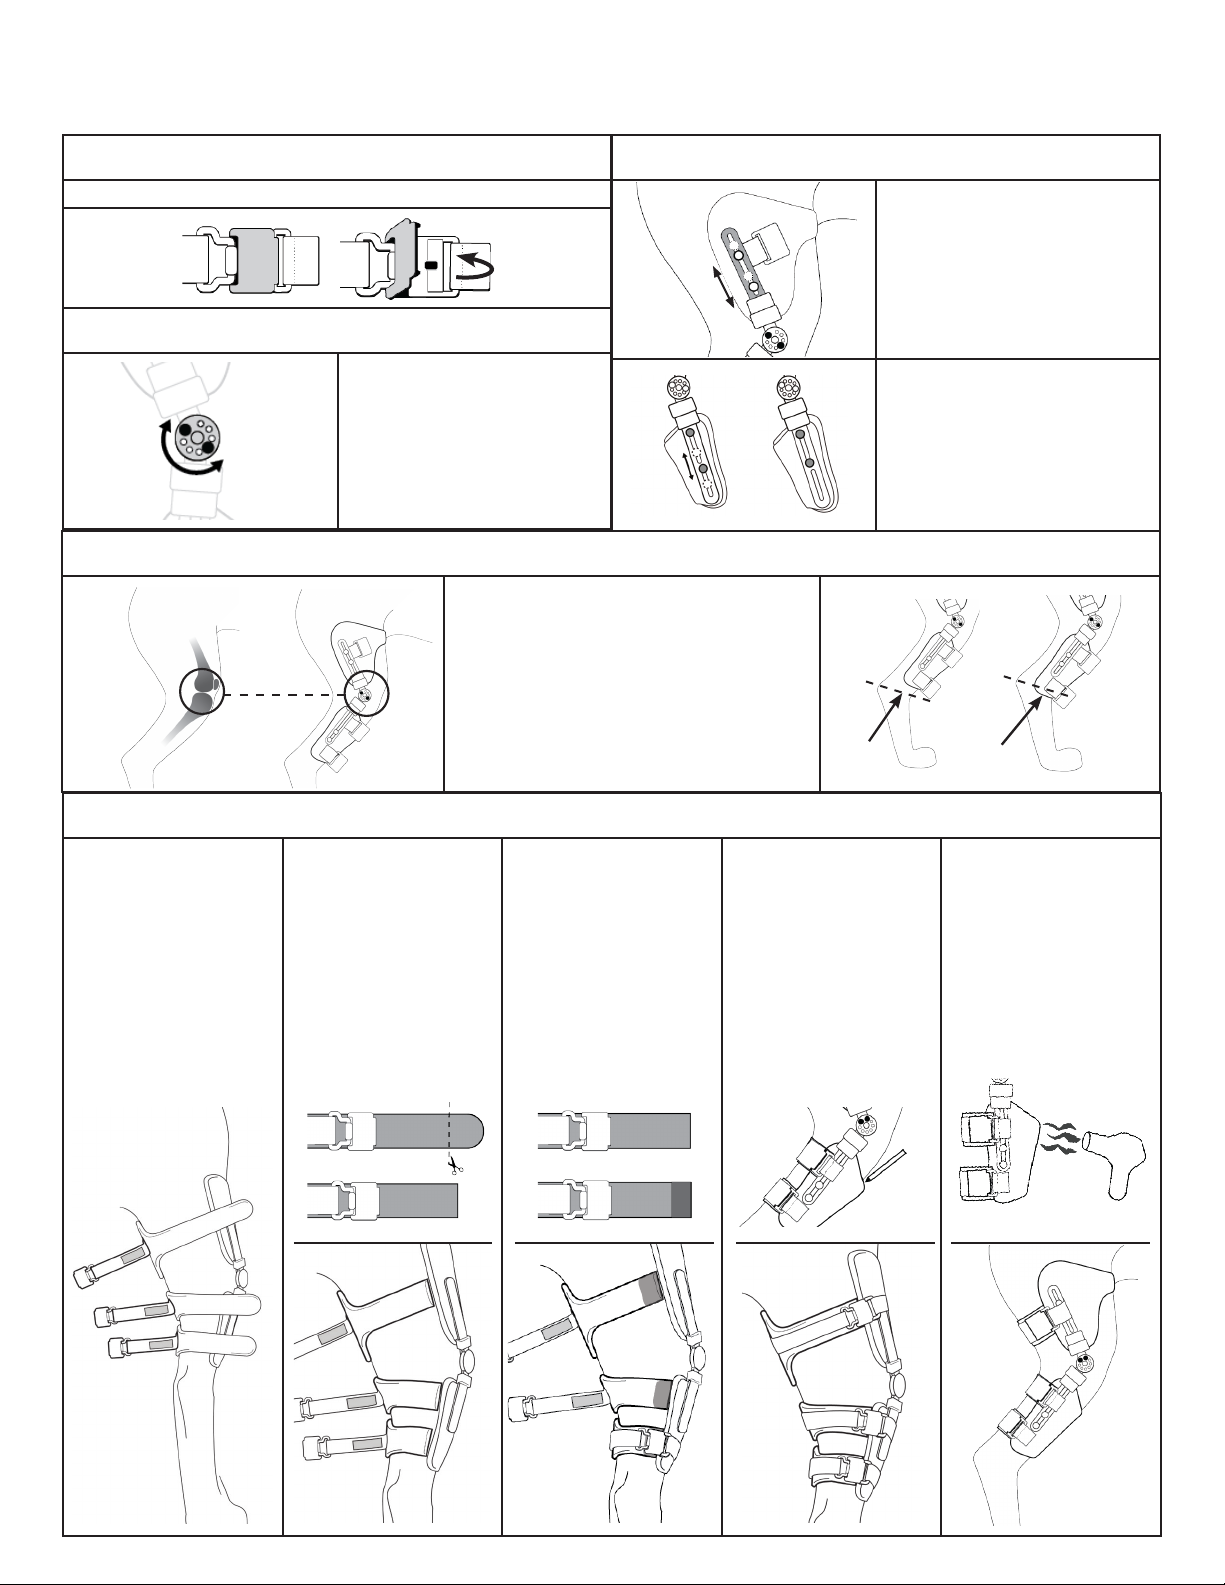
FITTING INSTRUCTIONS
1.
The foam padding straps
beneath the Velcro® serve
as a barrier to protect your
dog’s leg from Velcro® rubbing
and irritaon. The padding
straps are designed so they
can be trimmed to best t
your dog. Working from the
boom strap to the top, pull
each of the Velcro® straps
o the foam padding so that
both pieces can be moved
independently.
2.
While ng the brace to your
dog, incrementally trim the
foam padding straps as you
go ensuring you don’t trim
too much early in the ng
process. For some dogs, most
or all the strap may need to
be trimmed and removed.
The straps should be trimmed
so the end of the strap meets
the edge of the brace when
ghtened. The padding and
straps should not overlap.
3.
Once you have trimmed
padding down, cover raw
ends of the strap with edge
tape (included) to prevent
fraying. Start from the boom
and conform the padding by
compressing down the sides
of the brace to your dog’s leg.
Close the Fidlock® Magnec
Closure, ghten the Velcro®
strap and wrap the strap
around the brace.
4.
Repeat process for the top
part of the brace.
SNUG FIT
If you can get a pen in
between your dog’s skin and
the strap, then you need
to ghten more. It is most
important that it is snug at the
hock area. The brace MUST
t snug to prevent slippage
and to ensure proper t. For
some dogs you may need to
wrap the boom Velcro® strap
around your dog’s leg twice.
5.
If aer ghtening, there
is sll a gap between the
knee and brace, remove the
brace from the dog and heat
this area for 5 to 7 minutes
by using a blow dryer or
wrapping it in a heang pad.
Reapply and compress the
area against the leg, readjust
the straps, and wait for it to
harden while connuing to
compress the area.
FIDLOCK®MAGNETIC CLOSURE SYSTEM
Open or close using top ap.
THE HINGE RANGE OF MOTION
The hinge has a range of moon that
is preset. Please DO NOT adjust the
range of moon unless instructed by
your veterinarian.
ADJUSTING THE HINGE LENGTH
1. Both lower and upper extensions
of the hinges can be independently
adjusted to accommodate variaons
in limb length.
2. To adjust, remove all four set screws
(two on each side), slide vercally to
desired length. Re-ghten screws.
3. The most common ng issue is
the length of the Tibia/Lower Shell.
The length of the Tibia/Lower Shell
can be shortened by relocang
the screws to the upper slot of the
upright, as shown. To lengthen,
relocate the screws to the boom
slot of the hinge upright.
A
PROPER BRACE ALIGNMENT
1. Open the Fidlock® Magnec Closures and place your
dog’s leg into the brace.
2. Align the center of the brace hinge with the bend
of the knee (the bump on both sides of the knee
joint) A.
3. When the hinge is aligned with the knee, the boom
edge of the brace must sit above the dog’s hock
B. Several adjustments may be needed in order to
achieve the correct length. Follow the “Adjusng the
Hinge” instrucons to obtain the correct hinge length.
First, watch the tting video located on our website at aocpet.com/pages/instructions.
Please read the complete instructions before applying the brace.
B


