To switch on, press and hold the external switch. The LED Indicator will flash red & green and then produce a high-pitched tone followed
by a brief green colour flash which confirms it is on. Now release the switch.
To switch off, press and hold the external switch. The LED Indicator will flash red & green and then produce a low-pitched tone followed
by a brief red colour flash which confirms it is off. Now release the switch.
The Detect will become active when weight has been applied to the bed/chair pad for more than 3 seconds. The LED indicator will
illuminate during this period. If the sound option (No. 7 on dial) is enabled, a confirmatory beep will be heard after 3 seconds.
Follow the instructions below and overleaf on how to program the Detect.
1. Program the Detect to the desired Mode (if using modes 1-4, ensure the absence delay is set to a minimum).
2. Prepare the Notifier/other system by entering registration mode.
3. Activate the Detect.
4. The Notifier/other system should acknowledge the new device.
5. If using Modes 2 or 4, repeat steps 1-4 and activate the Detect using the pad connected to input 2.
To program the modes/options, use the following method:
1. Turn the dial to the desired setting
2. Press and hold the internal switch using a suitable instrument until LED 2 changes colour and you hear a sound (approx 2
seconds)
3. Release the internal switch. LED 2 and the sounder will flash/beep to confirm the mode number you have chosen.
4. Repeat steps 1-3 for other modes/options
5. Set the absence delay as described below.
Once the modes/options have been programmed, simply turn the dial to the desired number which matches the delay time required.
There is no need to press and hold the switch afterwards. The time settings are:
0 – 0.5 Second 5 – 1 Minute
1 – 1 Second 6 – 3 Minutes
2 – 3 Seconds 7 – 10 Minutes
3 – 10 Seconds 8 – 15 Minutes
4 – 30 Seconds 9 – 30 Minutes
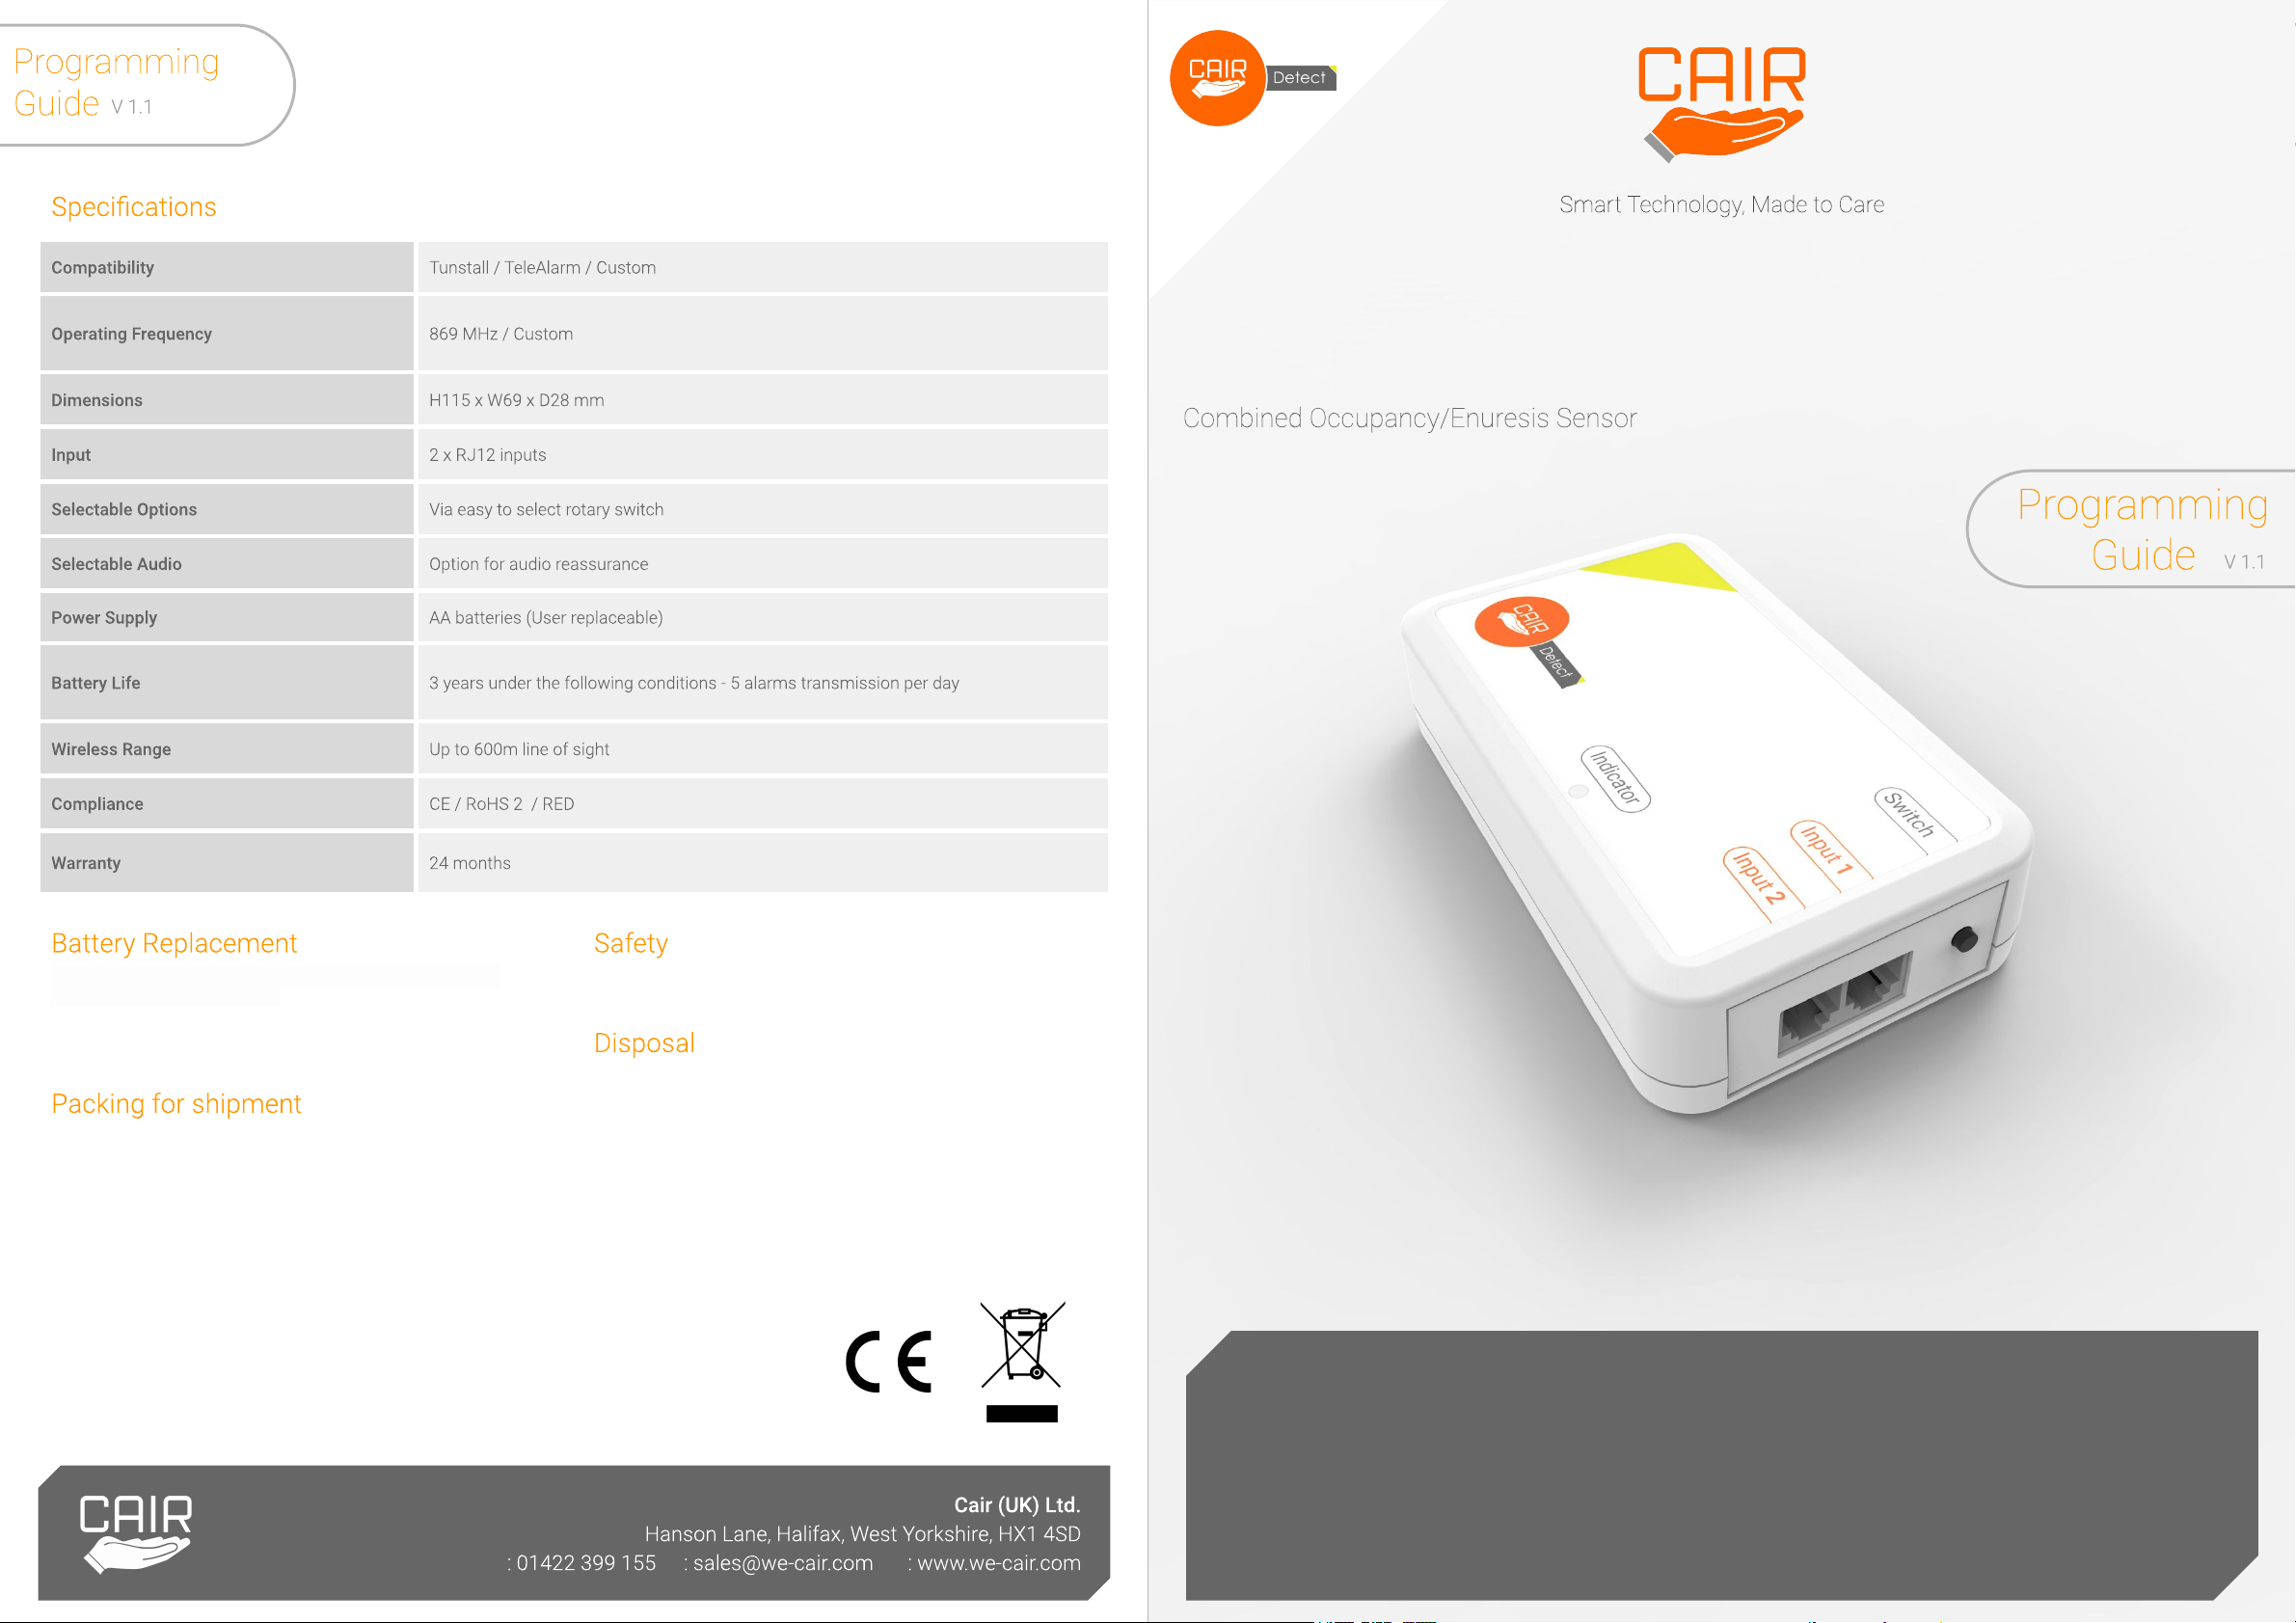
Internal
Switch Dial
LED Indicator
External Switch
T E W
The Detect is easily programmed using the dial positioned within the battery compartment. The dial is numbered 0-9, each option is
explained below:
No.0. Not used. (Only used for Absence Delay 0.5 secs).
No.1. Mode 1. Inputs 1 & 2 will transmit the same identity. Both inputs will ‘work together’, i.e. you can move from bed to chair and back
again without raising a call. When both pads are vacated for longer than the absence delay, the same trigger code will be sent,
irrespective of which pad was vacated last.
No.2. Mode 2. Inputs 1 & 2 will transmit different identities. Both inputs will ‘work together’, i.e. you can move from bed to chair and back
again without raising a call. When both pads are vacated for longer than the absence delay, different trigger codes will be sent, indicating
which pad was vacated last.
No.3. Mode 3. Inputs 1 & 2 will transmit the same identity. Both inputs will work independently of each other.
No.4. Mode 4. Inputs 1 & 2 will transmit different identities. Both inputs will work independently of each other.
No.5. Virtual Mode Option - On/Off. A transmission will be sent when the pad is both occupied and unoccupied (ideally this should be
used with Mode 1). (Default Off)
No.6. Cancel at Source Option - On/Off. A transmission will repeat every 2 minutes until the external switch is pressed 3 times. (Default
Off)
No.7. Sound Option - On/Off. A sound will be emitted when the occupancy has been confirmed and again when a transmission is sent.
(Default Off)
No.8. Enuresis Option - On/Off. Input 1 will send an Enuresis signal. Input 2 will work separately and can still be used with a bed/chair
pad. Mode 4 is automatically selected. (Default Off)
No.9. Factory Default. This method resets the unit to mode 1 with all options set to default.
1. Choose 9 on dial.
2. Press and hold the internal switch until LED 2 changes colour from red to amber and a tone is heard..
3. Release the internal switch, the unit beeps 9 times whilst LED 2 flashes red in sequence..
4. The LED will then flash red/green alternately.
5. Whilst the LED is flashing red/green, press and release the internal switch 3 times.
6. The unit will produce a high pitched tone and the LED will flash green then illuminate amber to confirm reset.
Tip: Always reset the unit using Mode No.9 if it has been used previously.
Note: Modes 1, 2 and 5 should be used for a single occupant only.
If you would like to:
- Choose No.2 (Mode 2)
- Choose No.7 (Sound On/Off)
- Set the absence delay to 3 seconds (No.2 on dial)
Follow these steps:
1. Reset the unit to factory default if it has been programmed previously (Refer to Mode/Option No.9).
2. Turn the dial to No.2
3. Press and hold the internal switch using a suitable instrument until the unit beeps and LED 2 changes from red to amber
(approx 2 seconds). LED 2 and the sounder will flash/beep repeatedly to confirm the mode number you have chosen
4. Turn the dial to No.7
5. Press and hold the internal switch using a suitable instrument until the unit beeps and LED 2 changes from red to amber
(approx 2 seconds). LED 2 and the sounder will flash/beep to confirm the mode number you have chosen.
6. Turn the dial to No.2 (3 secs absence)
Note: Steps 2 & 4 can be completed in any order.
LED 2