Cambridge Sound Works Playdock Playdock MP3 User manual

User Manual

TO PREVENT FIRE OR SHOCK HAZARD, DO NOT USE THIS PLUG WITH AN EXTENSION
CORD, RECEPTACLE OR OTHER OUTLET UNLESS THE BLADES CAN BE FULLY INSERTED
TO PREVENT BLADE EXPOSURE.
TO PREVENT FIRE OR SHOCK HAZARD, DO NOT EXPOSE THIS APPLIANCE TO RAIN OR
MOISTURE.
The lightning flash with arrowhead
symbol, within an equilateral triangle,
is intended to alert the user to the
presence of uninsulated “dangerous
voltage” within the product’s
enclosure that may be of sufficient
magnitude to constitute a risk of electric
shock to persons.
The exclamation point within an
equilateral triangle, is intended to alert
the user to the presence of important
operating and maintenance (servicing)
instructions in the literature
accompanying the appliance.
CAUTION: TO REDUCE THE RISK OF
ELECTRIC SHOCK, DO NOT REMOVE
COVER (OR BACK). NO USER-
SERVICEABLE PARTS INSIDE.
REFER SERVICING TO QUALIFIED
SERVICE PERSONNEL.
TABLE OF CONTENTS
Compatibility and Dimensions ................................. 2
Carton Contents ......................................................3
The Preparation Instructions show how to use each
of PlayDock MP3’s four holders with specific MP3
players. Your MP3 player may differ from the play-
ers used in the examples. For the best fit with your
player, follow the instructions for the illustrated player
that is closest to yours in size and configuration.
Preparation Instructions ...............................pp 4-8
Zen Micro, Dell Pocket DJ ....................................... 4
Zen Touch .............................................................4-5
iPod Mini .................................................................. 6
iPod, Dell DJ ............................................................ 7
Zen, Zen NX, Zen Xtra ............................................8
Operation ......................................................... 10-11
Normal Operation .................................................. 10
Storing DC and Audio plugs .................................. 11

Supported MP3 Player Types
Product Dimensions
244 mm H 180 mm W 261 mm D
9 5/8 in H 11 in W 10 1/4 in D
Page 2
Playback From Fitted Holder
PlayDock MP3 provides holders and holder inserts
to fit the following players:
Creative© Zen players (Zen, Zen NX, Zen Xtra,
Zen Touch, Zen Micro)
Creative MuVo2 hard drive players
Dell© DJ, Pocket DJ
Apple© iPod-size and iPod Mini-size players
Additional Playback Compatibility
Any MP3 player with a standard 3.5 mm headphone
minijack will connect and play through PlayDock MP3.
Most MP3 players will fit inside one of PlayDock MP3’s
four different holder configurations.
Charging
While operating with its AC power adapter, PlayDock MP3
will charge all the Creative players listed above plus Dell
Pocket DJ.

(Pre-installed with player)
B) Large Holder
C) Small Player Insert (inside Large Holder)
D) USB-style DC Connector
E) Battery (not included with all models)
Package Contents
(Packed Separately)
F) 120VAC to 13.5VDC Power Adapter
G) Mid Player Insert
H) Barrel-style DC Connector
I) Zen/NX/Xtra Holder
Also Included
J) User Guide
K) CSW Registration card
A) PlayDock MP3 Audio Player A)
B) C) D) E)
F) G) H) I)
Page 3

PlayDock MP3 comes set-up to support Creative Zen
Micro and Dell Pocket DJ. If you have one of these play-
ers, slip the bottom of the player into the holder from the
direction shown by the arrow.
Remove the Small Player Insert from the Large Holder as
shown.
Connect the DC Power plug and the Signal plug into the
jacks as shown in the next image. Zen Micro is illustrated.
Dell Pocket DJ is similar.
Creative Zen Touch, MuVo2
Creative Zen Micro, Dell Pocket DJ
SKIP TO NORMAL USE, PAGE 10
SETUP INSTRUCTIONS FOR SPECIFIC MP3 PLAYERS
FOLLOW THE SETUP INSTRUCTIONS FOR YOUR PLAYER THEN PROCEED TO
PAGE 10 FOR OPERATION INSTRUCTIONS.
Page 4

Slide the Zen Touch or MuVo2 player down into the Large
Holder.
Connect the DC Power plug and the Signal plug into the
jacks.
Remove the Large Holder.
Unplug the USB-style DC connector.
Plug in the Barrel-style DC connector.
Re-install the Large Holder. Slip the lip on the underside of
the Large Holder under the stage on top of the PlayDock.
Press the claws of the Large Holder on to the PlayDock
bar.
SKIP TO NORMAL USE, PAGE 10
Page 5

Slip the bottom of the player into the holder from the direc-
tion shown by the arrow.
Apple iPod Mini-size players
Unplug USB-style DC connector. Retain for future use.
Connect the Signal plug into the player’s 3.5 mm head-
phone jack.
SKIP TO NORMAL USE, PAGE 10
Page 6

Remove the Small Player Insert from the Large Holder as
shown.
Install the Mid-size Insert.
Unplug USB-style DC connector. Retain for future use.
Slip the bottom of the player into the holder from the direc-
tion shown by the arrow. The Apple© iPod is shown. The
Dell Pocket DJ fits in a similar manner.
Connect the Signal plug into the player’s 3.5 mm head-
phone jack.
Apple iPod-size, Dell DJ players
SKIP TO NORMAL USE, PAGE 10
Page 7

Remove the Zen Touch Holder and Small Player Insert as
shown.
Creative Zen Players (Zen, Zen NX,
Zen Xtra)
Replace USB DC connector with barrel-style DC connec-
tor.
Install the Zen holder.
Slip the lip on the underside of the Zen Holder under the
stage on top of the PlayDock.
Press the claws of the Zen Holder on to the PlayDock bar.
Slip the Zen player into the pocket in the Zen glove.
Connect the DC plug and the miniplugs.
PROCEED TO NORMAL USE, PAGE 10
Page 8

Page 9

Page 10
Normal Use
Connect the AC to DC power adapter.
1) Connect power adapter’s DC output plug to PlayDock
DC input.
2) Then connect power adapter’s AC plug to AC outlet.
3) Put the POWER button to the IN position. NOTE: If
portable operation is not frequent, you can use the PLAY/
MUTE button to turn off PlayDock. For the fastest battery
recharge or for long-term storage, put the POWER button
in the OUT position.
Normal Operation with AC Power
4) Press the PLAY/MUTE button as needed.
5) Green light indicates “PLAY”.
Red indicates “MUTE”.
With a green light, start an audio program on your player,
then
6) Adjust Volume Up and Volume Down buttons for your
preferred output level.
7) Use the WIDE button to expand the stereo sound, as
desired. WIDE sound has the most effect in large spaces
or outdoors.
12-14 VDC
IN POWER
1)
2)
3)
4)
5)
6)
7)

After Removing Player
For neat appearance, slip the DC connector and miniplug
into the Standby sockets.
Portable Operation
With the battery installed, PlayDock MP3 serves as a
stand-alone music system. When the AC power adapter
is disconnected, PlayDock MP3 automatically enters
Standby mode (the Play/Mute light will go dark). Press the
Play/Mute button to start portable operation.
PlayDock MP3 will re-enter the battery-saving Standby
mode after ten to fifteen minutes without an audio pro-
gram. Press the Play/Mute button to resume playback in
portable operation.
The rechargeable battery will operate PlayDock MP3 for
over 8 hours at a moderate volume level with a full charge.
Continuous operation at maximum output level can reduce
playtime to under 4 hours, even with a full battery charge.
In portable operation, PlayDock MP3 will not charge any
connected MP3 player. Be sure your player device has
sufficient charge for portable operation.
PlayDock MP3 shuts down automatically when the
battery’s useful charge level is depleted. If auto shutdown
occurs, do not attempt multiple restarts. This could perma-
nently damage the battery. The depleted battery should be
recharged as soon as possible to maintain a long battery
service lifetime.
NOTE: Leave the POWER
button “in” unless storing
PlayDock MP3. Use the
PLAY/MUTE button for nor-
mal or portable operation.
In Portable operation, a dark PLAY/
MUTE indicator confirms the battery-
saving STANDBY mode. Press PLAY/
MUTE to resume operation.
Page 11
Keep The Internal Battery Charged
The battery charges whenever the AC power adapter is
connected. It can not be over-charged. Unlike some bat-
tery types, the PlayDock MP3 sealed gel-cel battery has
no “memory” behavior. It will fully recharge from any state
of partial charge. You can safely use PlayDock in portable
operation from any state of partial battery charge.
Never store PlayDock MP3 with the battery uncharged.
Duration of Portable Operation
For fastest battery recharge, put the POWER switch in the
OUT position. Operating PlayDock reduces the recharge
rate. Even with the POWER switch is OUT, a depleted
PlayDock battery may take 18 hours to recharge.

Long Term Storage With Battery
If the PlayDock MP3 will be disconnected from AC power
for more than a few weeks, fully charge the battery and
put the POWER switch in the out position. A fully-charged
battery can be stored at room temperature (68 degrees F,
20 degrees C) for over nine months.
Immediately re-charge the battery after storage for longest
battery service lifetime.
NOTE: To preserve the con-
dition of the optional battery,
leave the POWER button
“out” when PlayDock MP3
will be stored for more than
a few weeks.
Battery Installation & Replacement
When the battery fails to operate the PlayDock for more
than two to three hours after a 18 hour charge cycle,
replacement is indicated. Cambridge SoundWorks stocks
the replacement battery.
1) To install or replace the battery, remove the three
screws on the left hand endcap (the endcap without the
POWER switch.)
2a) If replacing the battery, note the red wire’s connector
is attached to the battery’s red (positive) terminal. Detach
both connectors from the battery terminals and slide out
the battery.
2b) If your PlayDock did not have a battery inside, locate
the loose battery wires inside the PlayDock. Remove the
protective sleeve from the battery wire terminals. Note that
one terminal has a red colored sleeve.
3) Attach the red wire’s connector to the red battery termi-
nal. Repeat for the other connector.
4) Slide the new battery inside the PlayDock.
5) Replace the endcap and charge the battery for at least
12 hours prior to portable operation.
Page 12

© 2005 Cambridge SoundWorks, Inc. All rights reserved. Cambridge SoundWorks is a registered trademark of Cambridge
SoundWorks, Inc., Andover, Massachusetts USA. All other brands and products are trademarks or registered trademarks of their
respective holders. All specifications are subject to change without prior notice. Actual contents may differ from those pictured.

Rev 2
Playback From Fitted Holder
PlayDock MP3 provides holders and holder inserts
to fit the following players:
Creative© Zen players (Zen, Zen NX, Zen Xtra,
Zen Touch, Zen Micro)
Creative MuVo2 hard drive players
Dell© DJ, Pocket DJ
Apple iPod©-size and iPod Mini-size players
Additional Playback Compatibility
Any MP3 player with a standard 3.5 mm headphone
minijack will connect and play through PlayDock MP3.
Most MP3 players will fit inside one of PlayDock MP3’s
four different holder configurations.
Charging
While operating with its AC power adapter, PlayDock MP3
will charge all the Creative players listed above plus Dell
Pocket DJ.
Supported MP3 Player Information
This manual suits for next models
1
Table of contents
Other Cambridge Sound Works Docking Station manuals

Cambridge Sound Works
Cambridge Sound Works Radio CD 745 User manual

Cambridge Sound Works
Cambridge Sound Works SoundWorks i755 User manual

Cambridge Sound Works
Cambridge Sound Works SoundWorks Radio 735i User manual

Cambridge Sound Works
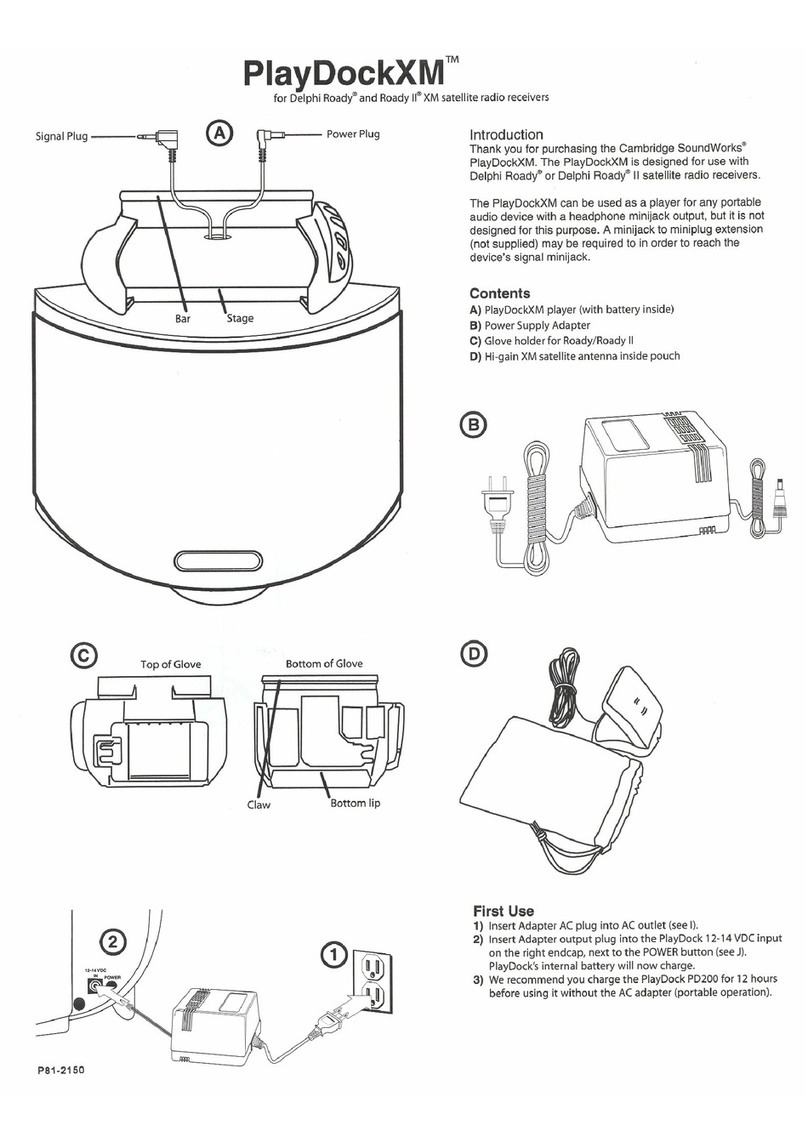
Cambridge Sound Works PlayDock XM User manual

Cambridge Sound Works
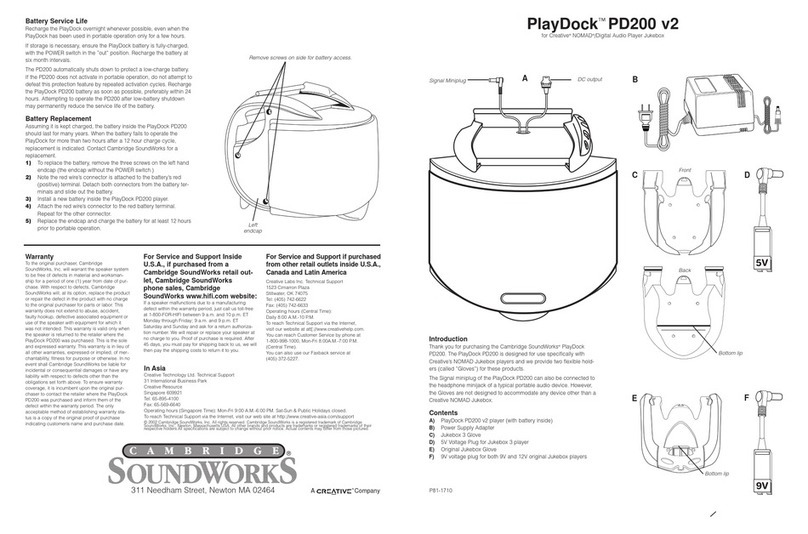
Cambridge Sound Works PlayDock PD200 V2 User manual

Cambridge Sound Works
Cambridge Sound Works SoundWorks 765i User manual