Campingaz CR 5000 PLUS THERMO User manual

INSTRUCCIONES DE EMPLEO
WL0001300625 / 4010070780
(ECN0047707-A)
APPLICATION DES GAZ FRANCE
CR 5000 PLUS THERMO
Este producto no es adecuado para calefacción primaria.
ES

1

2
Especificaciones para España
Potencia calorifica : 3,05 kW
Consumo : G30 = 222 g/h / G31 = 218 g/h
Cat I3+ G30/G31 28-30 / 37 mbar
Gas y presión :
Butano 28-30 mbar (G30) / Propano 37 mbar (G31)
NOTA: a menos que se especifique de otro modo, los siguientes
términos genéricos «aparato / unidad / producto / equipo /
dispositivo» que aparecen en este manual de instrucciones se
refieren todos al producto “CR 5000 PLUS THERMO”.
®.
CR 5000 PLUS THERMO.
A - CONSIGNAS GENERALES DE SEGURIDAD
- La utilización y el mantenimiento del aparato
tienen que ser efectuados en conformidad con las
reglamentaciones y normas vigentes.
- Leer estas instrucciones antes de utilizar su
aparato.
- Este aparato no debería ser utilizado en pisos de
gran altura, en sótanos, en cuartos de baño ni en
dormitorios.
- Utilizar el aparato en habitaciones bien ventiladas.
- El aparato no debe utilizarse en los vehículos de
turismo como en las caravanas y autocaravanas.
- El aparato no debe instalarse junto a paredes,
mobiliario, colgaduras, cortinajes, ropas de cama
y otros materiales inflamables. Para evitar riesgos
de incendio, se prohibe totalmente cubrir su
aparato.
- El aparato tiene que dirigirse hacia el centro de la
habitación .
- No utilice su aparato a menos de 50 cm de una
pared o de un objeto combustible.
-
No cubra ni bloquee los orificios de la toma de aire
situada en la parte inferior, frontal o superior de la
estufa.
- No utilice la estufa sin haber montado las ruedas.
El uso del dispositivo sin ruedas puede ser
peligroso para las personas.
- El mango del gas debe ser cambiado cuando pase
la fecha de caducidad o siempre que esté dañado
o muestre grietas en la superficie.
B - MONTAJE DE LAS RUEDAS
C - PUESTA EN SERVICIO
IMPORTANTE
®
.
C - 1 - Ventilación del local
3
3
C - 2 - Depósito de gas y regulador de presión
C - 3 - Tubo de gas
D - CONEXION DEL DEPOSITO DE GAS
G
-
Nota:

3
D - 1 - Montaje del depósito de gas:
-
-
D - 2 - Estanqueidad
En caso de fuga, la alimentación de gas del aparato
tiene que cortarse mediante el grifo del depósito de
gas y/o la manecilla del regulador de presión.
No buscar las fugas con una llama, utilizar un líquido
detector de fugas gaseosas.
Importante:
En caso de fuga o de olor de gas, cerrar inmediatamente
el grifo del depósito y/o la manecilla del descompresor
de presión. Favorecer la aeración de la habitación
abriendo las ventanas. Pedir la intervención de un
técnico especializado para el control del aparato y la
conexión correcta del depósito.
E - PILAS PARA ENCENDIDO ELECTRÓNICO
E- 1- Pilas necesarias
E- 2 - Cambio de pilas (imagen 7)
E- 3 - Eliminación de pilas
F- UTILIZACION
PRECAUCIONES DE EMPLEO:
NO instalar el aparato junto a una pared, cortinas o
cerca de un sofá o sillón.
No cubrir el aparato con ropas u otros objetos.
No desplazar el aparato cuando se encuentre en
funcionamiento.
SIEMPRE se tiene que dirigir el aparato hacia el
centro de la habitación.
El aparato se tiene que colocar en un lugar seco.
La rejilla de protección de este aparato ha sido
prevista para prevenir los riesgos de incendio o
heridas por quemaduras y ninguna parte debe ser
desmontada de manera permanente.
ESTA NO proteje COMPLETAMENTE A LOS NI—OS
O A LOS INVALIDOS.
INFORMACIÓN ÚTIL:
Durante los primeros instantes tras encender la
estufa es normal que se produzcan pequeñas
llamaradas sobre el panel hasta alcanzar una cierta
temperatura.
Por seguridad, el analizador de atmósfera hará que
la estufa se apague cuando la concentración de CO2
sea elevada. Deberá ventilar la habitación antes de
encenderla de nuevo.
Si su botella de gas proviene de un lugar frío
puede necesitar un tiempo para que incremente su
temperatura y así funcionar normalmente.
El regulador es un elemento fundamental para el
funcionamiento de la estufa, asegúrese de que está
en buen estado.
Las botellas de gas pueden tener en su comienzo
aire o impurezas que dificulten el primer encendido
de la estufa con ellas.
CONSEJOS DE USO Y PRECAUCIONES:
Cuando la estufa esté en funcionamiento, la chapa
metálica frontal estará muy caliente. Coloque la
estufa en un lugar adecuado y evite el contacto, tal
y como se indica en las instrucciones de seguridad
del manual de usuario.
La vida útil del panel catalítico depende de la forma
de conservar la estufa. Guárdela en un sitio seco,
protegida del polvo, el viento y la humedad.
No utilice aire para limpiar los catalizadores. Nunca
se ha de soplar sobre el panel catalítico para retirar
el polvo ni utilizar aire comprimido.
Lea el manual de usuario del producto con atención
en su totalidad.
F- 1 - Encendido del aparato
Nota:

4
2- IIII
Nota:
F- 2 - Reglaje de la temperatura o de la potentia (fig. 5)
IIII I
F- 3 - Paro del aparato:
ESTE APARATO ESTA EQUIPADO DE UN DISPOSITIVO
ANALIZADOR DE ATMOSFERA QUE APAGA
AUTOMATICAMENTE EL APARATO EN CASO DE
QUE HUBIESE EN LA HABITACION UN PORCENTAJE
DEMASIADO ELEVADO DE DIÓXIDO DE CARBONO (CO2).
SI ESO SE PRODUJERA AIREAR BIEN LA
HABITACION, DE NO SER ASI EL APARATO NO PODRA
ENCENDERSE DE NUEVO.
G -
DESMONTAJE O CAMBIO DEL DEPOSITO DE GAS
H - ALMACENAMIENTO - MANTENIMIENTO
1) Aparato
- Estedispositivodeberáser revisadoperiódicamente,
al menos una vez al año y cada vez que se cambie
el tanque de gas. Al cambiarlo, particularmente
deberá verificar el estado de la manguera de gas
instalada.
2) Tubo entre el regulador de presión y el aparato
- Realice una verificación periódicamente, al menos
una vez al año y cada vez que se cambie el tanque
de gas, del estado de la manguera de gas instalada
y reemplácela si muestra signos de daños o grietas.
C - 2.
I - PROTECCIÓN DEL MEDIOAMBIENTE
J - RESIDUOS ELÉCTRICOS Y ELECTRÓNICOS

5
Anomalías / remedios
Causas probables / remediosAnomalías

INSTRUCTIONS FOR USE
WL0001300625 / 4010070780
(ECN0047707-A)
APPLICATION DES GAZFRANCE
CR 5000 PLUS THERMO
This product is not suitable for primary heating purposes
GB
Do Not Print This Page.
Only For Reference!
Only For Reference!

1
Specifications for Spain
Heat input : 3,05 kW
Gas flow : G30 = 222 g/h / G31 = 218 g/h
Cat I
3+
G30/G31 28-30 / 37 mbar
Gas and pressure :
Butano 28-30 mbar (G30) / Propano 37 mbar (G31)
NOTE: Unless otherwise specified, following generic
terms “appliance / unit / product / equipment / device”
appeared in this instruction manual all refer to the product
“CR 5000 PLUS THERMO”.
®
CR 5000 PLUS THERMO
A - GENERAL SAFETY INSTRUCTIONS
-
This appliance must be used and serviced in
accordance with the regulations and standards in
force.
- Please read this handbook before using your
appliance.
- This appliance should not be used in high rise
flats, in basements, bathrooms or bedrooms.
- Only use this appliance in a well ventilated room.
- This appliance should not be used in leisure
vehicles such as caravans and camping-cars.
- This appliance should not be installed in the
vicinity of walls, pieces of furniture, hangings,
curtains, bedding items and other inflammable
materials. To prevent fire hazards, it is strictly
forbidden to cover the appliance.
- This appliance should always be directed to the
centre of the room.
- Do not use your heater less than 50 cm from a wall
or combustible object.
- Do not cover or block the holes of the air intake
positioned at the bottom, front or top of the appliance.
- Do not use the appliance without having fitted the
wheels. The use of the device without wheels can
be dangerous for people.
- The gas hose should be replaced when the expiry
date is passed or whenever it is damaged or
develops surface cracks.
B - ASSEMBLING THE WHEELS
C - SETTING TO SERVICE
IMPORTANT
®
C - 1 - VENTILATING THE ROOM:
3
3
C - 2 - GAS BOTTLE AND PRESSURE REDUCING
VALVE:
C - 3 - GAS HOSE:
D - CONNECTING THE GAS BOTTLE
Do Not Print This Page.
- This appliance should not be used in high rise
Do Not Print This Page.
- This appliance should not be used in high rise
flats, in basements, bathrooms or bedrooms.
Do Not Print This Page.
flats, in basements, bathrooms or bedrooms.
- Only use this appliance in a well ventilated room.
Do Not Print This Page.
- Only use this appliance in a well ventilated room.
- This appliance should not be used in leisure
Do Not Print This Page.
- This appliance should not be used in leisure
vehicles such as caravans and camping-cars.
Do Not Print This Page.
vehicles such as caravans and camping-cars.
- This appliance should not be installed in the
Do Not Print This Page.
- This appliance should not be installed in the
vicinity of walls, pieces of furniture, hangings,
Do Not Print This Page.
vicinity of walls, pieces of furniture, hangings,
curtains, bedding items and other inflammable
Do Not Print This Page.
curtains, bedding items and other inflammable
materials. To prevent fire hazards, it is strictly
Do Not Print This Page.
materials. To prevent fire hazards, it is strictly
Do Not Print This Page.
Only For Reference!
vehicles such as caravans and camping-cars.
Only For Reference!
vehicles such as caravans and camping-cars.
- This appliance should not be installed in the
Only For Reference!
- This appliance should not be installed in the
vicinity of walls, pieces of furniture, hangings,
Only For Reference!
vicinity of walls, pieces of furniture, hangings,
curtains, bedding items and other inflammable
Only For Reference!
curtains, bedding items and other inflammable
materials. To prevent fire hazards, it is strictly
Only For Reference!
materials. To prevent fire hazards, it is strictly
forbidden to cover the appliance.
Only For Reference!
forbidden to cover the appliance.
- This appliance should always be directed to the
Only For Reference!
- This appliance should always be directed to the
- Do not use your heater less than 50 cm from a wall
Only For Reference!
- Do not use your heater less than 50 cm from a wall
Only For Reference!
Only For Reference!
Only For Reference!
Only For Reference!
Only For Reference!
C - 3 - GAS HOSE:
Only For Reference!
C - 3 - GAS HOSE:
Only For Reference!
Only For Reference!
Only For Reference!
Only For Reference!
Only For Reference!
Only For Reference!
Only For Reference!
Only For Reference!
Only For Reference!

2
D - 1 - Installing gas bottle:
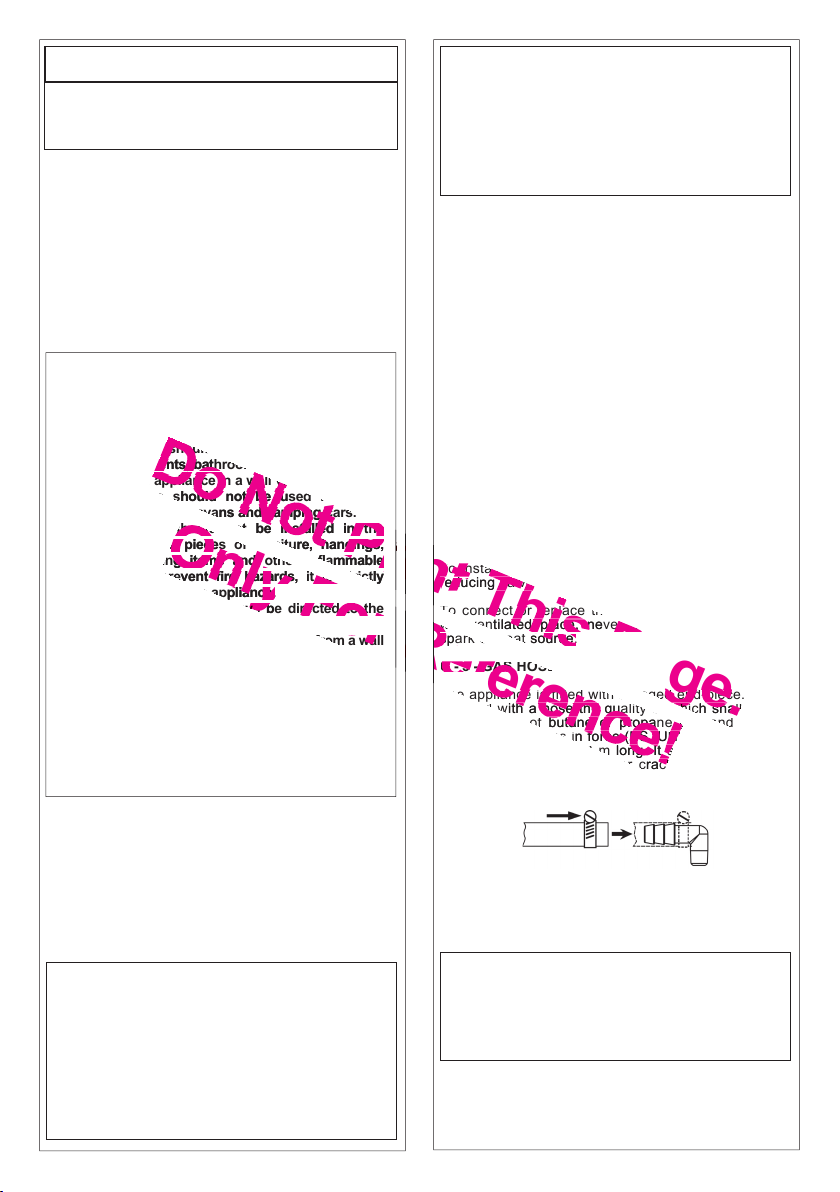
-
-
-
-
-
-
D - 2 - Tightness:
In case of leak, appliance gas supply must be shut
down using gas bottle cock and/or pressure reducing
valve handle.
Do not carry out leak tests with a flame, use a gas
leak detecting liquid.
-
-
-
-
-
Important:
In case of gas leak or odour, immediately close
bottle cock and/or pressure reducing valve handle.
Enhance room ventilation by opening the windows.
Ask a specialised technician to check the appliance
and proper bottle connection.
E - BATTERY FOR ELECTRONIC IGNITION
E- 1- Battery requirement
E- 2 - Exchanging the battery (fig.7)
E- 3 - Battery disposal
F- UTILISATION
OPERATING PRECAUTIONS
DO NOT install the appliance next to a wall,
curtains or a sofa or armchair.
DO NOT cover the appliance with clothes or other
objects.
DO NOT move the appliance when in operation.
The appliance must ALWAYS be directed to the
centre of the room.
The appliance must be put in a dry place.
This appliance protecting grid is designed to
prevent fire hazards or burns and no part shall
be permanently removed.
THE GRID DOES NOT TOTALLY PROTECT
YOUNG CHILDREN OR THE DISABLED.
F- 1 - Igniting the appliance
Note:
it
2- IIII
panel.
Note:
F- 2 - Setting temperature or power (fig. 5)
IIII
I
Do Not Print This Page.
In case of gas leak or odour, immediately close
Do Not Print This Page.
In case of gas leak or odour, immediately close
bottle cock and/or pressure reducing valve handle.
Do Not Print This Page.
bottle cock and/or pressure reducing valve handle.
Enhance room ventilation by opening the windows.
Do Not Print This Page.
Enhance room ventilation by opening the windows.
Do Not Print This Page.
Only For Reference!
Only For Reference!
In case of gas leak or odour, immediately close
Only For Reference!
In case of gas leak or odour, immediately close
bottle cock and/or pressure reducing valve handle.
Only For Reference!
bottle cock and/or pressure reducing valve handle.
Enhance room ventilation by opening the windows.
Only For Reference!
Enhance room ventilation by opening the windows.
Ask a specialised technician to check the appliance
Only For Reference!
Ask a specialised technician to check the appliance
Only For Reference!
Only For Reference!
Only For Reference!
Only For Reference!
Only For Reference!
Only For Reference!
Only For Reference!
Only For Reference!
Only For Reference!
Only For Reference!
Only For Reference!
Only For Reference!

3
F- 3 - Shutting down the appliance
THIS APPLIANCE IS EQUIPPED WITH AN
ATMOSPHERE ANALYSER DEVICE WHICH
AUTOMATICALLY TURNS OFF THE APPLIANCE
SHOULD THE ROOM CONTAIN TOO HIGH A
2
IN THIS CASE, THOROUGHLY VENTILATE THE
ROOM, OTHERWISE THE APPLIANCE WILL NOT
RELIGHT.
G- REMOVING OR REPLACING THE GAS BOTTLE
H- STORAGE - SERVICING
1) Appliance
- The appliance should be checked periodically, at
least once a year and every time the gas bottle is
replaced; particularly, the state of the fitted gas
hose should be checked at that time.
2) Hose between the pressure reducing valve and
the appliance
- Please check periodically, at least once a year and
each time the gas bottle is replaced, the state of
the fitted gas hose and replace it if it shows any
signs of damage or any cracks.
I - PROTECTING THE ENVIRONMENT
J - ELECTRICAL AND ELECTRONIC WASTE
Defects / Remedies
Probable causes / remediesDefects
Do Not Print This Page.
- STORAGE - SERVICING
Do Not Print This Page.
- STORAGE - SERVICING
Do Not Print This Page.
Only For Reference!
Only For Reference!
Only For Reference!
Only For Reference!
Only For Reference!
Only For Reference!
Only For Reference!
The appliance should be checked periodically, at
Only For Reference!
The appliance should be checked periodically, at
least once a year and every time the gas bottle is
Only For Reference!
least once a year and every time the gas bottle is
Only For Reference!
Only For Reference!
Only For Reference!
Only For Reference!
Only For Reference!
Only For Reference!
Only For Reference!
Only For Reference!
Only For Reference!
Table of contents
Languages:
Other Campingaz Heater manuals
Popular Heater manuals by other brands

Fujitsu
Fujitsu Waterstage Split Comfort 5 Series Installation

Westfalia
Westfalia 92 86 43 Original instructions

DeLonghi
DeLonghi TOWER CERAMIC HEATER instructions

Teesa
Teesa TSA8050 owner's manual

VES
VES Heatline Installation, operation and maintenance manual

Jaga
Jaga Micro Canal installation instructions

Reznor
Reznor RPV 2000 Installation commissioning servicing & user instructions

EUROM
EUROM EK3001R instruction manual

Webasto
Webasto Air Top Evo 5500 installation instructions

ermaf
ermaf GP 70 ACU operating instructions

Sencor
Sencor SFH 8050SL Translation of the original manual

Aleko
Aleko NTSA Series Installation and operating instructions