manuals.online logo
Brands
  1. Home
  2. •
  3. Brands
  4. •
  5. Candy
  6. •
  7. Ventilation Hood
  8. •
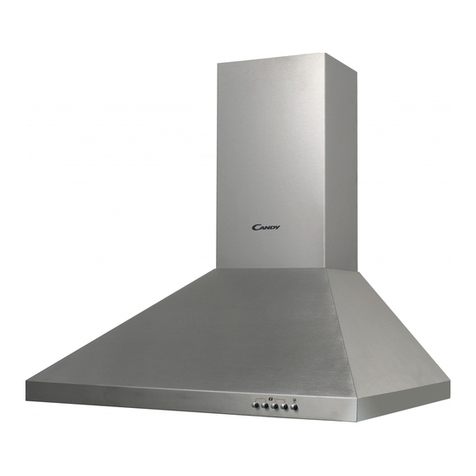
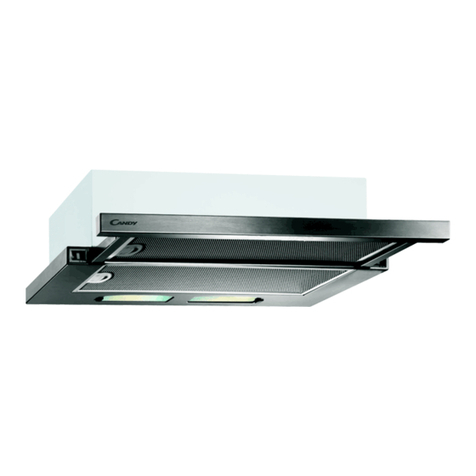
  9. Candy CBT625/2B User manual

Candy CBT625/2B User manual

This manual suits for next models

2

Other Candy Ventilation Hood manuals

Candy CSDH 9110 AQ User manual

Candy

Candy CSDH 9110 AQ User manual

Candy CBT6240 User manual

Candy

Candy CBT6240 User manual

Candy CFT910/4X User manual

Candy

Candy CFT910/4X User manual

Candy CVMAD60/1N User manual

Candy

Candy CVMAD60/1N User manual

Candy CFT63 Series User manual

Candy

Candy CFT63 Series User manual

Candy CBT6130/2W-07 User manual

Candy

Candy CBT6130/2W-07 User manual

Candy CBT9240/3X User manual

Candy

Candy CBT9240/3X User manual

Candy CDG6MB User manual

Candy

Candy CDG6MB User manual

Candy CCLH 916 User manual

Candy

Candy CCLH 916 User manual

Candy CFT610/5X/P User manual

Candy

Candy CFT610/5X/P User manual

Candy CCT 685/2 X User manual

Candy

Candy CCT 685/2 X User manual

Candy CCT 67 User manual

Candy

Candy CCT 67 User manual

Candy CDM656BG-07 Reference manual

Candy

Candy CDM656BG-07 Reference manual

Candy CBT62 User manual

Candy

Candy CBT62 User manual

Candy CVM670LX User manual

Candy

Candy CVM670LX User manual

Candy CCT61 Technical manual

Candy

Candy CCT61 Technical manual

Candy CBT 96 User manual

Candy

Candy CBT 96 User manual

Candy RHT625RB User manual

Candy

Candy RHT625RB User manual

Candy CMBS655X User manual

Candy

Candy CMBS655X User manual

Candy CVMI900X User manual

Candy

Candy CVMI900X User manual

Candy CBG620/1W User manual

Candy

Candy CBG620/1W User manual

Candy CMD 671 User manual

Candy

Candy CMD 671 User manual

Candy CFT 62 User manual

Candy

Candy CFT 62 User manual

Candy CCR 616 User manual

Candy

Candy CCR 616 User manual

Popular Ventilation Hood manuals by other brands

Gorenje S3 IHGC963S4X manual

Gorenje

Gorenje S3 IHGC963S4X manual

KOBE ISX2136SQB-1 Installation instructions and operation manual

KOBE

KOBE ISX2136SQB-1 Installation instructions and operation manual

U.S. Products ADVANTAGE-100H Information & operating instructions

U.S. Products

U.S. Products ADVANTAGE-100H Information & operating instructions

Kuppersberg DUDL 4 LX Technical Passport

Kuppersberg

Kuppersberg DUDL 4 LX Technical Passport

Framtid HW280 manual

Framtid

Framtid HW280 manual

Thermador HGEW 36 FS installation manual

Thermador

Thermador HGEW 36 FS installation manual

Electrolux LFT769X user manual

Electrolux

Electrolux LFT769X user manual

AEG X69453MVO UK user manual

AEG

AEG X69453MVO UK user manual

Broan B5836SS manual

Broan

Broan B5836SS manual

Heinner HDCH-6060RGBK quick start guide

Heinner

Heinner HDCH-6060RGBK quick start guide

Baumatic AS35SS instruction manual

Baumatic

Baumatic AS35SS instruction manual

Franke FTF 604 XS V2 Instructions for use and installation

Franke

Franke FTF 604 XS V2 Instructions for use and installation

Best UCB3I30SBW installation instructions

Best

Best UCB3I30SBW installation instructions

Gram EFU 503-90 X instruction manual

Gram

Gram EFU 503-90 X instruction manual

CIARRA CBCS6803 Installation and user manual

CIARRA

CIARRA CBCS6803 Installation and user manual

sauter SHG501 Instructions for installation and use

sauter

sauter SHG501 Instructions for installation and use

Franke 392-17 User instructions

Franke

Franke 392-17 User instructions

FALMEC Polar Black 35 Instruction booklet

FALMEC

FALMEC Polar Black 35 Instruction booklet

manuals.online logo
manuals.online logoBrands
  • About & Mission
  • Contact us
  • Privacy Policy
  • Terms and Conditions

Copyright 2025 Manuals.Online. All Rights Reserved.

CBT625/2X
CBT625/2W, CBT625/2B
Cooker Hood
Instruction Manual
ENGLISH(EN)--------------------------------------------------------------------------------page 001
CZECH (CS)----------------------------------------------------------------------------------page 013
GERMAN (DE) ------------------------------------------------------------------------------page 025
FRENCH (FR)--------------------------------------------------------------------------------page 038
CROATIAN (HR) ----------------------------------------------------------------------------page 051
POLISH (PL) ---------------------------------------------------------------------------------page 063
PORTUGUESE (PT) -----------------------------------------------------------------------page 076
SLOVAK (SK) --------------------------------------------------------------------------------page 089
SLOVENIA (SL) -----------------------------------------------------------------------------page 102
SERBIAN (SR) ------------------------------------------------------------------------------page 114
Cooker Hood
Instruction Manual
1
Content
1…………………………………..………………………………Safety instructions
2…………………………………..………………………………Installation
3…………………………………..………………………………Start using your cooker hood
4…………………………………..………………………………Troubleshooting
5…………………………………..………………………………Maintenance and cleaning
6…………………………………..………………………………Environment protection
2
SAFETY INSTRUCTIONS
This manual explains the proper installation and use of your cooker hood,
please read it carefully before using even if you are familiar with the product.
The manual should be kept in a safe place for future reference.
Never to do:
●Do not try to use the cooker hood
without the grease filters or if the filters
are excessively greasy!
●Do not install above a cooker with a
high level grill.
●Do not leave frying pans unattended
during use because overheated fats or
oils might catch fire.
●Never leave naked flames under the
cooker hood.
●If the cooker hood is damaged, do not
attempt to use.
●Do not flambé under the cooker hood.
●CAUTION: Accessible parts may
become hot when used with cooking
appliances.
●The minimum distance between the
supporting surface for the cooking
vessels on the hob and the lowest part
of the cooker hood. (When the cooker
hood is located above a gas appliance,
this distance shall be at least 65 cm)
●The air must not be discharged into a
flue that is used for exhausting fumes
from appliances burning gas or other
fuels.
Always to do:
●Important! Always switch off the
electricity supply at the mains during
installation and maintenance such as
light bulb replacement.
●The cooker hood must be installed in
accordance with the installation
instructions and all measurements
followed.
●All installation work must be carried
out by a competent person or qualified
electrician.
●Please dispose of the packing material
carefully. Children are vulnerable to it.
●Pay attention to the sharp edges
inside the cooker hood especially
during installation and cleaning.
●When the cooker hood is located
above a gas appliance,the minimum
distance between the supporting
surface for the cooking vessels on the
hob and the lowest part of the cooker
hood that distance must be:
Gas cookers: 75 cm
Electric cookers: 65 cm
Coal or oil cookers: 75 cm
●Make sure the ducting has no bends
sharper than 90 degrees as this will
reduce the efficiency of the cooker
hood.
●Warning: Failure to install the screws
or fixing device in accordance with
these instructions may result in
electrical hazards
3
Always to do:
●Always put lids on pots and pans
when cooking on a gas cooker.
●When in extraction mode, air in the
room is being removed by the cooker
hood. Please make sure that proper
ventilation measures are being
observed. The cooker hood removes
odours from room but not steam.
●Cooker hood is for domestic use only.
●If the supply cord is damaged, it must
be replaced by the manufacturer, its
service agent or similarly qualified
persons in order to avoid a hazard.
●This appliance can be used by
children aged from 8 years and above
and persons with reduced physical,
sensory or mental capabilities or lack
of experience and knowledge if they
have been given supervision or
instruction concerning use of the
appliance in a safe way and
understand the hazards involved.
Children shall not play with the
appliance. Cleaning and user
maintenance shall not be made by
children without supervision.
●Warning: Before obtaining access to
terminals, all supply circuits must be
disconnected.
Always to do:
●Caution: The appliance and its
accessible parts can become hot
during operation. Be careful to avoid
touching the heating elements.
Children younger than 8 years old
should stay away unless they are
under permanent supervision.
●There shall be adequate ventilation of
the room when the cooker hood is
used at the same time as appliances
burning gas or other fuels.
●There is a fire risk if cleaning is not
carried out in accordance with the
instructions
●Regulations concerning the discharge
of air have to be fulfilled.
●Clean your appliance periodically by
following the method given in the
chapter MAINTENANCE.
●For safety reason, please use only the
same size of fixing or mounting screw
which are recommended in this
instruction manual.
●Regarding the details about the
method and frequency of cleaning,
please refer to maintenance and
cleaning section in the instruction
manual.
●Cleaning and user maintenance shall
not be made by children without
supervision.
●When the cooker hood and
appliances supplied with energy other
than electricity are simultaneously in
operation, the negative pressure in the
room must not exceed 4 Pa (4 x 10⁻⁵
bar).
●WARNING: Danger of fire: do not
store items on the cooking surfaces.
●Asteam cleaner is not to be used.
●NEVER try to extinguish a fire with
water, but switch off the appliance and
then cover flame e.g. with a lid or a
fire blanket.
4
INSTALLATION (VENT OUTSIDE)
MOUNTING OF THE V-FLAP
If the cooker hood does not have an assembled V-flap 1, you should mount the half-
parts to its body. The images only show an example of how to mount the V-flap,the
outlet may be various according to different models and configuration.
To mount the V-flap 1 you should:
• Mount two half-parts 2 into the body 6
• a pin 3 should be top oriented;
• the axis 4 should be inserted in the holes 5 on body;
• repeat all the operations for the 2nd half-part
INSTALLATION (Wall Mounting)
1. Decide the location of the holes for fixing the cooker hood.
2. Install the L-shaped bracket on the top of the hood by two screws (4mm x 10mm)
5
3. The cooker hood is wall mounted by 4 screws (4mm x 30mm) and wall plugs.
Mount the cooker hood on the wall on the back of the cooker hood by 2 screws
(4mm x 30mm) and wall plugs. Then fix the cooker hood on the wall by 2 screws
(4mm x 30mm) and wall plugs through the small L-shaped bracket.
4. Fix the one-way-valve to the air outlet of the cooker hood.
INSTALLATION (Cabinet Mounting)
1. Fix the one-way-valve to the air outlet of the cooker hood.
2. Mount the cooker hood on the cabinet by 6 screws (4x35mm) and flat washers.
6
7
If there is gap between the wall and the cooker hood, you may install the L-shaped
bracket on the bottom of the hood by two screws (3 x 12mm).
The installation of the L-shaped bracket is optional.
Note: The expansion pipe is not included in the product.
WARNING:

For safety reason, please use only the same
size of fixing or mounting screw
which are
recommended in this instruction manual.

Failure to install the screws or fixing device in
accordance with these instructions may result
in electrical hazards.
Start Using Your Cooker Hood
Rocker switch
Rocker switch
1. Insert the power plug into the socket.
2. Push switch ①to , the lamp will be on; push switch ①to “0”, the lamp will
be off.
3. Push the switch ②into “I、II”, the motor will be on “low、high” two
speeds, push into “0”, the motor will be off.
8
4. The power will be connected when pull out the front panel. Conversely, the
power will be automatically disconnected.
TROUBLESHOOTING
Fault Possible Cause Solution
Light on, but motor
does not work
Fan switch turned off Select a fan switch position.
Fan switch failed Contact service center.
Motor failed Contact service center.
Light does not
work, motor does
not work
House fuses blown Reset/Replace fuses.
Power cord loose or
disconnected Refit cord to power outlet.
Switch power outlet on.
Oil leakage
One way valve and the outlet
are not tightly sealed Take down the one way valve
and seal with sealant.
Leakage from the connection of
chimney and cover Take chimney down and seal.
Lights not working Broken/Faulty globes Replace globes as per this
instruction.
Insufficient suction
The distance between the
cooker hood and the gas top is
too far
Refit the cooker hood to the
correct distance.
The Cooker hood
inclines The fixing screw not tight
enough Tighten the hanging screw and
make it horizontal.
NOTE:
Any electrical repairs to this appliance must conform to your local, state and
federal laws.Please contact the service centre if in any doubt before
undertaking any of the above.Always disconnect the unit from the power source when
opening the unit.
MAINTENANCE AND CLEANING
Caution:
• Before maintenance or cleaning is carried out, the cooker hood
should be disconnected from the main power supply. Ensure
that the cooker hood is switched off at the wall socket and the
plug removed.
• External surfaces are susceptible to scratches and abrasions, so please follow the
cleaning instructions to ensure the best possible result is achieved without damage.
GENERAL
9