2
Assembly Contents
*Extensions are included only over 48”models
Attention:
You are solely responsible for determining whether the handling, storage, assembly, installation or use
of this product is safe and appropriate in any location or for any given application. Canofix Co.,Ltd. is
not responsible for any damages or injury to you, any other person or any property resulting from the
improper handling, storage, installation, assembly or use of this product, or the failure to follow
Canofix Co.,Ltd. written instructions regarding the handling, storage, installation, assembly and use of
this product. This product is intended for normal residential use only. Do not use this product for any
application that is not recommended in these instructions or building codes in effect in location where
this product will be used. Alway take care and use appropriate safety equipment (including eye
protection) when assembling or installing this product.
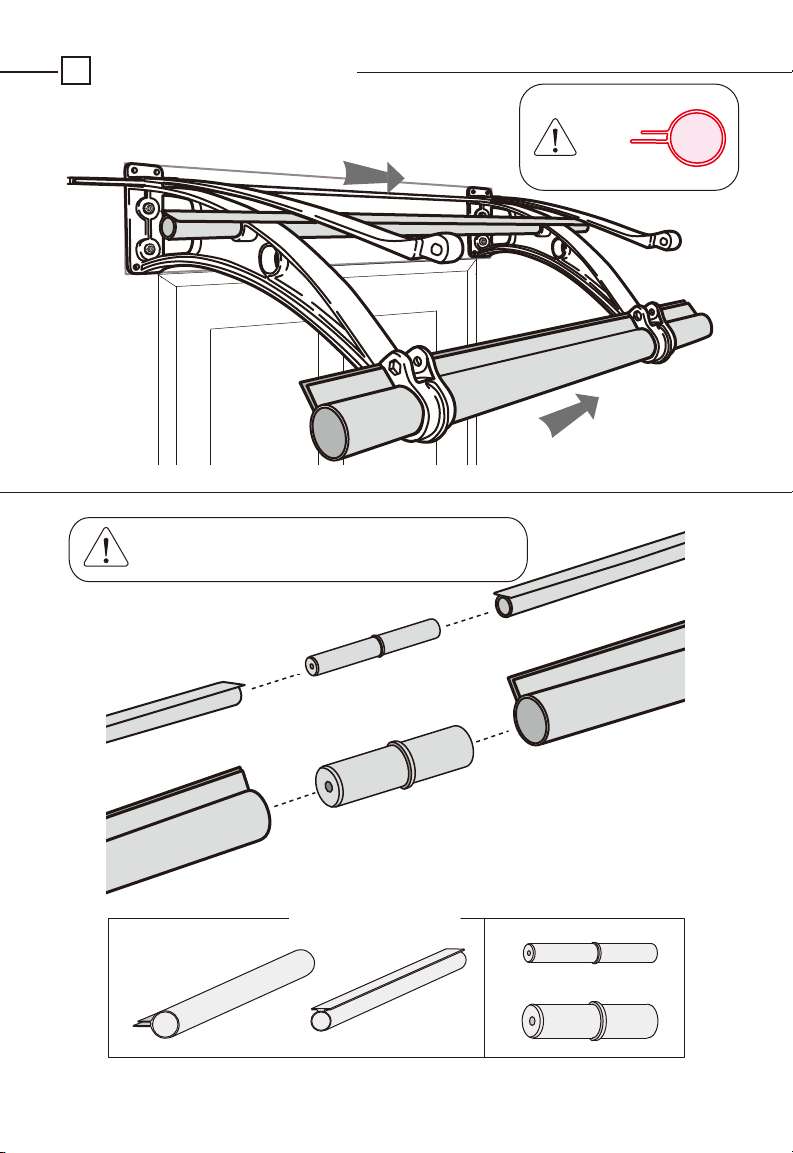
2m以上のものには追加部品があります。
P C ブ ラ ケ ット
前固定バー 補強バー 奥固定バー
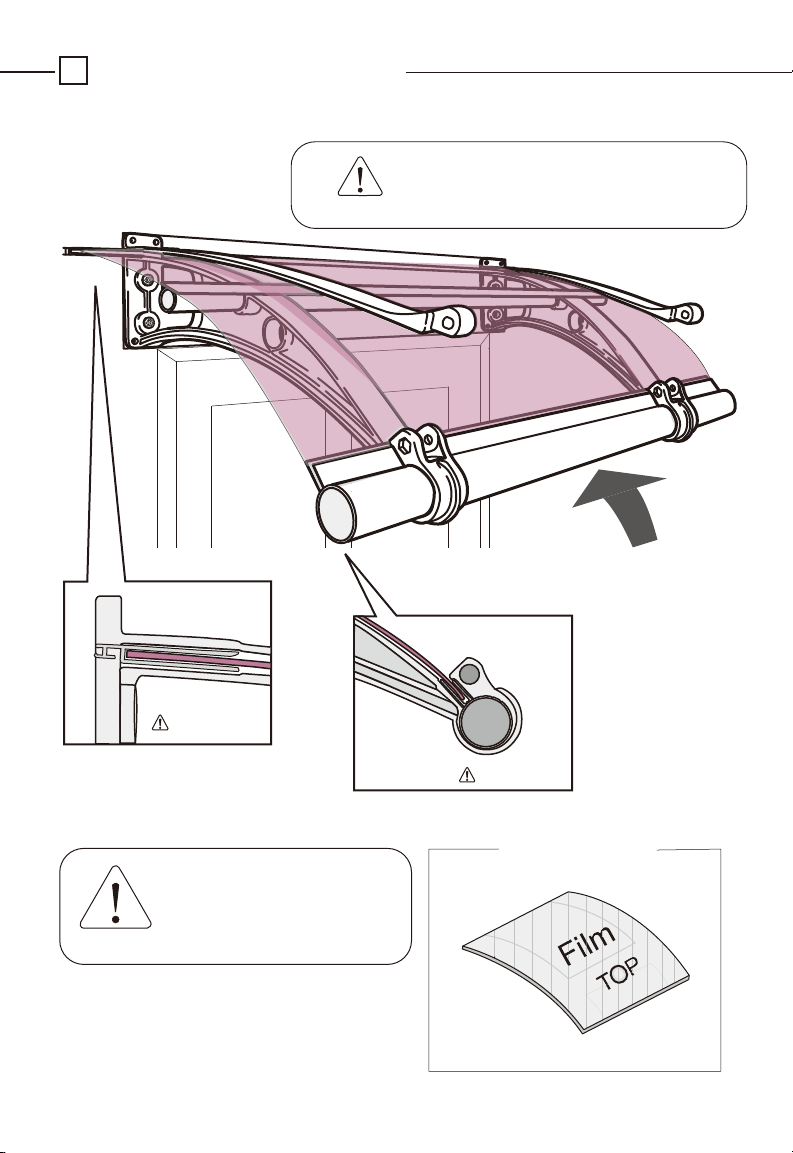
P C シ ート
front fixing bar
Edge cover
Concrete anchor
エッジカーバー
3/8*120
コ ン ク リ ート ア ン カ ー
6mmフランジナット
Flange Nut
六 角 ボ ルト
Hex bolts
連結ソケットは2M以上の場合必要になります。
bracket roofing
rear fixing bar
1 9 キ ャップ
pvc cap
3 8 キャップ
pvc cap
support bar
セット構成品
*Note : You will receive extra parts if you ordered over 40” model
ご注文頂いた製品の取り扱い、保管、組立、設置などの決定事項はすべてお客様の責任になります。弊社はお客様の不適
切な取り扱い、組立、設置による一切の責任を負いかねます。 この製品は一般住居用として開発されました。 この製品
が設置される地域の規制などがある場合はそれに合わせてご設置ください。 施工の際には保護メガネなどの安全装備
をご使用し、十分気を付けてください。
(set外)(set外)
(set外)
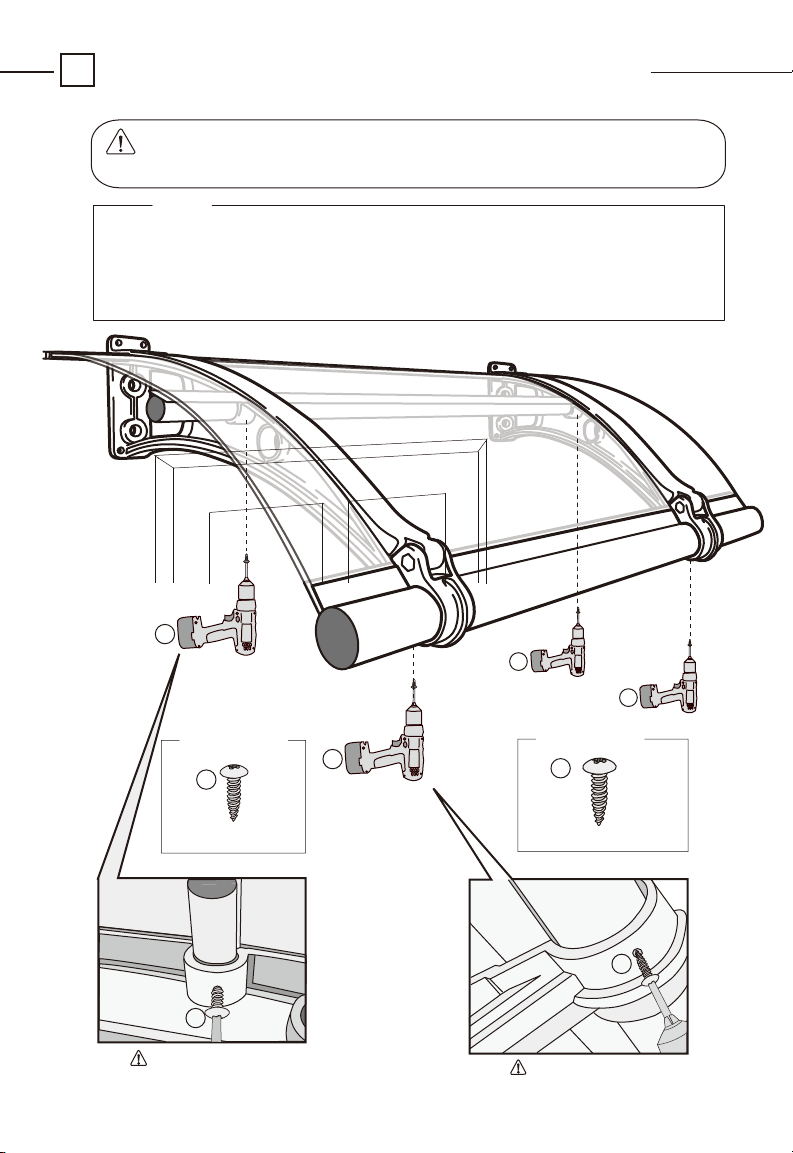
5x20トラスタッピング
4x16トラスタッピング