Basic Copy Operation
Shift the power switch to ‘I’.
If the temperature of the fixing assembly is
below the specified value, the MAIN/WAIT
indicator flashes at long intervals.
If the COPY START key is pressed at the
time, the indicator starts to flash at short
intervals to indicate that copying will start
as soon as the temperature reaches the
specified value.
If the COPY START key is not pressed, the
indicator remains lit as soon as the tem-
perature reaches the specified value to in-
dicate that the copier is ready.
The copier normally needs about 30 set to
warm up (at 20°C).
Open the copyboard cover, and place the
document face down aligned with the size
index.
See Figure l-5.
Sire index
Figure l-5
Press the A key if manual adjustment of
the density is desired; use the exposure
control lever to suit the density of the
document.
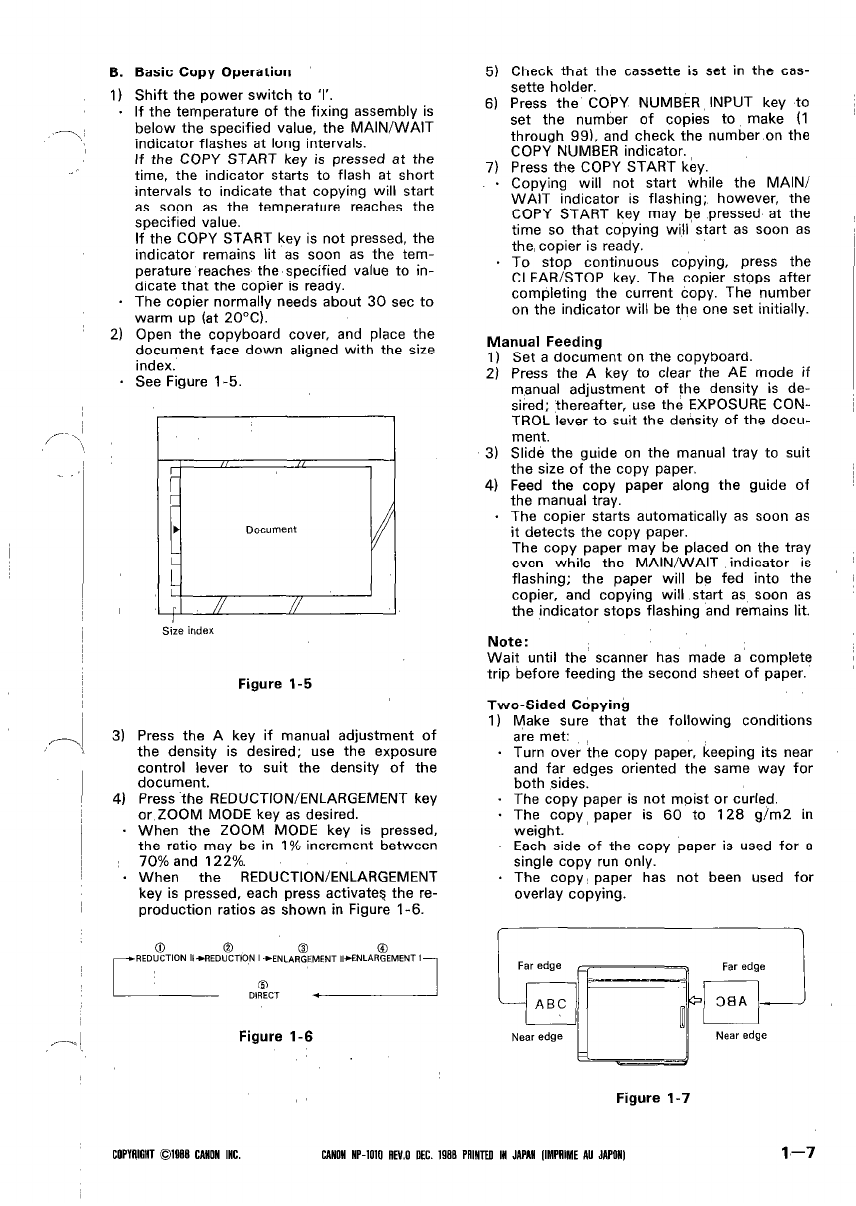
Press the REDUCTION/ENLARGEMENT key
or ZOOM MODE key as desired.
When the ZOOM MODE key is pressed,
the ratio may be in 1% increment between
70% and 122%.
When the REDUCTION/ENLARGEMENT
key is pressed, each press activates the re-
production ratios as shown in Figure 1-6.
Figure l-6
Check that the cassette is set in the cas-
sette holder.
Press the COPY NUMBER INPUT key to
set the number of copies to make (I
through 99), and check the number on the
COPY NUMBER indicator.
Press the COPY START key.
Copying will not start while the MAIN/
WAIT indicator is flashing; however, the
COPY START key may be pressed at the
time so that copying will start as soon as
the, copier is ready.
To stop continuous copying, press the
CLEAR/STOP key. The copier stops after
completing the current copy. The number
on the indicator will be the one set initially.
Manual Feeding
Set a document on the copyboard.
Press the A key to clear the AE mode if
manual adjustment of the density is de-
sired; thereafter, use the EXPOSURE CON-
TROL lever to suit the density of the docu-
ment.
Slide the guide on the manual tray to suit
the size of the copy paper.
Feed the copy paper along the guide of
the manual tray.
The copier starts automatically as soon as
it detects the copy paper.
The copy paper may be placed on the tray
even while the MAIN/WAIT indicator is
flashing; the paper will be fed into the
copier, and copying will start as soon as
the indicator stops flashing and remains lit.
Note:
Wait until the scanner has made a’complete
trip before feeding the second sheet of paper.
Two-Sided Copying
1) Make sure that the following conditions
are met:
Turn over the copy paper, keeping its near
and far edges oriented the same way for
both sides.
The copy paper is not moist or curled.
The copy, paper is 60 to 128 g/m2 in
weight.
Each side of the copy paper is used for a
single copy run only.
The copy paper has not been used for
overlay copying.
Near edge Near edge
Figure l-7
COPVAIGHT018sDCANONINC. CANONHP-1010AN.0DEC. KlBtl PAINlEO IN JAPAN IIMPAIME AU JAPONI l-7