9217
– 3 –
4348-7747-02
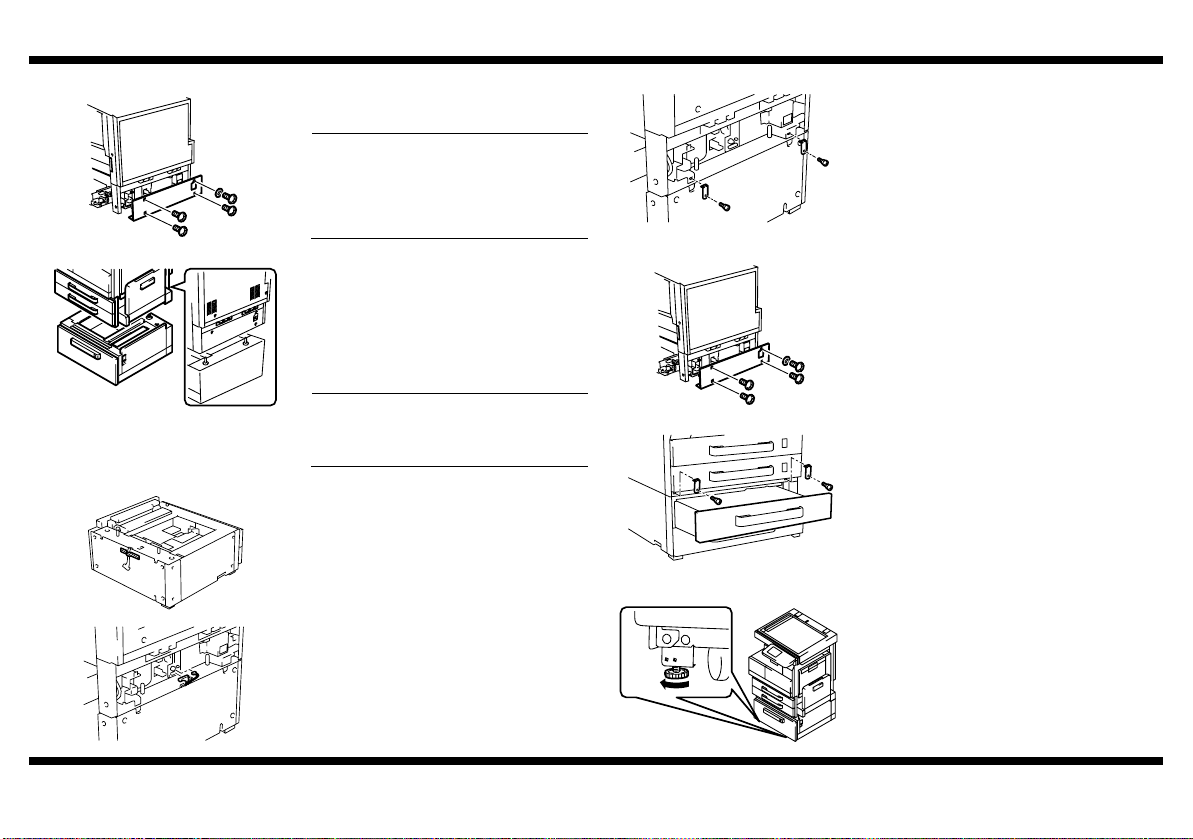
■Attaching the Copier to the Paper Feed Cabinet
■Installing the Fixing Leg and Fixing Leg covers
1. Remove the Lower Rear Cover of the copier
(four screws).
NOTE
Be sure to remove the Lower Rear Cover
before attempting to attach the copier to
the Paper Feed Cabinet. (This is done to
prevent the harness from getting wedged in
mechanisms.)
4348U018AC
2. Holding onto the transportation handles at
the front and rear of the copier, place the
copier onto the Paper Feed Cabinet. When
placing the copier, use the positioning pins in
the rear of the Paper Feed Cabinet to align
the copier correctly with the cabinet.
* Fit the rear side first.
NOTE
When attaching the copier, use care not to
apply load to the paper take-up section of
the copier.
4348U017AB
3. Peel off the tape that fixes the Paper Feed
Cabinet hookup harness in position.
4. Connect the two connectors of the Paper
Feed Cabinet hookup harness to the copier.
4348U005AA
4348U006AB
5. Using the Fixing Brackets and Shoulder
Screws furnished with the Paper Feed
Cabinet, secure the copier to the Paper Feed
Cabinet (at two places in the rear).
4348U019AA
6. Reinstall the Lower Rear Cover, which has
been removed in step 1 (four screws).
4348U018AC
7. Slide out the 3rd Drawer.
8. Using the Fixing Brackets and Shoulder
Screws furnished with the Paper Feed
Cabinet, secure the copier to the Paper Feed
Cabinet (at two places at the front).
4348U051AA
1. Move the copier and Paper Feed Cabinet to
the installation site. Then, adjust the two
adjusters at the front to let the Paper Feed
Cabinet sit on the floor.
4348U022AA
4348-7747-02.fm Page 3 Wednesday, July 30, 2003 12:09 PM