Parts List
NO. Name of part Part Specialized code QTY. Remark
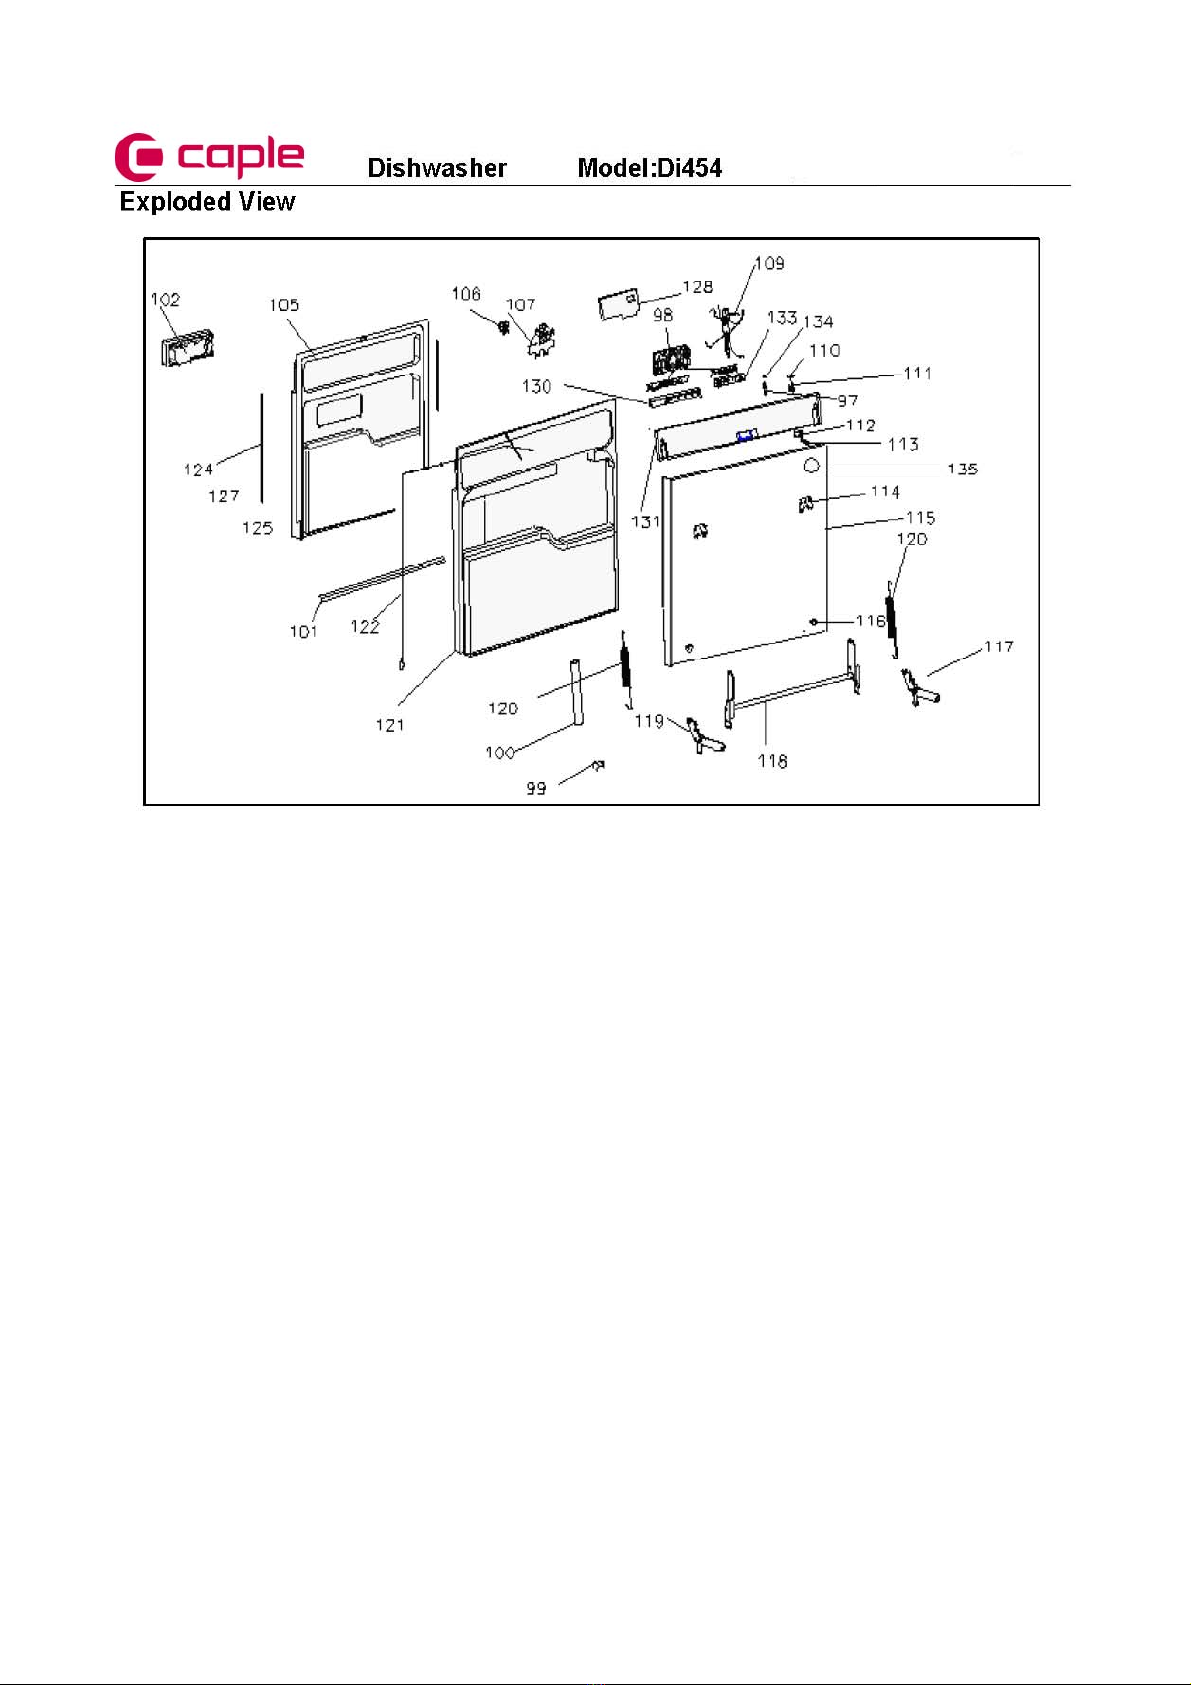
Dishwasher Model:Di454
66 Vibration-proof ring motor 012G4050159 1
67 Motor bracket assembly 012G9350006 1
68 Breather assembly 012G2160196 1
72 Breather ring nut 012G2150045 1
74 Lower sprayer 012G1450620 1
75 Lower sprayer column 0120200252 1
76 Lower sprayer base 0120200489 1
77 O-type sealing ring 012G4050153 1
78 Lower sprayer base fixing piece 012G2160193 1
79 Salt dispenser funnel 0120201753 1
80 Softener ring nut 012G2150042 1
81 Water softener sealing ring 012G4050236 1
82 Cover of salt dispenser port assembly 012G2150043 1
83 Electric wave filter 0120400001 1
84 Connection pipe 012G4050244 1
85 1-level pressure switch 012G6050031 1
86 Water gutter 012G2160191 1
87 Rubber coupling 012G4050152 2
88 Ring nut for cup fastening 012G2150040 1
89 Cup gasket 012G4050151 1
90 Microfilter (polyesthere) 012G1040014 1
91 Cylindric stainless steel filter 0120200949 1
92 Stainless steel extractable filter 012G1040012 1
93 Extractable glass filter 012G2160212 1
95 Infall pipe 0120800683 1
96 Elasticity retainer 0120600060 2
97 Green indicator 0120800354 1
98 control panel 0120804253 1
99 Hinge shaft 012G8080007 4
100 Door spring Cover 0120200048 2
101 Door gasket 012G4050172 1
102 Detergent dispenser 0124000746 1
105 Inner Door 0120806518 1
106 Door switch 0120800356 1
107 Switch mechanism assembly 0120800357 1
109 Control cable 0124000224A 1
110 Power Key-press 0120200226 1
111 Power supply switch 012G9370091 1
112 Springs adjusting small block 0120100042 2
113 Spring adjusting screw 0120600197 2
114 Block hooking bracket 0120100052 2
115 Outer door 0120106381 1
116 Rubber 0120300014 2
117 Left hinge articulation 012G9380558 1
118 Complete hinge assembly 0120800660 1
119 Right hinge articulation 012G9380559 1
120 Door spring 0120100047 2
122 Adjustable cable 0120103154 2
124 Door gasket guard strip 012G2140094 2
128 control cover 0120200244 1
130 Left led card support 0120300394 1
131 Dashboard 0120203340 1
133 Right led support protection 0120300393 1
134 Green indicator cover 0120200191 1
135 Sealed plug 0120300304 2